We had a really nasty spate of rainy weather up here in New England this Spring. Eight out of the last ten weekends were rained out. Our temperatures have been hanging around in the 50's, so that did not bode well for my outside banjo building. It is May already, and I have not touched this project yet. So I have been spending the time gathering some new tools and making plans for the design of this new banjo.
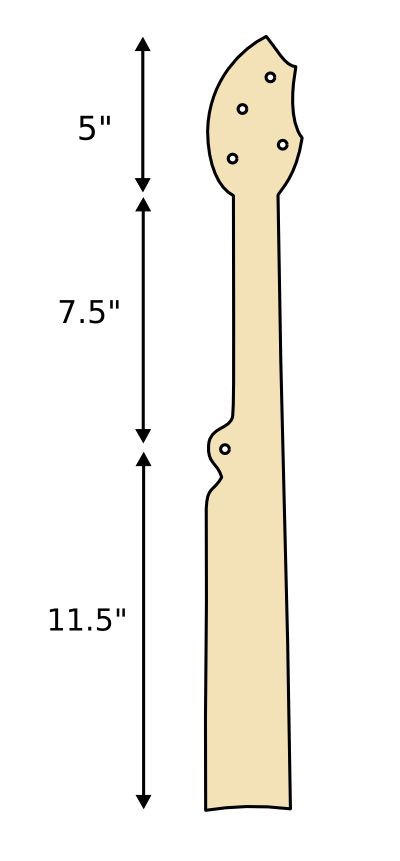
I decided to make the banjo a single ogee neck instead of the double ogee neck like I did on my previous gourd banjo. You can see the other neck by clicking here. The ogee is the scalloped edge on the left side of the neck. I am using a smaller gourd so I wanted to make a neck that would be a bit simpler in design. I also wanted to do something a bit more creative with the peghead than I did before. After pushing some ideas around on paper here is what I came up with.
You can see that the only bump on the neck is for the 5th string peg. Beneath that, the side of the neck is straight. The holes for the pegs are spaced around the peghead to maximize the distance between them. This should give me some better clearance between the buttons than if I space them out in a rectangle. I make my own pegs, and the buttons come out fairly large, so I need lots of room to work them. Besides, I would like a little artistic whimsy in this neck.
You cannot tell in the drawing, but I have spaced the peg holes horizontally so that the strings will take straight pulls from their slots in the nut to the side of the peg each will wind onto. I then spaced them vertically to maximize the distance between the pegs. That's the theory anyway.
The neck will be cut out of a neck blank that I will build very much the same as I built the previous one. It will be glued up from some nice figured maple dimensioned lumber that I found at Lowes. The lumber is just some 1 X 4 boards out of the shelving bin. I poked through the boards until I found some with figure in them and bought those. They did not cost any more than the straight grained boards that were sitting next to them. Each 10 foot board cost about $22.00. Here is the design for the neck blank showing the pieces of wood that I will stack up.
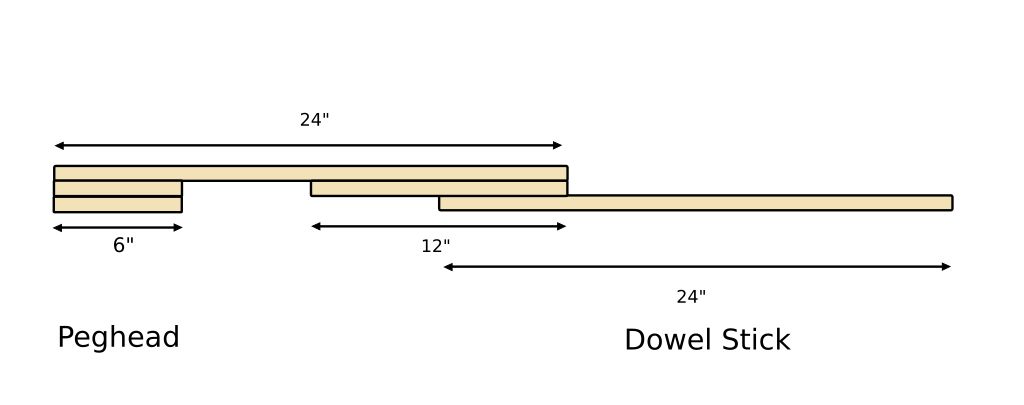
There will be six pieces of wood taken from a 1 X 4 length of lumber cut to the lengths shown in the drawing. The peghead will be cut from the part on the left side, and the tail will be cut from the part on the right side. The tail, or "dowel", will pierce the gourd to hold the neck in place.
I am going to put a handstop on the neck under the peghead, but I am going to do it a bit different this time. I will leave wood on both sides of the location where the nut will go. The nut goes right where the peghead slopes down to the left. Hopefully cutting it this way will leave enough wood for me to carve an interesting handstop between the peghead and the neck. Here is my idea of how I will mark the wood for cutting.
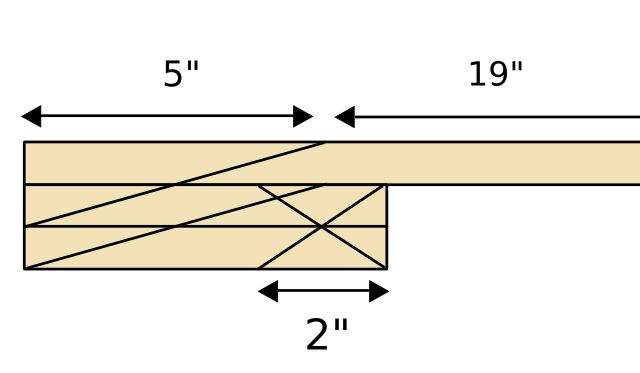
When the time comes to cut the wood I will simply cut along the straight lines, stopping so as to avoid cutting the peghead in half.
Tools.
I also treated myself to some new tools. For my previous project I bought a round bottom spokeshave, which did not work out well at all. All I could get it to do was chatter and grab the wood. I finally figured out that I should have used a flat bottom spokeshave for that work. So this time I bought a flat bottom spokeshave. Here it is. It looks a lot like the round bottom one.
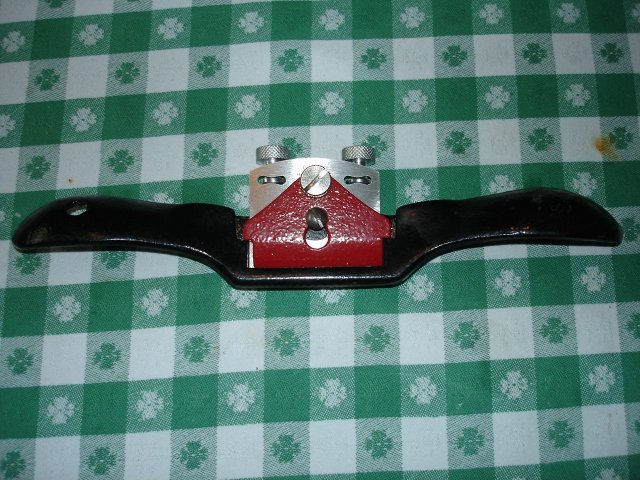
If you turn it over and look at the bottom, you can see that the sole of the plane is flat.

You can compare it to the round bottom plane by looking here.
The spokeshave is really just a little plane with ears on it. Here it is in pieces:
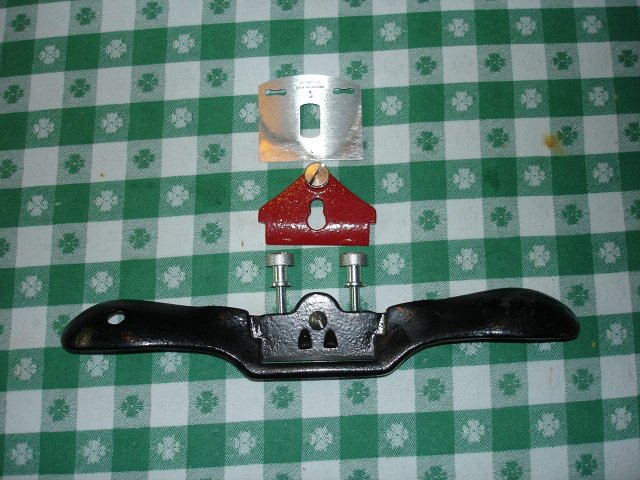
It has a little cap iron and a little blade. It is a Stanley, and I paid $27.50 at Woodcraft for it. The blade of this plane BTW was in pretty bad shape when it was new. The factory had just barely ground and edge on it, and it was very rough. I spent a couple of hours on my hones putting a real edge on it before I could use it at all.
To sharpen this new tool I bought some diamond hones. I already have a diamond hone of unknown grit (I think it is a "fine" grit, but it is unmarked). In order to sharpen my tools properly I need a range of grits, so I bought new ones. The new hones are both double sided. One is Coarse on one side and Very Coarse on the other. The second stone is Fine and Very Fine. Diamond hones are not cheap. These cost me $50 each, for a total of $100 for the pair. But the diamond hones last forever, and they do not go out of flat like a natural stone will. Here is a photo.
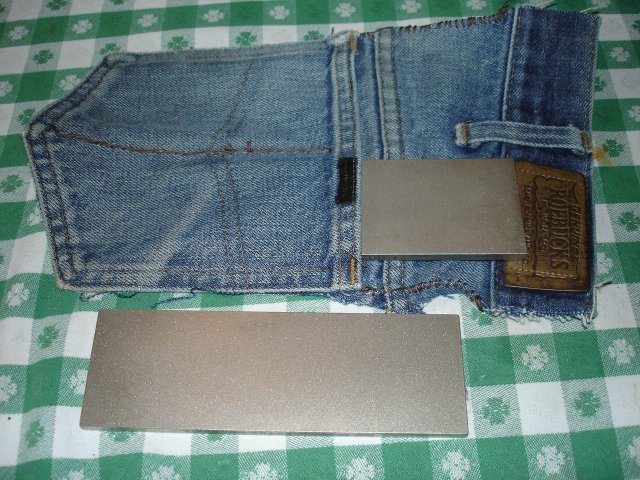
I made the case out of the back pocket of some jeans that were all used up. I sewed a line up the middle of the pocket to make two compartments and that was it. I even left the Sears, Roebuck label on it so that a hundred years from now people can wonder what the heck this is.
I also bought some new drill bits for drilling the holes in the peghead. I have a terrible time with tearout when I drill holes, and I read that the tearout can be avoided by using brad point drill bits. I could not find any brad point bits, but I found something similar called "pilot point" bits. Instead of a spike on the end they appear to have a short length of smaller size drill. Here is the set:

The small drills on the left do not have pilot points on them. They are just like the normal twist drills that you see in every hardware store. The larger bits on the right hand side do have pilot points. Evidently the smaller drills are too small to make the pilot points on them. Here is a closeup of a pilot point so you can see how this works:
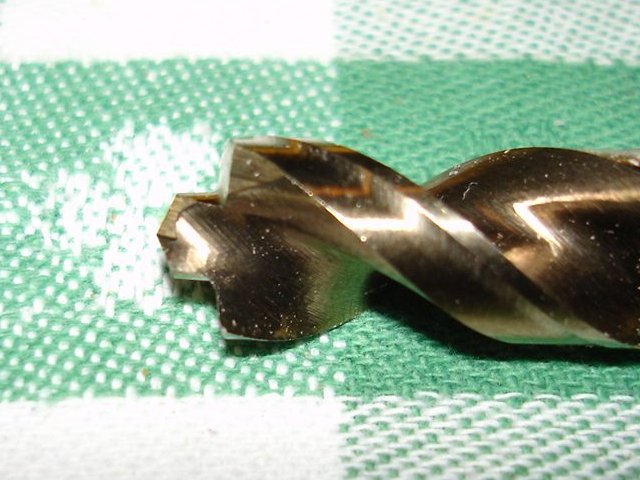
I guess the theory is that the pilot point guides the drill and the larger flutes cut the hole clean out the bottom. We will see how well this works when I get to that point....no pun intended.
Now all I need is some fine weather and some free weekends to get started.
I am not going to add in any time for this part of the project because I have been thinking about it all Winter, and there is no way I could calculate it.
Original post date May 23, 2008