It has been quite a while since I worked on the banjo. Our June weather broke records for extended gloom. Since I work outside I depend on decent weather to continue my banjo project, and we had nothing but thunder storms and rain for weeks. But today the sun was poking out, so I actually did skewer the gourd with the neck.
The first order of business is to mark the holes on the gourd in order to get the neck straight through and to provide the angle that I calculated previously. I marked the place on the dowel stick where the stick will come out of the gourd. I had figured that to be about 14.6" from the heel.
The reason for marking the dowel is so that I could measure the width of the stick at that point. The hole in the gourd has to be that width to make a tight fit against the dowel.
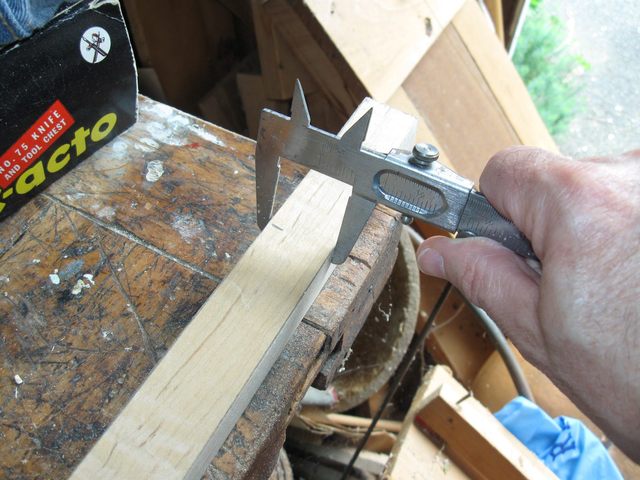
I measured the width of the stick to be 1 1/4" at that point. This measurement does not have to be exact since I will cut the hole in the gourd small and then pare it to fit when I put the neck through it. So now I know that the hole at the tail end must be about 1 1/4" wide and 3/4" deep. The width of the dowel at the heel is about 1 1/2", so that hole must be 1 1/2" wide and 3/4" deep.
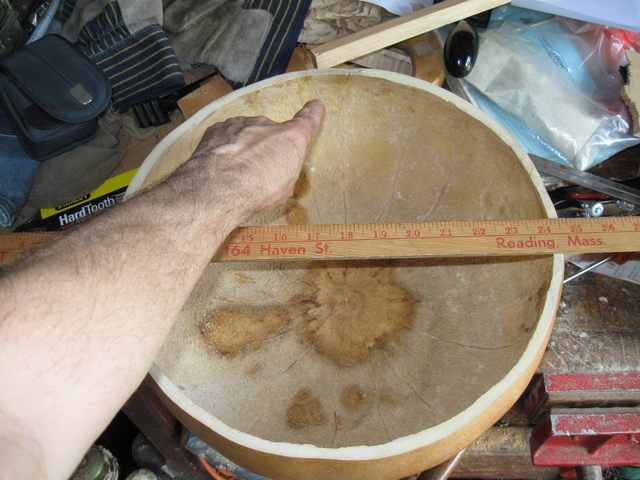
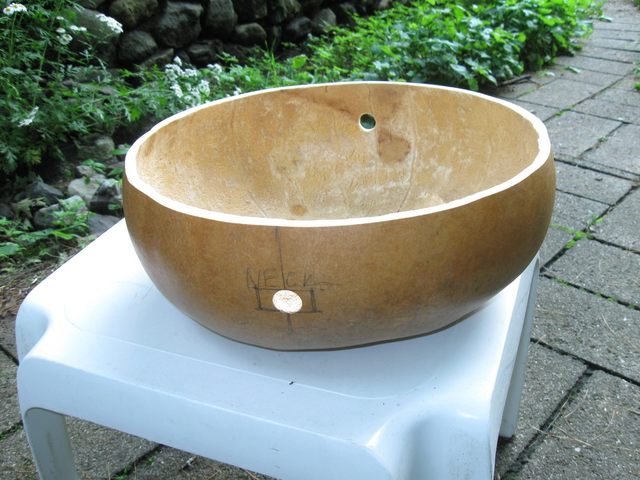
I oriented the gourd so that the repaired cracks will be on the bottom. I did not want to risk cutting the hole for the neck near the cracks, and putting it on the bottom will keep the cracks out of sight. In the photo I am pointing at the location of the two cracks.
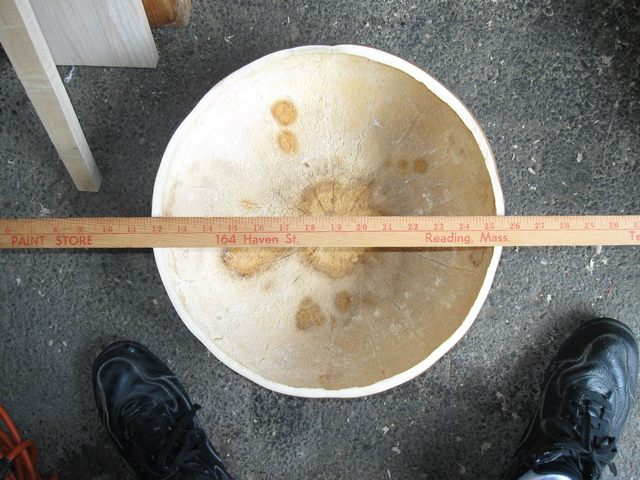
I eyeballed the center of the gourd by putting the yardstick over it and looking straight down to center the edge of the yardstick over the center of the gourd. I tried to measure an equal distance on either side of the line, but the gourd is not perfectly round so eyeballing it worked out better.
Once I had the edge of the yardstick centered over the middle of the gourd I marked the edges of the gourd with a pencil. Then I dropped a perpendicular line down the side of the gourd.
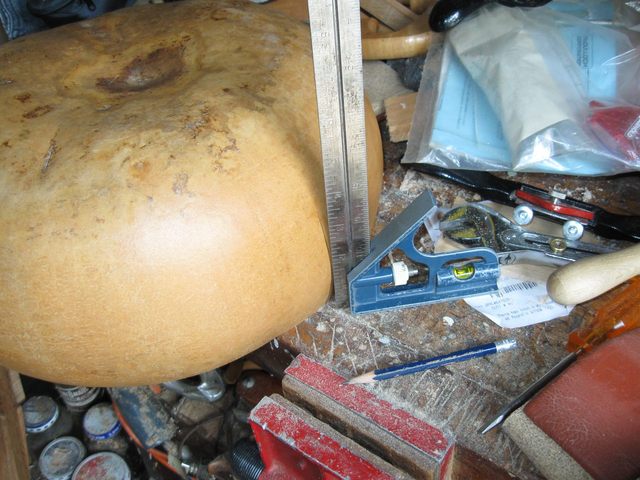
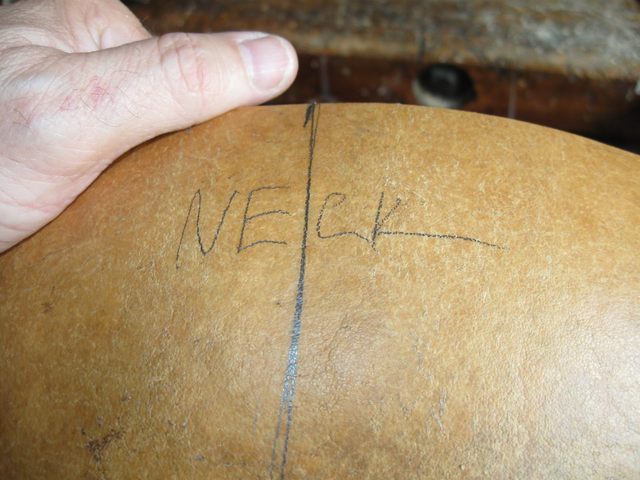
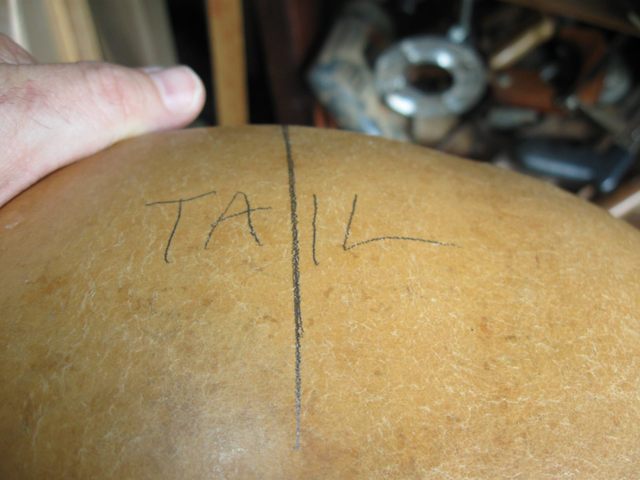
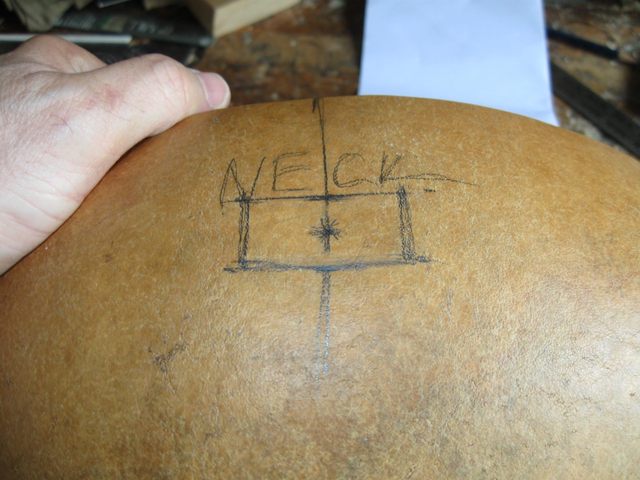
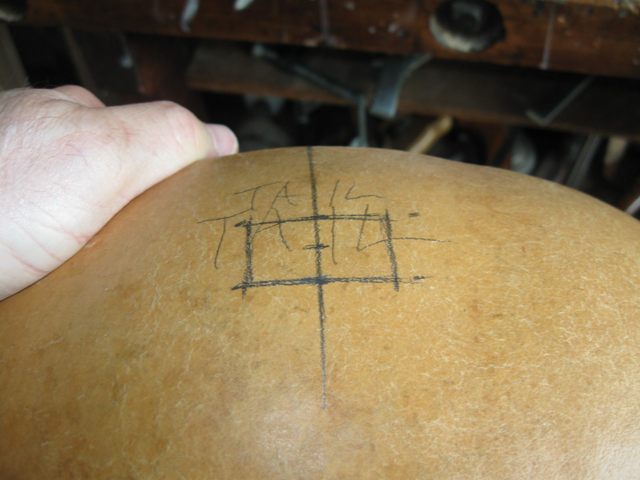
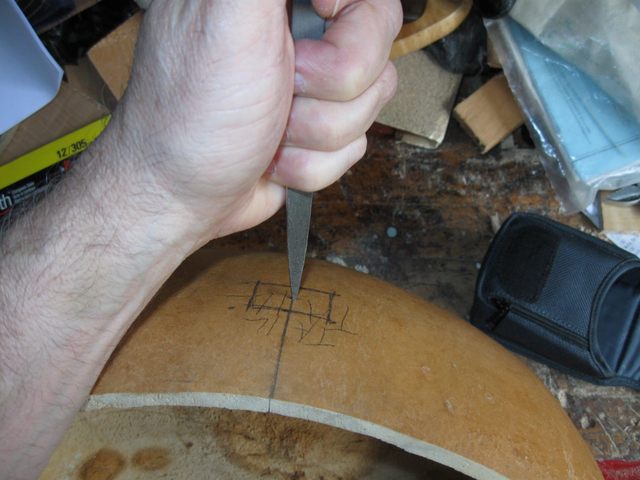
The easiest way to get the line perpendicular to the surface of the hole is to invert the gourd on the bench and put the square down on the bench, then draw the line up. Once the lines had been drawn, I labeled the two sides to make sure that I don't screw up and cut the holes backward.
Front
Back
I used the same trick of inverting the gourd to mark the locations of the holes.
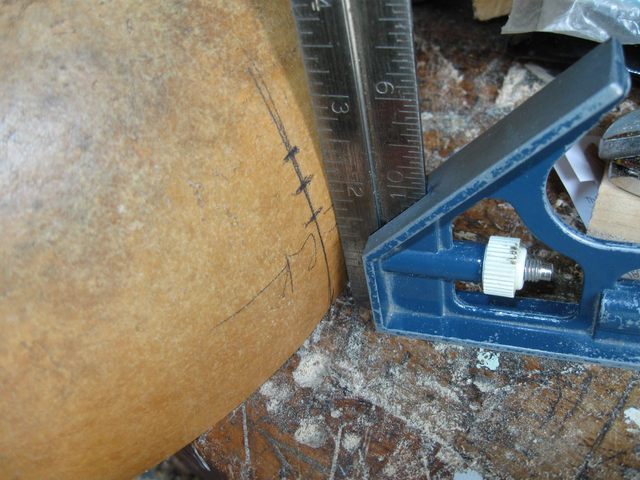
You may be able to see in the photo that the bottom of the neck hole is 2 1/2" from the bench and the top of it is 1 3/4" up. The mark in the middle is half way between the two. I did the same thing on the side where the tail piece goes through, but I moved it 1/4" closer to the top of the gourd to put a small angle on the neck. You can see in the photo that the mark for the bottom of the dowel is at 2 1/4" and the top one is at 1 1/2"
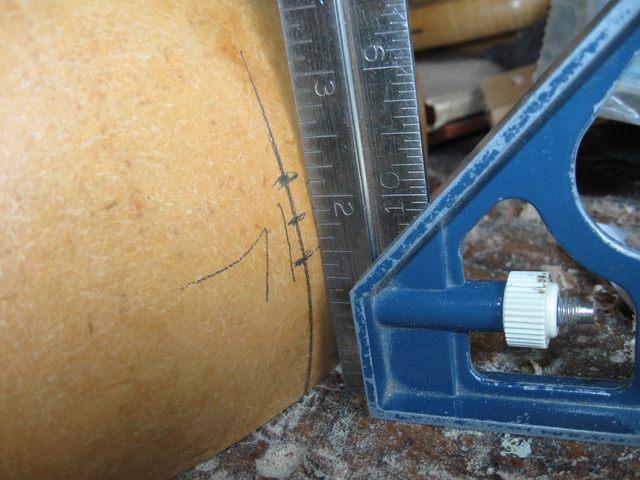
I measured off the width of the dowel at the neck and drew a rough rectangle around it.
I did the same on the tail side. Of course the tail hole will be slightly smaller than the neck hole.
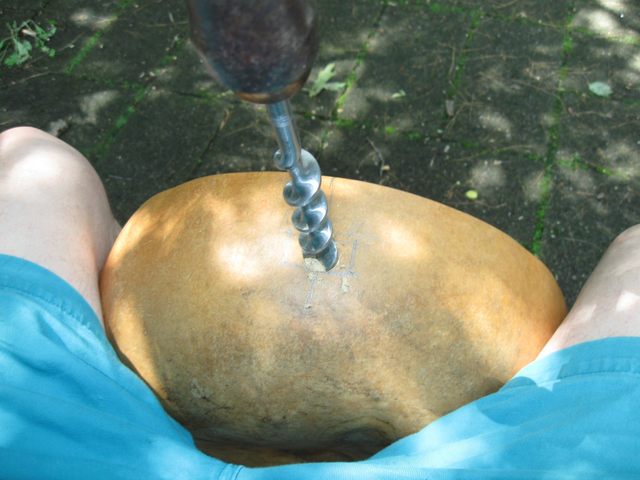
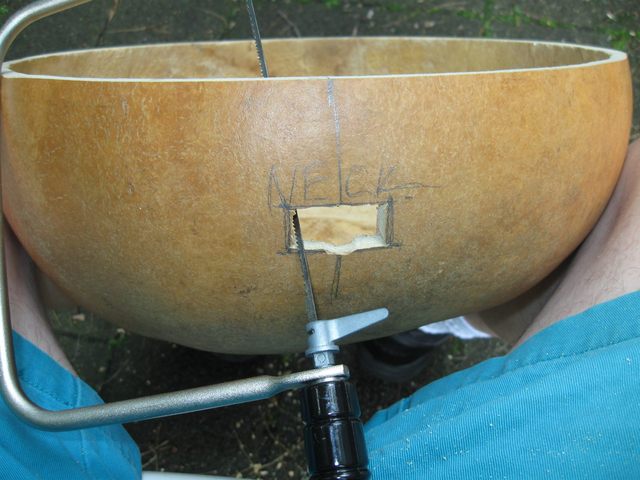
I start the holes using my brace and bit. I have a 3/4" bit which is just the size of the height of the holes.
I marked the center of the holes using the sharp end of the burnisher.
Then I simply drilled it holding it in my lap. The gourd wood is soft, so the bit makes quick work of it.
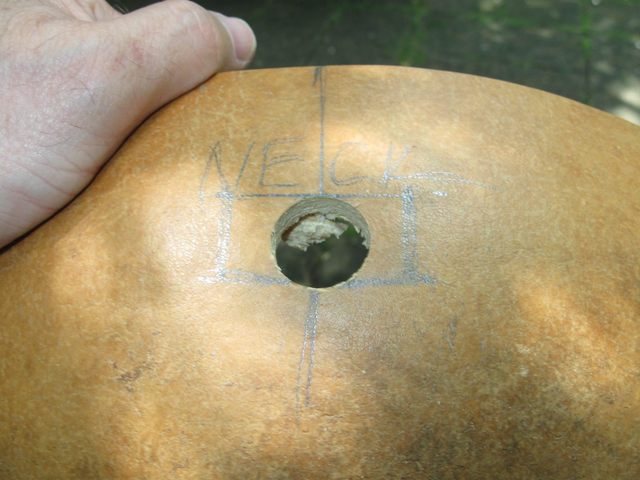
Here is the hole on the neck side of the gourd.
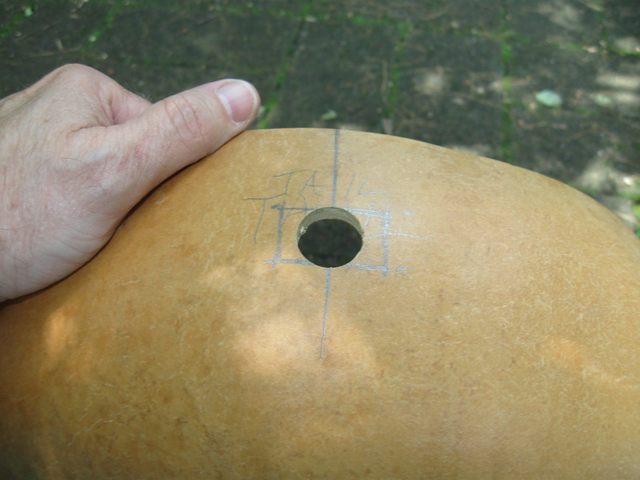
I did the same thing on the side where the tail goes.
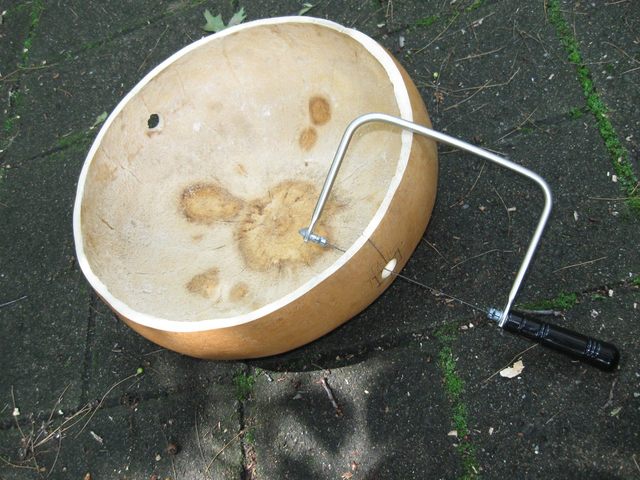
OK. Here it is drilled straight through.
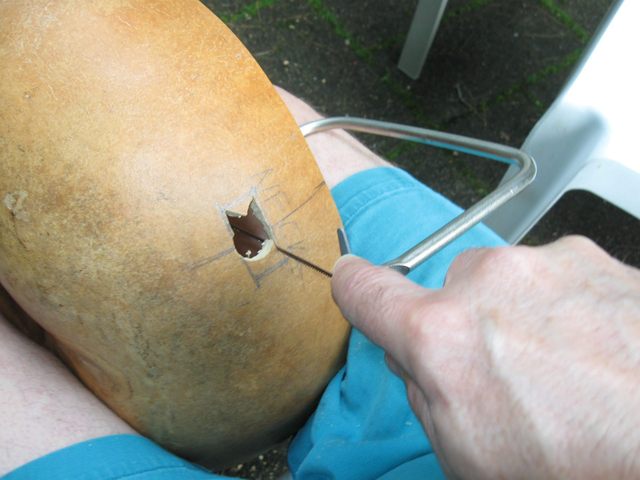
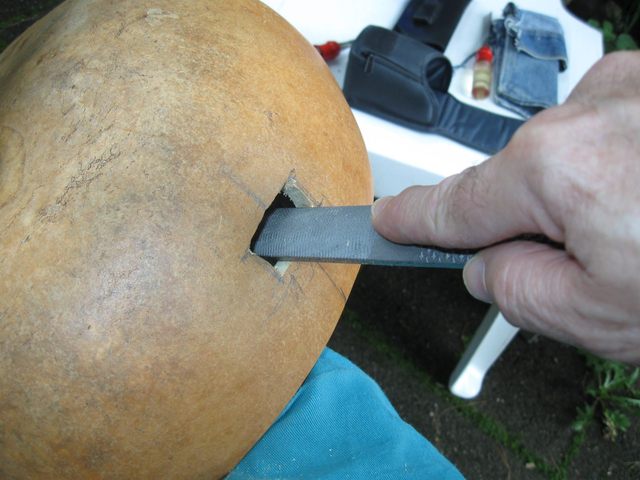
The next step was to make the holes rectangular to fit the cross section of the neck. Cutting out most of the wood is easy using the coping saw. I took the blade out and reassembled it with the blade going through the hole.
I sawed one side of the hole.
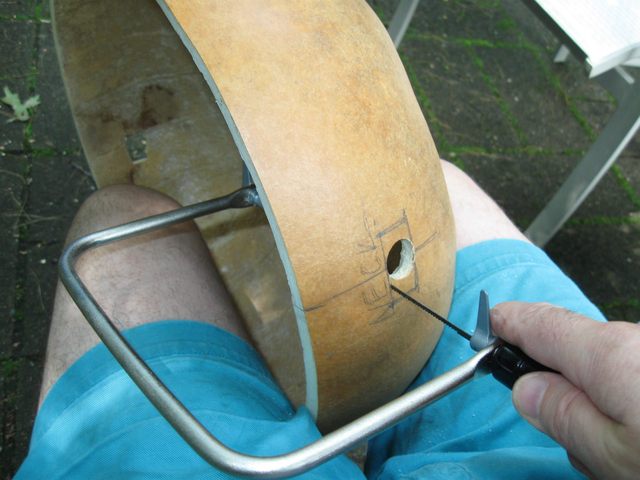
Then I twisted the blade around 180 degrees, turned the gourd over, and sawed the other side.
Here is the neck side roughed out using the saw.
I squared up the sides using the shoe rasp.
Once I had both holes rectangular, I tried out the fit to the neck.
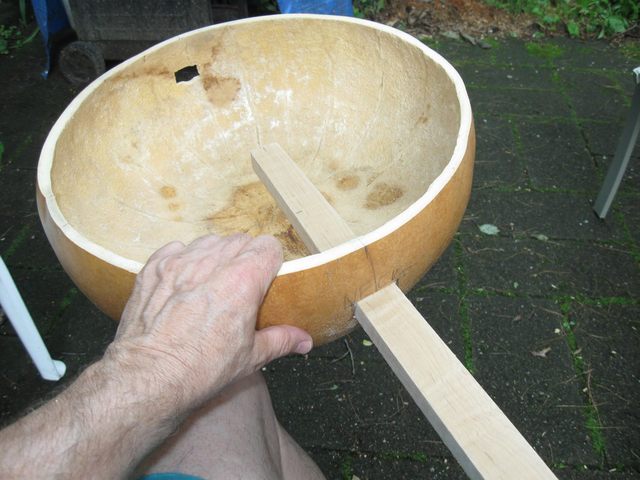
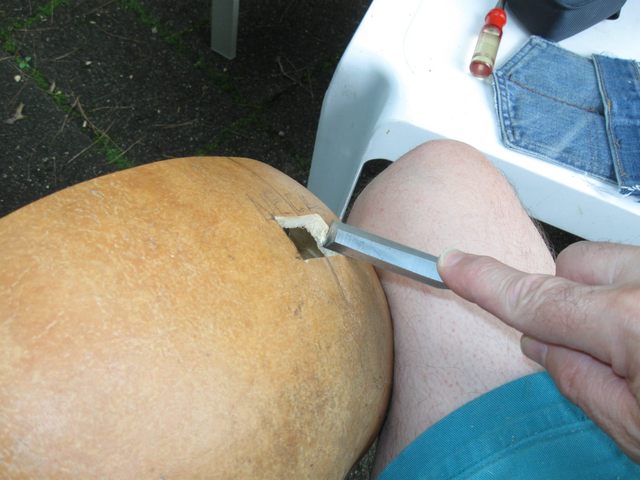
Hmmmm. Not a bad start. Of course I started with the holes deliberately small so that I could cut them to fit while trying the neck. To increase the size of the holes I pared the sides with a chisel.
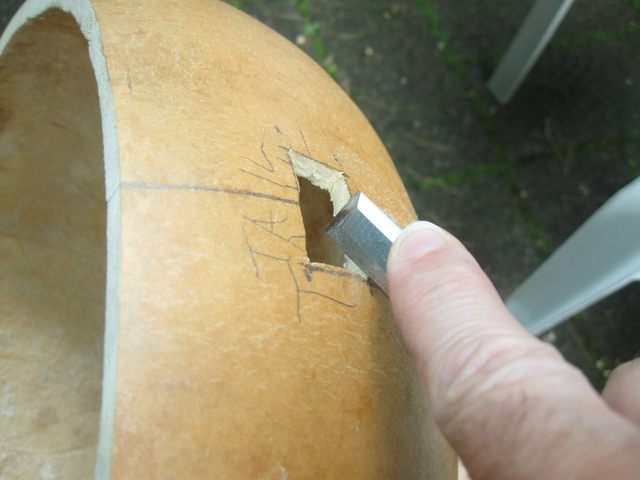
On the tail side I did the same thing, temporarily fitting the dowel stick in until it is close to its mark at the 14" location. Cut and fit, cut and fit, cut and fit. It is a tedious procedure, but it is necessary in order to get a tight fit. Almost there.
Once the height of the hole is correct, I stop cutting on it. To get the neck to go in farther I pare the sides of the hole using a chisel.
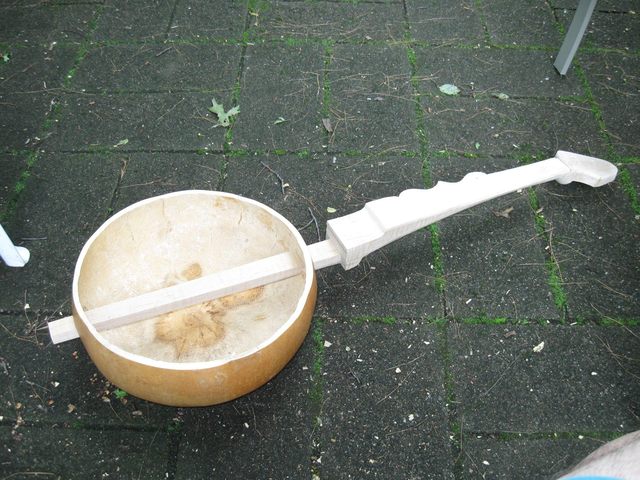
Finally, it goes all the way in.
The heel of the neck is still square, so it does not fit tightly to the gourd.
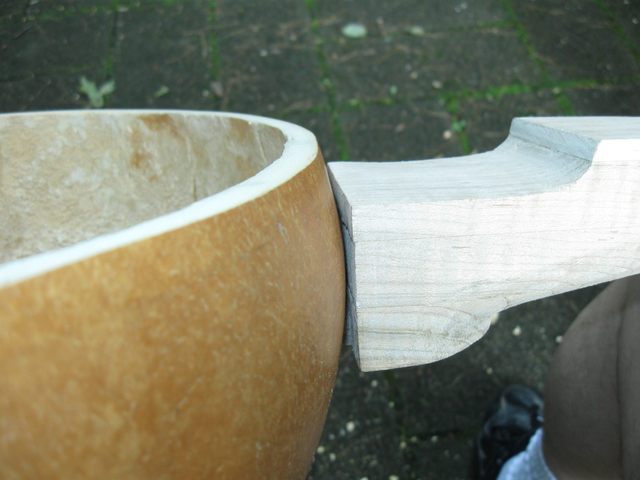
Before I carved the heel to fit the gourd I checked to see if the neck is level with the top of the gourd.
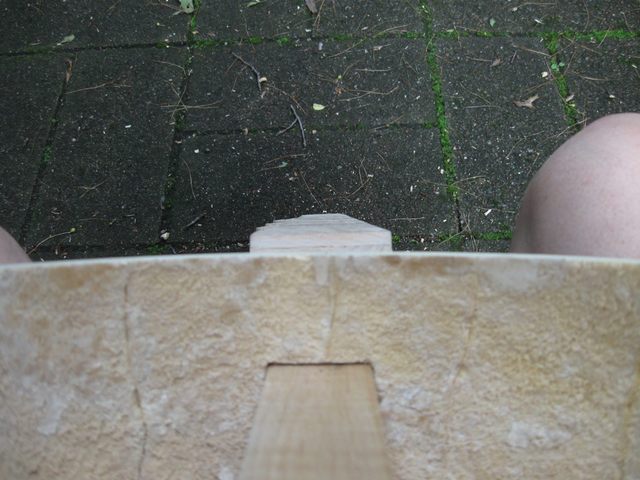
That isn't too bad. I leans very slightly to the left, but I don't think it is enough to matter.
Carving the heel of the neck to match the shape of the gourd is a tedious affair. I used the small gouge from my Exacto® set.
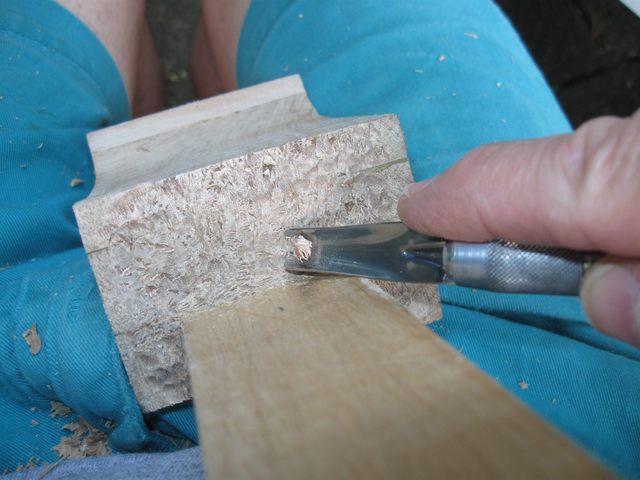
It appears to work better than the large gouge.
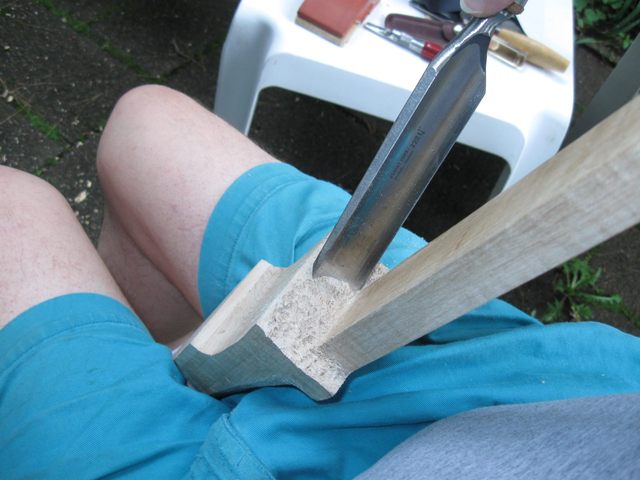
Yowza! Better be careful with that one!
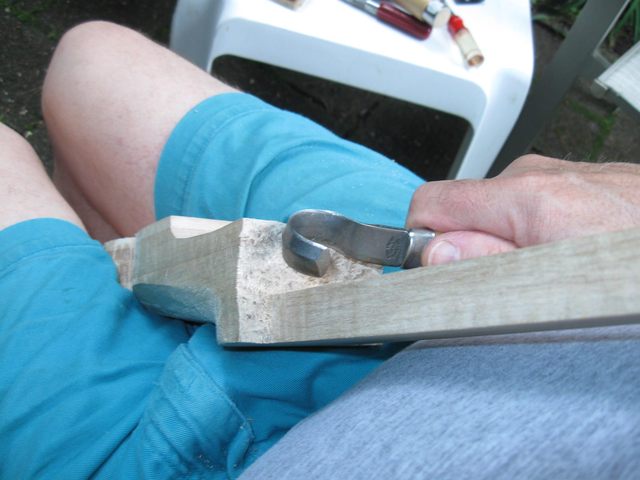
The hook knife is useful too.
I used 60 grit sandpaper too since that takes the wood off surprisingly quickly.
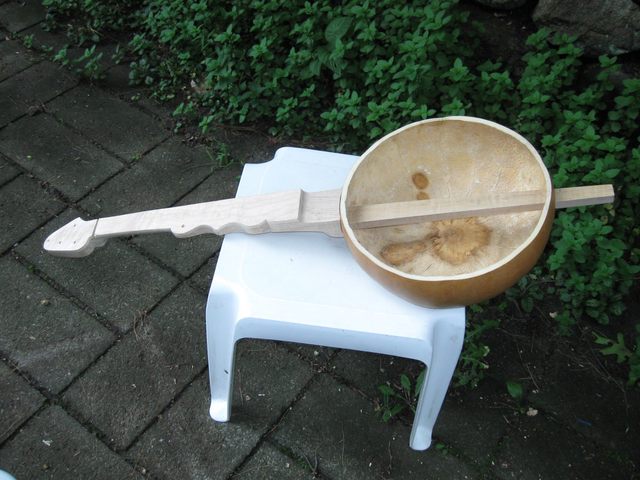
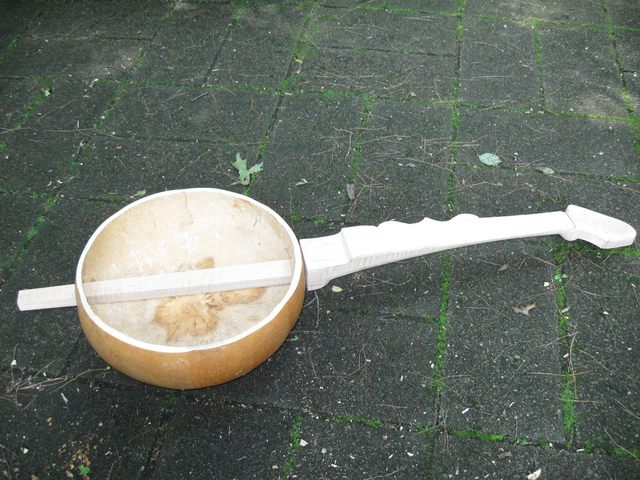
Well, there it is. The neck has been mated with the gourd. It looks pretty good like that.
I spent 4 hours doing this work today. The time just flew by.
Original post date July 8, 2009