Merry Christmas, everybody! It has been a loooong time since I have worked on this project. The last time I looked at it was last Summer, and now it is after Christmas! But now I am on Christmas break and I have some time (finally) to try using my steam bender. I have come to the Big Day when I will bend my first banjo hoop. Here is a photo of the setup.
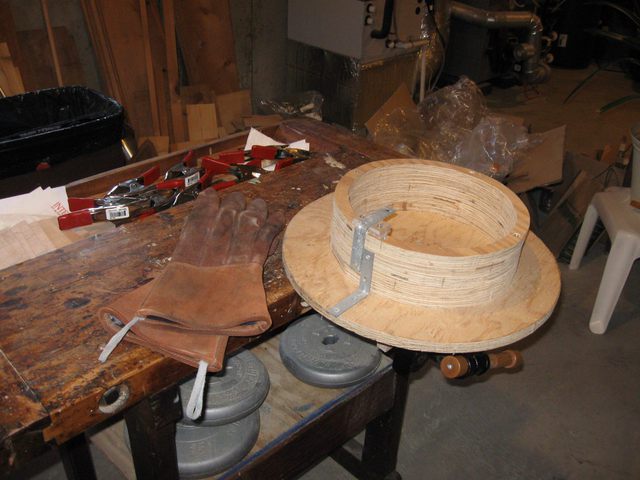
Everything Ready to Go
The form is clamped in the vise. The clamps and cauls are on the bench ready to go. I even found my old fireplace gloves for handling some very hot wood. So, here is the plan.
My source of steam is a wallpaper steamer that I bought on-line for about $50. I don't know how much steam it is going to make, but I am hoping that it is enough to soften up the wood for bending. In order to hasten the production of the steam, I filled the steamer with hot tap water from the kitchen faucet.
I have a book on wood bending that I bought, and that is where I got most of my information on how to do this. Here are the particulars about the book.
Title: Wood Bender's Handbook
Author: Zachary Taylor
Publisher: Sterling Publishing Co., Inc. New York
Year: 2001
ISBN: 0-8069-9702-8
The book contains instructions on multiple ways to bend wood. Steam is one of them. Depending on the kind of wood you are bending, how thick it is, and how severe the bend, the method you use will vary. According to the book, for a steam bend you should steam the wood for three quarters of an hour per inch of thickness. My wood is only 1/4" thick so it should only take a few minutes of steam to make it bendable. According to those numbers, I should be able to bend this wood after only 11 1/2 minutes in the steam.
I think I will double that just to make sure that the board gets hot enough. So about 20 minutes ought to do it.
Here is my steam setup all ready to go.

Ready To Go
Notice the drool bucket that I placed under one end of the tube. I have propped up the other end of the tube in order to encourage the condensed water to flow down to the end that has the drool bucket under it. I added some blankets on top to keep the heat inside of the tube.
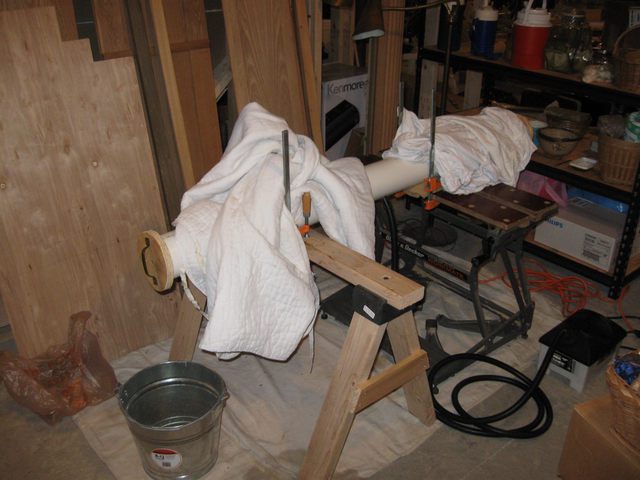
Setup With Insulating Blankets
I started the steamer at 14:52 (that's 2:52 p.m. for you non-military types). By 15:12 (3:12 p.m.) there was steam going into the tube. That is 20 minutes.
By 15:26 I had strong steam going into the tube. So it took about 34 minutes for my steamer to get up a good head of steam.
The drool system seems to be working. If you look real hard at the photo below, you can see some drops of water coming out of the tube around the plug.
You may also notice that the end plug is tilted. It actually kept falling out of the hole as I steamed the wood. I kept putting it back in and holding it there since it is too late in the process to fix the issue right at the moment.

Drool
I let the wood cook in the steamer until 15:45, which was 19 minutes of steam, and then I pulled it out and quickly bent it around the form, clamping it as I went along.
I do not have any photos of the process of bending the wood because I was busy with both hands pulling the hot wood out of the tube and bending it. It was.... "interesting" to say the least. Wrestling the wood and all those clamps and cauls required way more hands than I actually have. The wooden block that I made to push the wood around the form was utterly useless.
The book calls for using a bending strap when bending wood. A bending strap is usually a thin sheet of stainless steel that is the same size (i.e. length and width) of the wood to be bent. It is clamped to the wood at both ends and is used to press the wood around the form. The theory is that the steam makes the wood compressible but not stretchable. When you bend the wood, the inside of the curve is compressed and the outside of the curve is stretched. Without the bending strap, the stretched wood will separate and split. You need to bend the wood by compressing the inside and not stetching the outside.
The bending strap has a stop on each end, making it exactly the same length as the wood. Since the wood is trapped between the two ends of the strap, it cannot get any longer through stretching and is forced into compression.
That is the theory.
Unfortunately, finding a piece of thin, flexible stainless steel that is exactly 48" by 3 1/2" proved impossible to do. Machining such a thing to put blocks on each end or to clamp it securely to the form and the wood would prove difficult with my simple hand tools. After a few weeks of looking into how I might create a bending strap, I gave up and built the block that you can see on the bench in the photo below. The theory was that I could us it to push the wood against the form and provide some of the compression that is supposed to be provided by the bending strap that I do not have.
That was the theory.
The reality, as I mentioned above, is that the block proved to be totally useless.
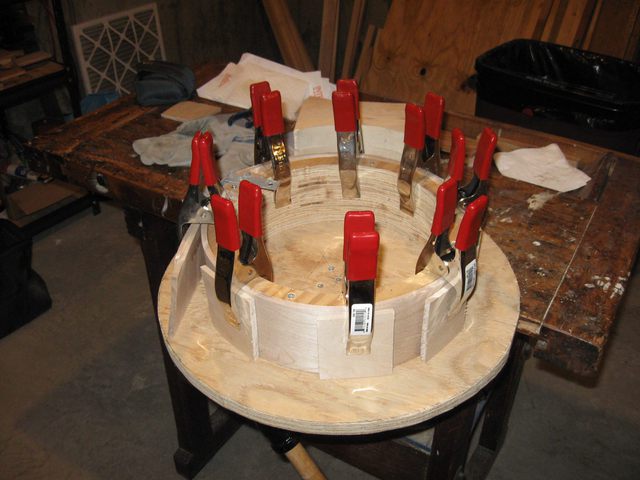
Anyway, here is what I ended up with.
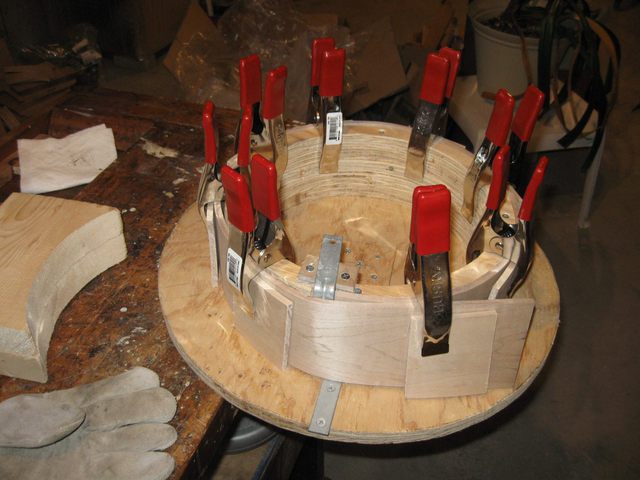
The Wood is All Wrapped Up
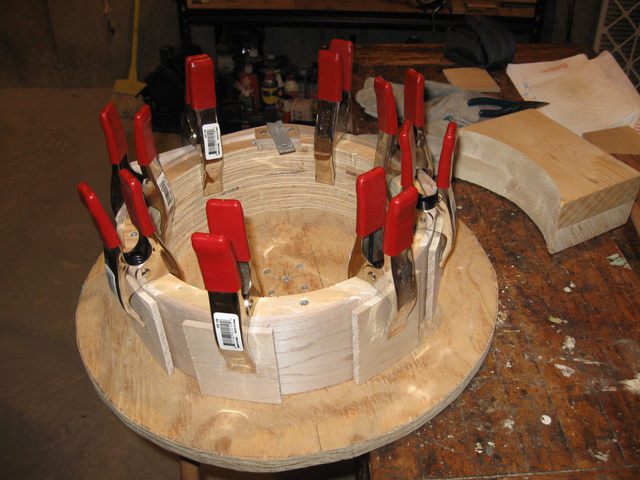
The wood cooled off very quickly, and the last bend required some forceful pushing on the end. I don't like the look of that end piece. The wood has split again. But I will probably cut that end off anyway since I have extra length of wood on the ends. Here is a photo from the other side of the form.
The Other Side of the Form
It looks pretty good over there. Here is another side.
Another Side
Not bad over here. One last side.
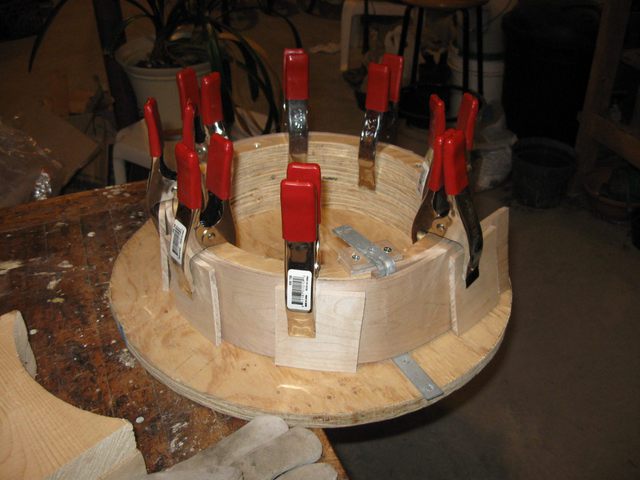
One Last Side of the Form
It looks OK up to that sharp bend around the angle irons.
The book says that I should let the wood dry out for a day to minimize the springback. So that is what I am going to do. Tomorrow I will take the clamps off and see how it looks.