Well, sanding is just about the most boring job there is. But you have to do it right if you want to have a good outcome with the banjo. I do not have a whole lot of photos to show about the sanding stage. I just basically took some sandpaper and worked on the neck for a long time until it was smooth. So, for lack of photos, I thought that I would wax philosophic about sanding in general.
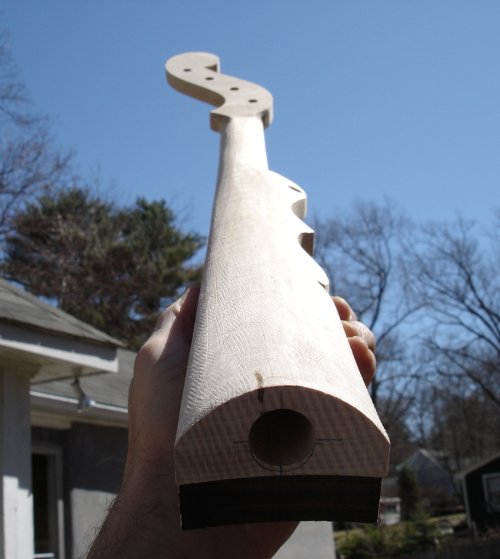
Sanding is a visual job, not a tactile job. What I mean by that is that I do not sand until the wood feels smooth to the touch. I sand until all traces of machining marks and scratches are no longer visible. In order to see the marks, I hold the neck up to the sunlight. Here is a photo of the neck before I started sanding it:
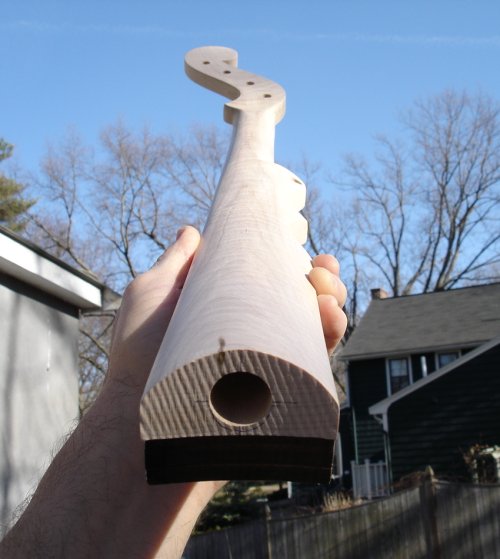
If you look closely (click on the image to get a larger view of it) you can see the marks made by my shoe rasp as I took off the unwanted wood. Those marks are pretty deep, and I had to remove a bunch of wood with the sandpaper to make them go away. Here is a photo of the finished neck. You can see that the marks are gone now. I did not bother to smooth out the heel where it will be screwed against the pot.
It helps me if I think of the sandpaper as a eraser and I am erasing the marks on the wood. It is slow, but that's OK because sometimes we have to slow down.
The banjo kit came with some sandpaper in it, but the roughest grit was 220. I tried using that first but it was going to take me forever to get rid of all those rasp marks with it. So I rummaged around in my toolbox and came up with some 100 grit paper to use. That removed the wood quite a bit faster.
After the I had removed most of those marks with the 100 grit paper I graduated to some 150 grit to remove the scratches made with the 100 grit. And so I progressed down through the 220 and the 400 and the 600. Each grade of sandpaper is used to erase the marks made by the previous grade.
The kit came with some 800 grit crocus cloth as well, but it was leaving a red residue on the neck as I used it. I stopped and "erased" the red stuff with my 600 grit paper and called it done.
One final step I like to do is to buff the wood down with some 0000 steel wool. This is very fine steel wool, and it will shine the wood up just like you had put a finish on it. I use it very gently so as not to get any of the steel embedded in the wood. I just swoosh it lightly across the surface and that is that. This is looking like it is going to take a nice finish.
I spent a good three hours just sanding the neck. I had to do the pot on a different day. Just sanding the pot took me another hour, but in the end it will all be worth it when I can admire the wonderful finish.