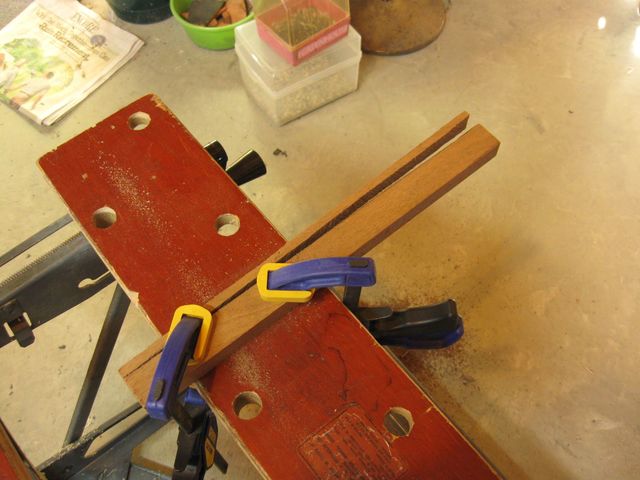
I finally got around to making the pegs. If you page back through a few screens of this story you will find where I measured the pegs on the other banjo so that I would know what size to make these new ones. The results were that the pegs will be 3 1/4" long, 1/2" thick and 1" wide. So I need to cut some walnut down to get 5 pieces that size. Here is the walnut that I found in the leftovers from a different project. The piece is 14" long.
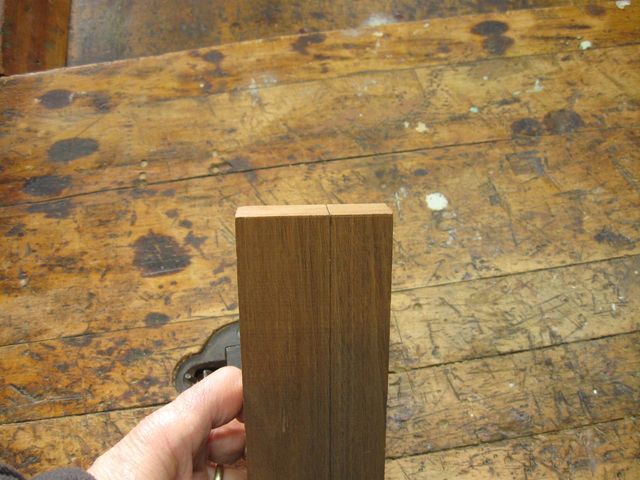
This Piece is 14" by 2 1/2"
Since the piece is 14" long, I should be able to get 4 lengths of 3 1/4" out of it. And since it is 2 1/2" wide I can get two strips of 1" wood. That gives me enough wood for 8 pegs..... my 5 plus some spare to cover my mistakes.
I marked off the first 1" strip of wood, and sawed it with my huge rip saw.
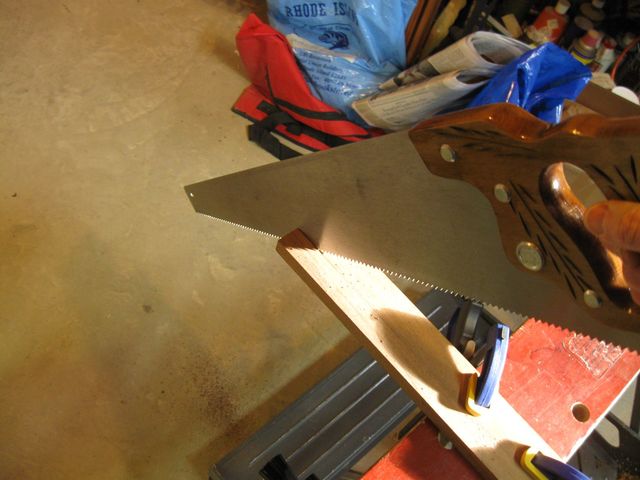
Sawing Walnut With the Rip Saw
The saw is sharp, and the walnut is soft, so this is like cutting cheese. It really does cut fast and easy. In just a few minutes I had my first 1" strip of wood sliced off.
Strip of Walnut, 1" by 3/4" by 14"
I measured the next strip one inch wide.
Measuring One Inch
I clamped it to the Workmate® and sawed off the skinny little bit I don't need.
The Second Strip Is Done
In order to measure things cleanly and make the next cuts accurately, I squared up the raw surfaces using my wooden jack plane. I got this plane in a rummage sale somewhere as a curiosity. Now, I use it often since I find it actually easier to set up than my metal jack plane. Go figure.
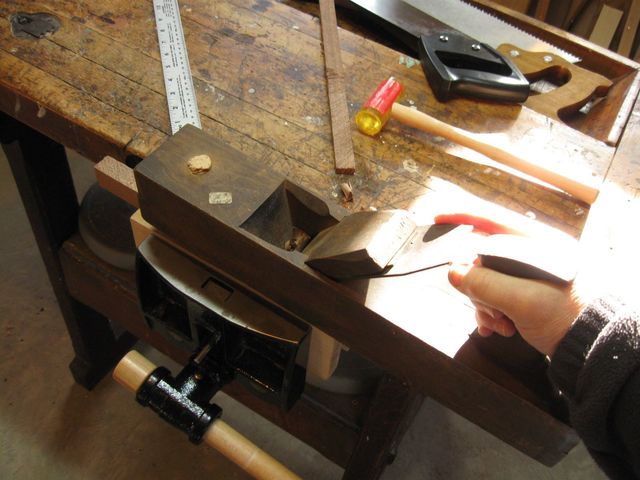
Plane the Cut Surfaces Flat
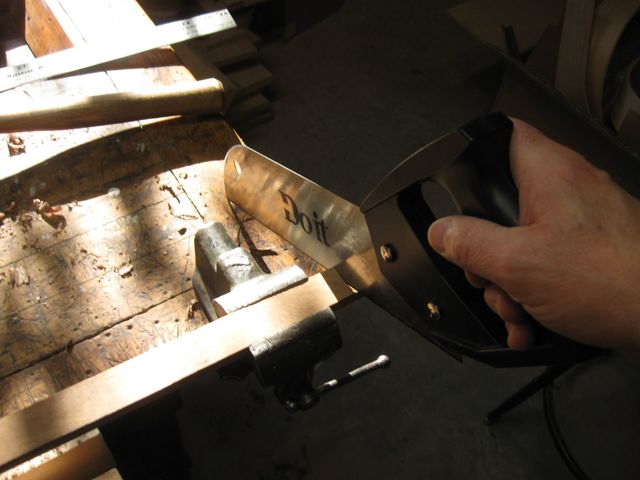
My next trick was to take the 3/4" thick wood and cut it down to 1/2", which is what I need for the pegs. I used the rip saw to do those cuts as well, but to keep better control over it, I started the notch using the little panel saw. I needed to make a kerf that is wider than the thickness of the panel saw, so I carved it out by leaning the saw blade, first to the right....

Lean the Saw to the Right
Then, I widened the kerf by leaning the blade to the left in order to cut down the right side of the kerf.
Widen the Kerf by Leaning to the Left
Here is the starting kerf, which is wide enough for the blade of the rip saw.
This is For Starting the Big Rip Saw
You can see that the saw blade just fits right in there. This makes it easy to start those big teeth cutting right away and avoids the saw blade jumping around and marring the wood.
The Rip Saw Blade Starts Easily
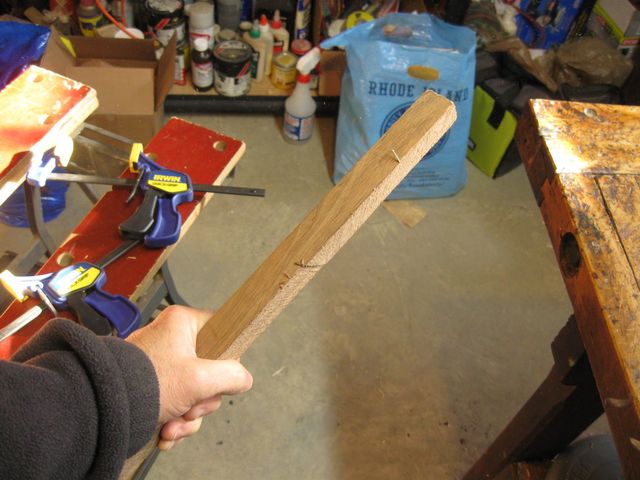
I ripped 1/4" of wood off the sides of the 14" strips, leaving me with two strips that are 1" by 1/2" by 14".
Here Are the Pieces
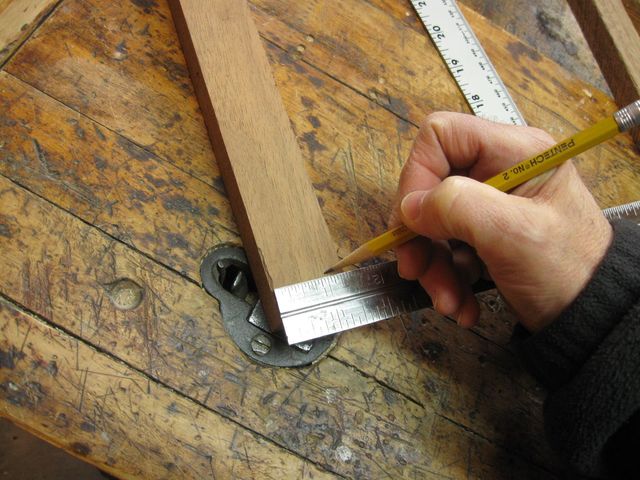
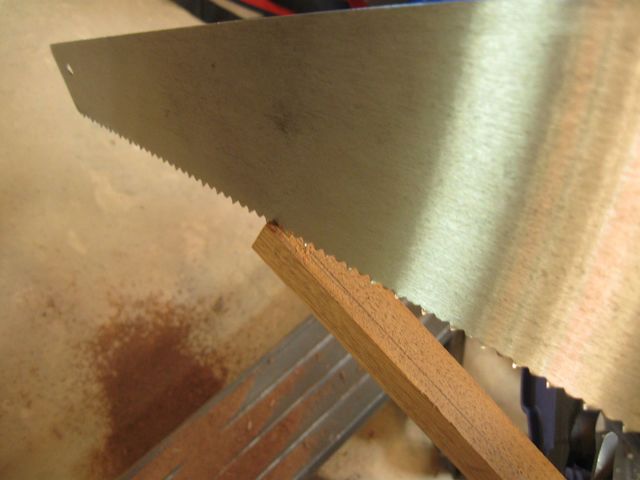
I marked off 3 1/4" on one of the strips.

Mark 3 1/4"
Then I cut the piece off with the panel saw.
Cut Off a Peg Blank
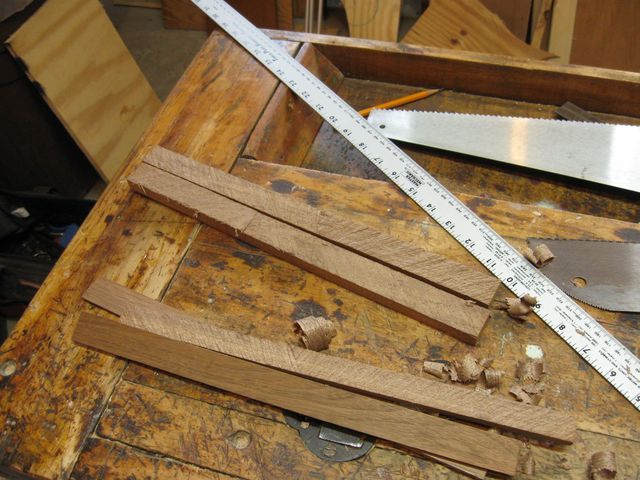
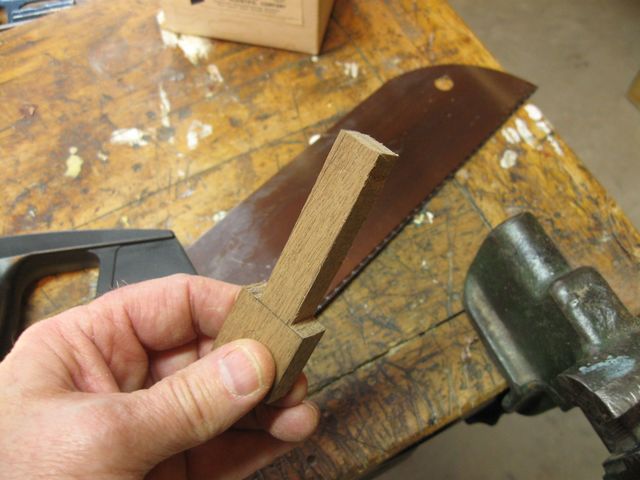
Here they are. Five walnut peg blanks that are 3 1/4" by 1" by 1/2".
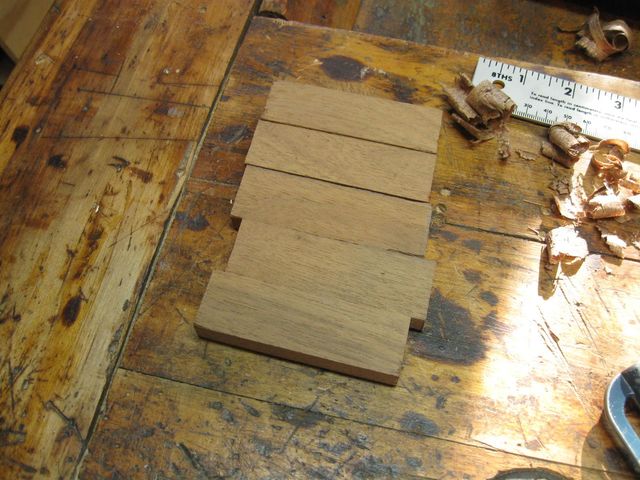
Five Peg Blanks
The buttons are going to be 1" by 1" square. The shaft of each peg will be shaped out of a square part that is 1/2" by 1/2". I marked the blanks so that I could cut the shafts out of them.
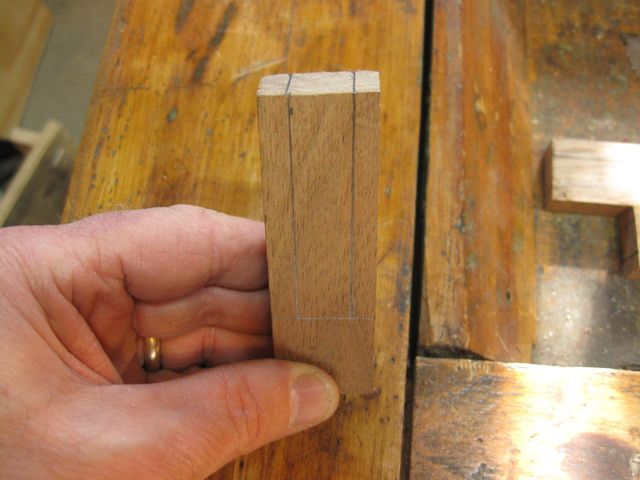
The Shafts are 1/2" by 1/2"
The panel saw is the right size for these cuts, and it has no back plate so I can cut as deep as I need to. But the blade binds in the kerf and squeaks. I think it is because the teeth aren't set right, but they are way too tiny for me to set them. I wish you could hear this thing squealing. It is very loud.
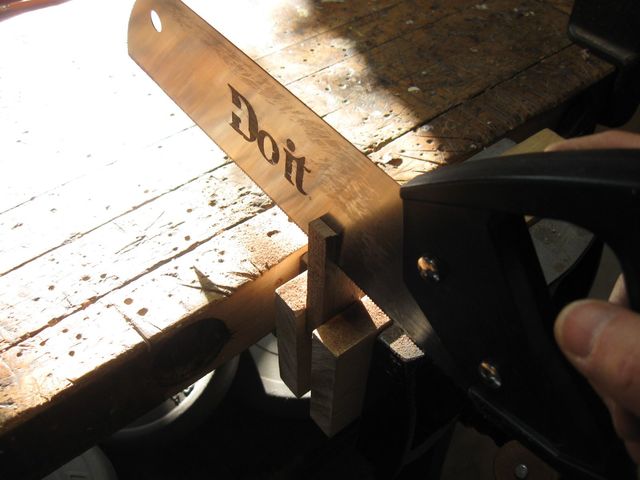
The Saw is Squeaking Very Loudly - Annoying!
One trick people use to stop a saw from binding in the kerf is to put candle wax on the blade to lubricate it. I looked all over for the stub of a candle, but I couldn't find any, but I did find this box of bee's wax. I put some of that on the blade.
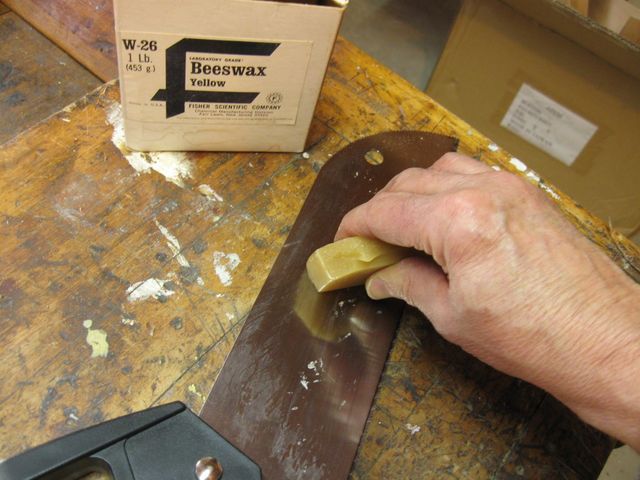
Maybe Some Bee's Wax Will Quiet Down This Saw
Ahhh! Sweet silence! The wax worked. I cut the cheeks of the shaft in docile quietude.
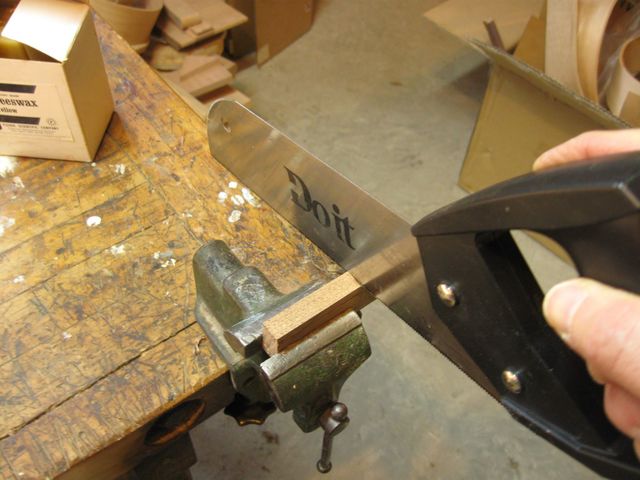
Cutting The Cheeks of the Shaft
Here it is... a 1" button and a 1/2" shaft.
This Blank is Ready
Do that four more times, and we have our five peg blanks.
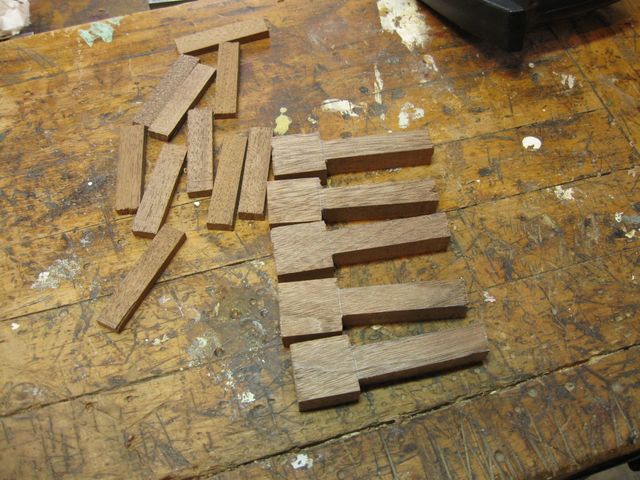
Five Peg Blanks are Ready to Be Shaped
I just noticed something about the pieces that I have been cutting off. What does this look like?
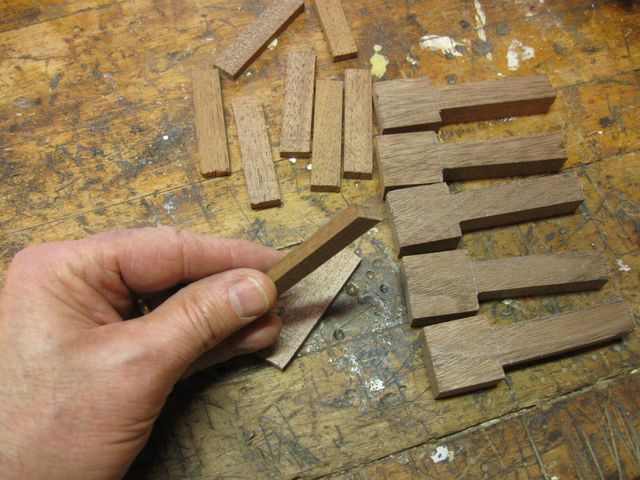
This Scrap Looks Familiar
It looks like a nut blank. I bet I could get a nut blank out of one of those. Most banjos have the nut made out of really hard stuff, like ivory or bone. But that is for stretching steel strings across them. Steel strings would eventually cut through a wood nut. But I will be stringing this banjo up with NylGut® strings, and those are soft plastic. I make my nuts out of the same walnut that I use for the pegs.
Getting back to the blanks, I drew the edges of the button shape on the buttons. I just did a geometrical thing, drawing lines between the middles of the sides. That turns the square into a diamond.
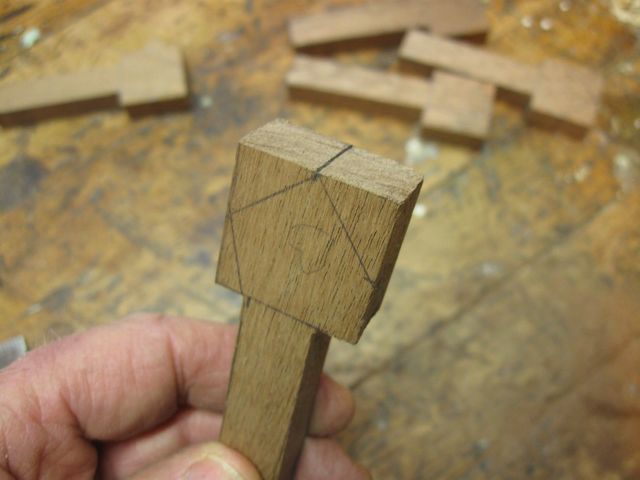
The Basic Shape of the Button
I left one side straight because I am going to round that side off. I will cut off three of the corners and leave one untouched. To make sure that I did not cut off the extra corner, I marked it clearly with a pencil.
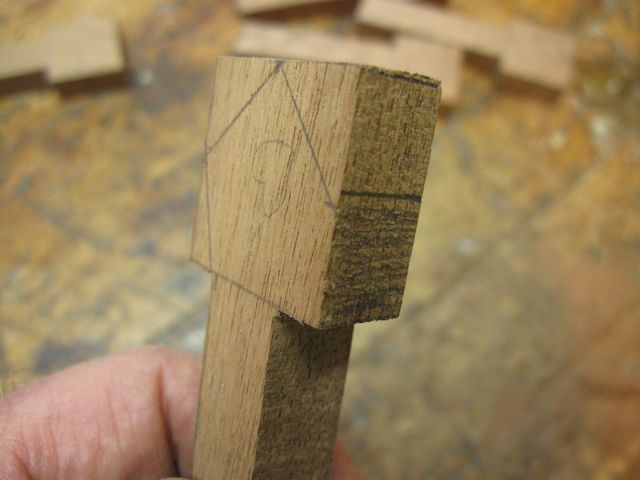
This Corner Will Not Be Cut Off
After a few minutes with the panel saw, this is what I had.
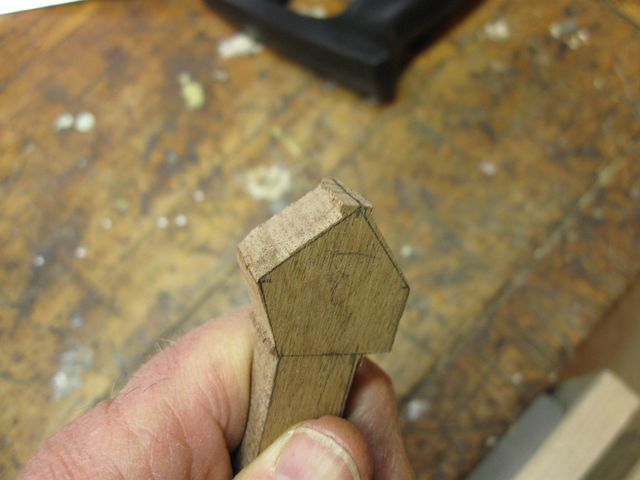
Three of the Corners Have Been Cut Off
I simply clamped the peg in the metal working vise and cut off the corners.
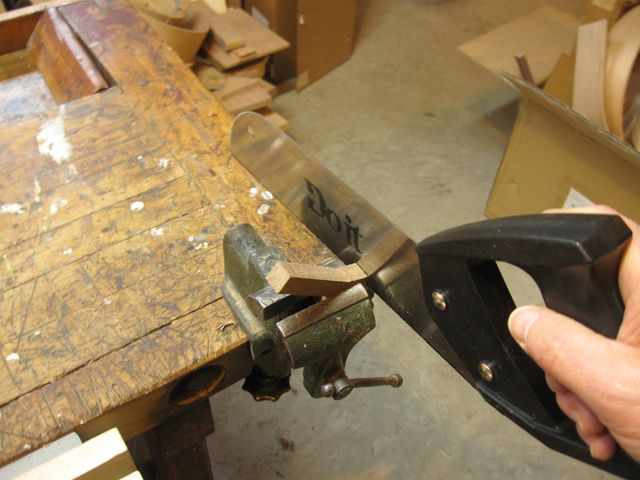
Cutting Off the Corners is Easy
Do that four more times, and we have five blanks again.
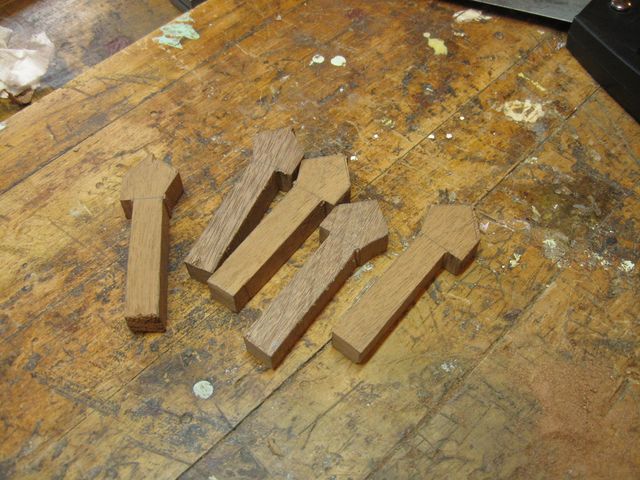
The Buttons Are Roughed In
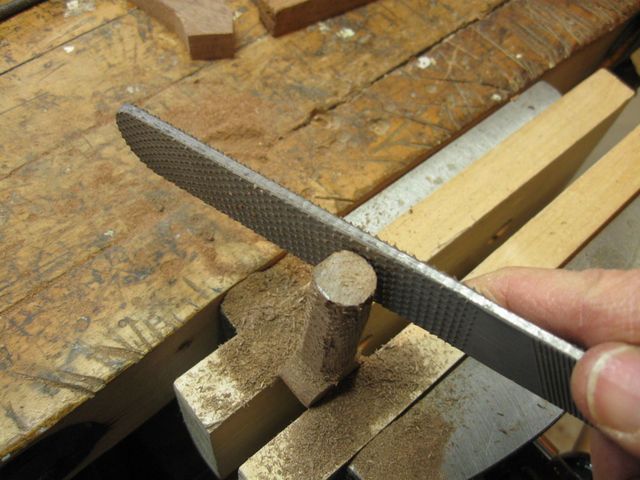
To make the concave part of the button, I used the rattail file. It cuts through the soft walnut very quickly.
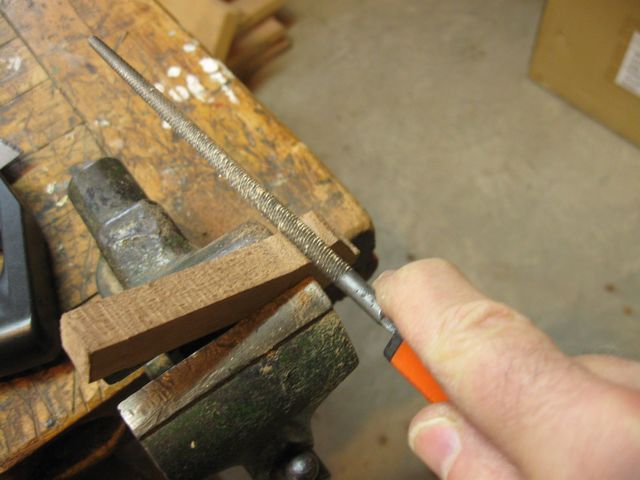
The Rattail File Cuts the Concave Part
The convex part of the button, which is carved out of the corner that I did not cut off, is done with the shoe rasp.
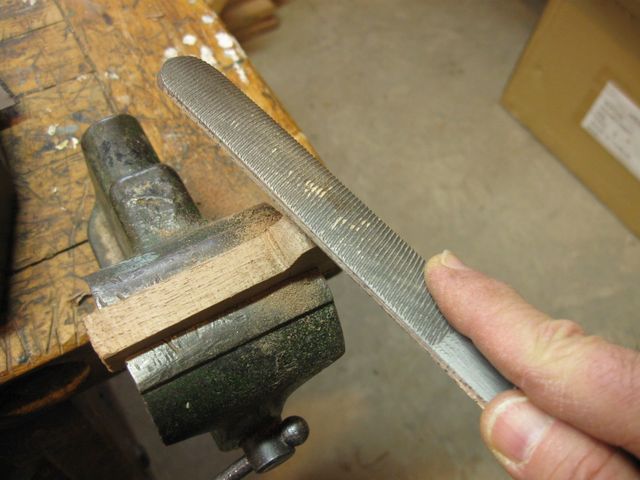
The Shoe Rasp Carves the Convex Part
Here is the shape of the button. I designed it to echo the shape of the peghead, concave on one side and convex on the other side. This has no functional purpose. It is merely aesthetic.
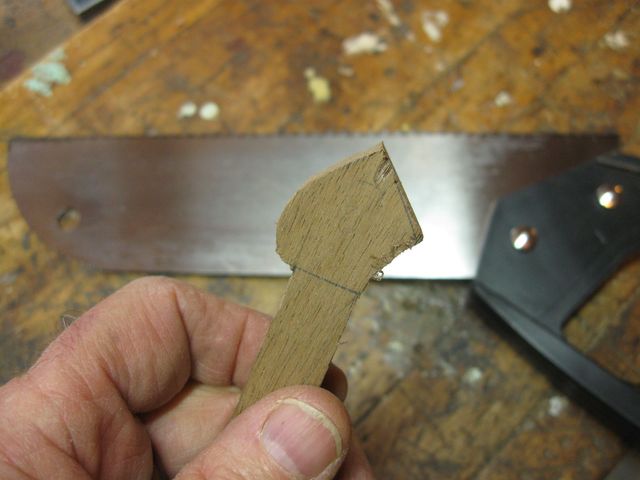
One Button Is Done
Do that four more times and.... well... you know.
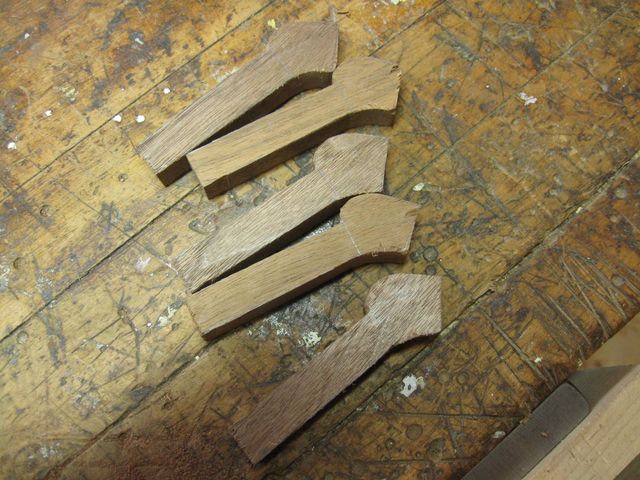
The Buttons Have Been Carved
The next step is to carve the shafts of the pegs. The shafts have to be sized to fit into the holes of the peghead, and they have to be tapered to the same taper in the peghead. I have some tools that I use to do that when it comes time to install the pegs, but first I have to rough them in.
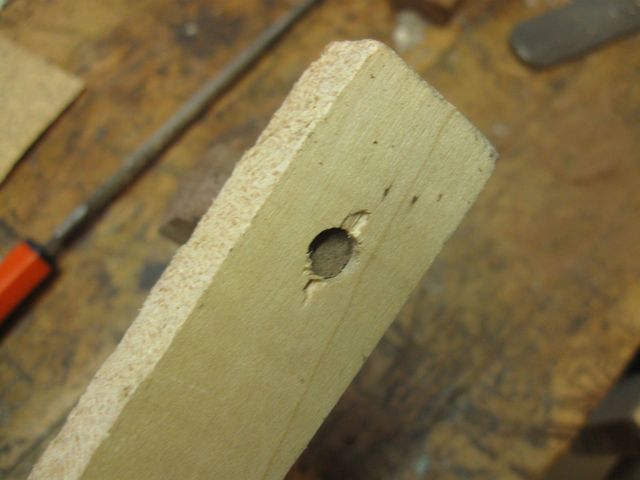
In order to get them close to their final shape as I rough them in, I created this testing hole in some scrap maple. The hole has been reamed out to the proper taper and size to match what I will do in the peghead. The plan is to carve the shafts on the pegs so that they go part way into the hole, but not all the way. When I finalize the fitting of the pegs, I will shape them with my peg shaver tool to make them fit precisely in the peghead. Until then, I use this hole to get a rough shape.
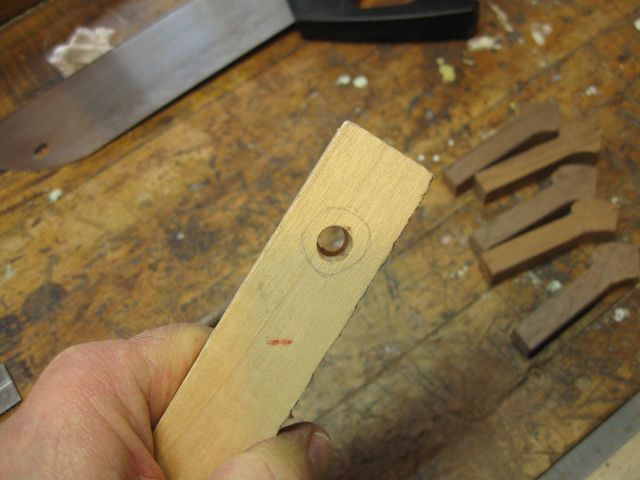
A Hole To Test the Rough Peg Shafts
I carve the shafts by hand using the shoe rasp, eyeballing the shape to make the shaft round, always keeping the taper in mind.
Carving the Shaft
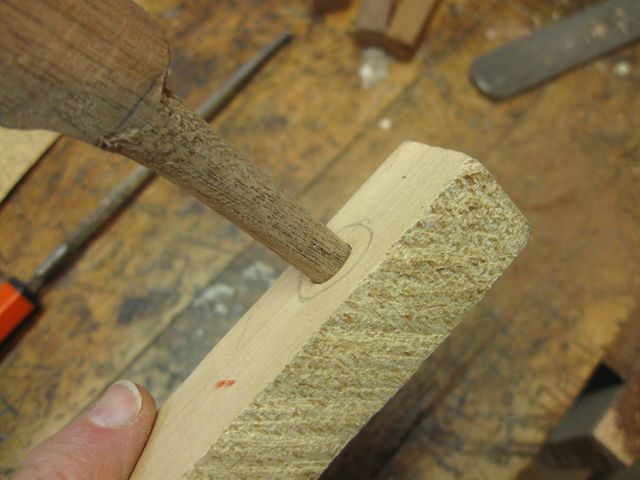
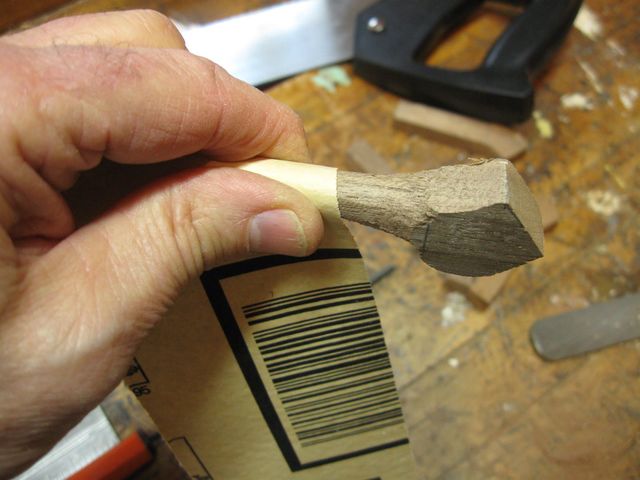
I carve it until it looks about right, then I try fitting it into the hole.
Testing To See if the Shaft Fits the Hole
After the tip of the shaft will just barely fit into the hole, as in the photo above, I switch from the rough side of the rasp to the fine side and continue shaping the shaft.

Finish Shaping Using the Fine Side
I shape it and fit it and shape it and fit it, and slowly the peg goes deeper into the hole with each try. As I do this, I try to keep the taper of the shaft to the taper of the hole. It isn't possible to do that perfectly, but the closer I get to the final shape the better.
It Fits In The Hole
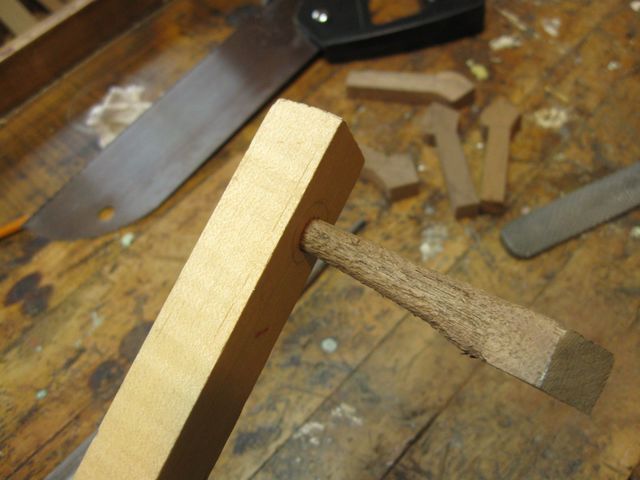
After several tries, the tip of the peg shaft just starts to peek out of the other side of the hole.
The Tip of the Shaft Come Out of the Hole
I work on it until the shaft is about even with the surface of the wood. I don't want to go much farther than that because I want to leave some wood to shave off with the peg shaver. The peg shaver cuts the shaft to the exact shape it needs to be in order to work in the peghead hole. When I do that fitting, I will shave the shaft down enough for the peg to protrude out of the hole, and that is the part that the string is wound on. For now, I stop and smooth the sides of the shaft with sandpaper. To make it a bit more round, I wrap the sandpaper around the shaft and turn the peg inside of the sandpaper.
Turn The Peg to Make the Shaft Round
To make the sides of the shaft straight, I drag the shaft across some sandpaper that is held down to the bench. That is 60 grit sandpaper, and it cuts quickly.
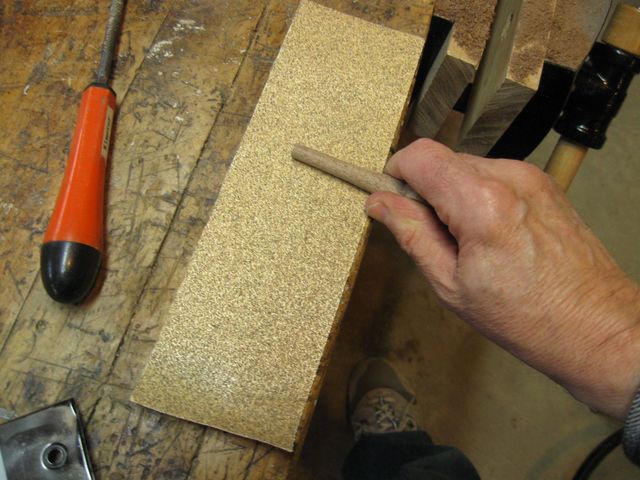
Straighten the Sides With Sandpaper
Do all of that five times and......
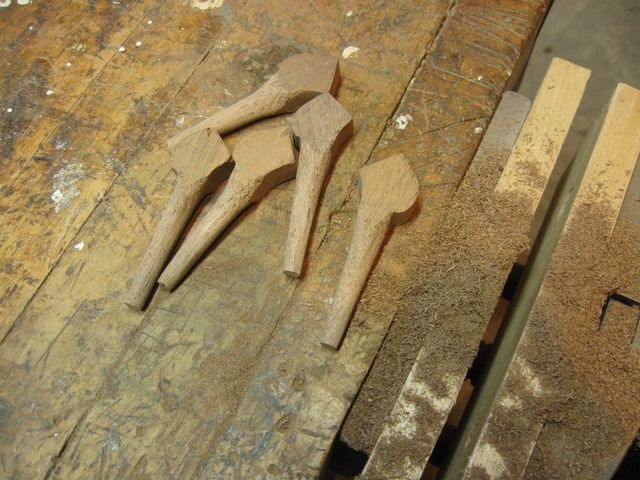
All Five Pegs Have Been Shaped
You can see in the photo that the pegs are not shaped perfectly. But they are the basic shape that they have to be to get them ready to fit into the peghead.
