Today I drew the shape of the neck and the peghead onto the neck blank. I do not have a template for this; I just drew it by hand using some measurements from another neck that I built a while ago. The new neck will be a copy of the neck that I put on my last gourd banjo because I like the look and feel of that neck. In fact, I am making this new neck out of the other half of the board that I used for the gourd banjo neck, so the two necks will be kissing cousins for sure.
The neck that I am using as a template has a double ogee on the side that was inspired by a Boucher minstrel that I put together from a Bob Flesher kit. You can see how I built that banjo at my other page, http://www.thekimerers.net/brian/minstrel/
I did not use the Boucher peghead for the gourd banjo, but designed one myself. The photo below is of my gourd banjo that has this neck on it.
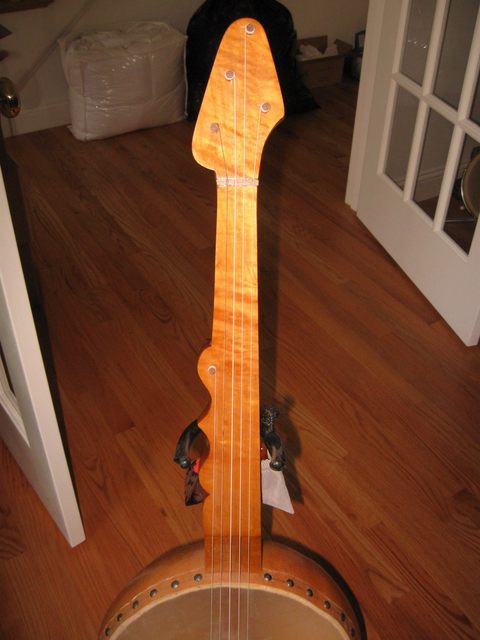
The Neck of My Gourd Banjo
Notice the complex curves on the left side just beneath the 5th string peg. That is the double ogee.
I built the gourd banjo back in 2009. You can see how I made that banjo at my other page, http://www.thekimerers.net/brian/gourd3/. As I mentioned earlier in this project, I want to build this latest banjo with the same neck but with a wooden hoop instead of the gourd.
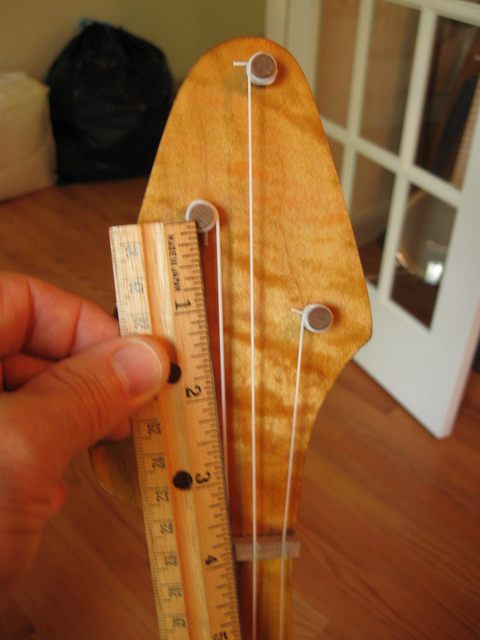
Here is the peghead that I designed for the gourd.
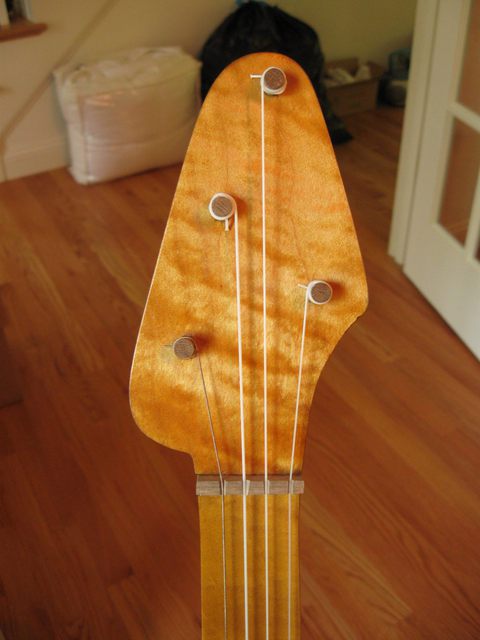
The Peghead That I Will Duplicate
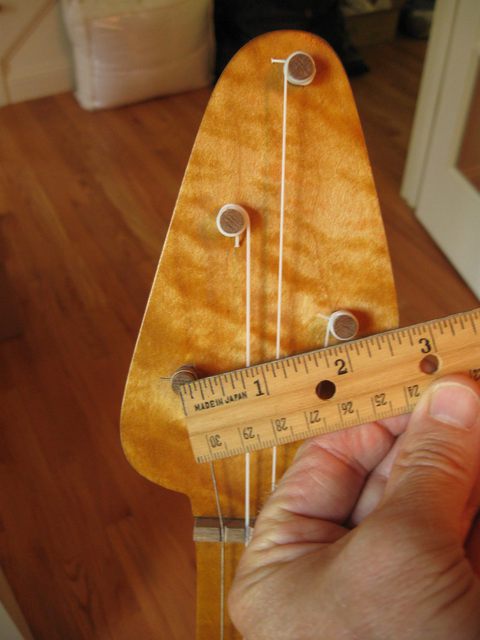
The pegs are laid out to maximize the distance between them. I make my own pegs, and the "buttons" on them are 1" across. So they take up a bit of room and can be difficult to manipulate unless there is considerable space between the holes. The peg layout allows me to put 2" of space between all of the pegs. Notice the measurement in the photo below.
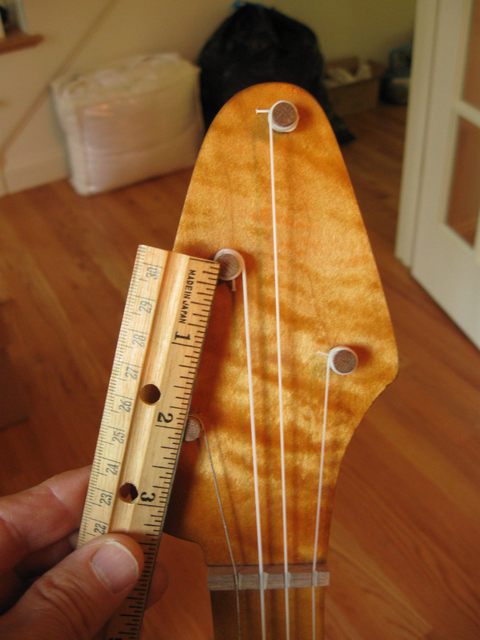
Pegs 3 and 4 are 2" Apart
With 2" between the pegs, and the buttons on the pegs 1" wide, that provides 1" between the edges of the buttons on the back of the peghead.
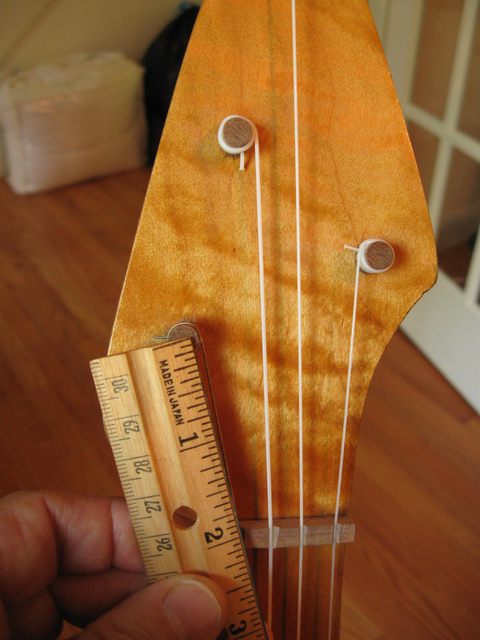
Pegs 2 and 3 are 2" Apart
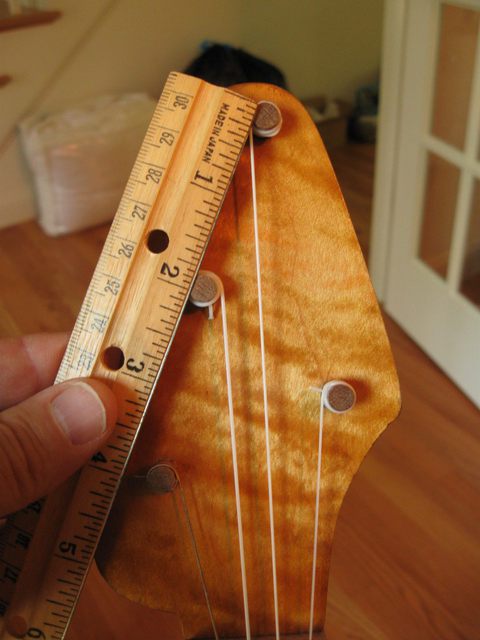
Pegs 1 and 4 are 2" Apart
The pegs for the first and second strings are actually 3" apart, but that is OK. Farther apart is OK.
Pegs 1 and 2 are 3" Apart
The layout also places the pegs in locations where the angles of the strings are not too steep. Steep angles on the strings from the nut to the peg will make the strings want to jump sideways out of the nut slots. So it is best to keep them shallow. All of the strings have pretty shallow angles but the 4th string, and that one works OK.
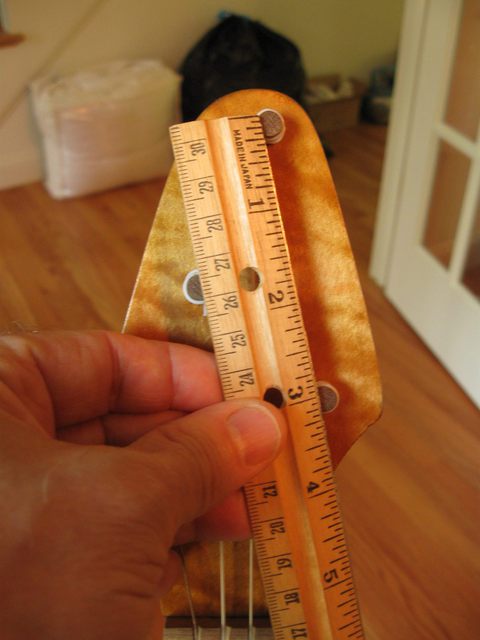
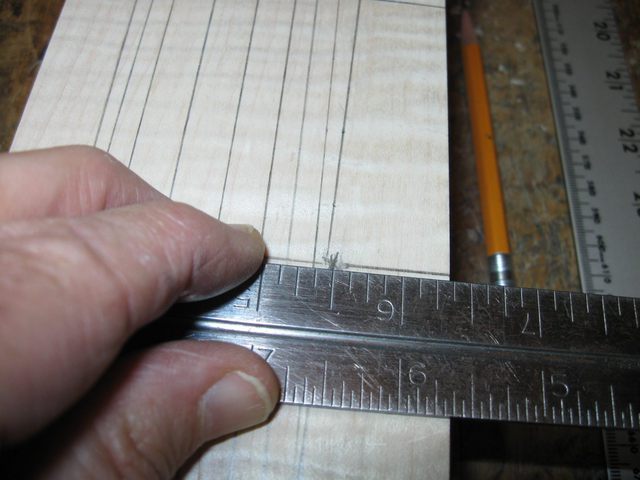
The pegs also ended up showing an unintended pattern in their distances from the nut. Look at this. The peg for the 4th string is 2" from the nut.
The Peg for the Fourth String is 2" From the Nut
The peg for the first string is 3" from the nut.
The Peg for the First String is 3" From the Nut
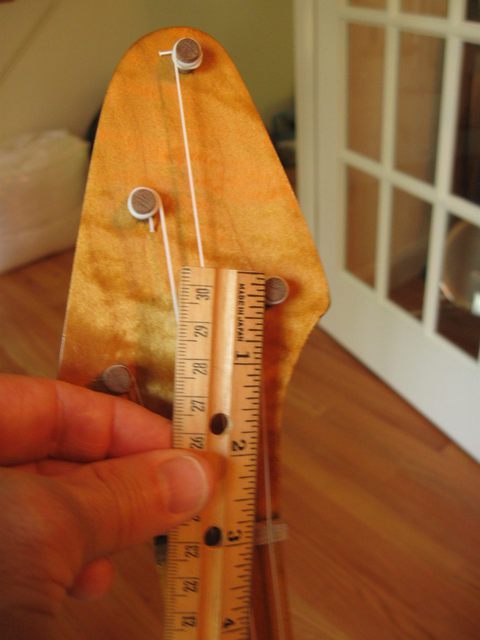
The peg for the third string is 4" from the nut.
The Peg for the Second String is 4" From the Nut
Finally, the peg for the second string is..... um...
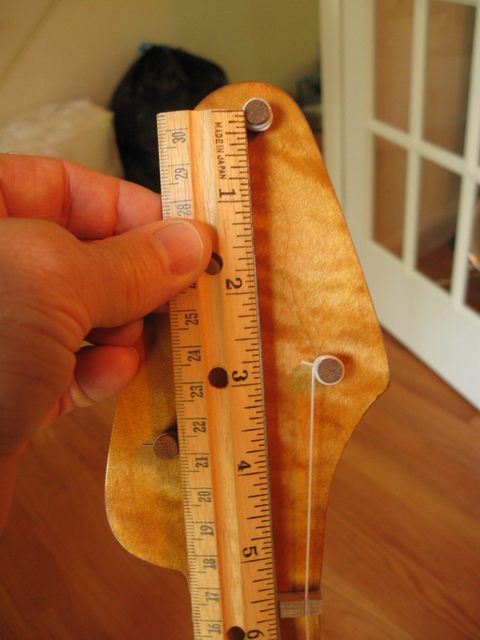
The Peg for the Second String is 5 3/4" From the Nut
Hmmm. That peg is 5 3/4" from the net. Oh well. I guess that is the end of that Foolish Consistency. I am going to make my new peghead the same as that one anyway. I really like it.
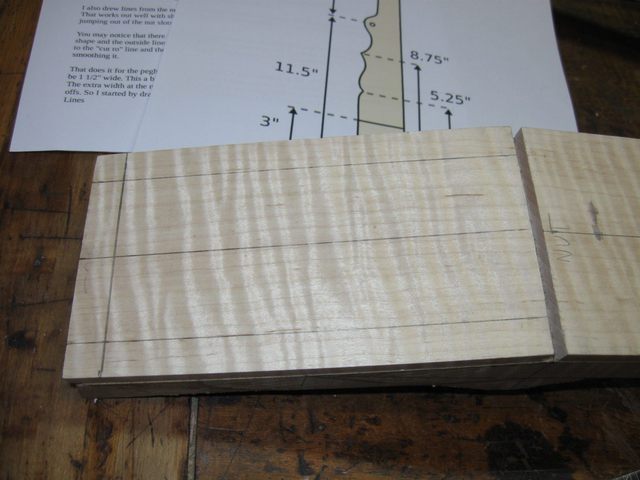
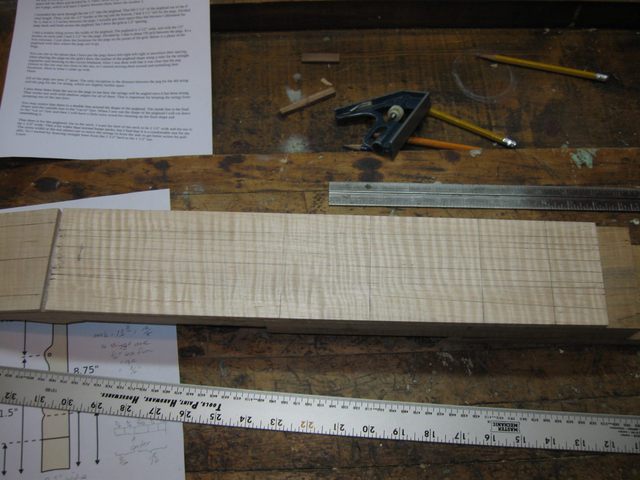
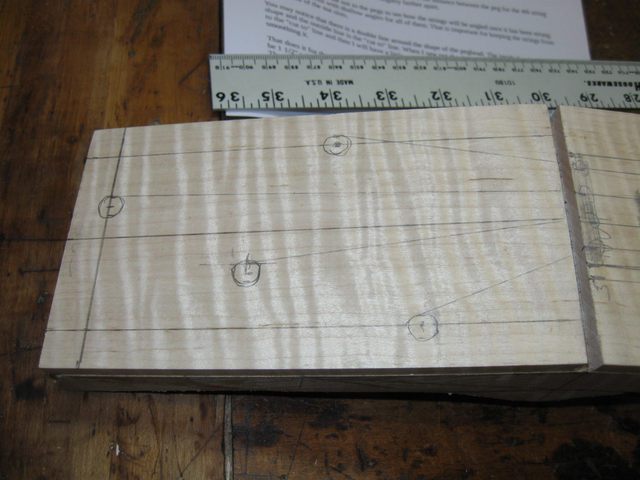
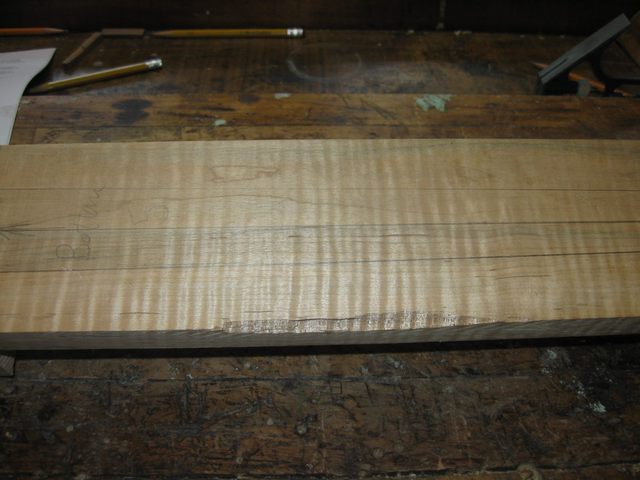
I drew that other peghead freehand on the neck blank last time, and since I did not have the foresight to make a template for it, I will have to re-accomplish the drawing on this new blank. Here is the blank just as I left it last time after I glued the fancy overlay onto it.
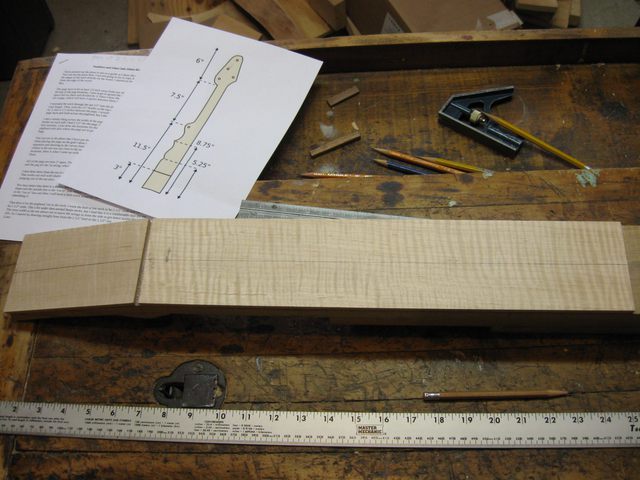
My Canvas for the Neck Drawing
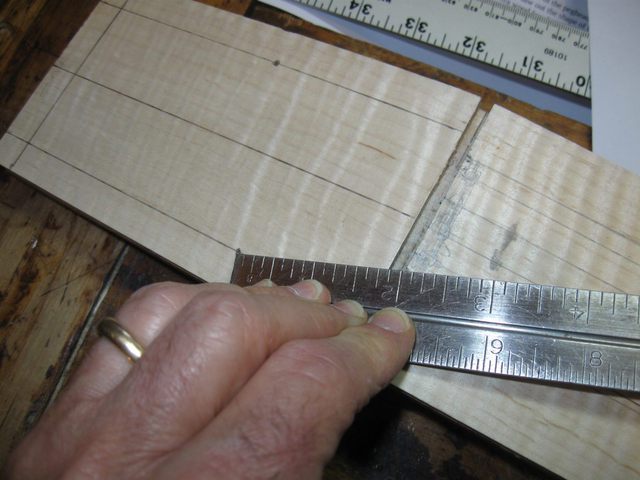
As you can see in the photo, the first thing that I did was to draw a center line down the middle of the blank. Then, I marked off the locations for the double ogee curves and peaks and all. You can see by looking at the ruler that there are now lines at 3", 5 1/4", and 8 3/4". In the photo I have not yet drawn the line for the 5th string peg, which should be at 11 1/2" from the heel.
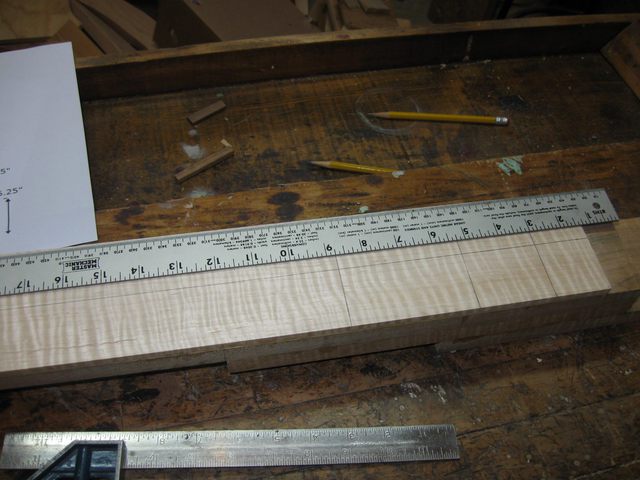
The Locations of the Ogee are Measured
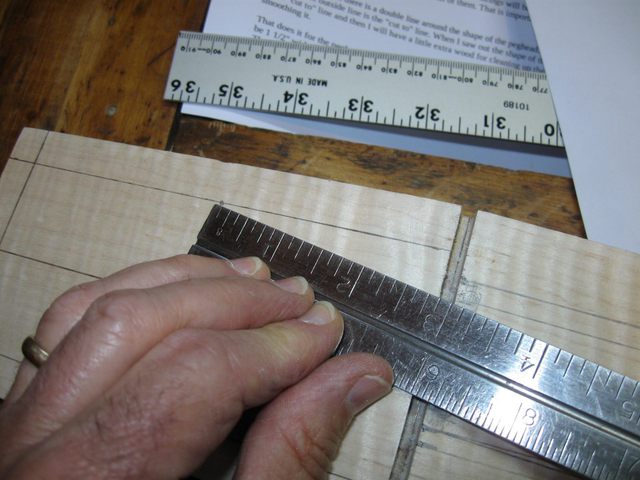
After laying out the neck, I started on the peghead. I want at least 1/2" of space between the pegs and the side of the peghead, so I drew a box that is 1/2" from the sides and the top of the blank.
The Pegs Go No Closer Than 1/2" From the Edge
Then, I marked off where the nut will go. Take a look at the photo below, and you may notice that the nut will be off center from the middle of the neck.
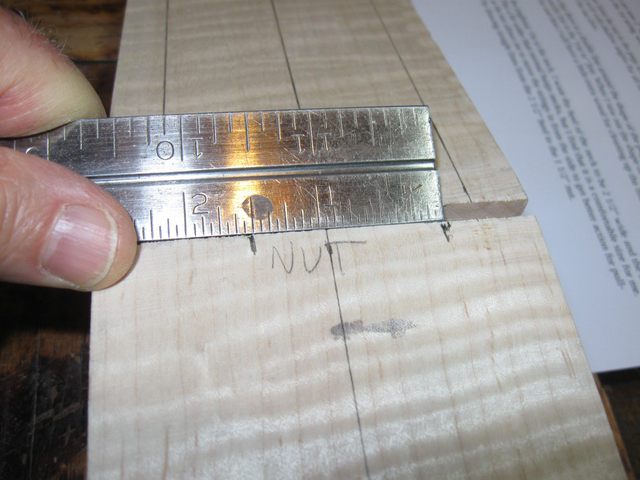
The Nut Will Be Off Center
That is not a mistake. That is necessary because of the way the 5 string banjo is constructed. There is a big controversy among the makers of 5 string banjos about whether the center line of the neck goes through the middle of the nut or through the slot in the nut that holds the 3rd string. The issue comes up because there are 5 strings on the banjo, but only 4 of them go over the nut. The 5th string is a short one that ends at the 5th string peg.
My opinion is that the nut needs to be off center from the center of the neck in order to align the strings properly parallel to the neck. Here is my logic.
There are 5 strings on the banjo. So, there is a string exactly in the middle of them, and that is the 3rd string. Therefore, the third string must be aligned with the center of the neck.... because it is the middle string. Follow me?
The third string does not go down the middle of the nut because there are only 4 strings at the nut. So the third string is offset from the center of the nut by the same amount that the 2nd string is offset in the other direction.
Even so, the center of the neck must be exactly aligned with the middle string, i.e. 3rd string, regardless of how far up the 5th string goes. If I made a neck that was wide enough to have the 5th string go all the way up to the nut, then the 3rd string would be in the middle of the nut and in the middle of the neck. But the 5th string does not go all the way up, it stops short. But that does not matter. The strings still have be centered on the neck.
So what has happened with the design of the neck is that the center of the neck goes all the way up to the "center" of the "wide-enough-for-5-strings" nut where the 3rd string goes over it..... but we do not need the bit on the left where the 5th string would go over it, so that part of the nut (and the neck as well) has been lopped off.
But the center of the neck still goes up through the slot in the nut that holds the 3rd string, regardless of the strange shape of the neck.
Otherwise, the neck will be misaligned.
Got it?
This is not a big issue on a fretless banjo because it does not really matter whether the strings are exactly aligned with the center of the neck or not as long as you can push them down onto the surface of the neck.
The issue comes up on fretted banjos, where the frets must be perpendicular to the strings to ensure proper intonation when the strings are fretted.
But I am going to do this neck properly anyway, and the center of the neck will be aligned with the nut slot that holds the 3rd string.
So the nut is offset from the center of the neck.
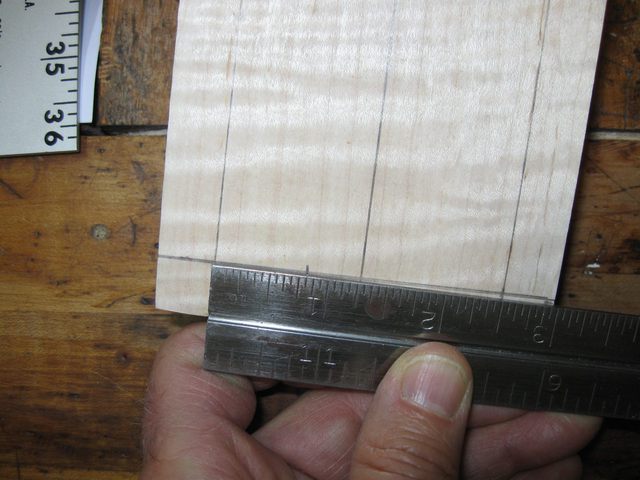
The heel of the neck will be 2 1/2" wide, centered on the neck.
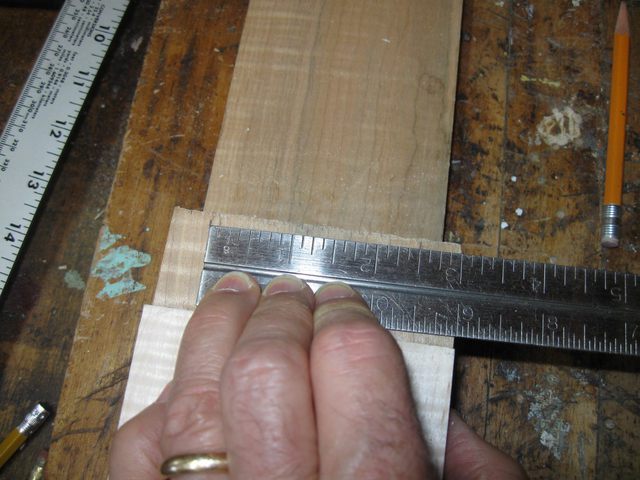
The Heel is 2 1/2" Wide, Centered
The width of the neck at the nut will be 1 1/2". Here is how the spacing for the strings is allocated. All the strings are 3/8" apart, and the two outside strings, the 1st string and the 4th string, will be 1/8" from the edge of the neck. So the width of the neck is:
1/8 + 3/8 + 3/8 + 3/8 + 1/8 = 11/8
Shoot. That didn't work out so well. I guess I need to put the strings more like 3/16" from the edge of the neck instead. So here is the new formula.
3/16 + 6/16 + 6/16 + 6/16 + 3/16 = 24/16" = 1 1/2"
That will do it.
The Sides of the Neck Are Drawn
Once again, look closely at the photo above and you can see that the 1 1/2" nut is not centered on the middle of the neck.
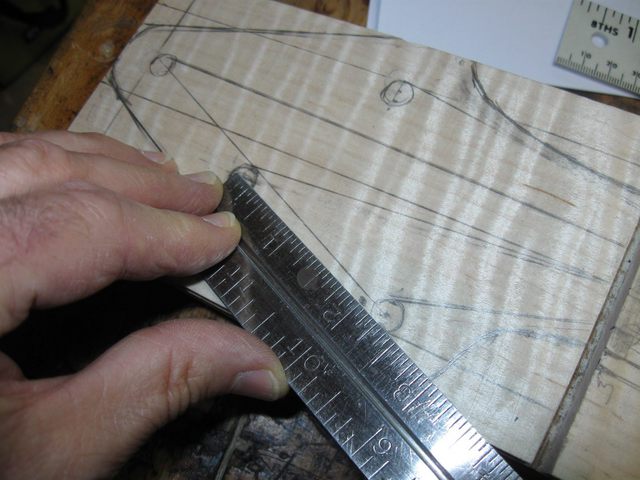
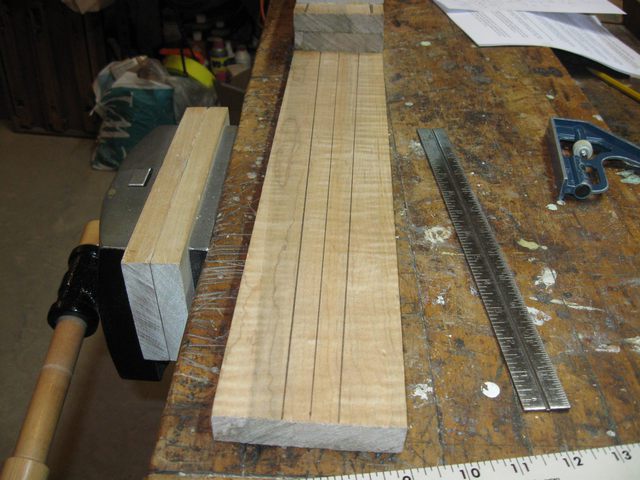
I drew lines for all of the strings on the banjo so that I can calculate where things need to go. You probably can't see the lines in the photo below, and my ruler really does not curve like that.... That is caused by my crappy camera. But the lines are there just the same.
The Lines are Where the Strings Will Be
I have spaced the strings the same amount at the heel as they are at the nut. The strings will not fan out as they go onto the bridge, but will be parallel. Since the neck is wider at the heel, there will be more space bewteen the outer strings and the side of the neck at the heel than there is at the nut, but that is OK because I won't be fretting the strings at the heel.
The Strings are Spaced the Same at the Heel
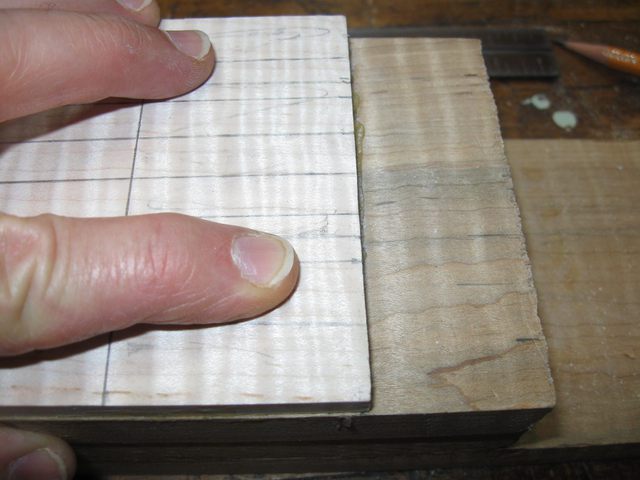
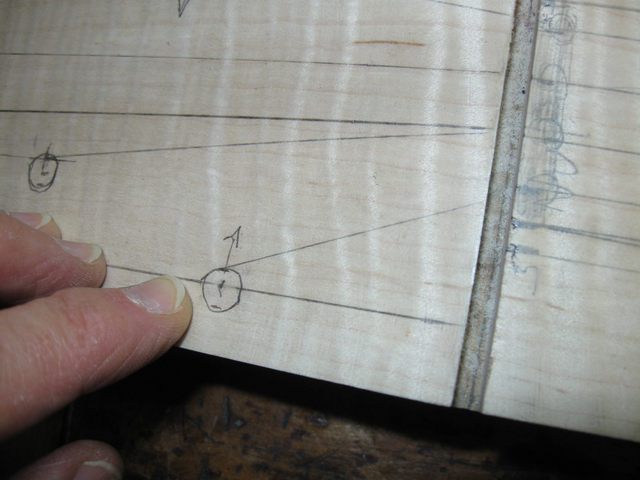
I marked off the location at the nut where the 5th string would cross it, if the 5th string went up that far. I have scribbled pencil in the space where the nut will be to make it apparent that the location of the 5th string is off the side of the nut. In fact. it is off the side of the neck. My finger is pointing at where the 5th string would be if it went all the way up.
If you look at the lines for the 5 strings only, and ignore the lines that represent the sides of the neck, you will see that the strings themselves are, indeed, centered on the neck.
Where the 5th String Would Go If It Went There
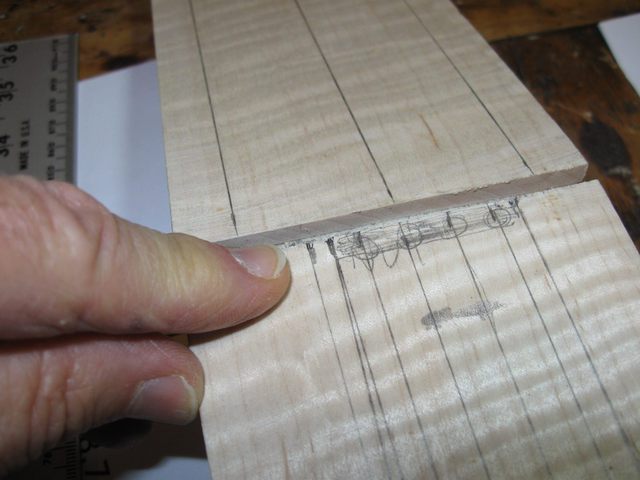
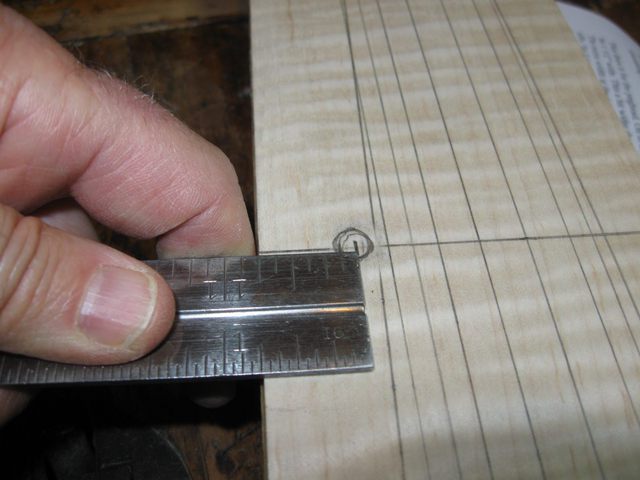
The reason for drawing the 5th string line is so that I can locate the lateral position of the 5th string peg on the neck. The peg needs to be located such that when the string is wrapped around it, the string will be aligned with the 5th string line on the neck. The pencil in the photo below is pointing at the intersection of the 5th peg position line (at 11 1/2") and the 5th string line.
The slantly line is where the edge of the neck would be if we just cut the neck out straight. If we did that, there would be no place to put the 5th string peg on the neck. Later on I will draw the bump where the peg will go.
Where the 5th String Peg Must Go
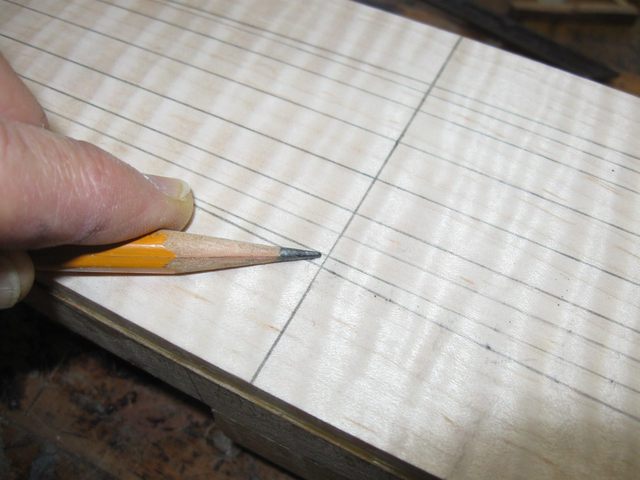
Since the peg will be about 1/4" across, and the string will be coming off the side of the peg, it is necessary to offset the peg hole from the string line so that the side of the peg will be where the string ought to be. Hence, I measure off 1/8" from the string line and mark it there.
Where the 5th String Peg Really Must Go
You may be wondering why I am obsessing so much about the location of the 5th string peg. On the previous neck, the one on the gourd banjo, I just eyeballed the location of the 5th string peg, and when I got done, the peg was too close to the edge of the nut, so there was not enough space between the 4th and 5th strings.
Have you ever tried to move a 1/4" hole over about 1/8"?
It looked stupid, and I had to make a new nut for the banjo with the location of the 4th string seriously far away from the edge of the neck in order to get the banjo to play.
Seriously! It looks demented. Scroll back up to the top of this page and look at the photos of the peghead. Dumb.
So this time I am going to be very careful about how I measure the lateral location of the 5th string peg.
OK. Now I need to lay out the locations of the other pegs on the peghead. I used some rules for that as well. I used the measurements I took from the other peghead to locate the pegs on this one. If you remember, the pegs are 2", 3", 4", and 5 3/4" from the nut. So that is where I put them. I drew a dot at the intersection of the proper distance with the 1/2" border I drew on the peghead.
The First String is 3" From the Nut
I did the 4th string next.
The Fourth String is 2" From the Nut
For the other two strings, I split the remaining width of the peghead into three spaces. After marking off 1/2" on each side of the peghead, which is 3 1/2" wide, I have a space of 2 1/2" left to parcel out to the other two pegs. Since there must be [space]peg[space]peg[space] I need to divide the 2 1/2" into 3 equal segments.
2.5 / 3 = 0.833333333333 ~ 13/16"
The Location of Peg 2 is 13/16 From the Edge
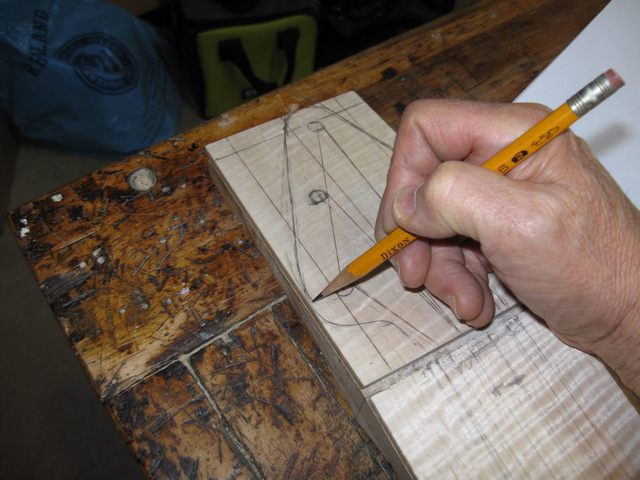
Similarly, the location of the peg for the 3rd string is the intersection of lines that are 13/16" from the edge and 3" from the nut. I have drawn the strings from their nut slots to the side of each of the pegs to mark what they are going to look like. Then I eyeballed the whole thing to see how it looks.
The Location of Peg 3 is Marked
I decided to move the 4th string peg in because of the sharp angle that the string makes coming off the nut. All the other strings seem to be OK with respect to that issue, but the 4th string is a bit too far off from the slot.
Move the 4th String Peg In
I moved it in half the width of a peg and drew the string line again. You can see by the line that I drew that the three pegs are not co-linear anymore, but that doesn't really matter. It looks better this way.
The Angle Looks Better With the Peg Moved
I took some measurements to see how I did with respect to the spacing of the pegs.
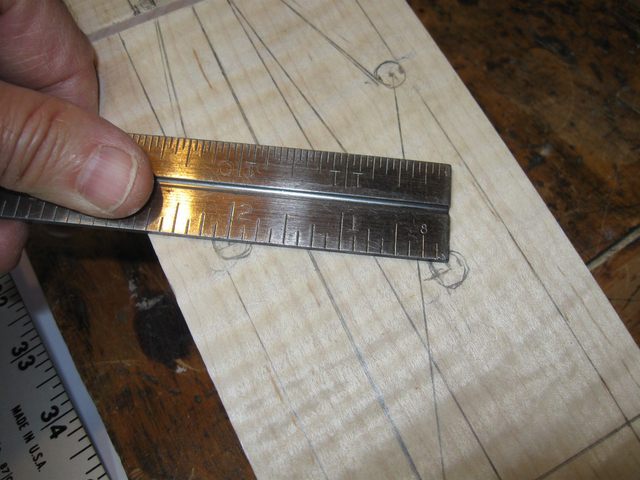
The Pegs Will Be 2" Apart
Still obsessing over that 5th string peg location. I moved it out a bit more to make sure.
I Moved the 5th String Peg Out Some More
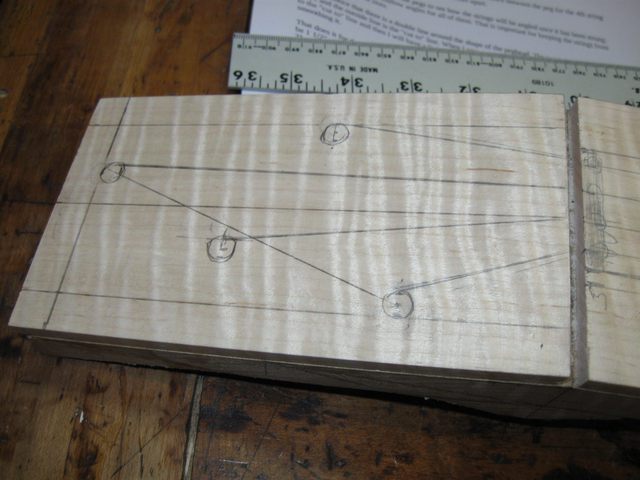
Now I get to draw. I drew the double ogee curves freehand around the 5th string peg and locating the curves, notches and bumps at the measured locations.
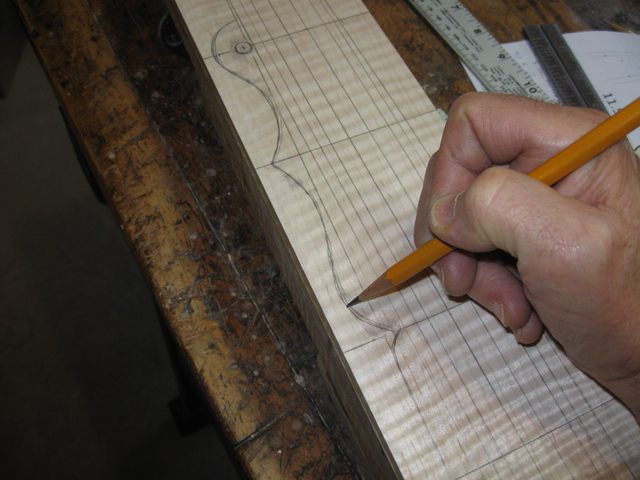
The Double Ogee is Drawn Freehand
I did the same thing with the peghead outline. I just drew it freehand so that it looks nice. The actual outline of the peghead has no structural or functional impact, so I can do anything I want with it.
The Shape of the Peghead is Drawn Freehand
I did some more measurements of the locations of the pegs. It looks pretty good.
The Pegs Are At Least 2" Apart
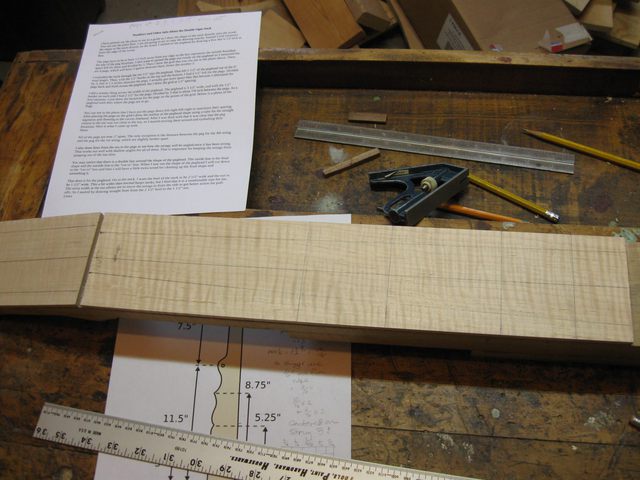
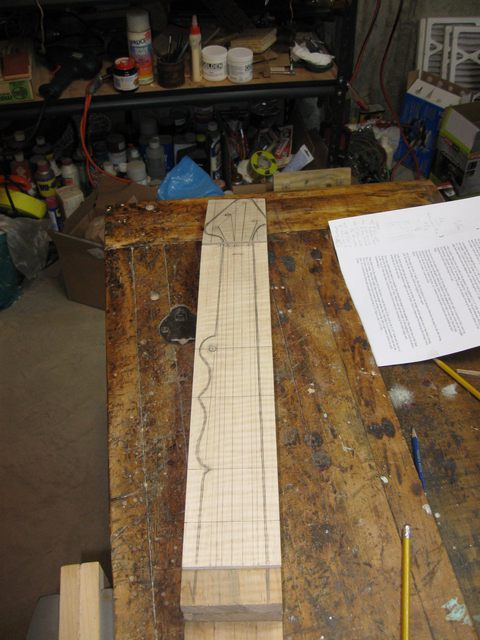
So, here is is, all drawn out. It looks like the shape of the other neck, but I took a bit more care with this one to get everything positioned properly.
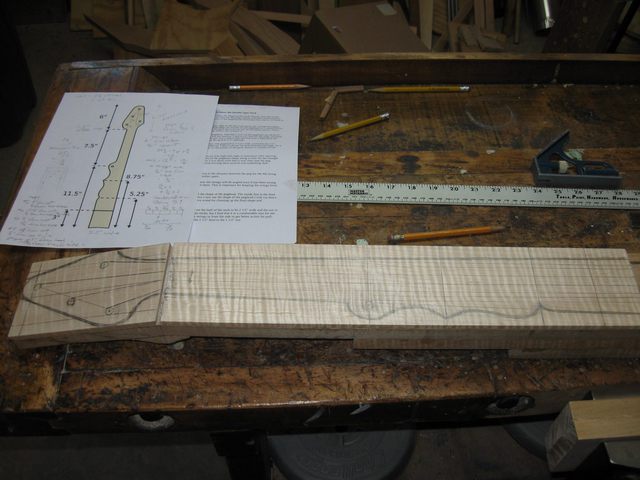
The Drawing on the Neck Blank
The tail dowel is easy. It is 1 1/2" at the heel and 1" at the far end. So I could just use the ruler to draw straight lines.
The Tail Dowel is Drawn on the Blank
I drew the same shape on the bottom of the blank as well for ease of sawing later. Here you can see that the ugly chip in the board is now out of the picture as far as the neck goes. It will be cut off as scrap. I had to swap the sequence of the boards in order to plan for that.
The Ugly Chip will Be Cut Away
Well, I am done drawing the neck. This time, I thought that I would capture the shapes before I cut this out. Maybe I can simplify this process on my next neck.
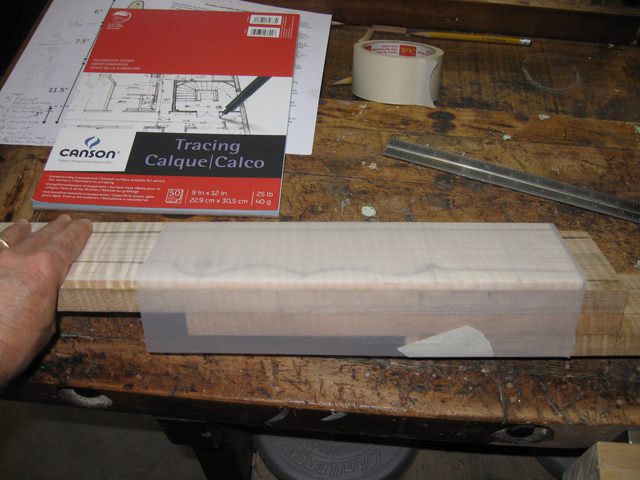
Tape Tracing Paper to the Neck
I traced the double ogee and the peghead shape. The rest of it can be easily drawn with a ruler.
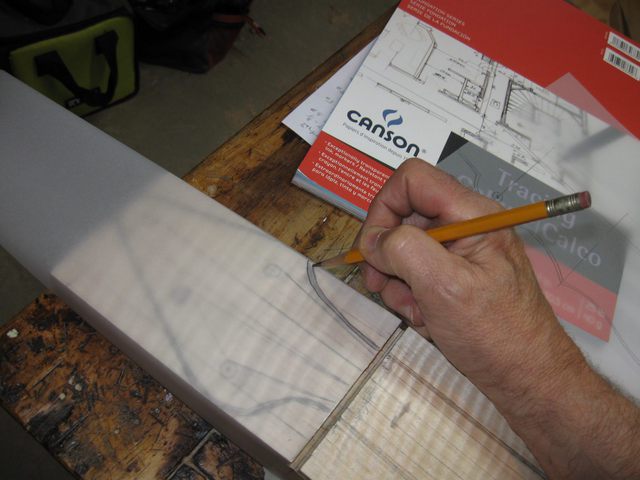
Tracing the Peghead Shape
There they are.... tracings and plans. The next trick is not to lose the papers before I do this again.

Tracings and Plans
Here is the drawing, looking up from the heel end. Looks nice.
The Drawing Looking from the Heel
That's it for today.
Oh, and by the way, happy 4th of July.
