I have one board left from that original piece of oak. This one has a gouge out of it at one end where the saw went awry on that first cut. So I will not be able to plane it down to a board that could be used in an instrument. I will not be able to remove all of the saw marks. However, I am going to plane it anyway and use it to practice bending.
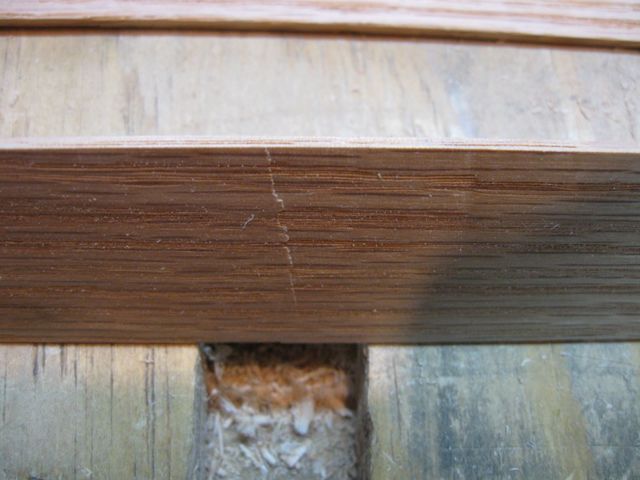
Here is a photo of the board part way through the planing process.
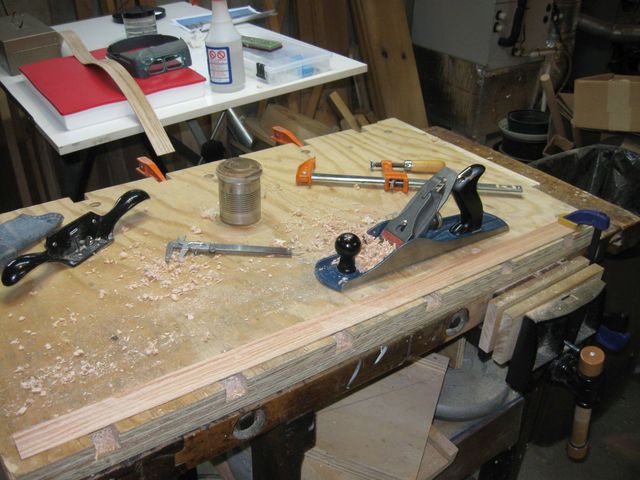
The Planing is Not Going Well
You cannot tell from the photo, but the planing was not going well. The iron was either not cutting at all or it was grabbing the wood. I have this problem all the time, and I am having a heck of a time figuring out how to fix it.
The first thing I tried was to sharpen the iron. That helped some, but it was still grabbing the wood. Here is what it was doing. First, I backed off the iron so that it was not cutting anymore. Then I went through this sequence:
- Advance the iron a tiny bit and try - no cutting at all
- Advance the iron a tiny bit and try - no cutting at all
- Advance the iron a tiny bit and try - no cutting at all
- Advance the iron a tiny bit and try - no cutting at all
- Advance the iron a tiny bit and try - no cutting at all
- Advance the iron a tiny bit and try - no cutting at all
- Advance the iron a tiny bit and try - grab!
So I started from scratch and reset the plane using a piece of scrap wood. The goal was to get it cutting to the same depth on both sides of the iron and making a thin shaving.
I backed the iron all the way off. Then I moved it forward until it was barely cutting a thin piece of scrap wood. Once it was cutting, I tried cutting on just each side of the iron. It was cutting on the left, but not on the right. So I moved the lateral lever until it was cutting equally on both sides of the iron.
At that point it was cutting too deeply, so I backed off the iron and did it again, making lateral adjustments until it was taking a shallow cut equally on both sides.
It was cutting evenly on both sides now, but still grabbing. So I photographed the position of the plane iron to see what the setup looks like.
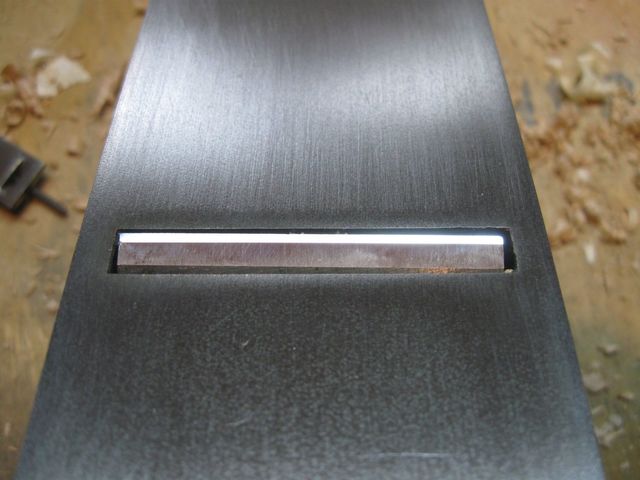
This Iron is Cutting OK
That is a little strange because it looks slightly angled in the mouth. Here's a closer look at it.
Is That Mouth Hole Crooked?
"It is a poor craftsman who blames his tools."
Well, maybe so, but that hole looks like it is wider on the right side than it is on the left. And the edge looks ragged too. I wonder if the plane is out of whack. This is a carpenter's plane that I bought in a hardware store 40 years ago. It is not an especially high quality plane.
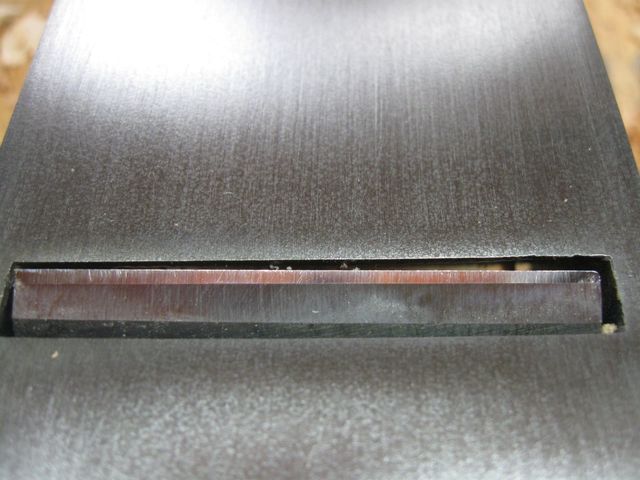
Then I had a thought. "Maybe the cap iron is not set right". So I took it out and looked at it. The iron was set very close to the edge of the blade (sorry, no photo). I moved it back a bit and it looked like this.
This Looks Like a Little Too Far Away to Me
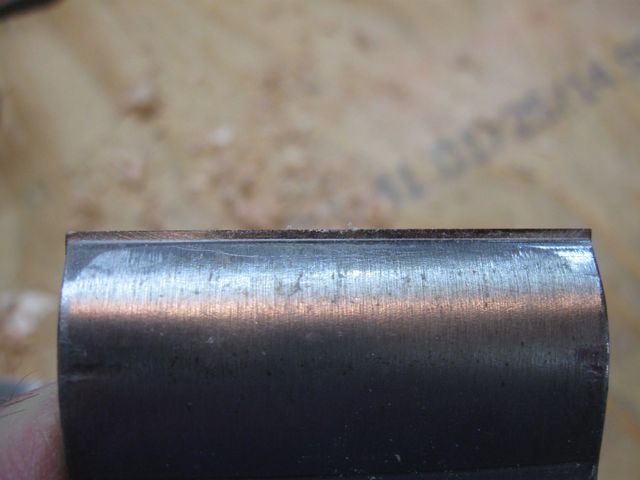
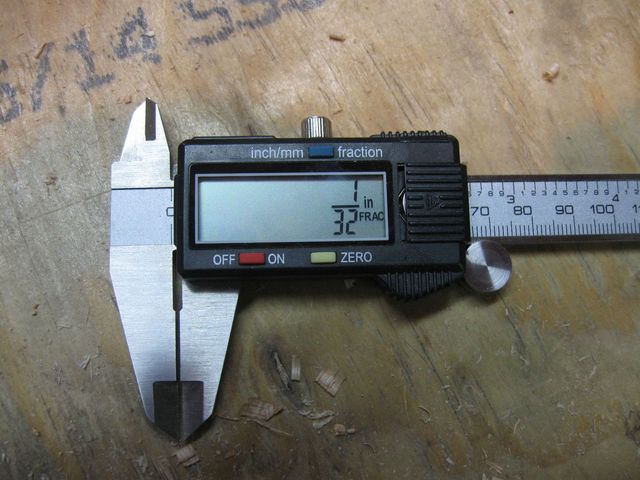
I tried it in the plane, and it worked much better. With the cap iron set like that it was cutting better. So I took the iron out of the plane and measured how far back the iron is from the edge.

Measuring the Distance With My Calipers
Hmmm. 1/32 inch is what I have heard recommended. Maybe I have been setting the cap iron too close to the edge all this time. I will try it like this for a bit and see how it goes.
It Looks Like it is More than That, but I Measured It
The plane worked better after moving the cap iron back. Go figure.
I don't have any photos of the planing, but I did manage to plane the board down. I also used the cabinet scraper to cut the board down to a thin size. Here are some measurements that I took of the board thickness while I worked my way up the stick.
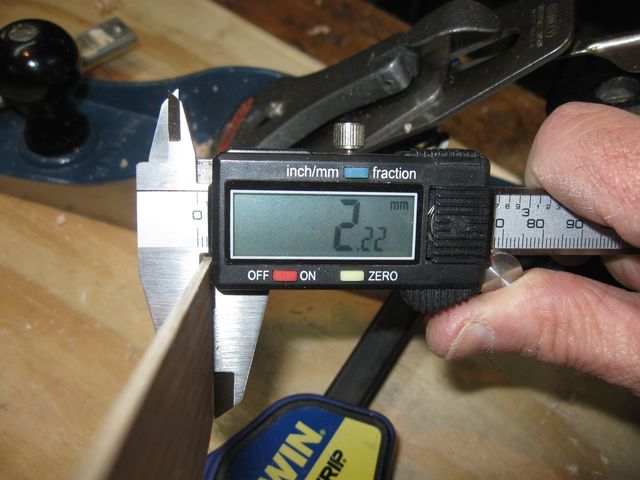
2.22 mm
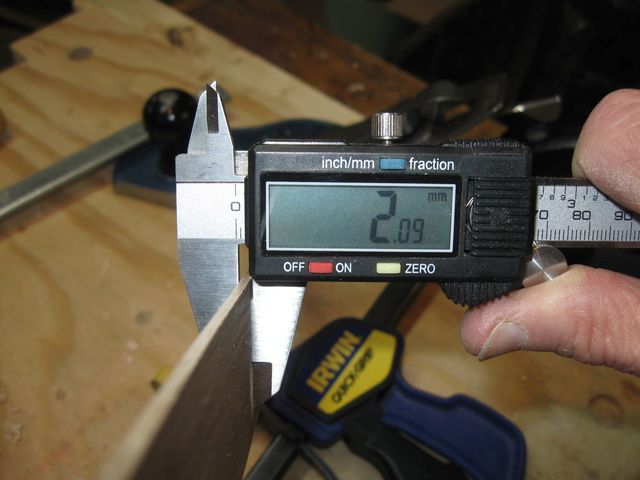
2.09 mm
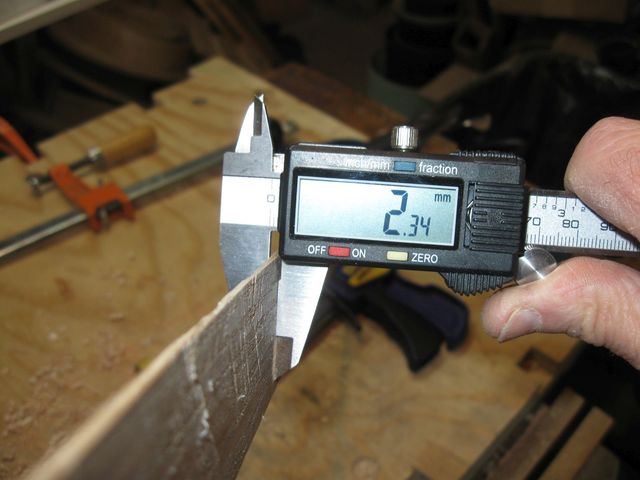
2.34 mm
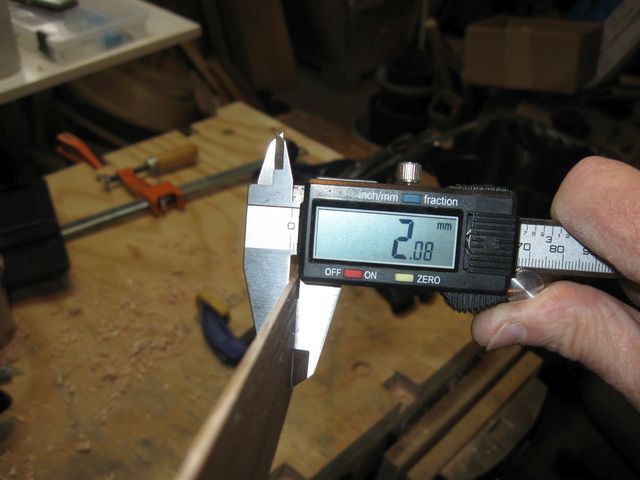
2.08 mm
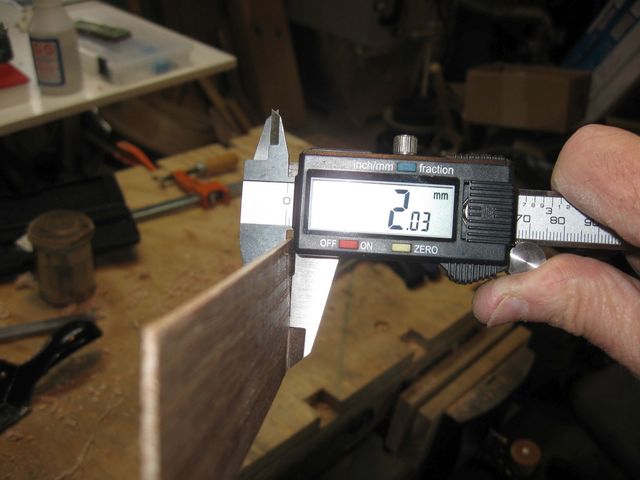
2.03 mm
It isn't perfectly even, but given the scoring from the saw that I won't be able to get rid of, it will be good enough to try a bend. Here are the two boards together.
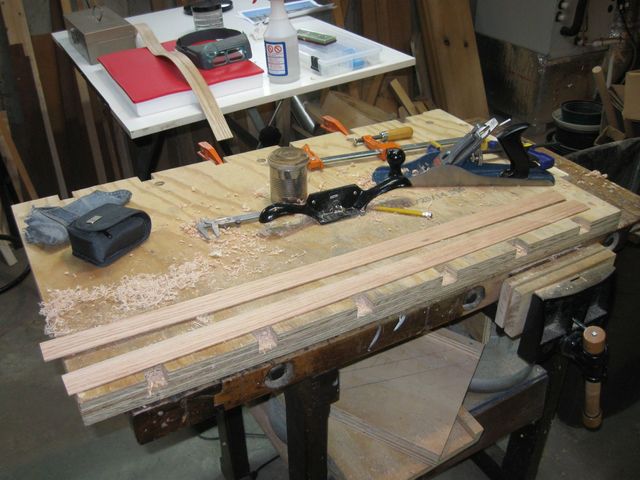
Two More Boards to Bend
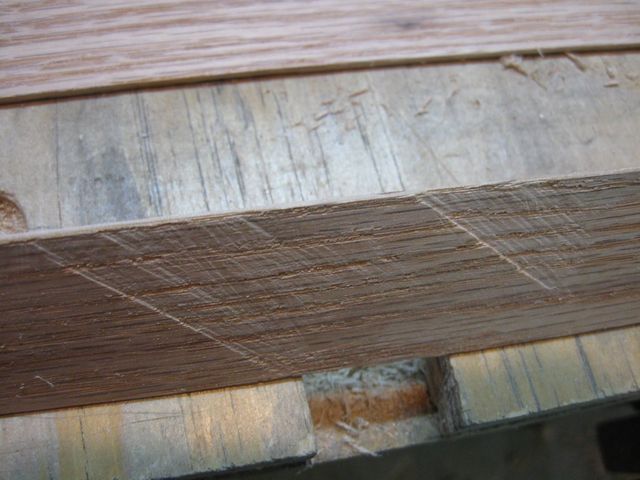
This second board could not be used for an instrument because there are flaws on both sides of the board. If one side is good, I could put the flaws on the inside and they would not be seen. But this one has saw marks on the "good side" as well.
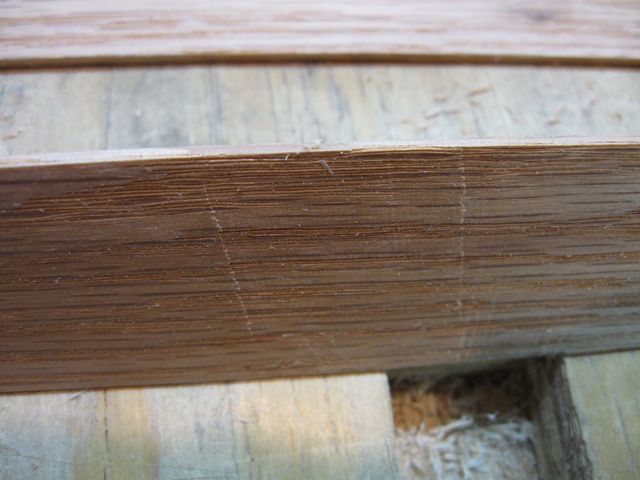
These Saw Marks are on the Good Side
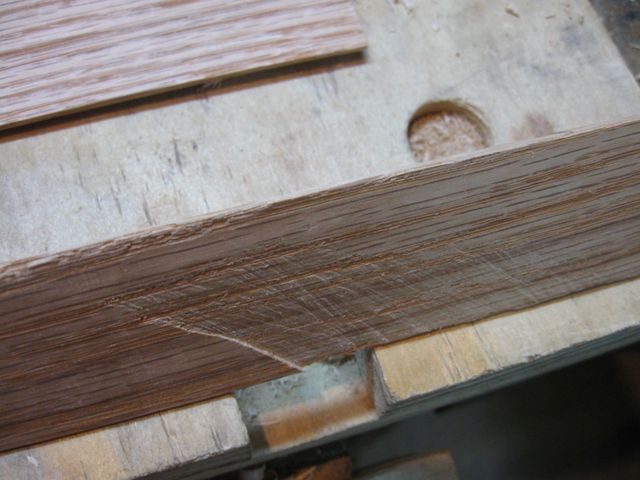
Here is another one, also on the good side.
This Mark is Also on the Good Side
The.... um... "bad side" looks like this.
That is Too Deep to Plane Away
And down at the end where the errant saw kerf was located, it looks like this:
This is Really Bad
However, that is the same end as the first board I bent, that looked like this:
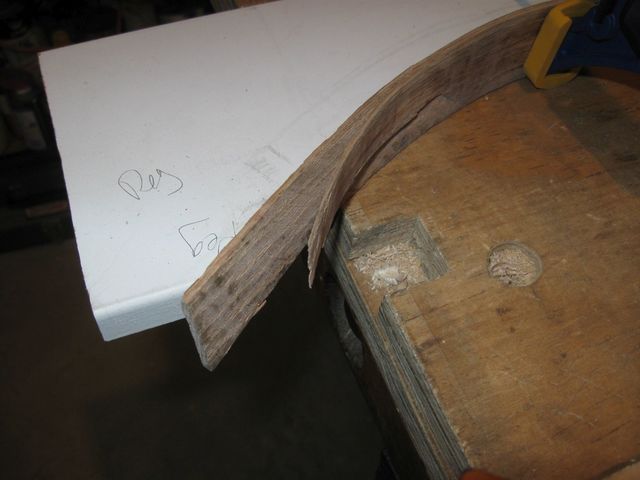
It is Better than This Mess
This one should be a better bend. The reason the extra piece is gone is that I planed this one thinner, so all of that extra wood was planed off. However the saw marks are too deep to get rid of, so what I have will have to do.
