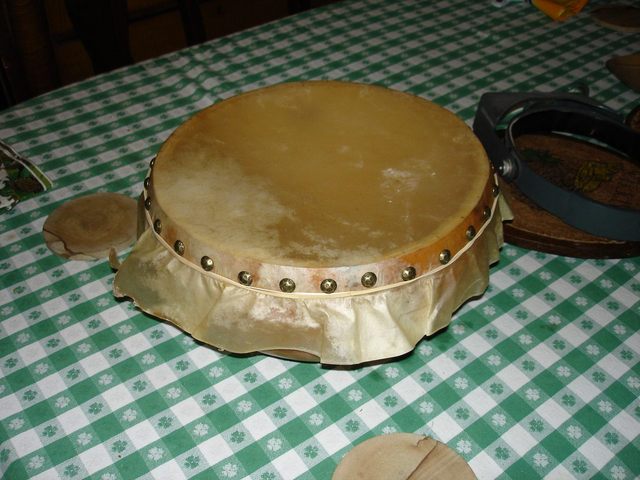
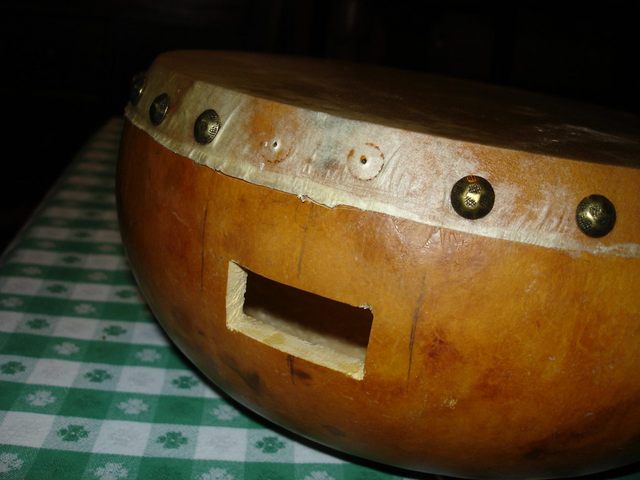
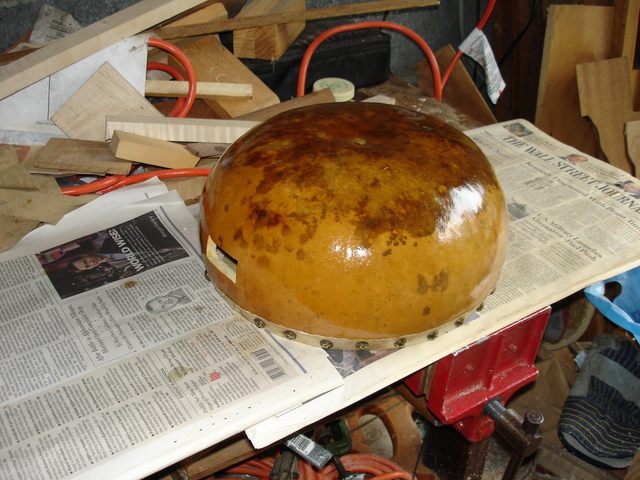
Today I made the bridge. But before I worked on the bridge I trimmed the extra skin off the head. It is gray and rainy today, so I decided to sit inside for a while longer, sip my coffee and trim the head first. Here is the gourd with the head stretched on it.
The head has been drying for a week, and it is dry and stiff again. It is also tight now and sounds like a drum when I tap on it. I have a very short recording of me tapping on the head so you can hear it. Click on the link below to download the file.
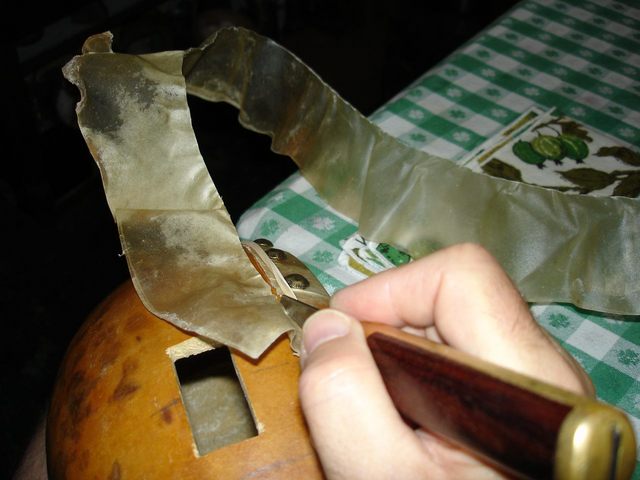
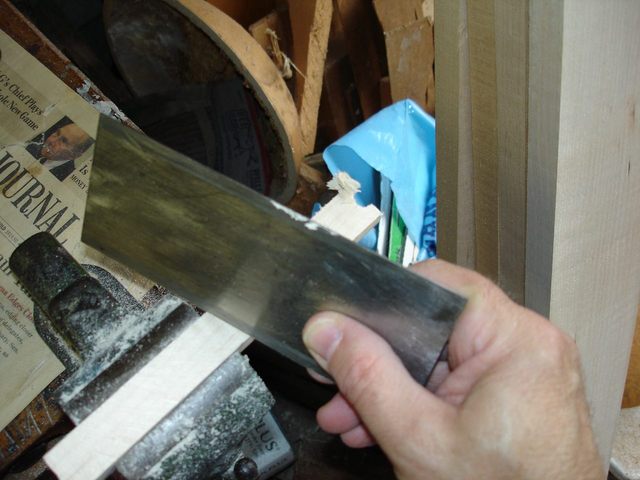
To trim the excess skin off the head I used my shop knife.
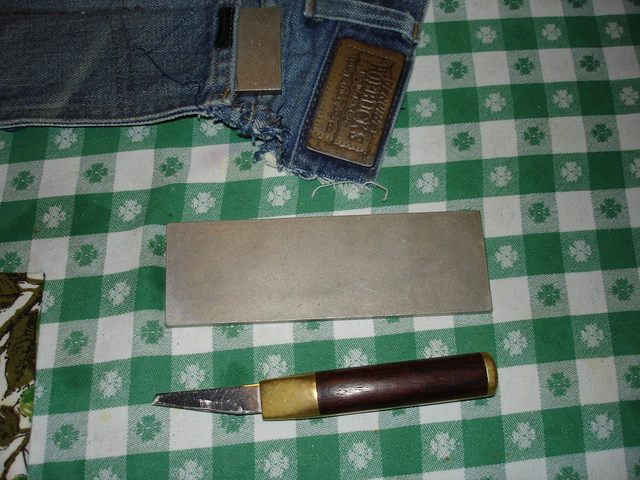
The point of the knife can be made very sharp, and I took some time to sharpen it before attempting to do this bit of work. I had to be very careful when using the knife because it would be easy to slip and perforate the head. If I did that then I would have to soak off the torn head and start over.
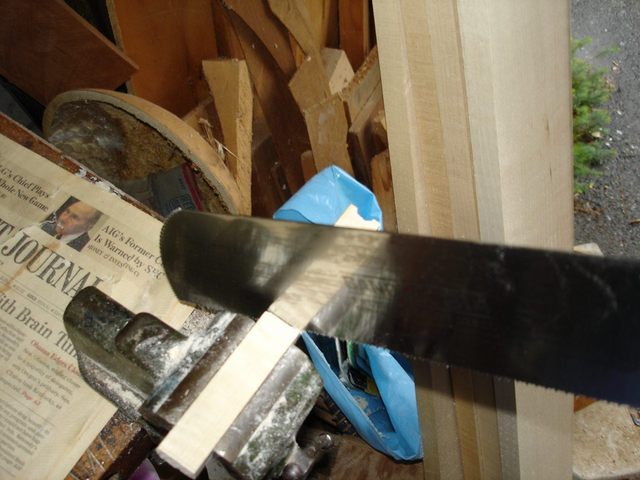
The first thing I did was to slice the skirt of the head down from just under the rubber bands.
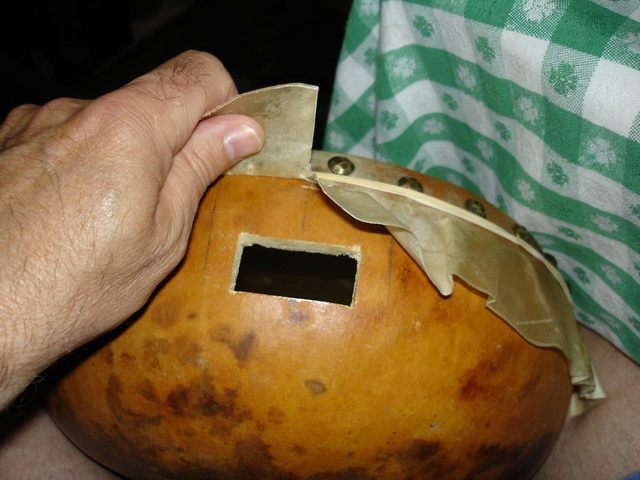
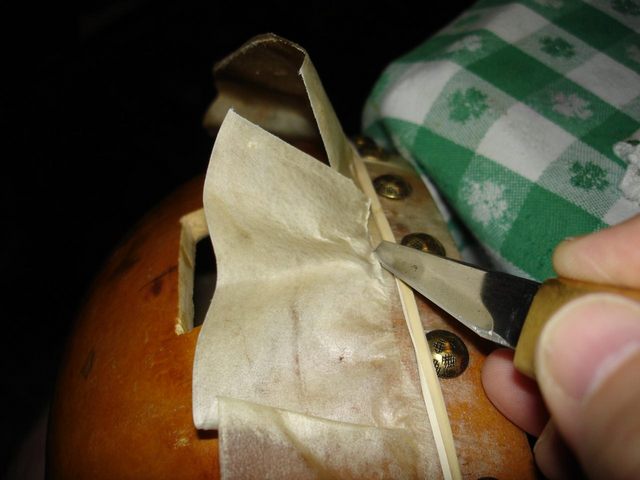
Then I very carefully sliced through the skin with the point of the knife just beneath the rubber bands.
Holding the gourd is difficult because it is round. I have found that I can wedge it between my left leg and the edge of the table and that keeps it pretty stable.
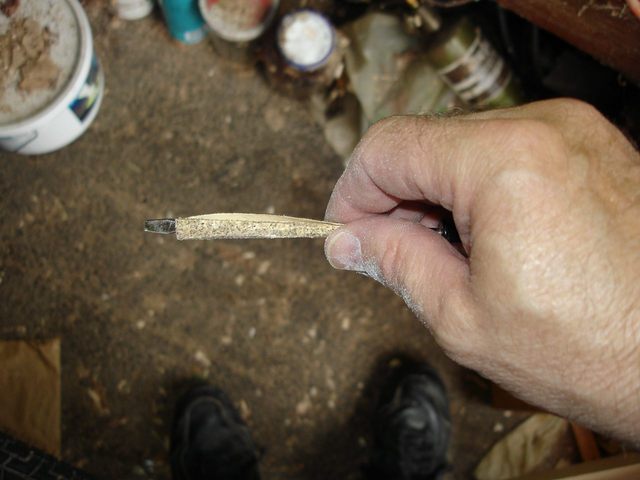
Just for grins, I shot this photo of myself while I was trimming the head.

Which proves that one can make oneself look seriously silly while doing this. But that isn't my problem because I don't have to look at myself. My poor family, though!
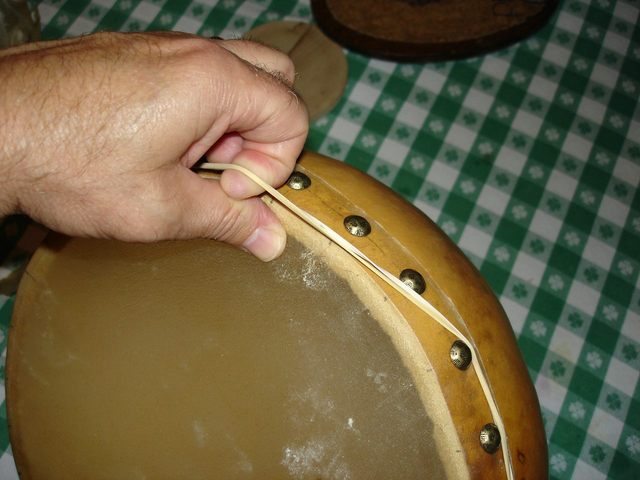
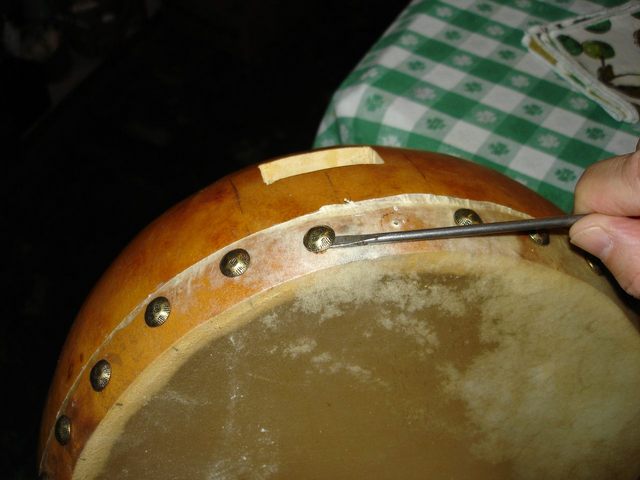
Back to the head. Here it is almost finished.
Then I pulled off the rubber bands.
I pried out those extra two tacks that I had put in to hold down the skin where the neck goes. First one:
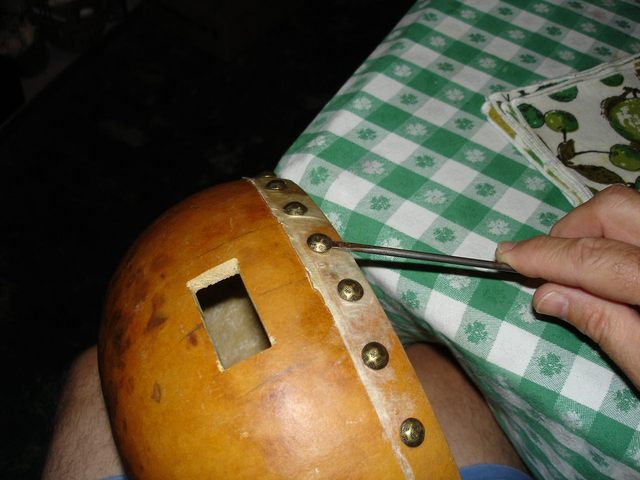
Then the other.
Here is the ugly mess left behind.
But we won't worry about that because it will be under the heel of the neck.
Enough of that. Now on to making the bridge.
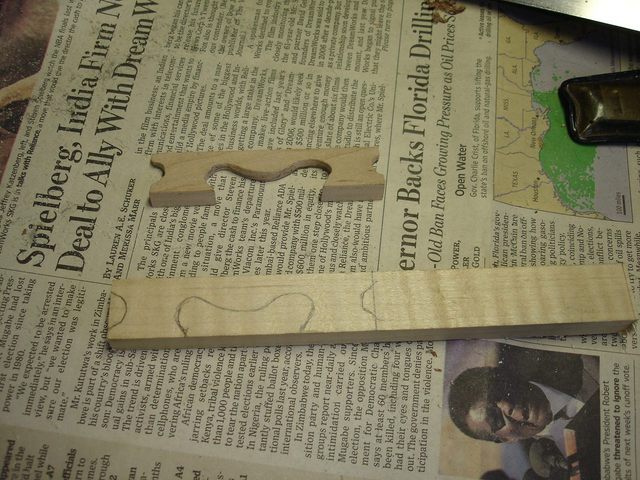
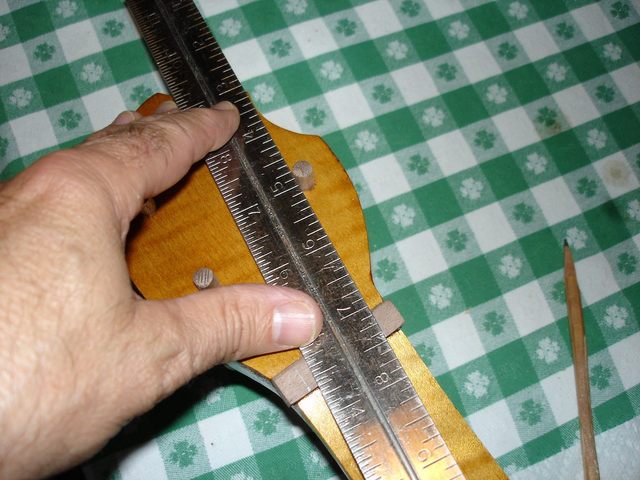
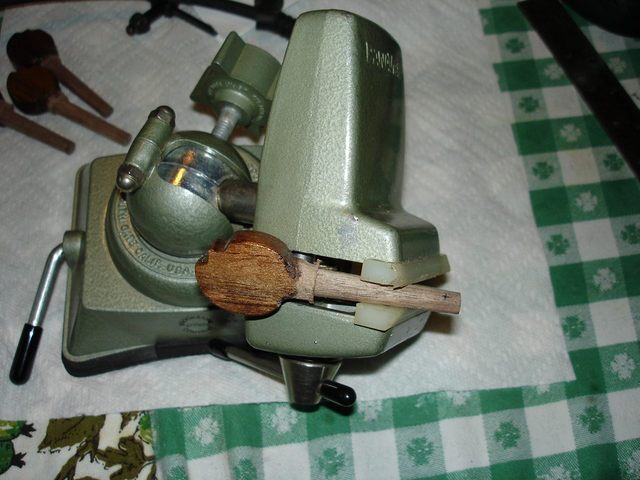
I am going to try a bridge that is 3/4" tall to start. If that does not work, then I will make one a different size. Since the lumber that I used for the neck was 3/4" thick, I have lots of scrap pieces to make the bridge out of. I measured a bridge that I had made before and found the feet to be 3/8" thick and the bridge 3 1/8" long. So I marked off a piece of wood 3 1/8" by 3/4" by 3/8".
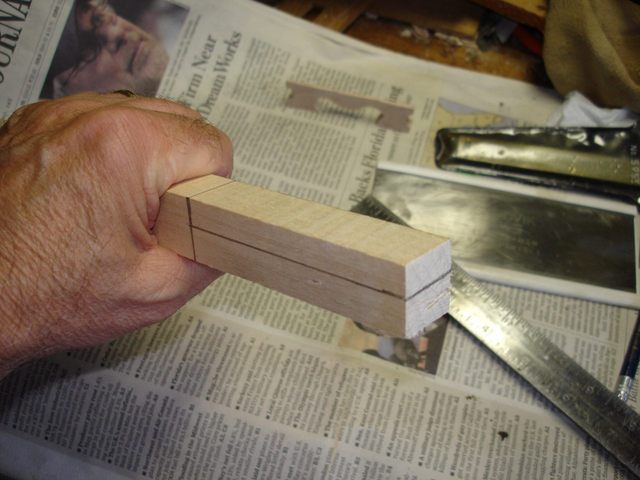
I actually marked off two sections that are 3 1/8" long so that I will have a handle to clamp the bridge down with while I am cutting it out. Then I ripped the wood down the middle using my panel saw.
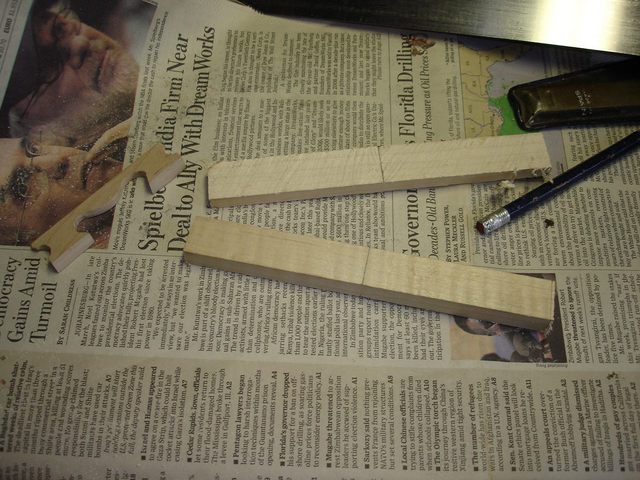
Hey! That's a curly maple bridge! Only the best for this banjo!
After ripping the wood down the middle I have two blanks that I can use to make bridges out of.
Using the old bridge I drew the outline of the bridge on the blank. So, if I have an old bridge, why am I making a new one? I'm glad you asked. I might put the old bridge back on the other banjo. The other banjo has a 1" bridge on it because the strings were buzzing with a 3/4" bridge. But I have planed 1/8" off of the fingerboard on the other banjo, and a 3/4" bridge might work...... at least in the Winter time when the skin is dry and tight.
But I digress. I traced the bridge onto the blank.
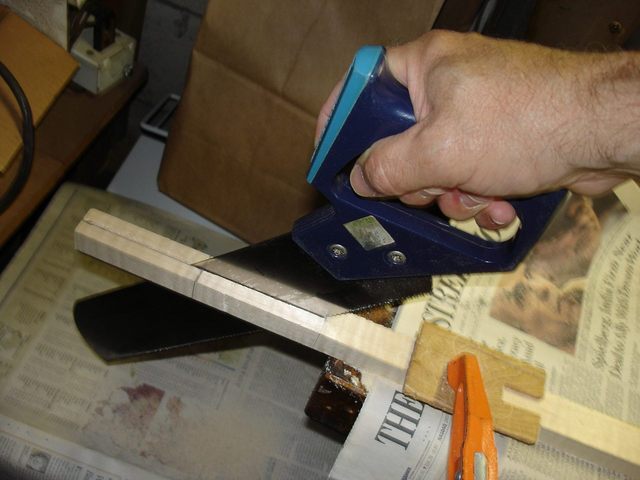
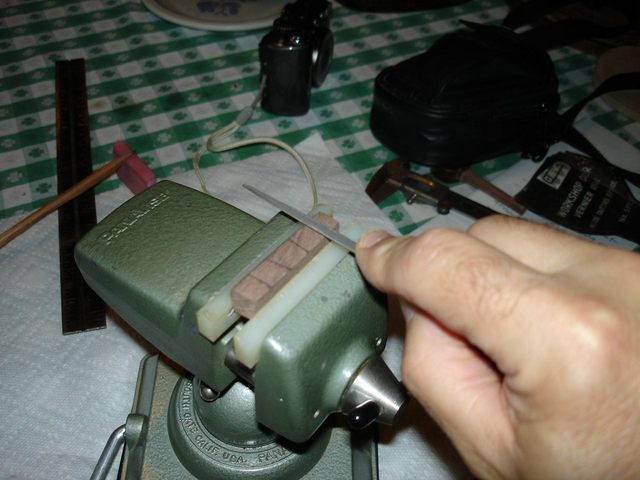
Then I cut the shape out with my coping saw.
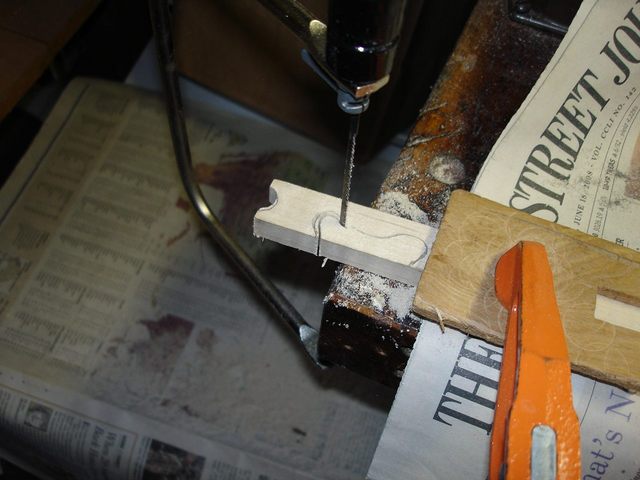
After the basic shape was cut out, I used the rattail file to finish shaping the curved parts.
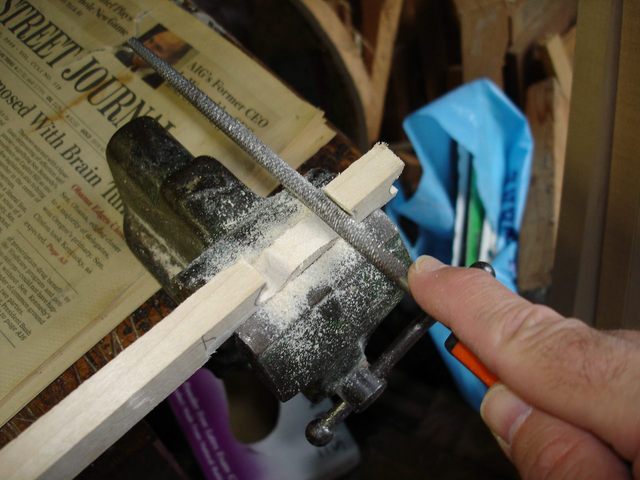
I started putting a taper on the bridge with my shoe rasp.
That proved to be too slow, so I got out the cabinet scraper and used it to remove the wood faster.
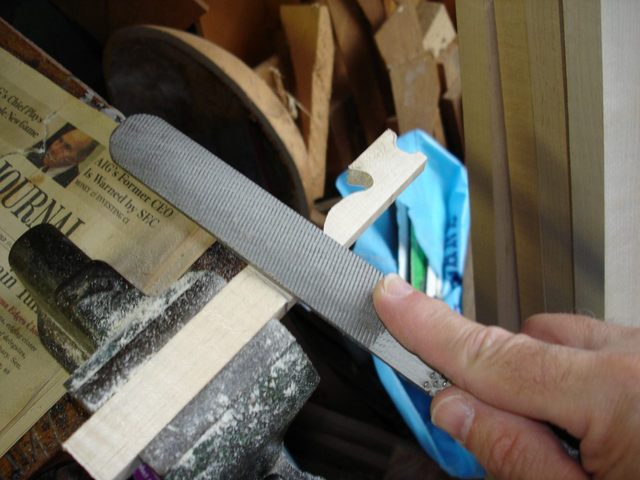
After I got the bridge mostly shaped, I cut it off of the piece I was using as a clamping handle.
Here it is, roughed out anyway, except at the end where it was attached to the handle.
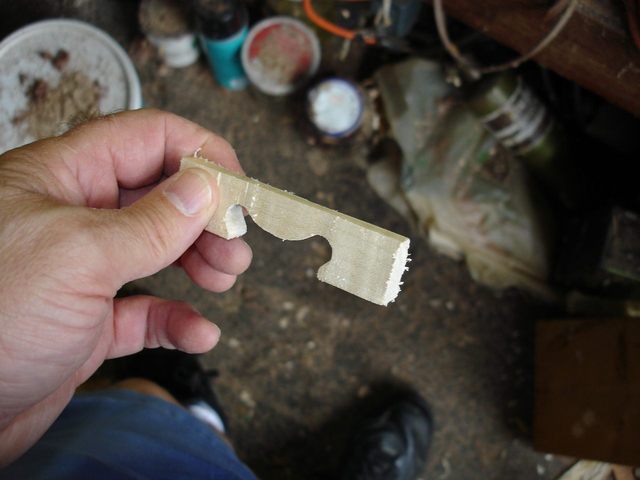
You can see on the sides of it where the cabinet scraper has gouged out the soft wood between the curls. That is how my other finger board got its rippling effect when I did the final smoothing with the scraper. Live and learn. I will sand out the ripples on the bridge.
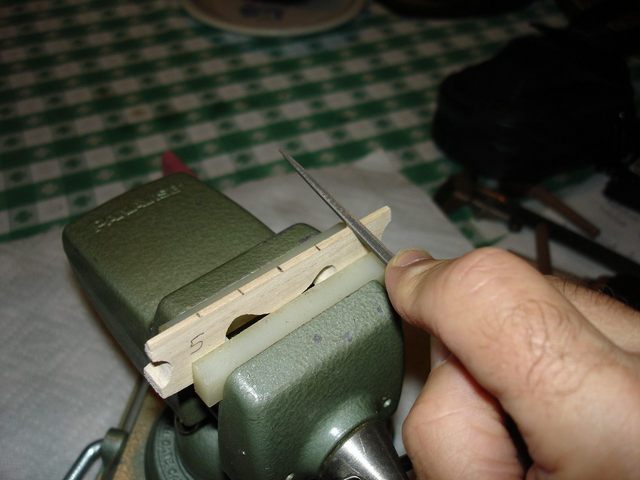
I cut out the notch in the last end of the bridge and shaped it with the rattail. Then I put some 60 grit sandpaper down on the bench and used it for the final shaping of the bridge.
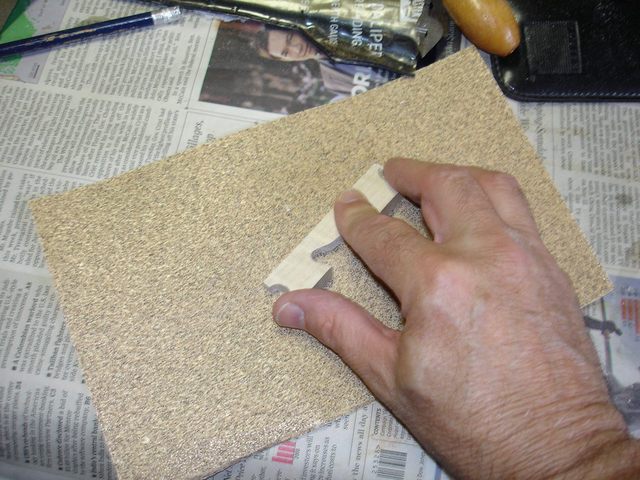
To finish sanding the inside curves I wrapped a small piece of the 60 grit paper around a tiny screwdriver.
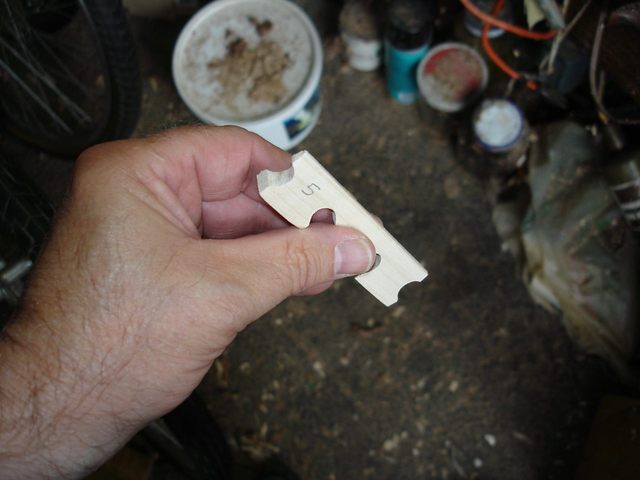
Here it is. I marked it with a 5 where the 5th string will go. I based the decision about where to put the 5th string on the shape of the bridge. It has a slightly steeper taper on one side, and the steeper taper should go toward the tailpiece.
OK! I gathered up all of the pieces and stuck the neck through the gourd and set all the pieces into place. Here is what it looks like so far.
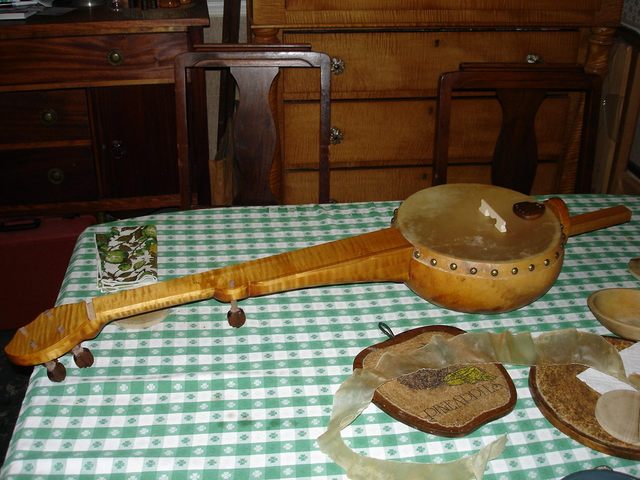
It is starting to look like a banjo. Of course, none of the parts are really assembled; they are just sitting there. Now I need to put a coat of finish on the gourd to bring out the color and to seal it against moisture. I put the gourd down on the bench with the head down to give me access to the entire gourd. Here it is before I put on the finish.
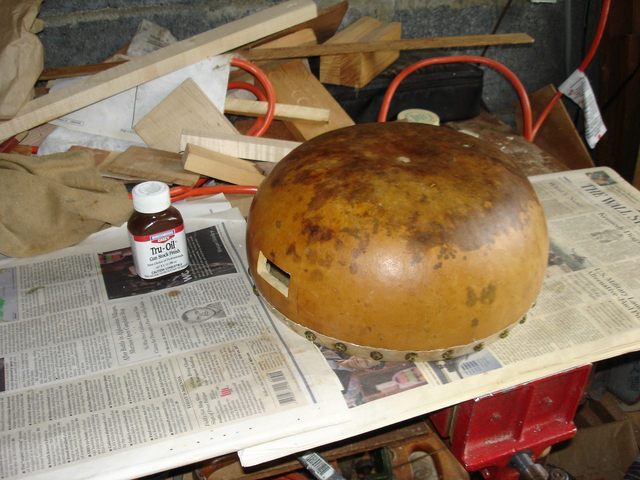
Here it is after I put on one coat of finish.
Nice gloss, huh? The oil does not appear to soak into the outer skin of the gourd like it does into the wood, so one coat gives it a glossy appearance.
There was still some time left in the day, so I decide to do some preliminary work marking off the nut and the bridge. I also drilled the string holes in the ends of the pegs. First, the nut.
The strings need to pull back across the nut toward the pegs, so I marked off the string spacing on the front of the nut and placed a ruler on top of it to draw a line from each notch to its peg.
Since the 5th string does not go across the nut, there are four notches to cut into the nut. I spaced the strings 3/8" apart. I put the nut into my Multi vise and used a small triangular file to cut a shallow notch into each line.
The top of the nut stands just over 1/8" above the finger board, so if I cut shallow notches in it, the action of the strings should be just under 1/8". That is where I am going to set the strings to start. That is a high action at the nut, which is usually set to 1/16" or less on a banjo, but the other banjo has a high action now and I like the way it plays. I can always cut the notches deeper if I hate it this way. The notches that I filed this time were just markers. I will set the strings later during final setup.
When filing the notches in the nut it is necessary to slant the file downward toward the peghead so that the highest point where the string comes off the nut is at the leading edge, right over the finger board. That keeps the strings from buzzing against the nut.
After I marked the nut, I marked the bridge the same way.
In the case of the bridge, the notches are spaced 1/2" apart and there are 5 of them. They also are slanted downward, but in the direction of the tailpiece. This will keep the string from buzzing where it vibrates, which is over the finger board, on the side that is away from the tailpiece.
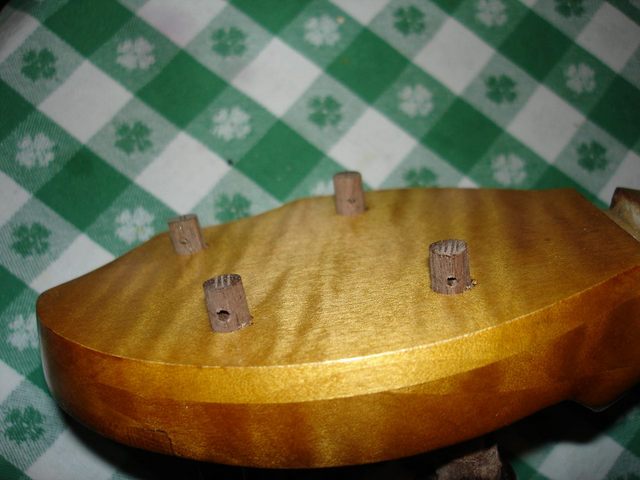
On to the pegs! I put the holes for the strings down 3/16" from the end of the peg. Since the peg stands 5/16" proud of the fingerboard, that provides 1/8" of space between the hole and the peghead surface. The air was humid when I fit them into the holes, so the pegs are as low as they will get. When the air is wet, the pegs swell and the holes shrink making it necessary to pull the pegs out a bit to make them fit. In the Winter, when the air is dry, the pegs will shrink and the holes will expand, making it necessary to push the pegs in a bit to make them fit. The positioning of the string hole is a compromise to keep it above the level of the peghead, but not too far up as the humidity changes.
The holes are drilled with a bit that is 5/64" in diameter. This is just large enough to allow the string to pass through twice to tie it off. That size works well for all the strings except the 3rd string. The 3rd string will be too large to pass twice through a hole that size, so I used a 3/32" bit for that one.
How do I know that? I screwed it up on my previous banjo. Live and learn.
I used a center punch to mark the location of each hole, then I clamped each peg into my Multi-Vise.
I drilled out each of the pegs in turn, and here they are installed in the peghead again.
That's it! No more today!
I spent quite a bit of time on the project today. It took me 45 minutes to trim the head because I was being so careful not to cut the wrong part. Then I spent an hour and a half making the bridge. The odds and ends of cutting notches and string holes took an hour. Putting the finish on the gourd only took about 15 minutes. So that is 3.5 hours today.
I am getting close to having this banjo finished. Next time I will do the final setup and stringing. I still have to finish cutting the notches in the nut and the bridge to make them fit the strings, but other than that it is just a matter of putting it all together.
Original post date September 16, 2008