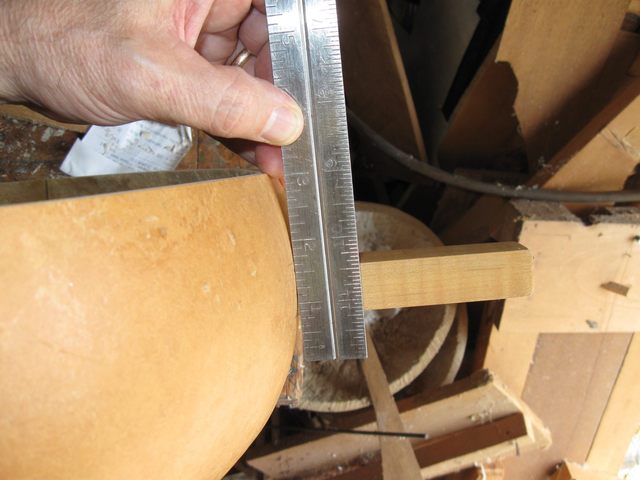
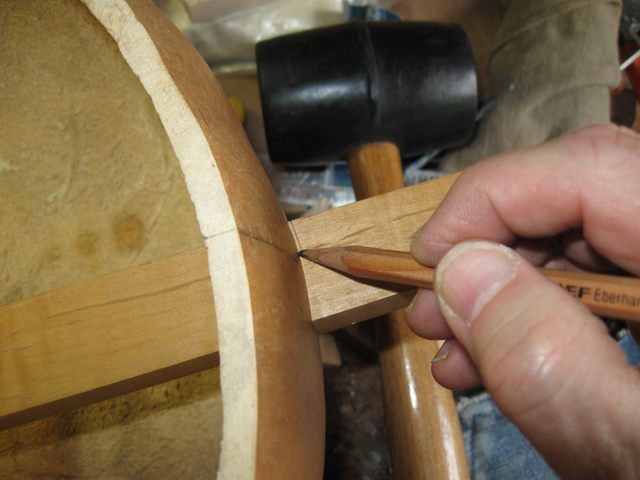
I made the tailpiece today. Well, actually, I made one part of the tailpiece, the vertical part. I measured on the gourd to see how big I needed to make it. I leave 3/4" at the bottom of the tailpiece and leave about 3/8" sticking up above the head.
I put the bottom of the ruler 3/4" beneath the bottom of the stick and measured. It looks like it is exactly 3" to the rim of the gourd. So 3 3/8" should be right.
I also measured the width of the dowel stick where the gourd comes out of it.
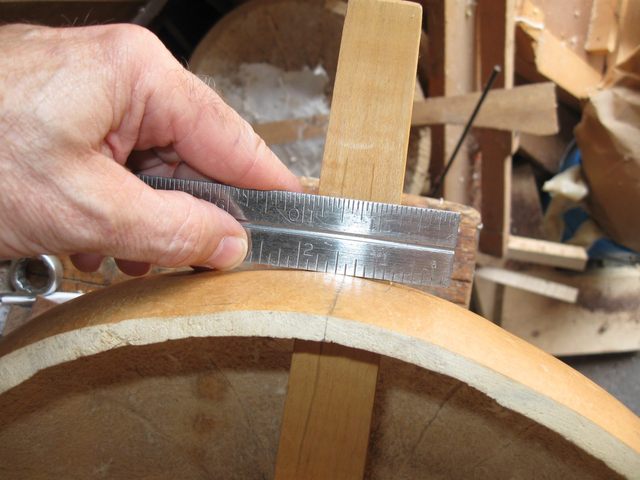
The stick is 1 1/8" wide at that point, and I want to leave 3/4" on each side of the stick, so the tailpiece has to be 2 5/8" wide.
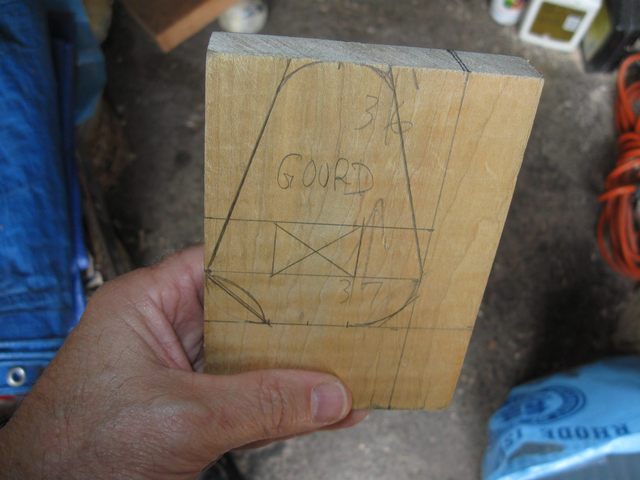
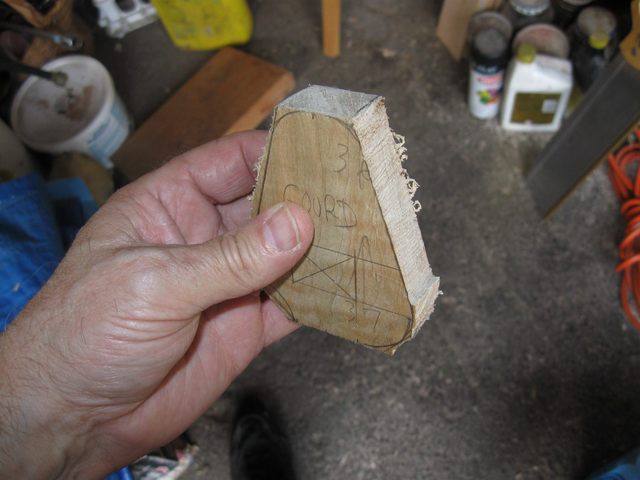
I found the last end piece of maple that was left over after I cut the wood for the neck blank. You can still see the numbers that I wrote on it before I cut it up to make the neck blank. This piece will make a good color and figure match with the rest of the banjo.
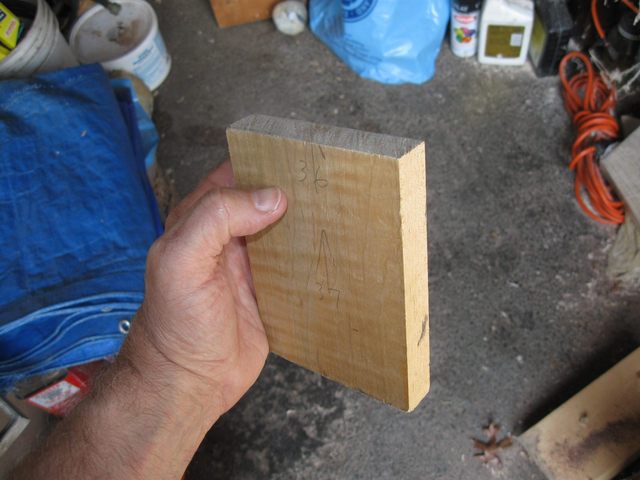
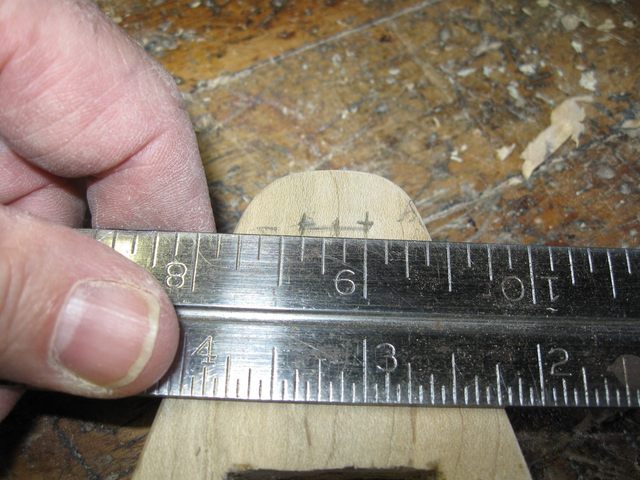
The piece is about 5" long, which should be plenty but it has some checking on one end. But I only need 3 3/8" of it for my tailpiece.
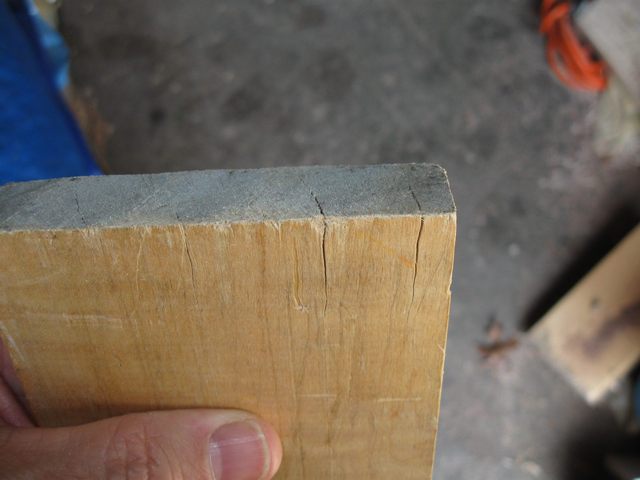
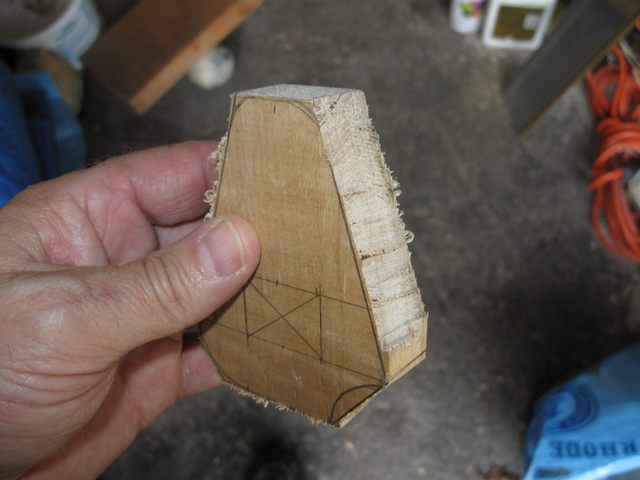
I certainly don't want to include the checked end in the final piece, so I marked off the shape of the tailpiece on the other end of the wood.
|
|
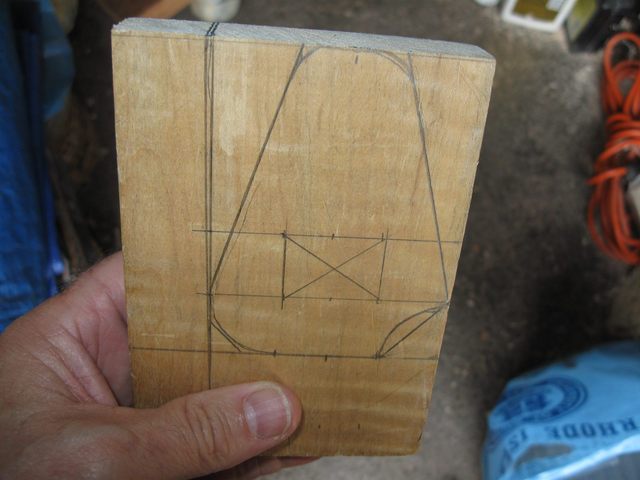
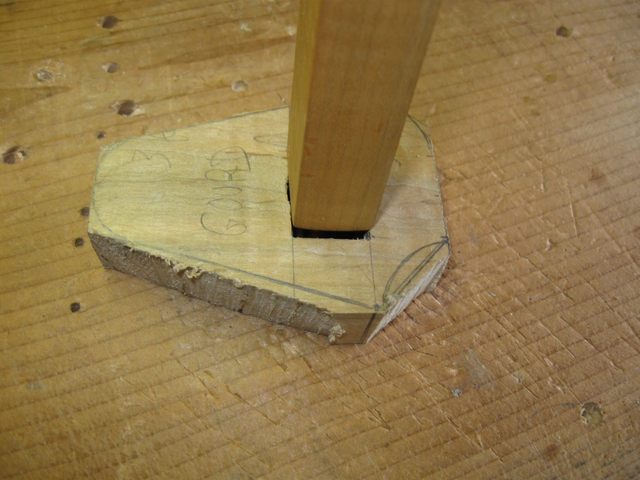
I drew the tailpiece on both sides to make it easier to cut and wrote "GOURD" on the side that will face the gourd. That way I will be able to keep it right side up and down side down if you know what I mean. I cut along one of the diagonal sides first.
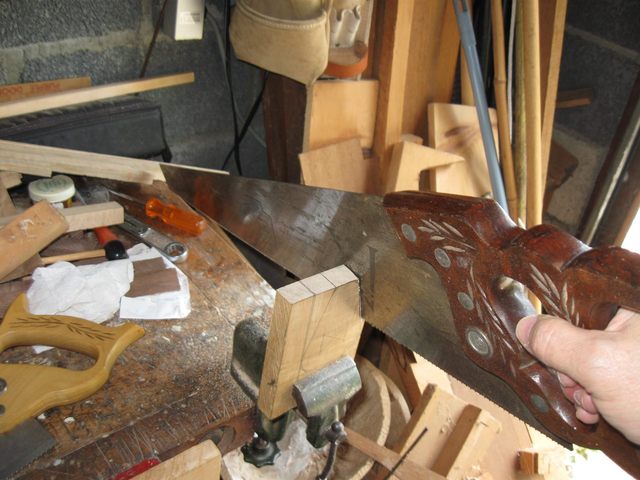
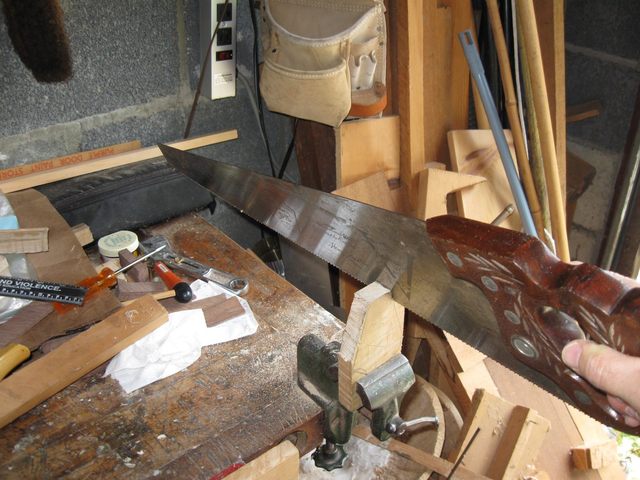
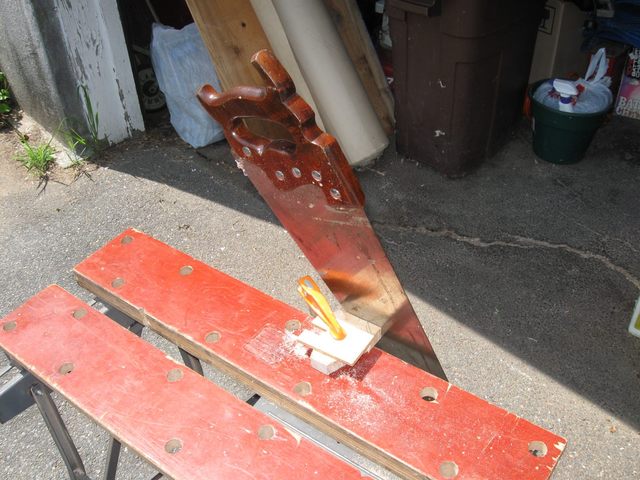
I still miss my panel saw. I used the large crosscut saw to do this, but that is getting a bit ridiculous. I am going to have to fix the panel saw or get a new one. Next I sawed off the extra piece along the side.
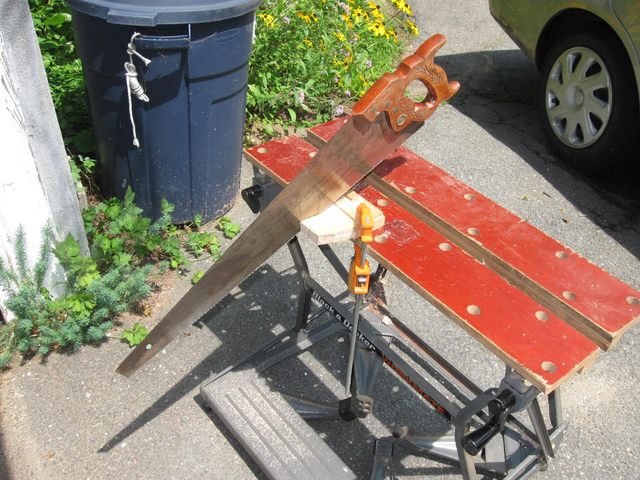
Next was the other angled cut.
Finally, I cut the bottom off the piece.
And here it is.
|
|
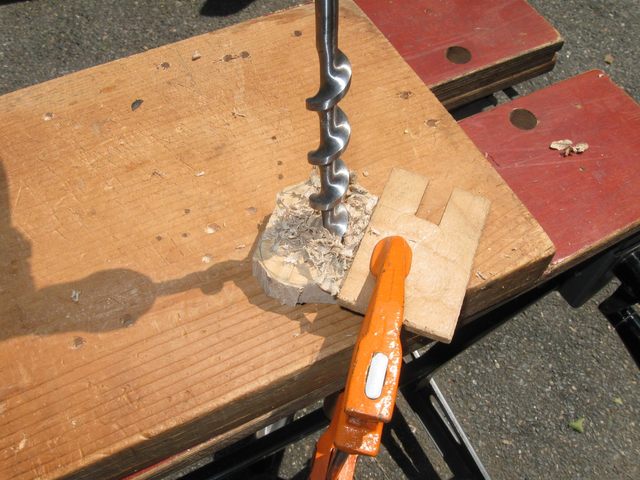
The hole is 3/4" by 1 1/8". I have marked it a bit smaller than the final size so that I can cut it to fit after I rough it in. To start I used my 3/4" auger.
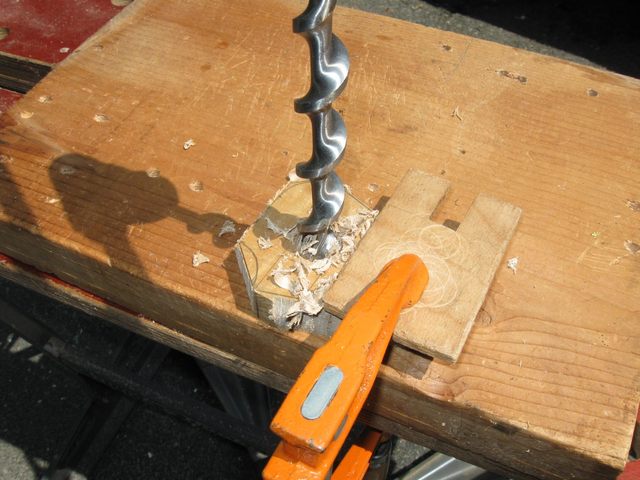
To avoid tearout on the back side I drilled half way through the piece from the first side.
Then I turned it over and drilled the other half from the other side.
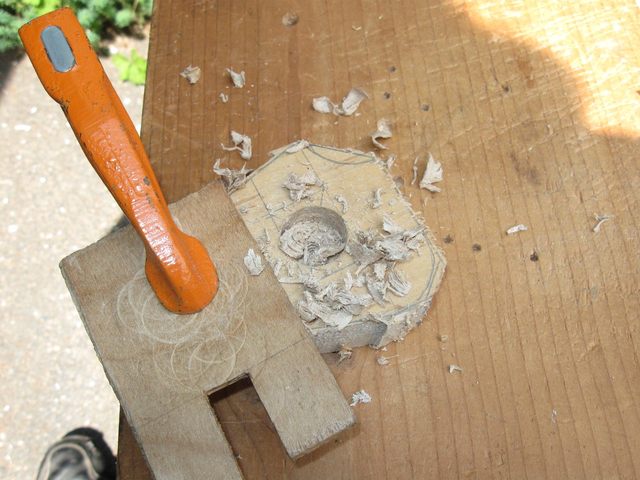
After I finished drilling, the little piece left in the middle just popped out.
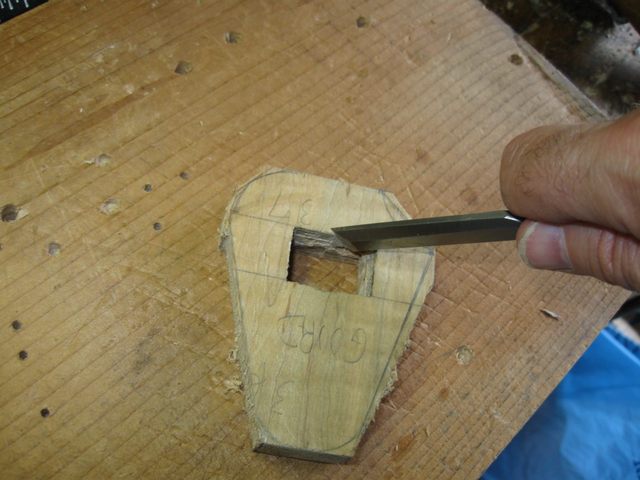
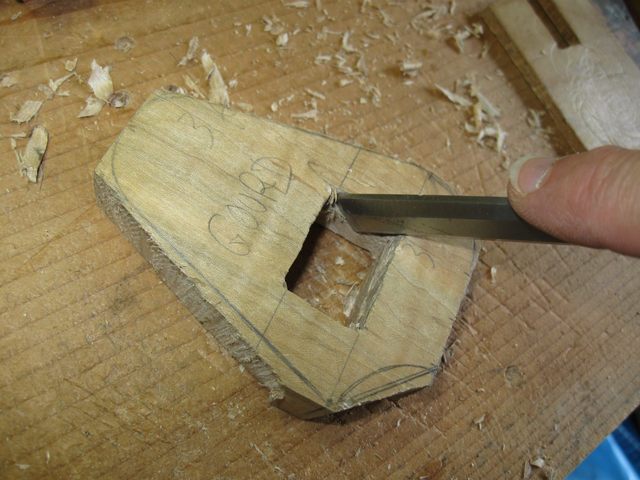
Next I had to make the hole rectangular to fit the dowel stick. I did that with my chisel.
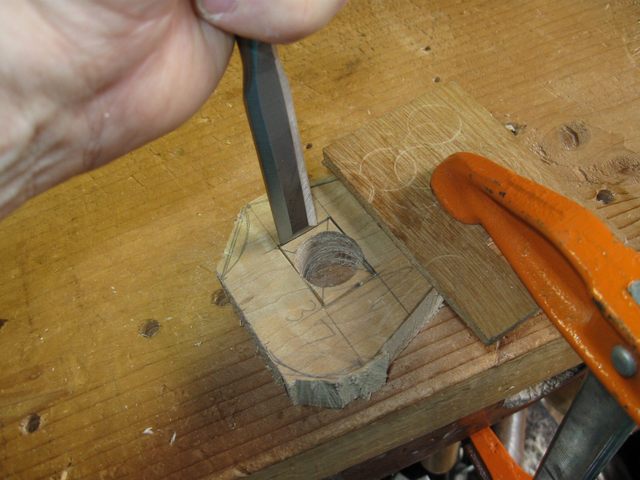
I chopped a line around the outside of the hole, and then chopped away the wood inside.
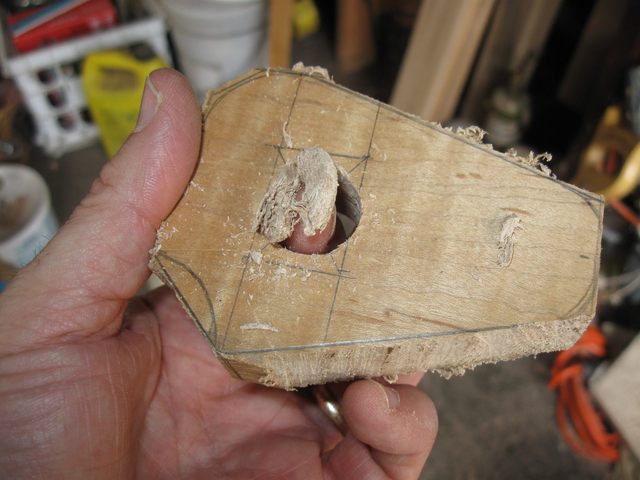
I did that until I was about half way through and then turned it over and did the same from the other side. Here is a photo of the hole when it was about half way through.

Here is the hole as I broke through from the other side.
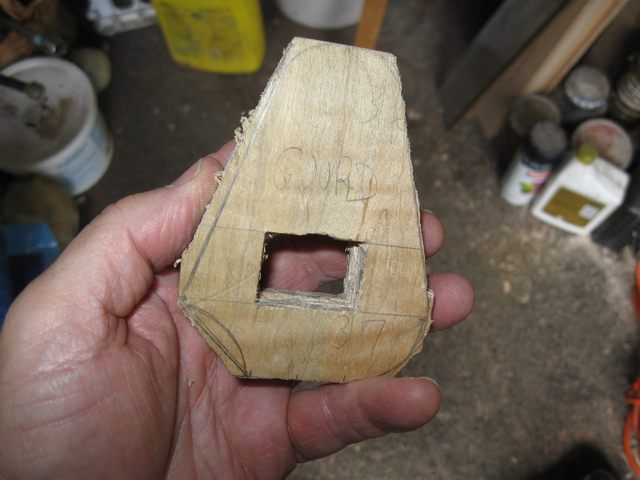
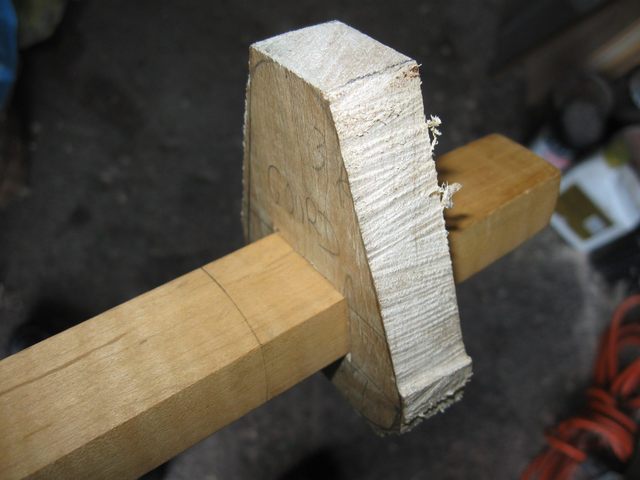
Finally through the piece, the hole is now roughly rectangular. The next step was to do the final fit to the dowel stick.
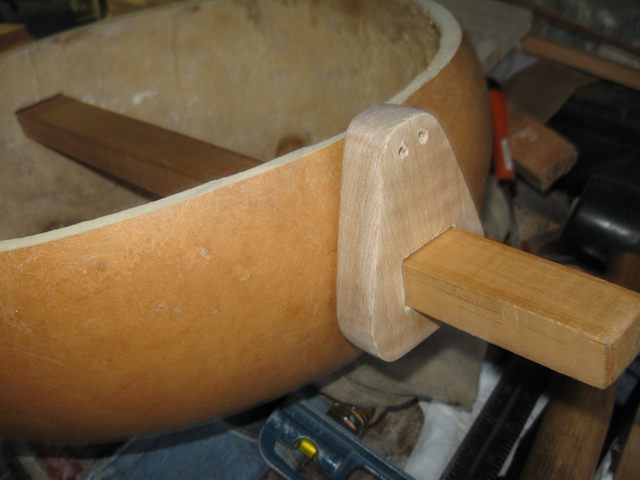
The goal is to place the tail piece right next to the gourd but not close enough to cause it to put any pressure on the gourd from the string tension. The purpose of the tailpiece is to transfer the string tension directly to the dowel stick instead of to the gourd. Yet the tailpiece sits right next to the gourd and keeps the gourd pushed up against the heel of the neck.
To make sure that the fit is proper I marked on the dowel where the side of the gourd is located when the neck and the gourd are joined.
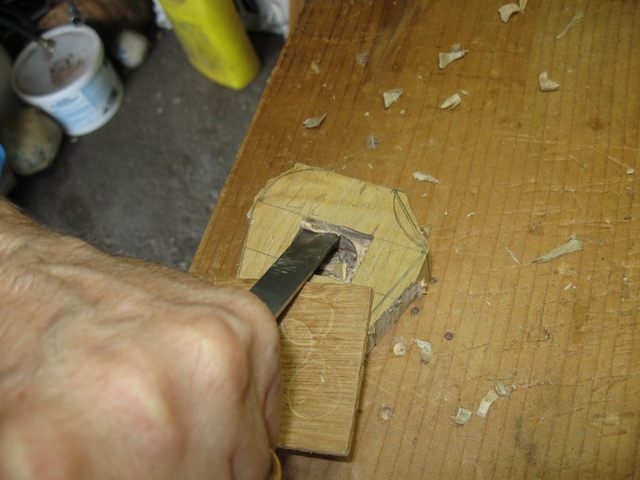
After that, I tried it to see if it would go together. At first, the hole was not tall enough to allow the dowel stick to go in it.
Using the chisel, I pared away the top and bottom of the hole to square it up and make it a bit taller.
During this part I didn't use the mallet on the chisel. I just pared the sides by hand. I worked from both sides to minimize the tearout.
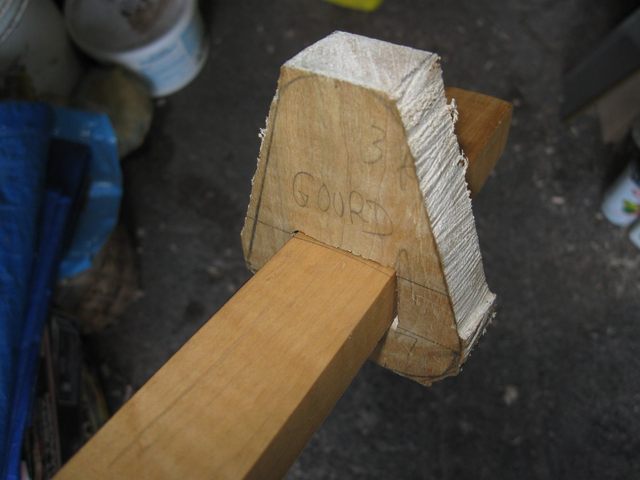
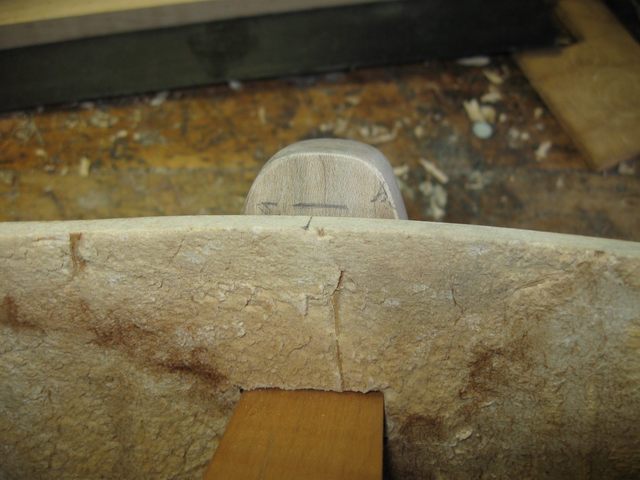
Once I got the hole tall enough, the tailpiece went into the hole this much:
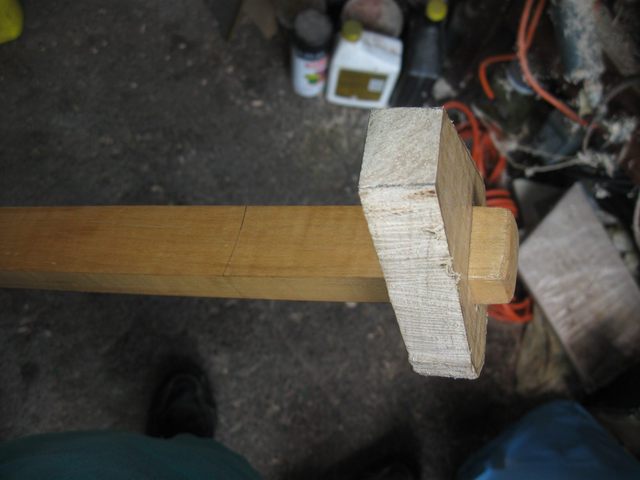
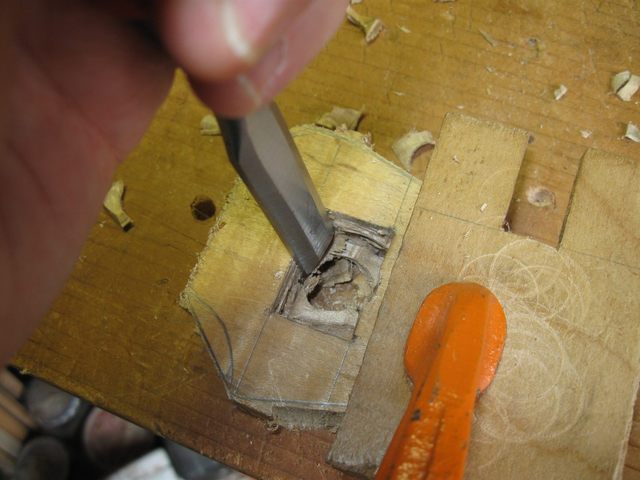
To move the tailpiece up the stick I just worked on the sides of the hole to make it wider. The height of the dowel stick does not taper, so the height of the hole does not need to change. Here it is a bit farther along.
So that is how it is done. Pare the sides and try the fit; pare the sides and try the fit; try not to cut your finger off; pare the sides and try the fit...
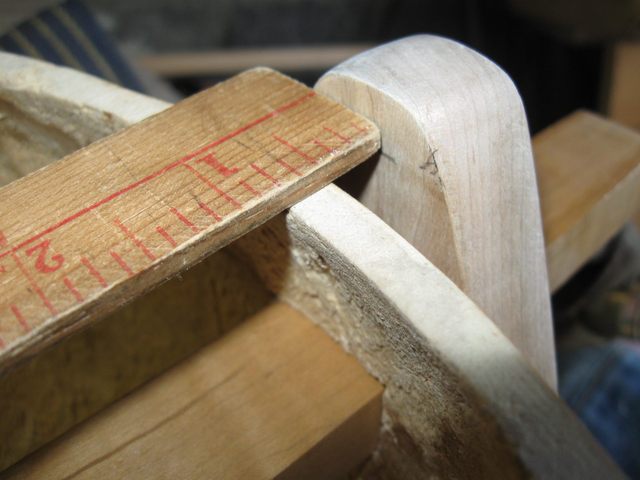
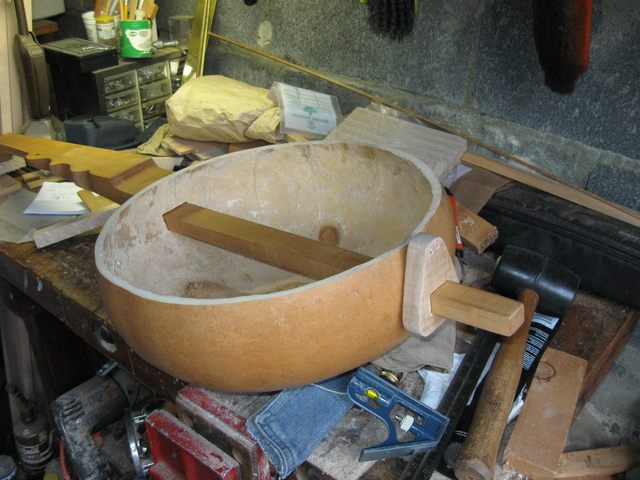
Finally, there it is, set right up against the line.
Here it is up against the gourd.
Once the piece was fit to the dowel properly I did the final shaping and sanding. First the shoe rasp.
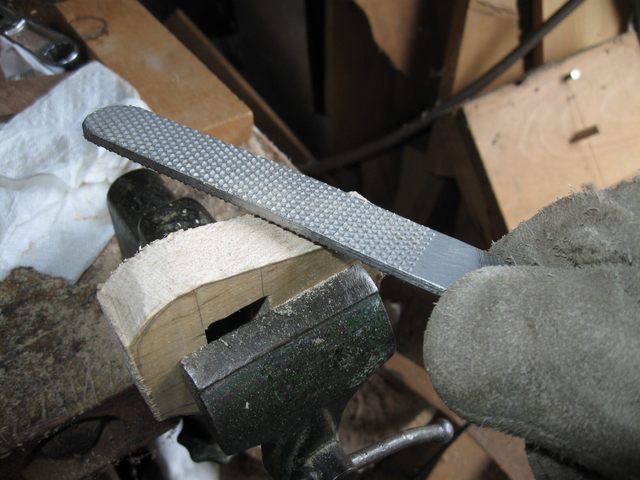
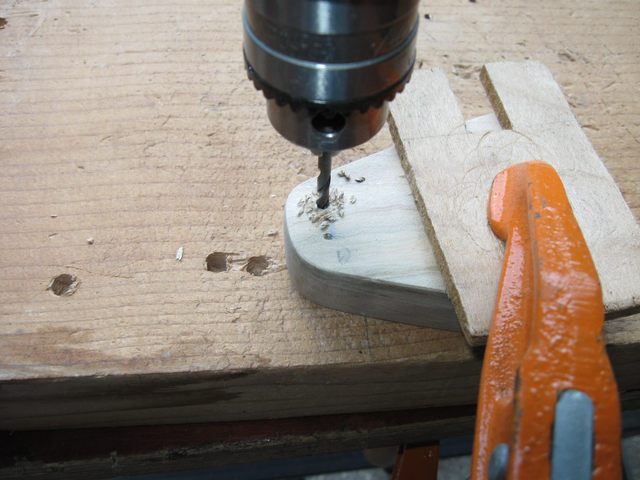
Well, I won't bore you with the shaping of this thing. It is just the same procedure of successively finer grits, rasps and sandpaper and rattail files and all that. The next interesting step was to drill the holes for the wire that holds the other half of the tailpiece on. I marked the spot that is level with the top of the gourd so that the wire will clear the head. I put a yardstick on top of the gourd and marked beneath it where the top of the gourd is.
Here is the mark where the holes go.
I marked the location of the holes just above the line to keep the wire above the head.
Clamped and drilled with a 1/8" drill bit. Then I gently chamfered the holes using a 3/16" bit.
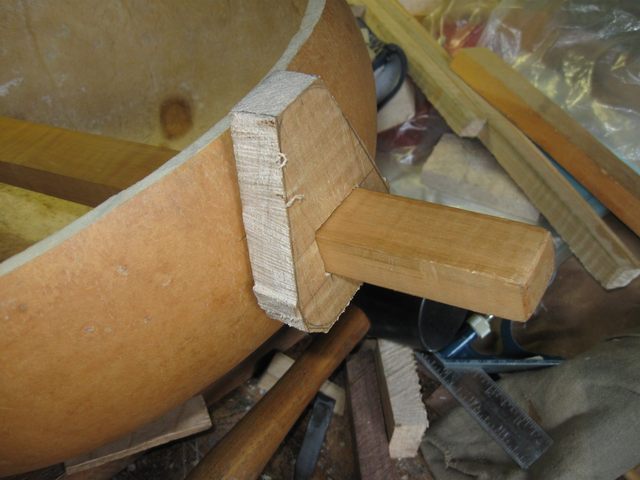
Here it is.
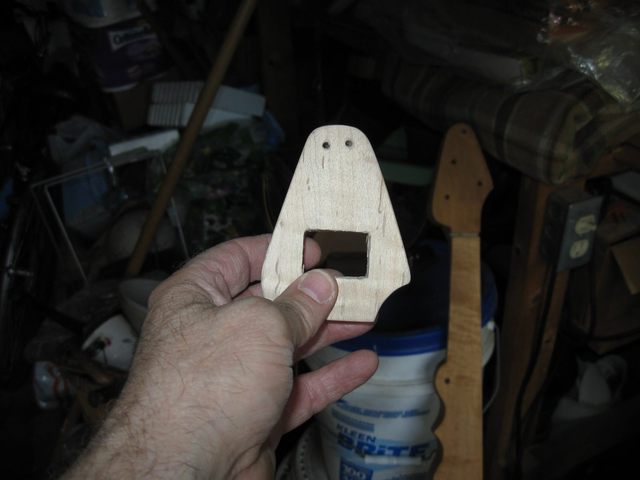
You may notice the similarity of the tailpiece shape to the shape of the peghead in the background. Here is the finished piece on the dowel next to the gourd.
And here is a closeup.
A back view.
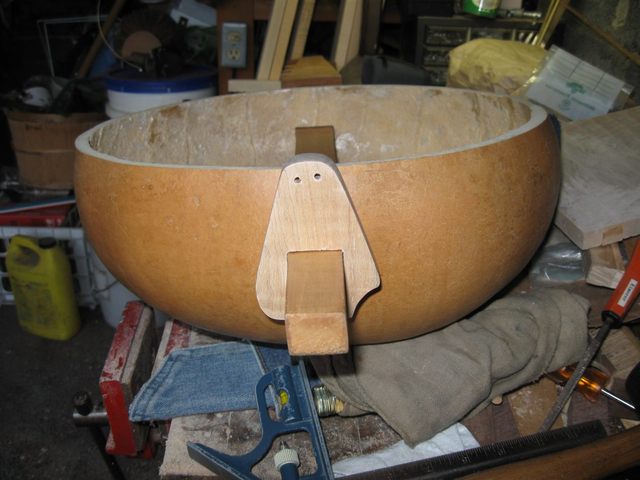
Hmmm. The holes look a little cockeyed, don't they? Oh well. It is what it is. I doubt it will be very noticeable once the thing is together.
Whew! It took me 3 hours to make that little piece. I kind of like it though.
Original post date July 28, 2009