I am going to make my new steam box out of 3/4" plywood. I am using exterior grade plywood because it will be in steam, which will condense into water, which might tend to delaminate anything that is not water resistant. The plywood will not melt in the steam, and it will provide a small amount of insulation as well. So, plywood is the material of choice.
I bought a full sheet of plywood from the Big Box store (about $25 at 2012 rates) and had them cut the 4' by 8' sheet into two 4' by 4' sheets. That is the largest piece of wood that will fit in the car.
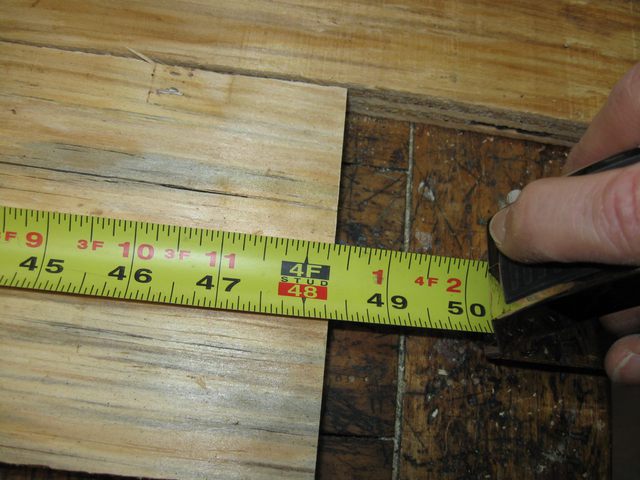
I marked off 4 foot long sections that are 5" across. That ought to give me plenty of room in the box for the wood. I am going to butt joint the sections together rather than trying to do any fancy joinery. The box does not have to be air tight because I want the steam to flow over the wood, and I don't want to spend an inordinate amount of time on this. Here is a diagram of the cross section of the box.
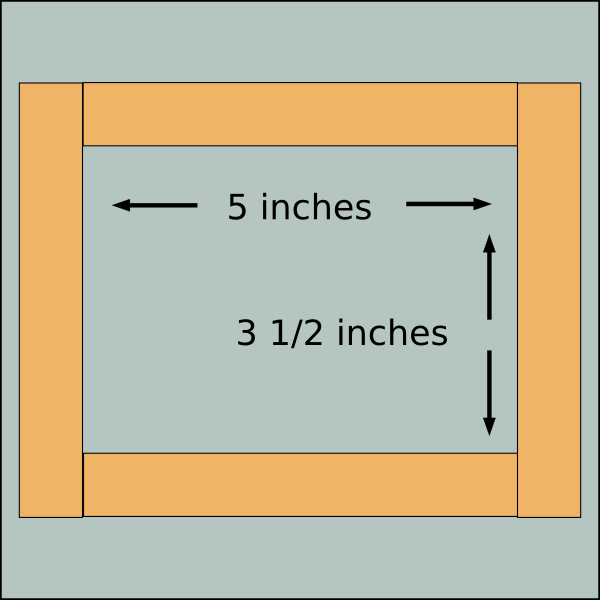
Cross Section of the Steambox
You can see that the box will be 5" wide and 3 1/2" tall. That should provide adequate room for my 3 1/2" by 1/4" board. As with all of my projects, I am going to screw the box together using #8 wood screws.
First thing, I ripped the 4 foot boards into the 5" wide strips.
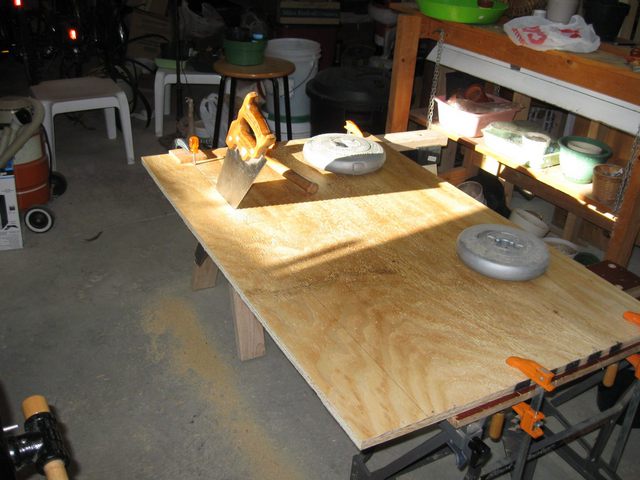
I Ripped the Plywood Using My Hand Ripsaw,
Sharpened by Me and Set Using My sägenschränkzange
Which You Can Read About Here
I cut four strips of plywood, and had some left over which I can use to make doors for the ends.
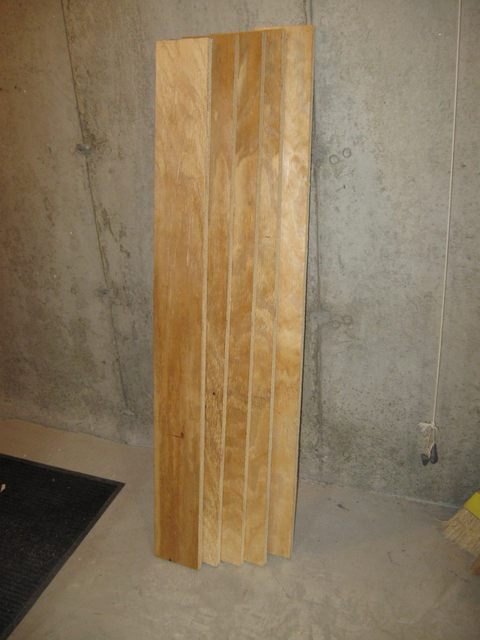
Four 5" Strips Plus Some Leftover
The plywood, as it turns out is just slightly longer than four feet. Looks like it is about 48 5/16"
Four Feet Isn't Really Four Feet Either
That is just as well because it will provide a small pad for my four foot boards inside the box.
I am going to put the screws 6" apart to make this as sturdy as possible. A butt joint is not a sturdy joint, and the box will rack if it is not screwed together properly. So I am going to use a lot of screws.
The Screws Will Be 6" Apart
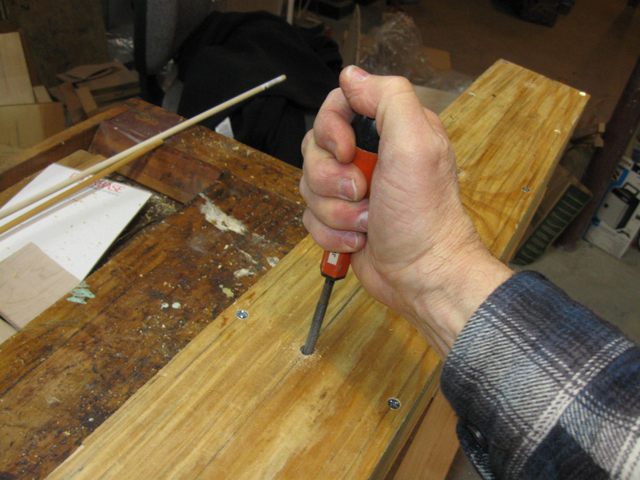
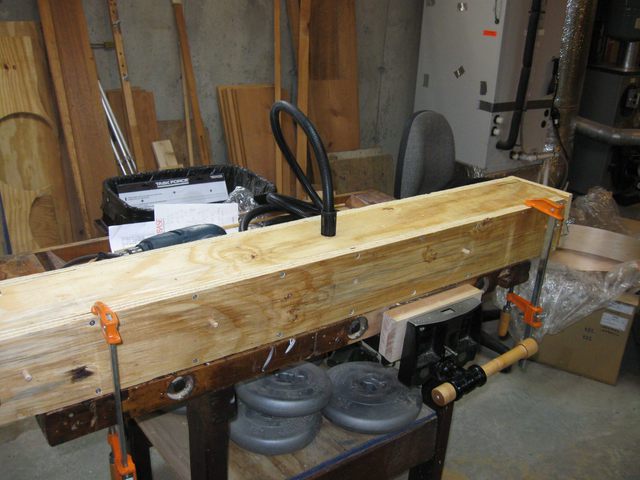
I clamped all of the pieces together and to the bench so all I have to do is drill the pilot holes and set the screws.
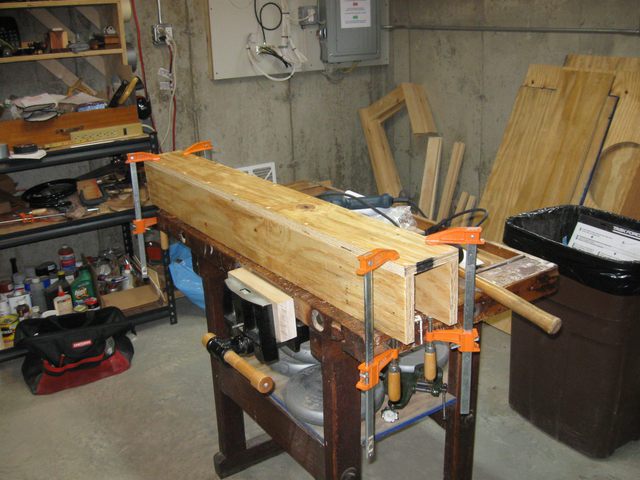
Everything Is Clamped
After I screwed the box together, I drilled some holes in the sides to add some dowel sticks. The dowels were cut from a 5/16" dowel that I found lying around the basement. I don't think the size matters much because the load won't be very heavy. The purpose of the dowels is to keep the board centered in the steambox.
The tool I am using to drill the holes is called a "Portalign", and it is a poor man's drill press. It was made by the Portalign Tool Company out of San Diego CA. They have since gone out of business, but you can get clones of this tool at the Big Box stores. I wouldn't run off to get one, though. It has limited usefulness. I get it out once in a while to remind myself about how imprecise it really is.
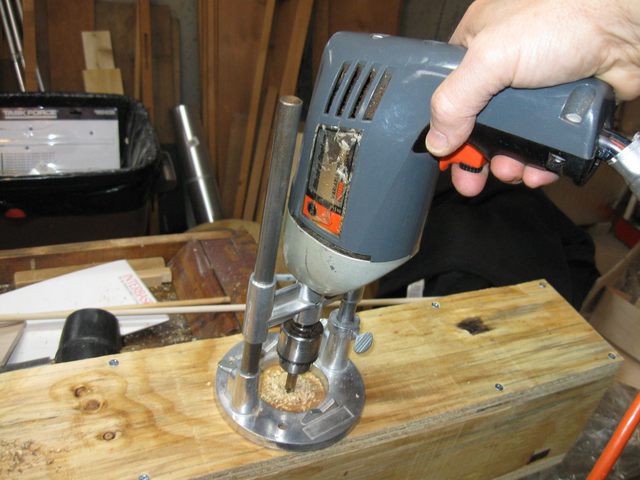
Drilling With My Portalign Tool
I drilled the holes on both sides of the box using a 1/4" drill bit and then increased their size just a mite with my rattail file. That way I can adjust the friction fit of the dowels in the holes.
Another Precision Fitting Job with My Rattail
I sawed off some 6" lengths of dowel and pounded them into the holes. Here they are sticking out of the box.
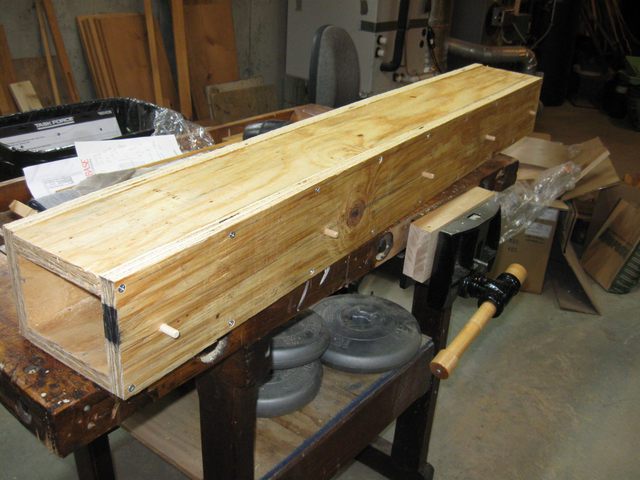
Dowel Sticks In the Box
Here is what they look like on the inside. The hoop board will rest on top of the dowels so that it will be centered in the steam box for best circulation of the steam.
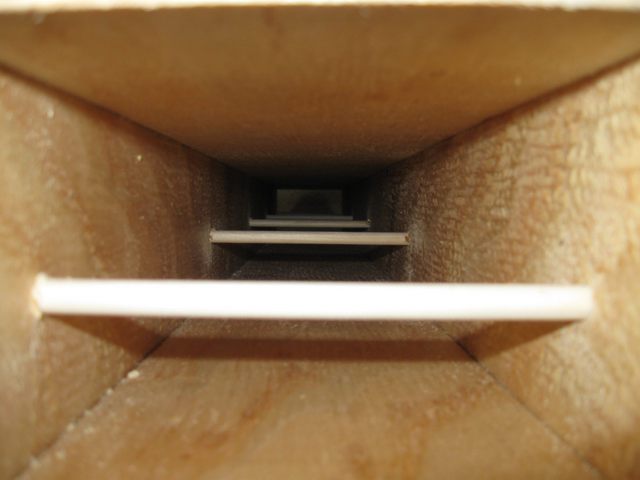
Inside Of The Box
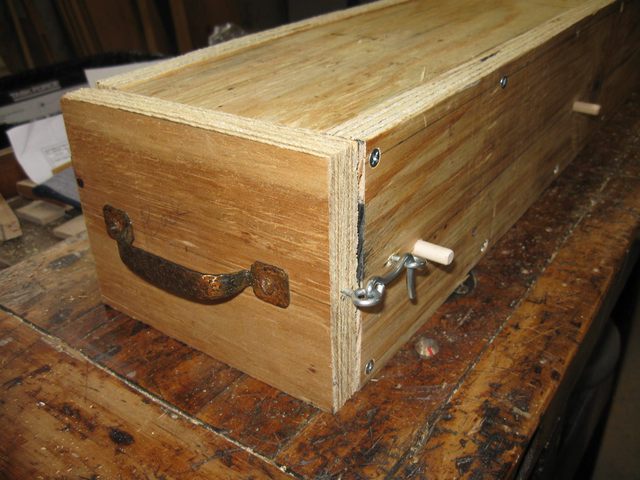
I made a couple of doors for the ends of the box and hinged them onto the side this time. They are held shut with some gate latches so I don't have to mess with keeping them in the holes. Here is the box.
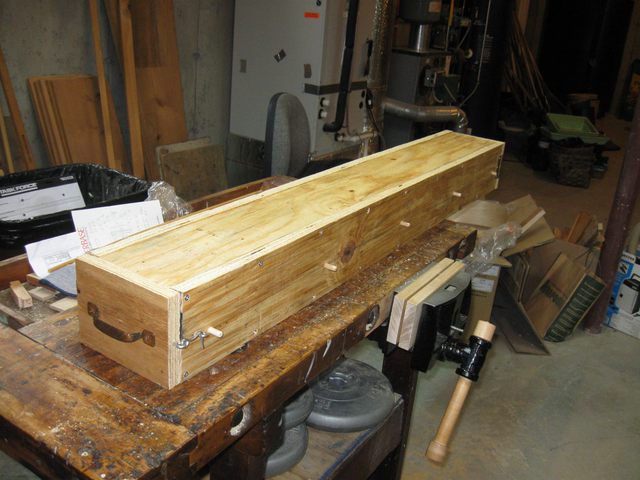
The Finished Steambox
Here is a closeup of one of the doors. The doors fit flush and do not go inside of the box. Part of the reason for that is that I have a 4' box and a 4' board, so there is no room in the box for any plugs. Besides, this box should not be air tight anyway, so a flush fit is fine.
Hey, and check out those repurposed drawer handles! Pretty cool.
Closeup of the Door
Putting the wood into the box will be easy, I just open one of the doors and slip it in.
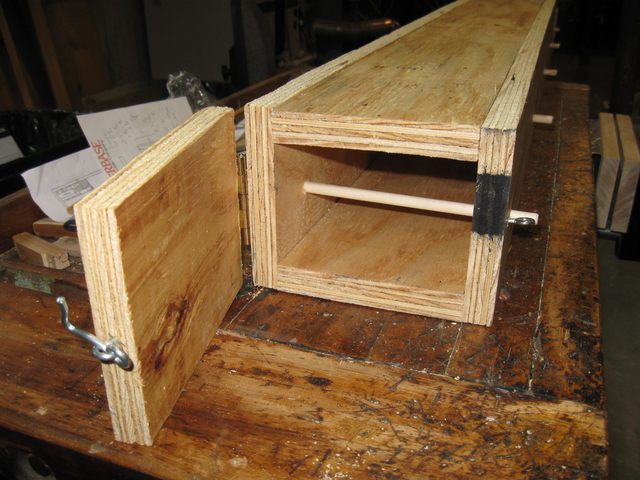
The Door in its Open Configuration
There is one last thing I need to do. I need to make a hole for the steam tube to go into. If you remember back when I was making a steam box out of PVC pipe, I used a spade bit to drill the hole... and made a nice mess of it. Check it out here. This time, I am using one of the coolest tools I own.
This tool fits in my brace and is designed to make holes any size I want. I bought this at a yard sale out of curiosity, and it comes in handy every now and then to make odd sized holes. I have never seen one of these anywhere else, and I doubt anybody makes them anymore.
The way it works, is you loosen the set screw on the back, then line up the marks on the size of hole you want to drill. Turning the knob to set the numbers, moves the cutter in and out to adjust the size of the hole it will cut. The auger on the point screws into the wood and pulls the bit through it, cutting the hole. If you look carefully, you can see a spur on the blade under the auger. That slices the wood fibers in advance of the blade (the movable part) which cuts the hole.
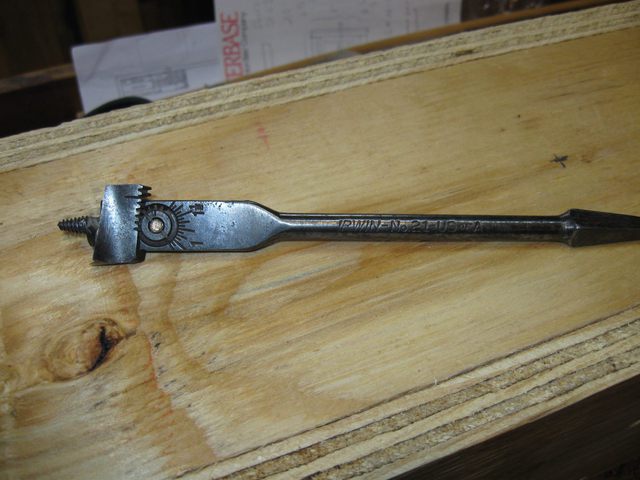
A Multi Size Hole Cutter from the Old Days
Here is a closer view of the tool so you can see the settings and the spur a bit better.
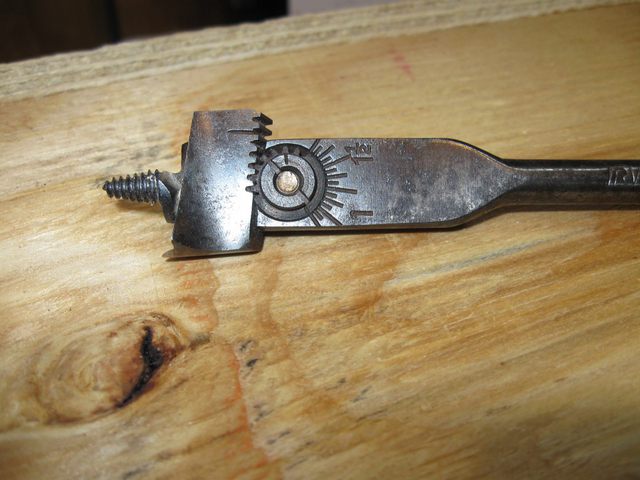
Closeup
It fits in the brace like this.

The Brace With The Hole Cutter
After a few turns, the hole has been cut. It has broken through the wood instead of making a clean exit on the other side because I was too lazy to take the box apart and drill this hole with a backing board.
By the way, that is the set screw on the back of the hole cutter in the upper left part of the photo.
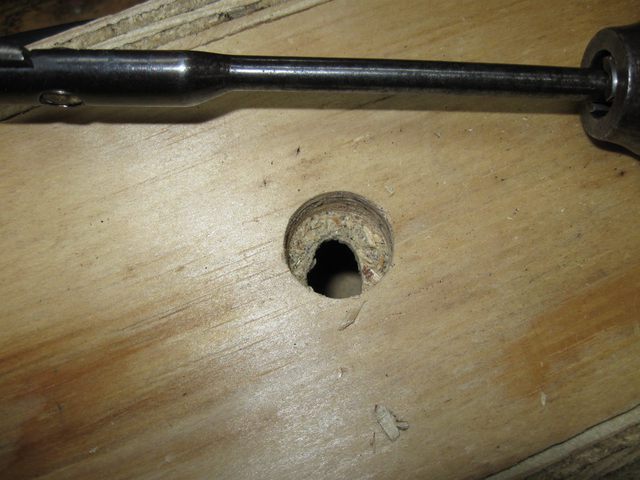
The Hole Has Been Cut
To clean up the hole, I used another tool. This is a rasp that goes in the drill to file down things like the sides of nasty holes that were made by lazy people who make bad holes.
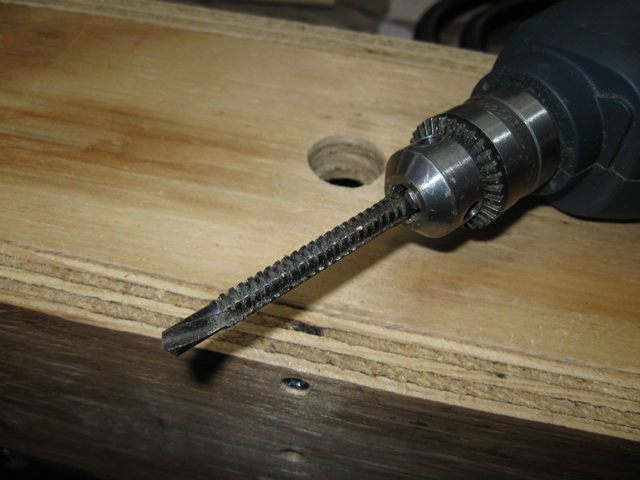
The Easy Way Out - A Power Tool
So, I cleaned up the hole with the power rasp. It looks better than the one I did on the PVC.
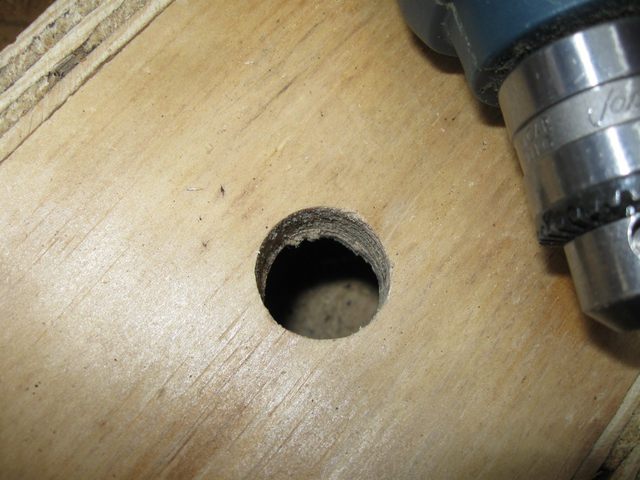
A Fairly Clean Hole After All
There we have it. The hose fits in the hole just fine. I think this is going to work much better than the pipe.
The Steam Hose Fits in the Hole
I took the new steam box back to the sawhorse and set it up, complete with the drool bucket and the block of wood under the far end to force the condensed water out of the drool end.
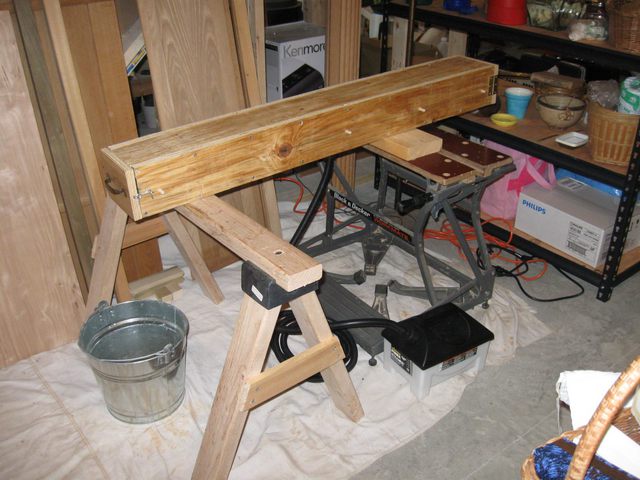
Drool Bucket et al.
Heap on some blankets for insulation and we are good to go.
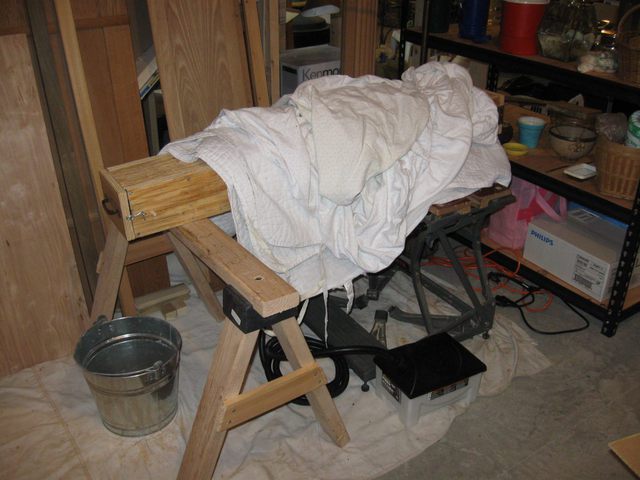
Blankets For Insulation
This ought to be a good box for steaming my wood. It is much studier than the first one made out of that pipe. Next time, I should be ready to go and make the bend that will make my banjo hoop.