It is a couple of weeks later, and as expected there are some issues with the banjo. One interesting aspect that I have discovered about making a banjo is that the new instrument starts out with issues and then it gets better as I figure out how to deal with them. With a store-bought banjo it is almost the opposite - it starts out fine and then goes out of whack as I use it and wear it out. Store-bought banjos are harder for me to fix since I am not as familiar with how they were constructed.
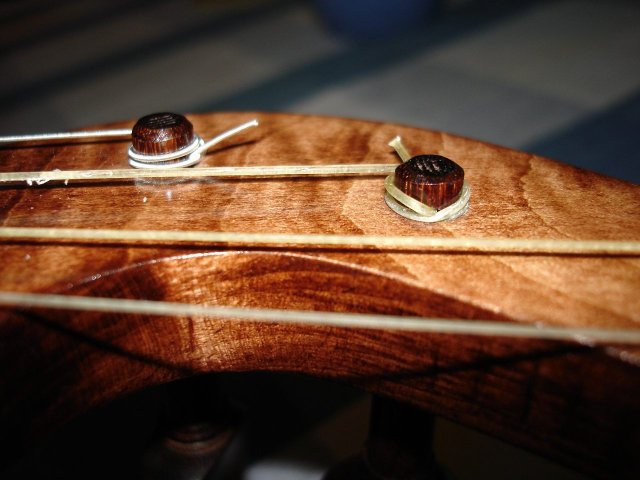
The first issue is that my new banjo has become untunable. The pegs have completely locked up and will not turn. We are experiencing the most rain ever recorded for any Spring in New England, and the humidity is very high. The holes in the peghead have shrunk so much, and the pegs have swollen so much that the strings have been drawn down into the peghead holes and jammed there.
I cannot turn the pegs to loosen the strings because they are stuck. I cannot tap the pegs out of the holes to loosen the pegs because that just forces the strings further down into the holes. A couple of photos will describe this much better than words can.
|
|
|
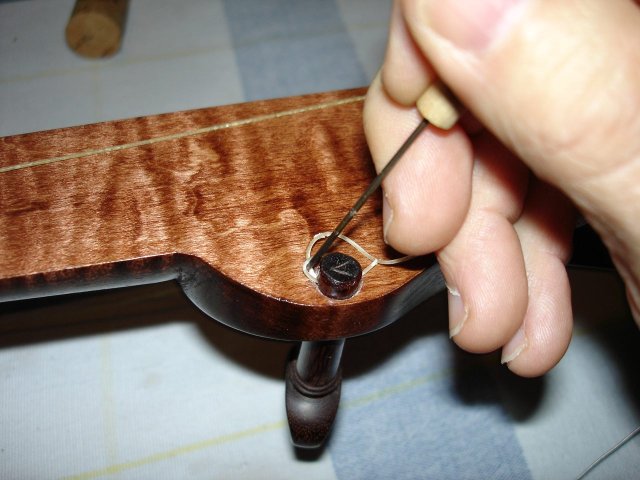
This situation had me stuck for a number of days. I requested help from a couple of banjo lists on the internet, and tried some of the many good suggestions that I received. I even put the banjo by the air conditioner for a few hours to see if I could loosen up the pegs. Finally, the weather broke somewhat and the air dried out a bit. I was able to turn the pegs just a bit to loosen the strings. Then, I removed the strings from the posts. I had to untie them carefully and pull them out of the holes with a needle, like this:
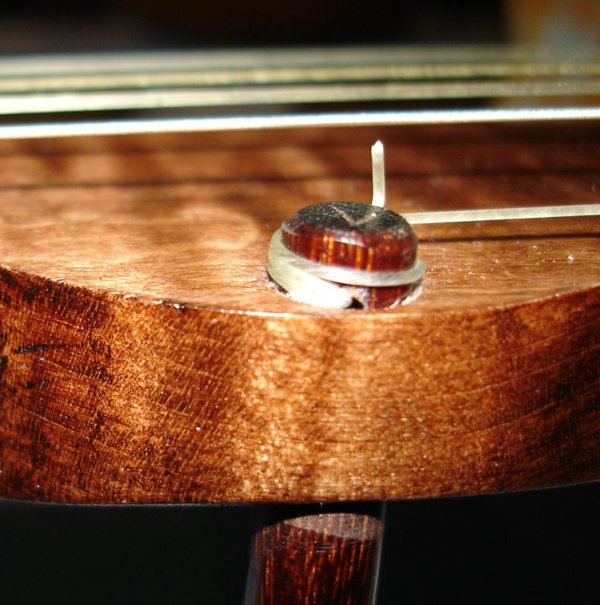
The ends of the strings were pretty well crushed by all that force. But at least I could now get the pegs out of the holes. Here is what the pegs looked like before I took them out.
|

|
The holes in the pegs are buried half way into the peghead. There is no way to string this up and make it tunable. I have to either enlarge the holes in the peghead or make the pegs smaller. I decided to make the pegs smaller since, as someone on the net pointed out, it is better to sacrifice the pegs rather than the peghead since they are easier to replace if something goes terribly wrong.
I do not have any fancy equipment such as violin reamers or peg shavers, so I have to make do. I decided to try reducing the size of the pegs using coarse sandpaper. I found some 100 grit sandpaper and just sanded down the pegs like this:
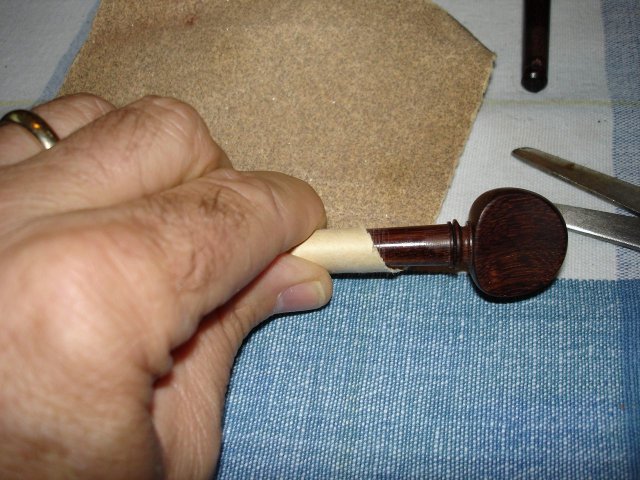
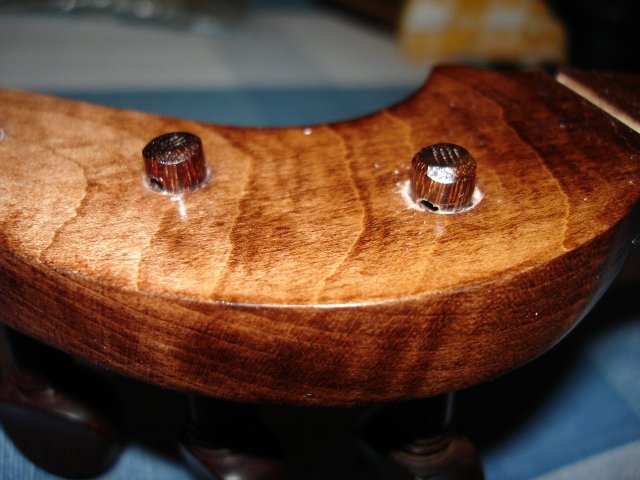
This took a long time to do; a couple of hours anyway. I turned the peg in the sandpaper for a few minutes and then tried it in the hole. I gradually removed wood from the pegs until they stood farther above the peghead than before. Then, I sanded them smooth with successively finer paper, 220, 400, 800 and strung them up again. Here are some photos of the fixed pegs.
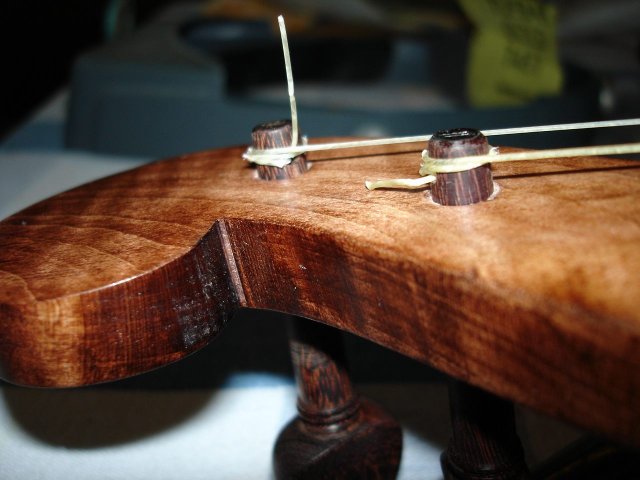
|

|
There is now enough space to wrap the strings onto the post without having them crushed between the hole and the peghead. When next Winter arrives, the air in the house will dry out, and these posts will climb higher once again, but I figure that I will be able to wind the strings down onto the post far enough to keep the angle OK from the nut to the post. Only time will tell on that one.
Another thing that I discovered is that the behavior of the pegs improved as I twisted them in the holes. I guess it burnishes the wood and evens out the friction between the peg and the peghead. I spent a few minutes twisting each of the pegs in its hole until the action was smoother before I put the strings back on.
The pegs seem to work pretty well now. They still have sticky places, but I can tune the banjo if I fuss with it. I think that the lesson to be learned by all of this is that you cannot just take the pegs out of the box and stuff them into the peghead, expecting it to work. The pins really need to be checked out and fitted to the holes or you can get into trouble. When the instrument arrived from CA last November, the pegs fit just fine. You can see that on the first page of this site, Marking the Pegs. But after a few months in our New England climate, the arrangement had changed.
By the way, I am glad that I marked the pegs back then since that made it easy to keep them straight as I messed with them.
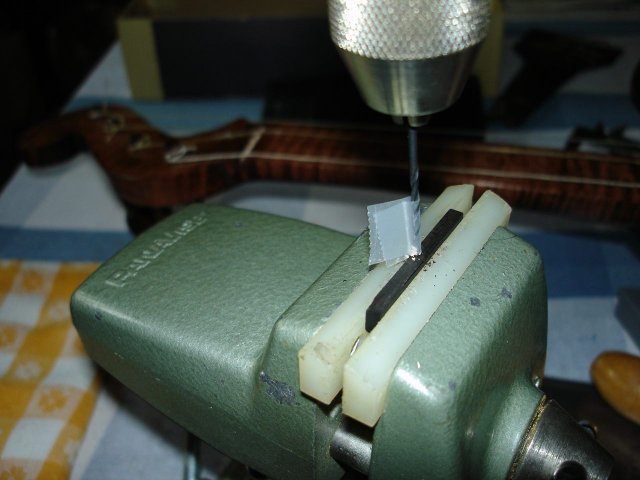
The next issue that came up was that the strings kept popping out of the slots in the bridge as I played it. This one is easy since all I have to do is cut the slots a bit deeper and angle the backside of the slots toward the tailpiece. I just put the bridge into my mini-vise and cut the slots with my knife until they worked.
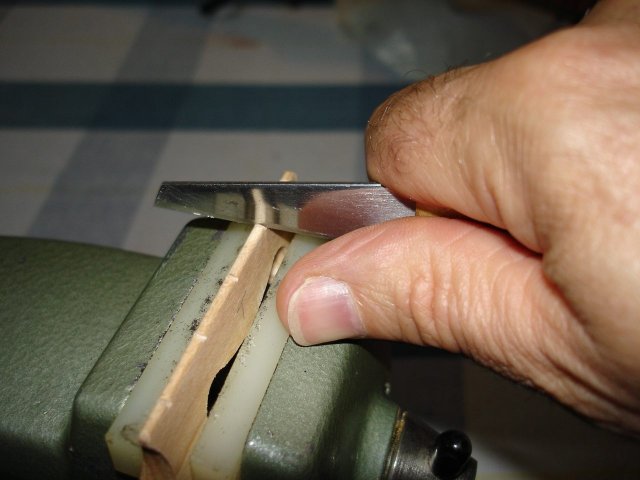
You can just barely see the "T" marked on the bridge. That marks the tailipiece side of the bridge.
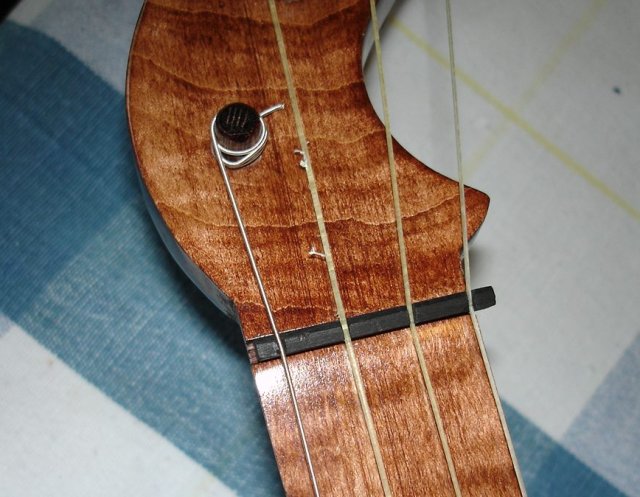
Finally, here is a nasty problem. The nut keeps slipping sideways in its slot. Because of the asymmetrical shape of the peghead, the lateral forces on the nut are not equal, so the nut wants to move sideways when under string tension. I guess when the weather was more humid the nut had swolen tighter into its slot, and that kept it from moving. However, now:
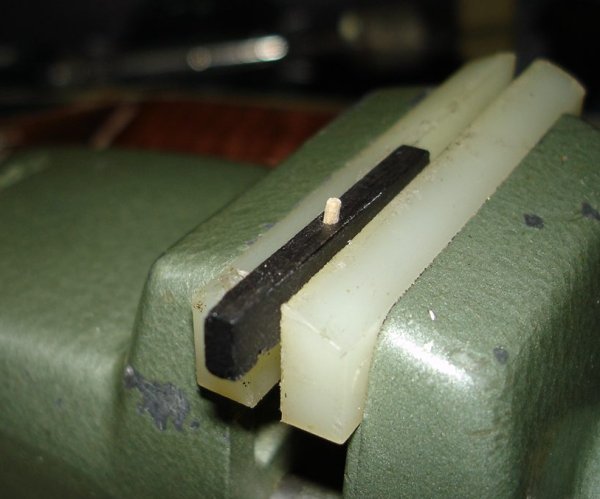
The normal answer to this problem is to glue the nut into the slot. But I don't like glue as an answer to these things. Glue has let me down too many times. Besides, I may have to make a new nut some day, and removing a nut that has been glued could be a problem. So I designed a mechanical solution. I made a pin out of a toothpick to pin the nut into the slot. I sanded the toothpick down to 1/16 inch, then drilled a hole in the bottom of the nut:
I put the little wooden pin into the hole in the nut:
I drilled a matching hole in the bottom of the nutslot in the neck. Then I just pushed the nut and peg down into the nutslot to fix it in place. It took a couple of tries to get the pin the right length for the two holes, but eventually it went home. Here is the fixed nut:
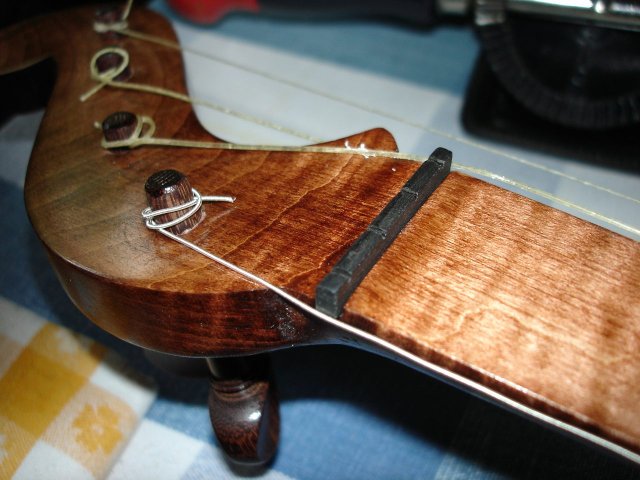
You cannot tell that I have done anything to the nut, but now it stays put. Also, if I decide later that this method is not working out, I can simply remove the pin, make a new nut and glue it in place. No worries.
I can now tune up my banjo without too much angst. It sounds like it has a head cold because all of this moisture has made the head soft. I might try to tighten it a bit, but I might not. If I tighten it too much then it could split the head in the Fall when the air gets try. I will just have to wait and see what happens. At least, tightening and loosening the head is just a matter of working the bracket nuts, like on a modern banjo, right?