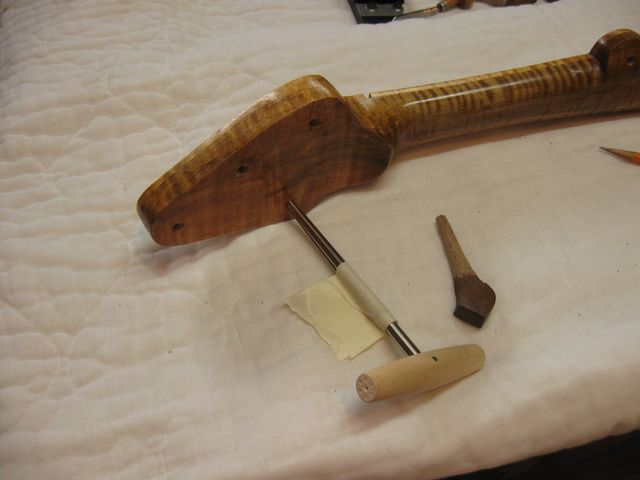
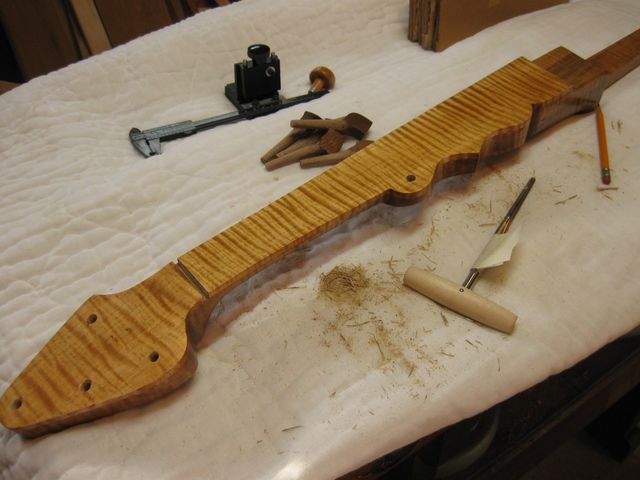
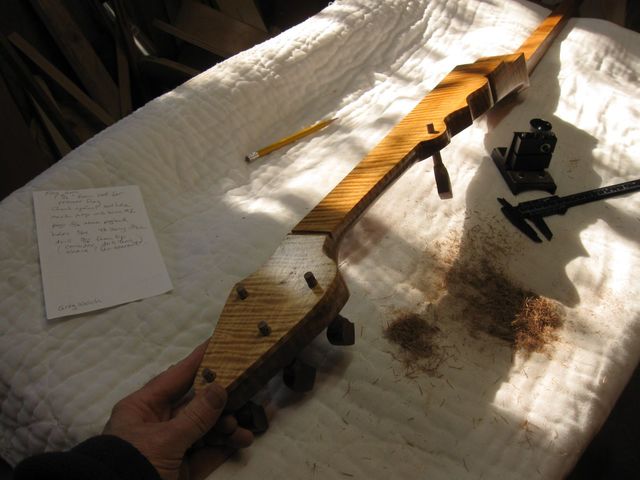
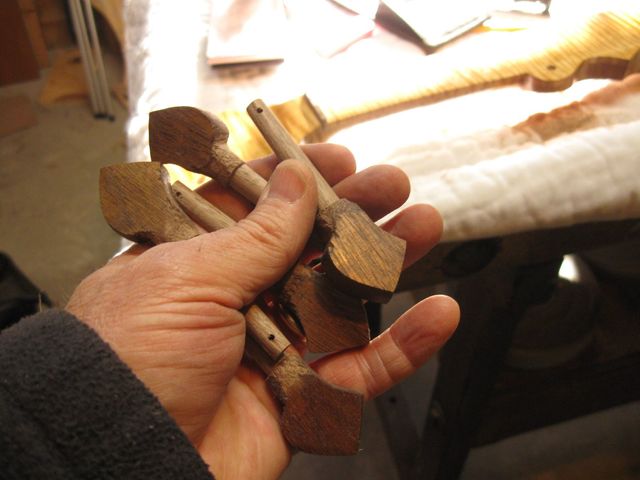
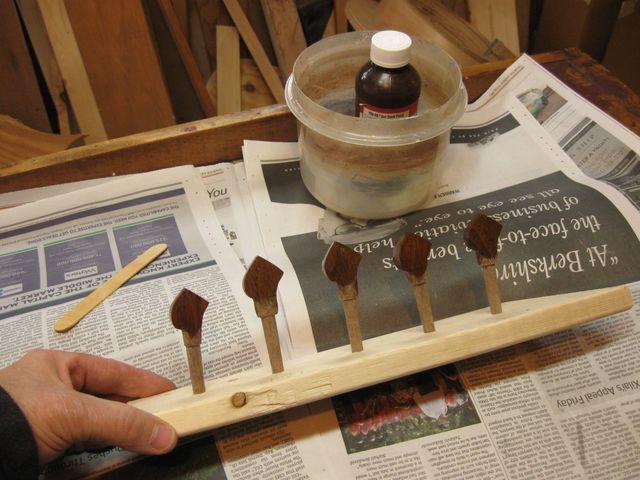
I have finally arrived at the point where I will fit the pegs into the peghead. The peg holes have to be reamed out to the proper size and taper, and the pegs have to be shaved to fit in the holes. Here are all the pieces and parts.
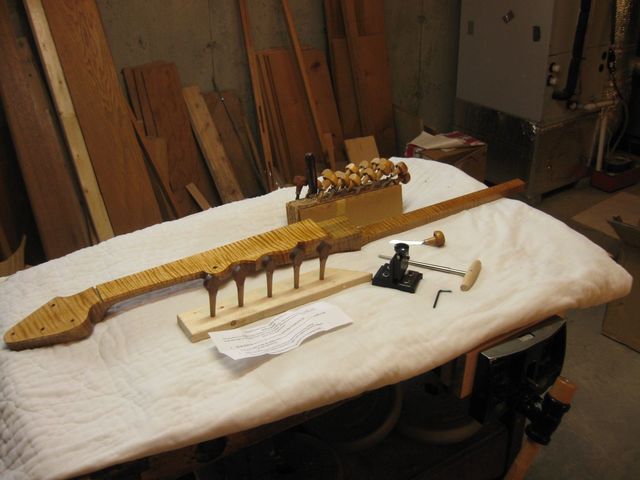
Everything is Ready to Go
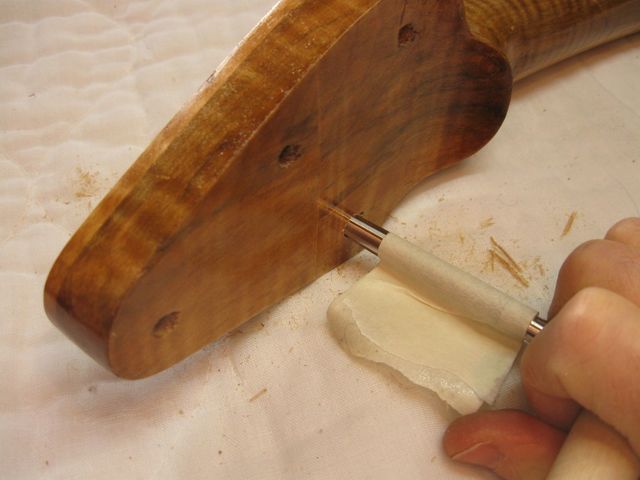
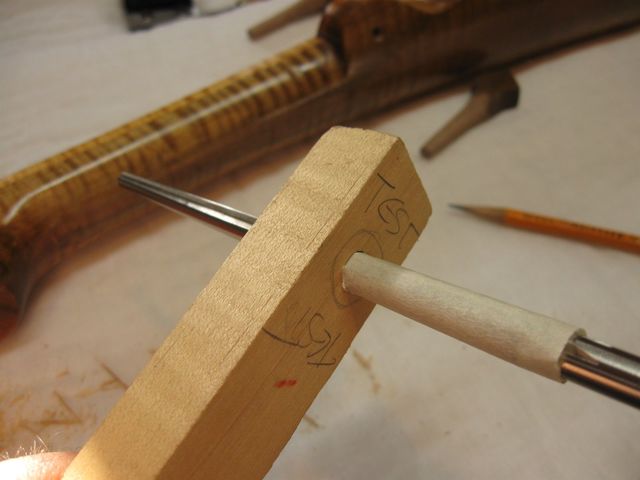
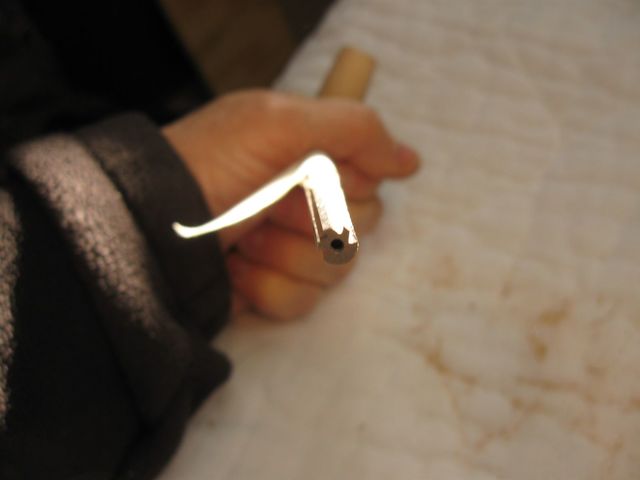
As I install the pegs into the holes, each peg is sized to fit in its own particular hole. It is not wise to move them around from hole to hole. Therefore, I mark each of the pegs on its tip to indicate which hole it goes into. I mark the pegs by engraving into the tip the number of the hole that the peg fits. I use my wood engraver's burin to do the marking.
This is a #1 Wood Engraver's Burin
The #1 burin is the smallest one that I have.
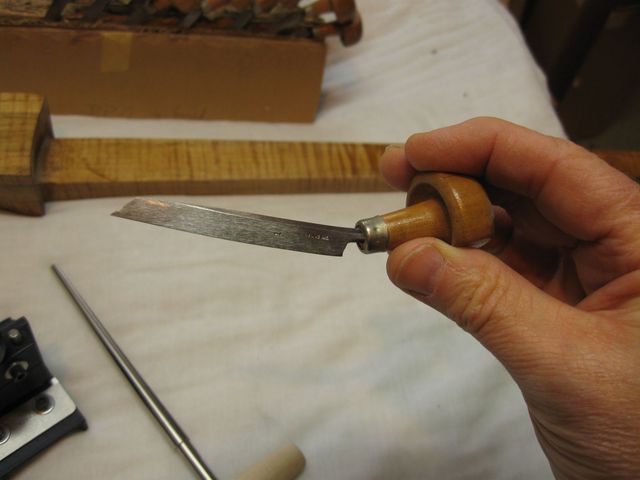
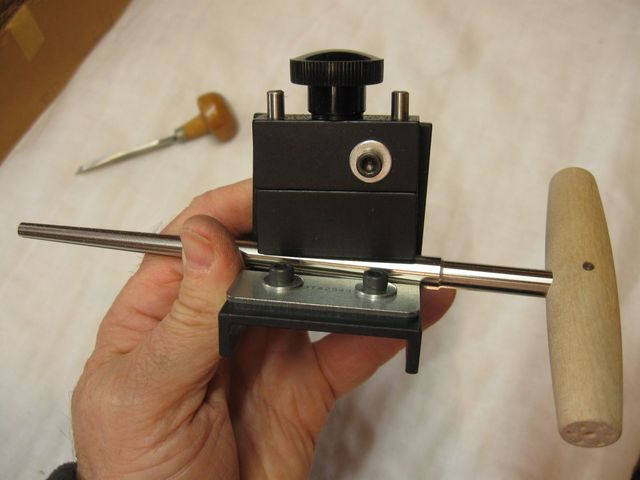
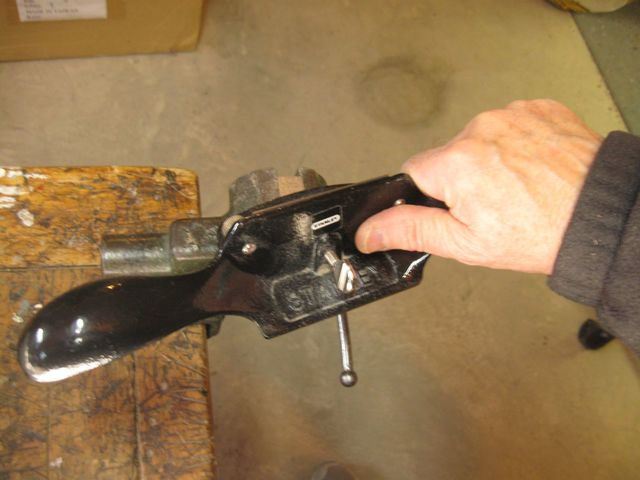
Another tool that I use is a violin peg shaver. It works like one of those old fashioned pencil sharpeners that you use by sticking the pencil into a hole and turning the pencil. Inside is a blade set at an angle, and turning the pencil against the blade sharpens the pencil.
I never could get those dang things to work. I always ended up breaking off the lead.
Anyway, the peg shaver works the same way. It has a sharp blade set at the proper angle, and when the peg is inserted and turned, the peg is shaved to the proper taper to fit in the hole in the peghead. I have used this peg shaver to fit the pegs into my three gourd banjos, and now I will use it to fit the pegs on this new banjo.
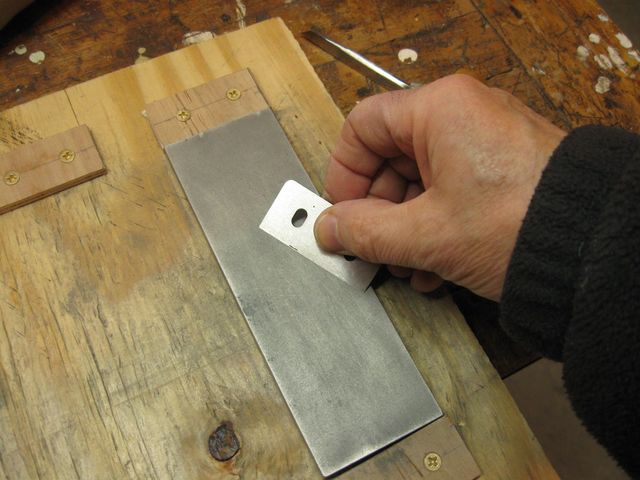
Since I have used the shaver on three other banjos, I thought that it was about time I sharpened the blade. So I took the blade off. It is held in place by two hex key bolts.
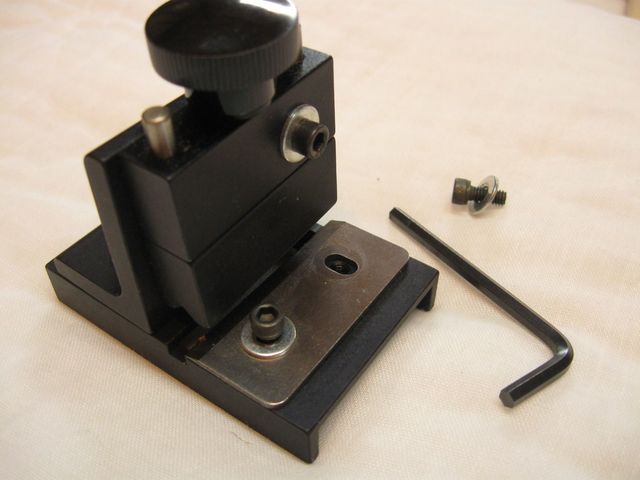
I Removed the Blade by Removing the Bolts
The shaver came with the proper size hex key in the box. After I removed the blade, I noticed that it is a very nice one. Very pretty, but dull now.
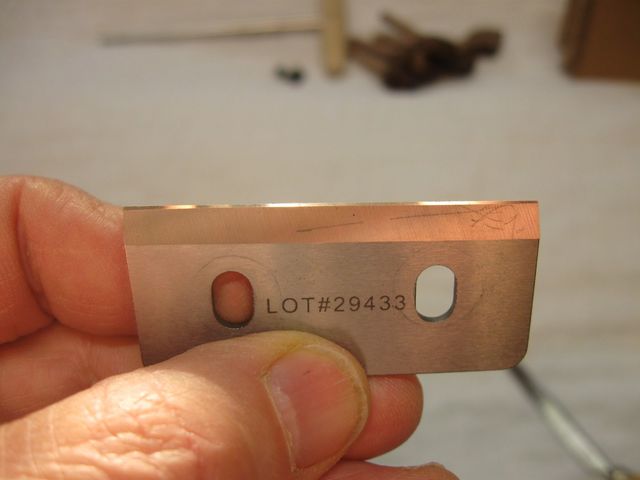
This is a Pretty Blade
As you can see in the photo, the blade has a very nice secondary bevel on it. That is good because that means that I should be able to sharpen it easily using just my fine stone and my extra fine stone.
Just like sharpening any plane iron, I flattened the back.
Flattening the Back
Then I honed the secondary bevel on the blade.
Honing the Secondary Bevel
In addition to the hex key being in the box, there were some directions in the box on how to put the shaver back together and set it up.
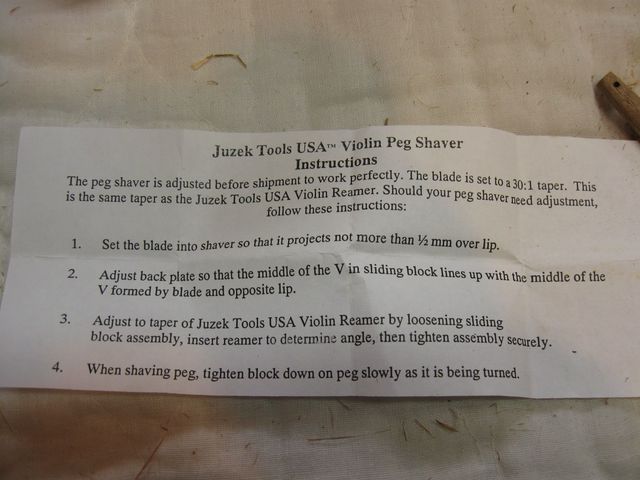
Here Are the Instuctions for the Shaver
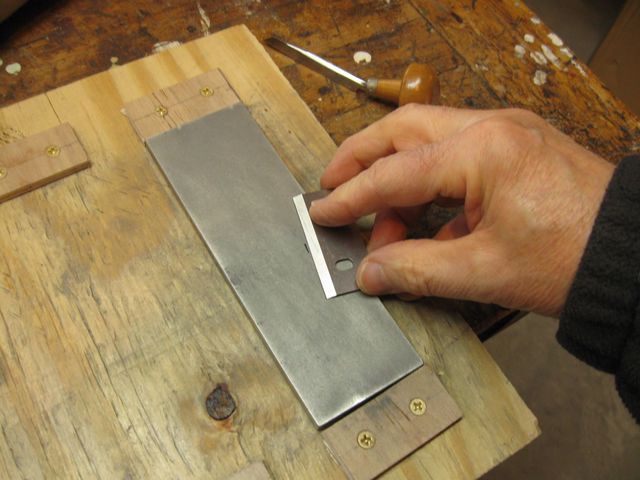
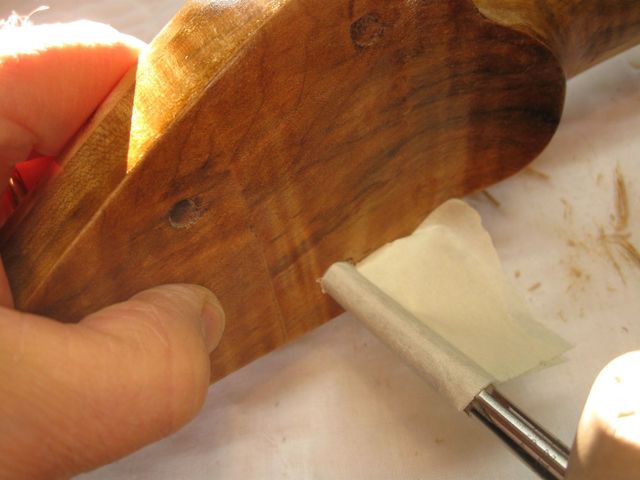
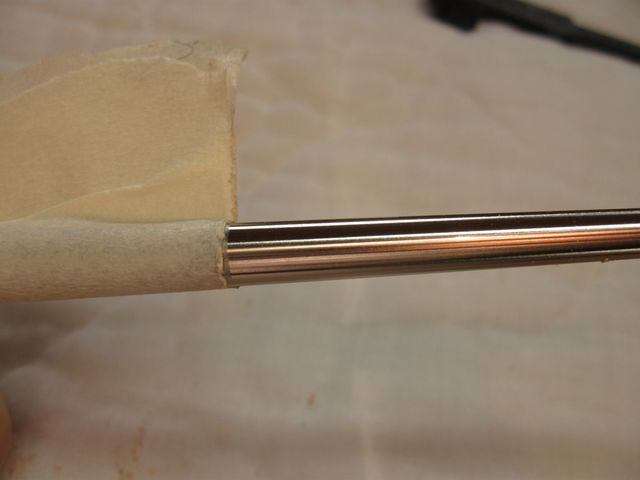
After honing the blade, I put it back into the shaver. The two oval holes in the blade allow me to set the amount that the blade extends past the body of the shaver. You can see in the photo below that I have set it as indicated in the instructions, about 1/2 mm over the edge.
The Edge of the Blade Barely Extends Past the Body
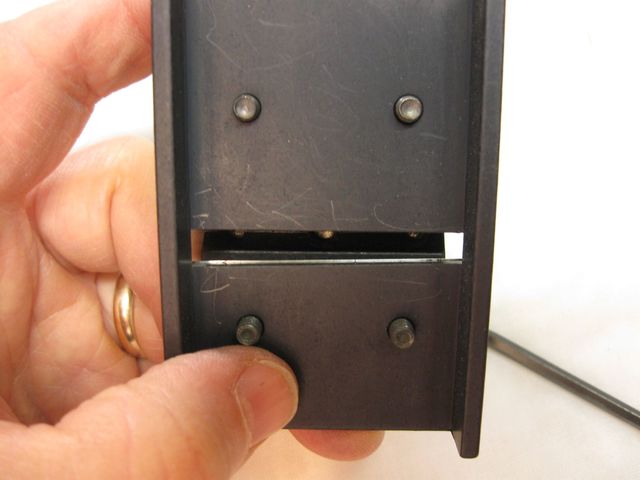
From what I read in the instructions, it looks like the angle of the shaver can be set by adjusting it with the reamer in the slot. Like this....
The Shaver and Reamer Have the Same Taper
Fortunately, the shaver is already set up. I only needed to sharpen the blade. So I put the shaver aside for now and got out the reamer. The plan is to ream the holes in the peghead to their final size, then the pegs will be shaved to fit in the holes.
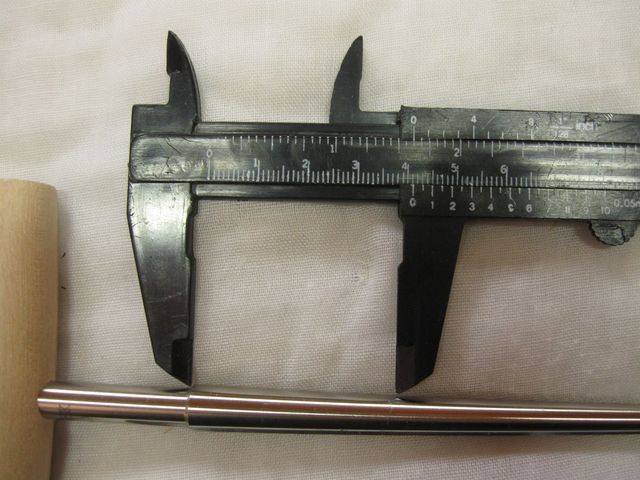
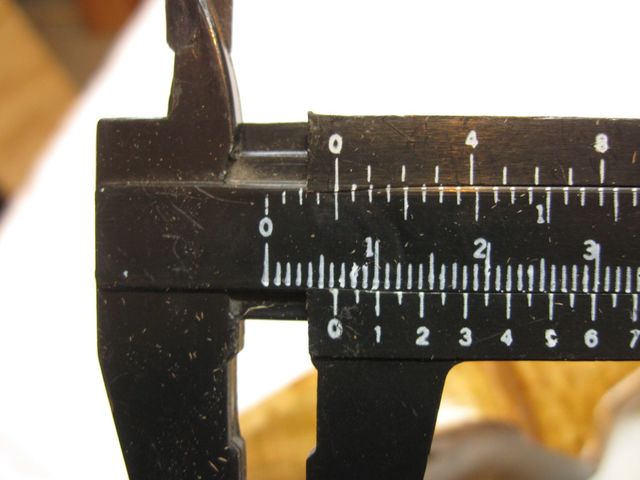
When I first started using these tools, I measured the size of the holes on my Flesher minstrel and set the reamer to ream the same size hole. This turned out to require that I ream out the holes until the reamer is 1 9/16" from the places where the cutting flutes stop. I know that it seems like a strange number, but that is what I measured.
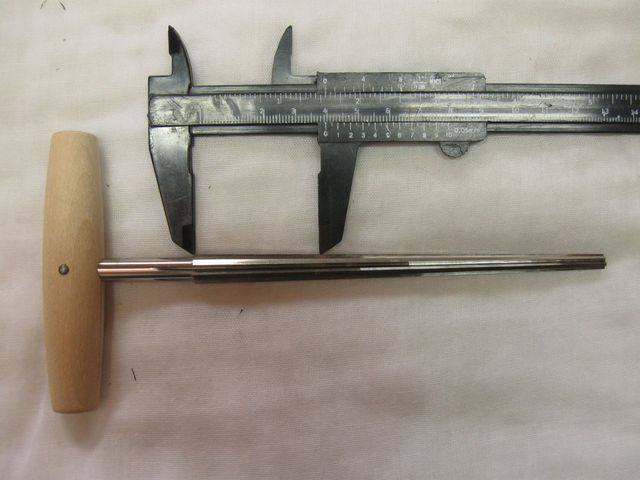
Stopping Point is 1 9/16" From the End
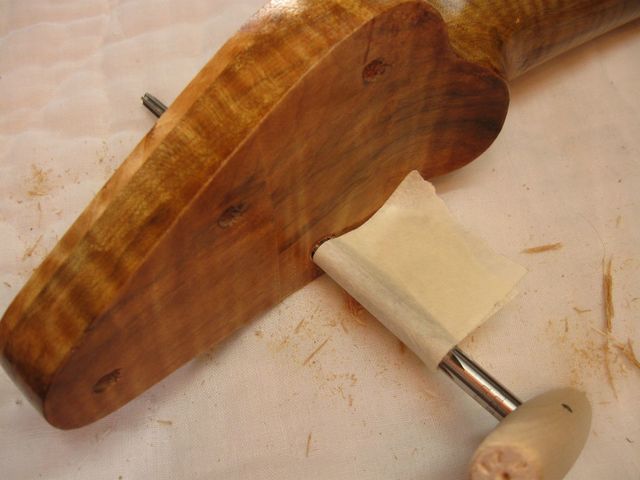
To make sure that I do not go beyond that location I put a masking tape flag on the reamer.
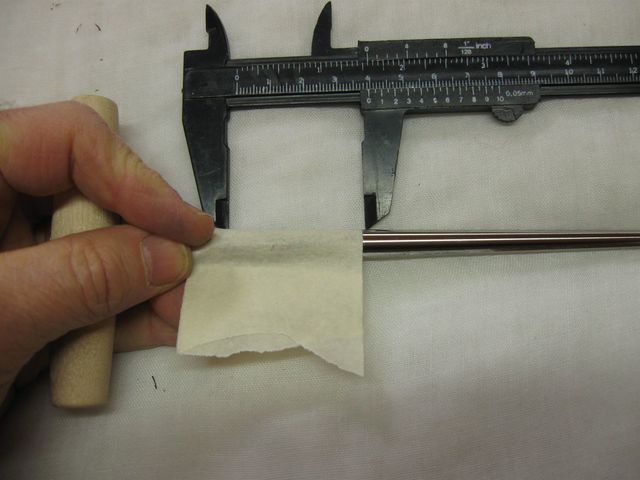
The Flag Keeps me Honest
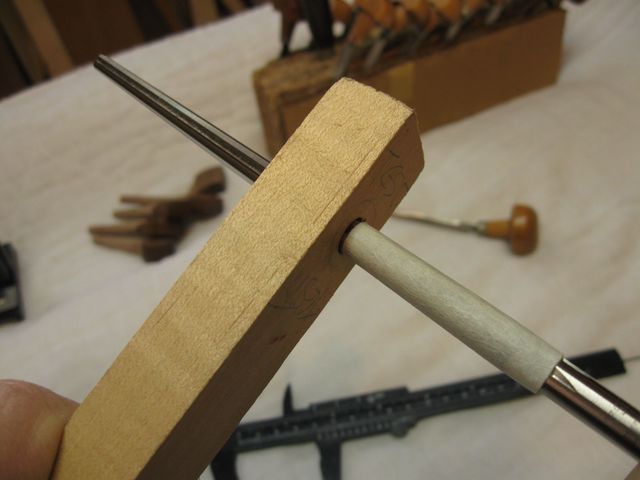
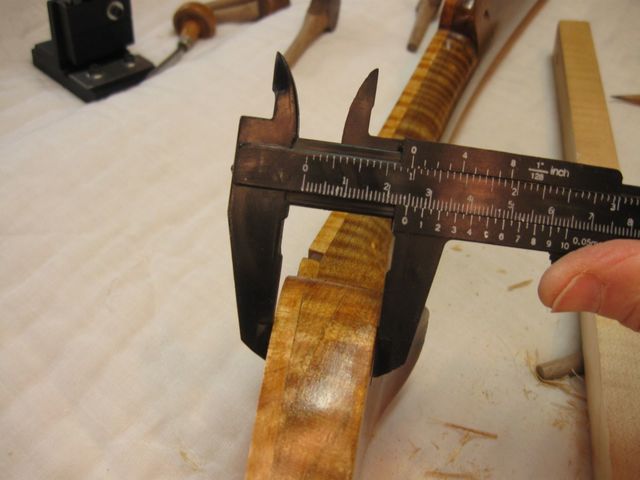
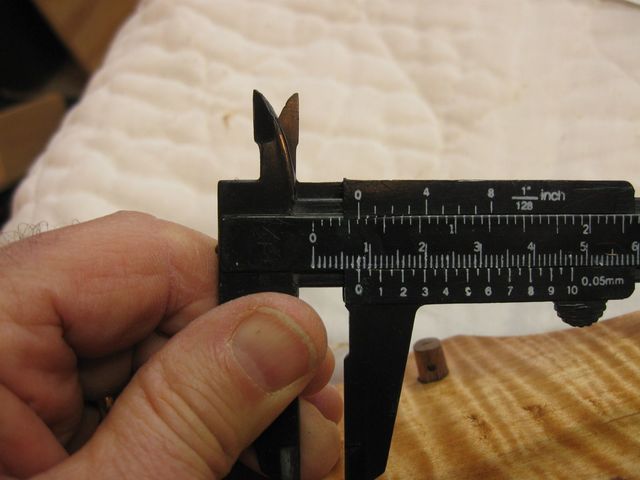
To double check that I have got this right, I checked it against the hole that I used to rough out the size and shape of the pegs.
Hmmmm. Looks a Bit Short
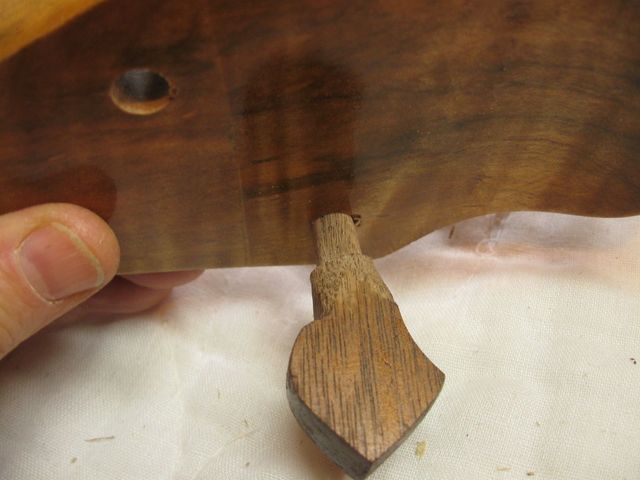
Hmmm. That is a not insignificant gap between the surface and the flag. Maybe my test hole has narrowed down. I don't want to make the hole in the peghead too large and then not have enough wood on the peg shafts to shave them round. I think I should move the flag a bit. I took the flag off, and I measured 1 5/8"
Adding a Bit to the Flag Location
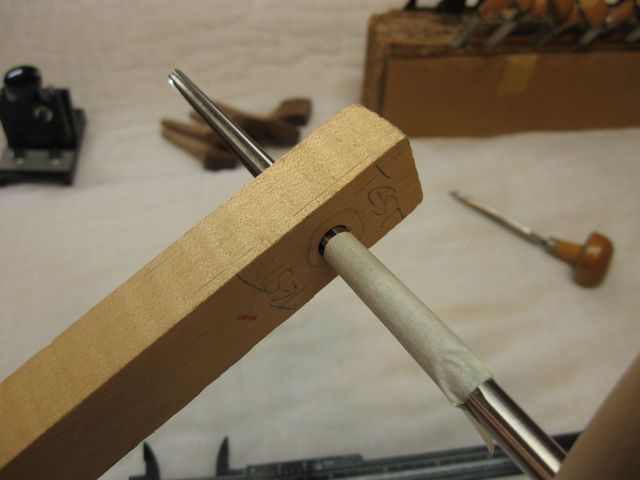
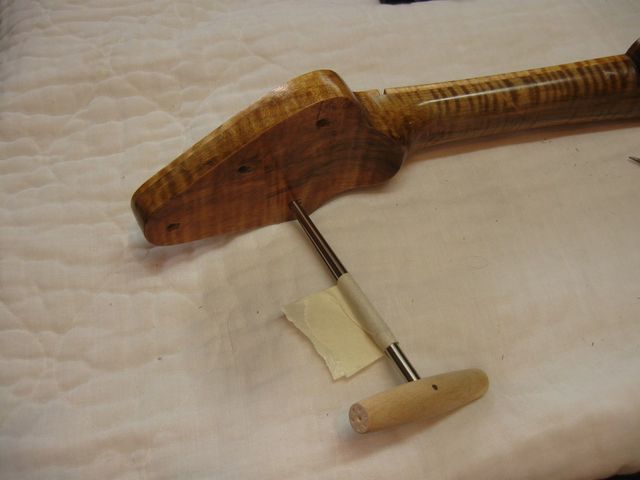
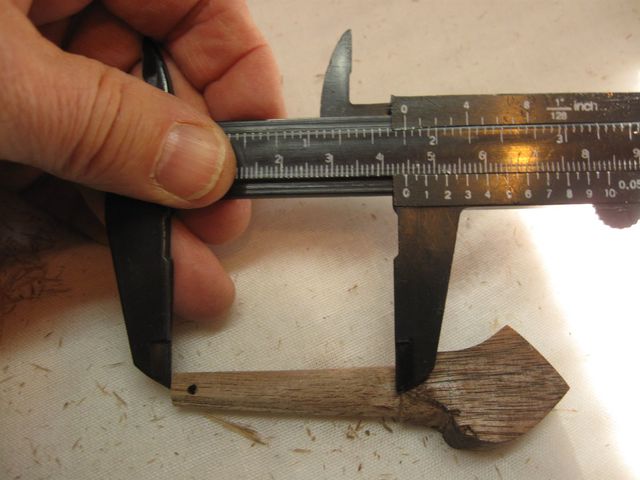
I put the flag there and tested against the test hole again.
That Looks Better
That looks better. I will go with that. I can always make the holes bigger if I need to. Making them smaller is a more difficult trick.
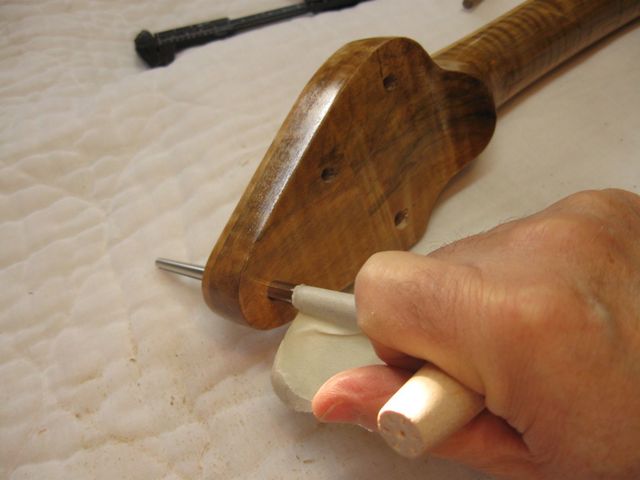
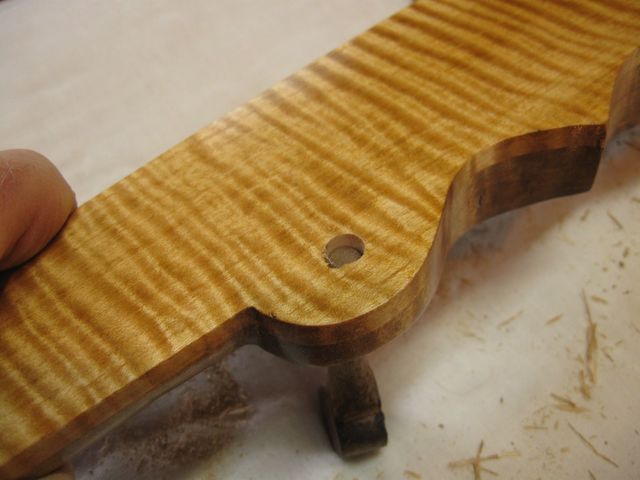
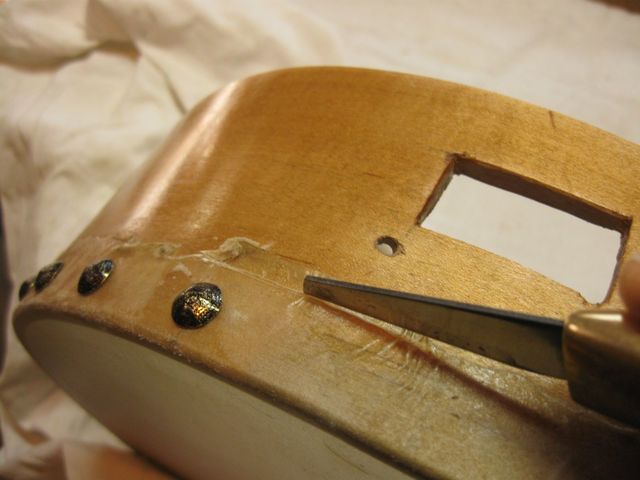
It is time to ream out the holes on the peghead. This is a somewhat scary step because if I mess this up I have ruined the entire neck. It is not easy to repair holes in a peghead. So, I put the reamer into the hole for the first string....... and then I stopped.
The Reamer is In the First Hole
I checked it out from the top side. It is of critical importance that I not mess up and ream the holes from the wrong side. If I did that, the pegs would be sticking up from the front side of the peghead, and would look stupid.
So I check it again.
Yep. That is the way the peg will go into the hole, and I have to ream it in that direction.
This Looks Correct to My Old Eye
OK. So before we cut any wood, step away from the banjo. Take a break. Clear the mind.
Stare off in the other direction, and let the neurons relax.
Staring At the Ceiling for a Few Seconds
Dum de dum.
Just letting the brain settle down.
Maybe look the other way for a while.
Staring The Other Way
Hey. Look! There is that old trolley bell that we inherited a while back. That is a real trolley bell. It makes a wicked big noise when you pull on the chain.
Dum dum de dum.
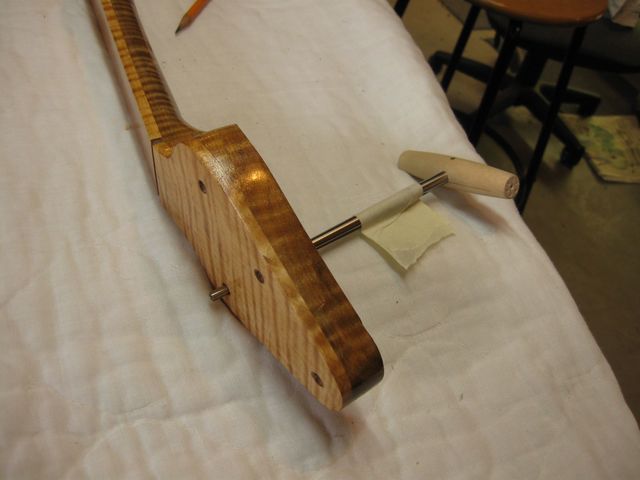
OK. Looking back at the banjo now to triple check that I have not had a brain cramp setting up this reamer.
The Reamer and Peg are on the Correct Side
Yep. The peg goes in from the back side, and so the reamer must also go in from the back side. We are ready to cut some wood.
You may be thinking that this is a bit of overkill in the caution department, but just scroll back through these pages and take a look at some of the dumb things that I have done.
But I am convinced this time that I have it right, so let's ream some holes.
This is the easiest tool to use. I love using this tool. You just put it into the hole, and twist it gently and pull it out to remove the chips. It is self-centering in the hole.

Pull the Reamer Out to Remove the Chips
It is not an auger, so there is no twist to pull the chips out of the hole. The cutters go straight down the side. After a turn or two, I have to pull the reamer out and remove the chips.
Then, back in it goes to ream out the hold a little bit closer to the flag.
Almost At the Flag
Finally, the hole is big enough that the reamer goes in all the way to the flag. Then it is done.
Stop When We Reach the Flag
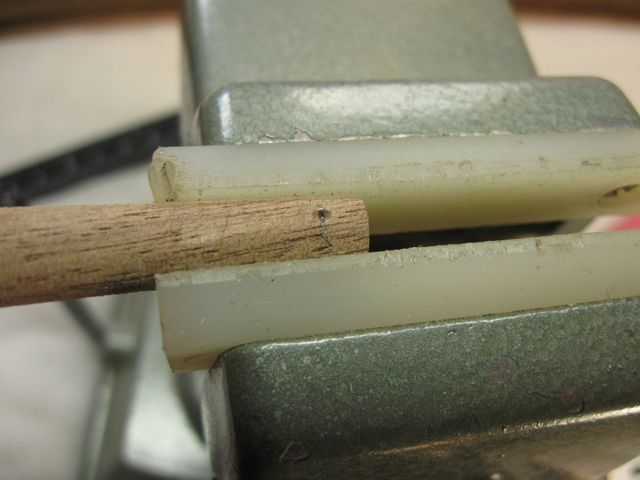
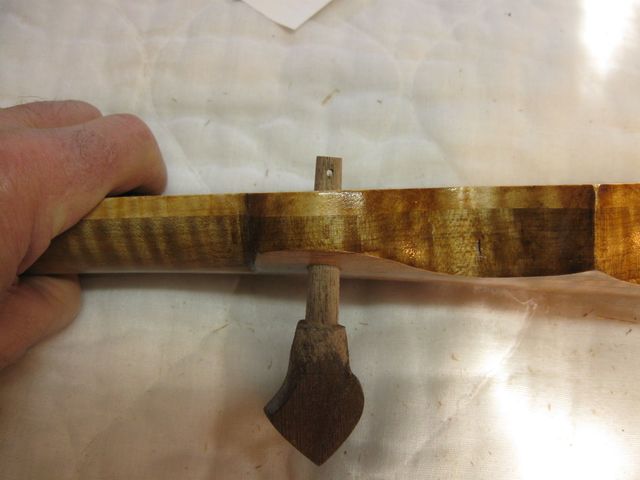
The peg now fits part way into the hole, just like it did in the testing block.
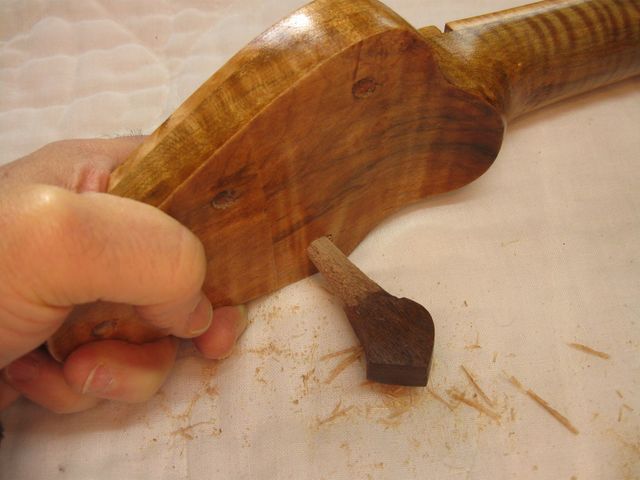
The Peg Blank Fits into the Hole
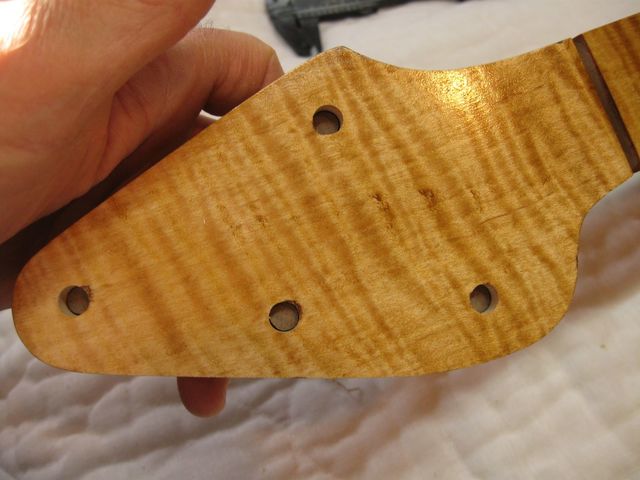
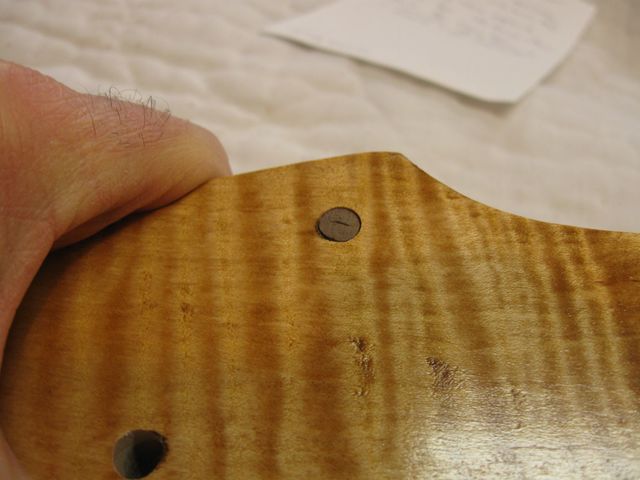
Turn over the peghead to see that the tip of the peg comes out of the hole just a little bit.
Except it doesn't. The tip is beneath the surface quite a bit. That isn't right. Something is wrong here.
Shouldn't the Peg Reach the Surface?
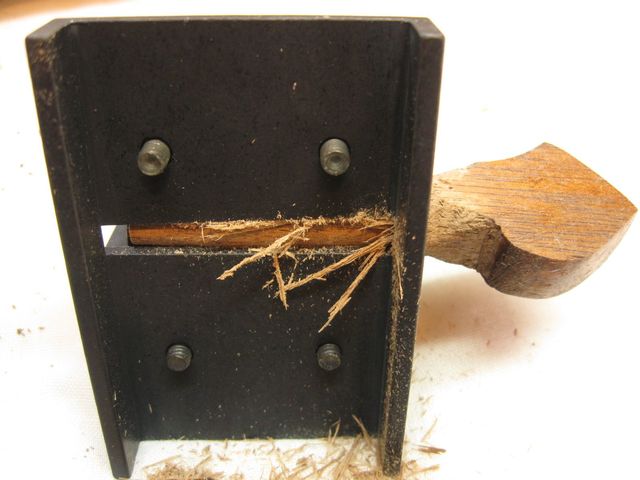
I did not want to cut these holes incorrectly, so I pulled the peg out of the peghead and stuck it back into the testing block to see what is going on.
The Rough Peg Sticks Out of the Hole
I tested the reamer in the test hole to make sure that I have the flag set properly.
The Reamer Still Fits Properly into the Test Hole
The reamer fits properly into the peghead hole too. They are the same.
The Reamer Fits in the Peghead Up To the Flag
I put the peg back into the peghead hole, and it still does not come all the way to the surface.
Strange
Then the answer hit me. The peghead is thicker than the test block. The test block is made from a 3/4" piece of scrap maple.
The Test Hole is in 3/4" Maple
The peghead has the 1/4" overlay on it, so it is 1" thick.
The Peghead is One Inch Thick
Dang. Another brain cramp. I hate it when that happens. Oh well. Everything is OK. I just need to shave the pegs down a bit more to make them fit in the peghead holes far enough to poke all the way through the 1" peghead.
Back to my adoration of these tools. The reamer is tapered to a 30:1 taper. That is the standard taper for violin pegs, which is what this tool was designed to do.. ream holes in violin pegheads. It is round on one side, and has straight cutters on the other side. Here is the round side.
The Round Side of the Reamer
When I turn it over 180 degrees, you can see the cutting flutes on the other side.

The Cutters Are On the Other Half
This end view shows you both the round side and the side with the cutting edges.
The End of the Reamer
The round part of the reamer guides it in the hole and centers it, and the cutters ream it out. Pretty cool.
Back to reaming the holes in the peghead. I am doing the holes in the order of the strings, the hole for string 1 first, followed by the hole for string 2 and so on. So, with hole 1 done, I went on to hole 2.
Reaming Out Hole Number 2
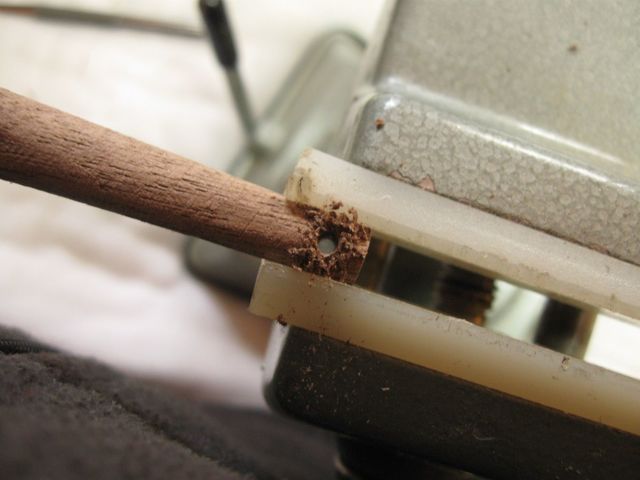
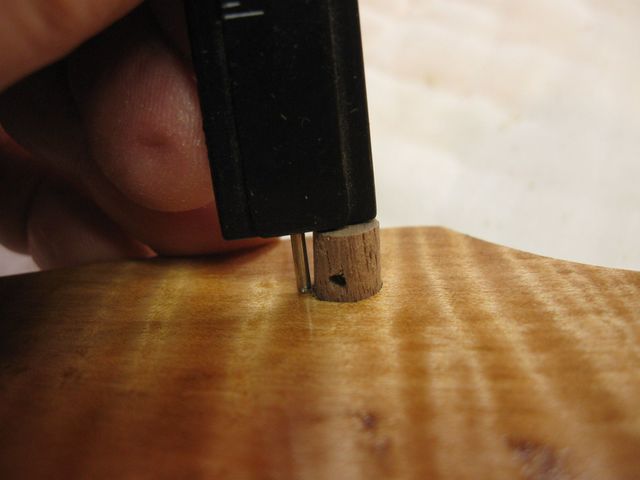
Sometimes the chips get stuck in the flutes, and I have to take the reamer out and clear out the chips with my pencil. Not a big deal.
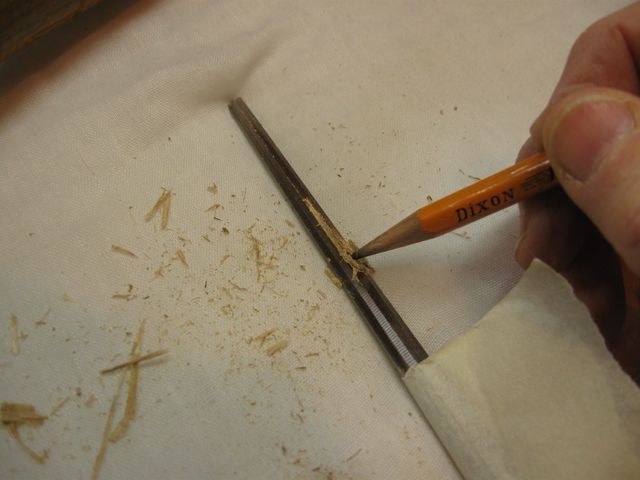
Cleaning Out the Chips With a Pencil
Reaming hole number three.
Reaming Hole Number Three
Reaming hole number four.
Reaming Hole Number Four.
Finally, last, but not least, reaming out the hole for the fifth string peg.
Reaming Out Hole Number Five
There it is. All the holes have been reamed out to the proper size and taper. It doesn't look any different, but it is.
The Holes Have Been Reamed
Shaving the pegs is next. Right now, the pegs have not been assigned to their holes. The blanks are unmarked. I started by choosing the peg for the fifth string hole. That hole is not as deep as the others, probably slightly less than 1" deep. So I chose one of the fatter pegs that does not come all the way through the hole. I simply tried all the pegs in the hole until I liked one of them best.
The Best Peg for Hole Five
Once I had identified the peg, I marked it with my burin by carving a Roman V ( for five ) into the tip of the peg. This will be Peg Five forever.
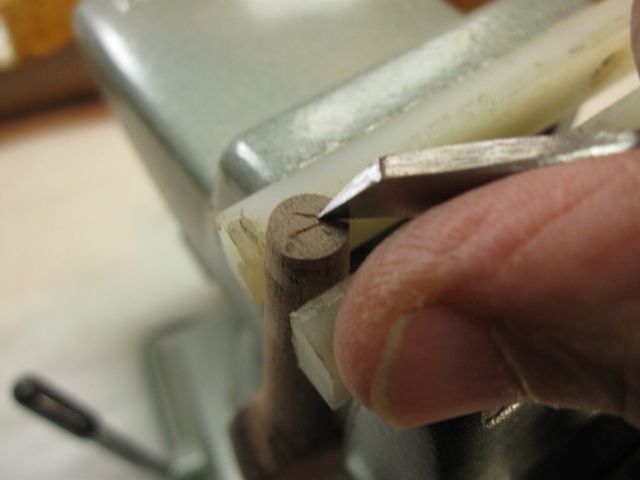
Marking Peg Five With a Roman V
I did the other pegs in a similar way. I juggled them in and out of the peghead holes until they were all pretty even in how far down they were.
Pegs In the Holes
All the pegs look about the same. After I took this photo, I took out the pegs one by one and marked them each with a hole number. I used roman numerals again because they are easy to cut. So after I was done, I had pegs numbered, I, II, III, and IIII. I used IIII for the fourth peg because I didn't want to put IV on it, and it just looks better. They do that on clock faces too. The IIII looks better across the face from VIII than IV would look. It is an aesthetic balance issue. I did it on the banjo pegs just to be a snob.
I took the pegs out of their holes one by one and marked each hole number with the burin.
The Pegs From the Top
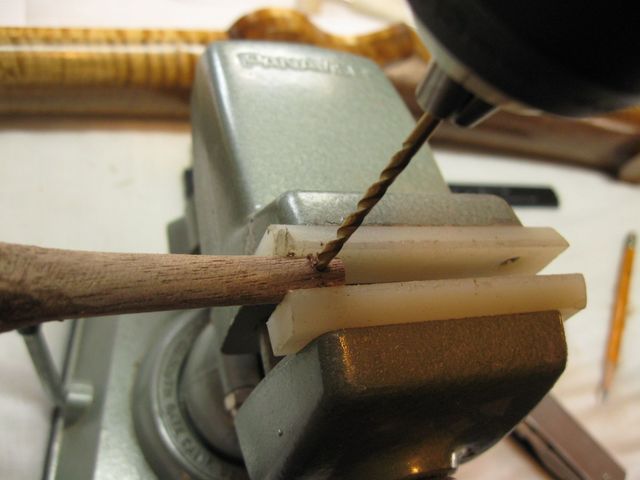
Last time I did this, I shaved the pegs to size and then drilled the holes for the strings. When I did that, I found considerable tearout on the tips of the pegs after drilling..... and after shaving. So this time, I drilled the holes before shaving the pegs, and then when I shaved the pegs to fit the holes, I cut away the tearout.
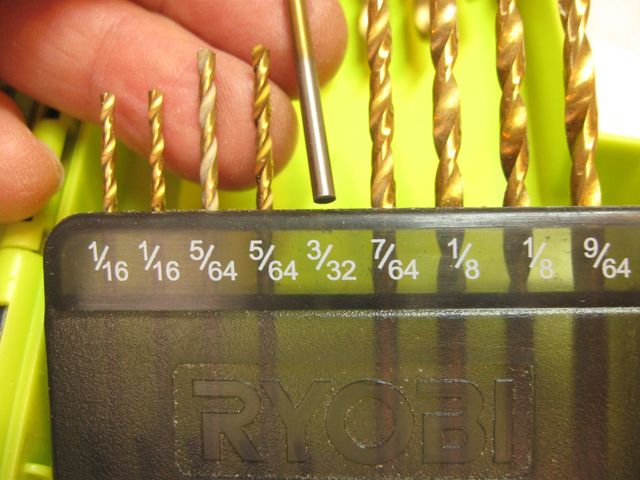
The hole in the fourth string peg needs to be a bit larger than the holes in the other pegs because I will be putting a fat, wound string through the hole (twice). So I pulled out the 3/32" drill bit to drill the fourth sting peg hole. I came onto that size by trial and error a few banjos ago, so I just know to use it.
Drill the Fourth String Peg Hole 3/32"
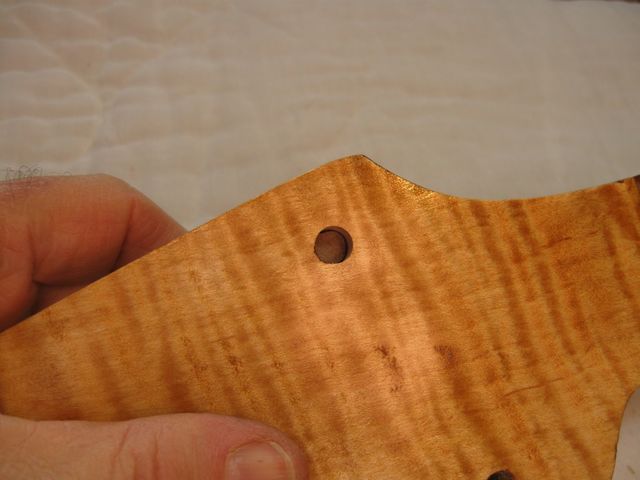
I drill the hole 3/16" down from the tip. When I am done, the peg will protrude 5/16" above the peghead. So that will provide a 1/8" space between the hole and the top of the peghead. Once again, I am using those numbers because I used them before and they worked.
Mark the Hole 3/16" Down From the Tip
I drilled all of the holes perpendicular to the direction of the button because I can do it any way I want to so I did. Mark the location with the center punch.
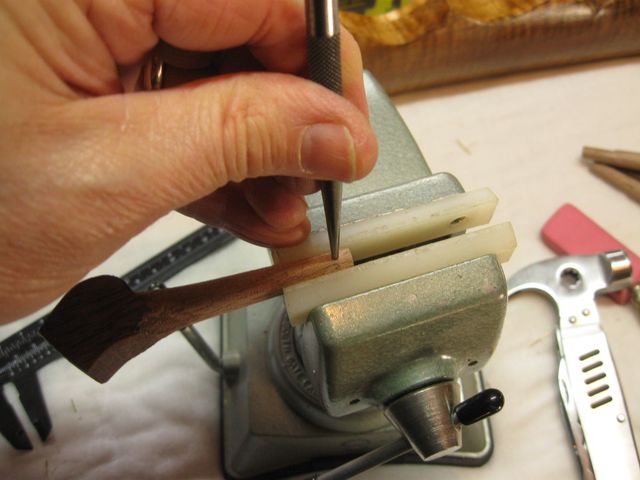
Mark the Hole With the Center Punch
Here is where to drill.
Drill Out the Dent
Confirm one last time that I have Peg Number IIII.
Make Sure That I have Peg IIII
Yep. That is Peg IIII. Drill 'er out.
Drilling the Hole
Here it is. That is a big hole in that peg.
A Big Hole
The other holes are 5/64" in diameter. So I pulled out that bit.
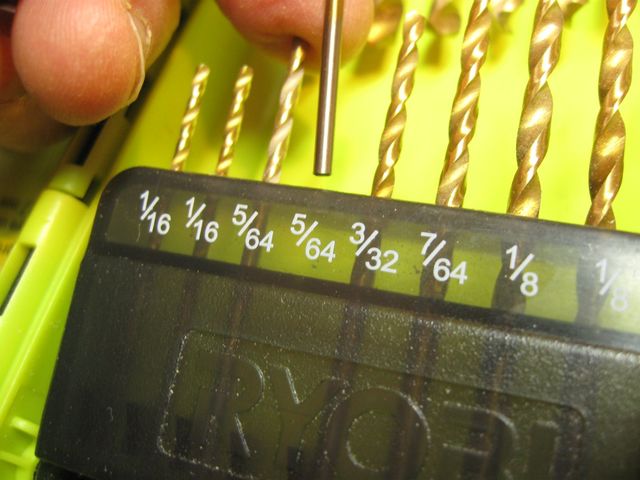
I Drilled the Other Four Pegs 5/64"
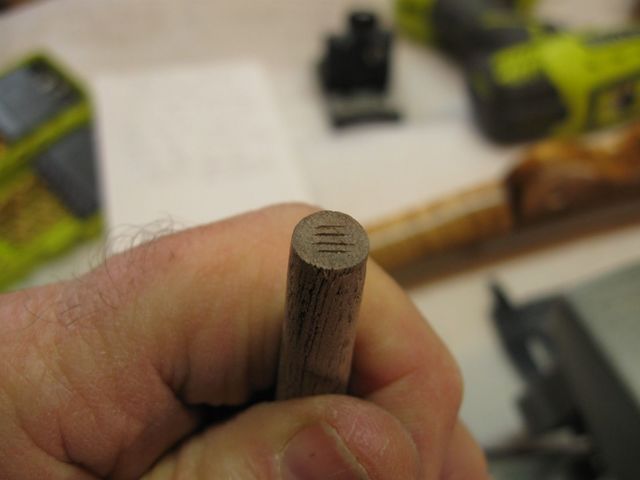
As expected, I got some tearout. Here is one of the pegs after drilling. When I shave the peg down to fit in the hole, most of this damage will be removed.
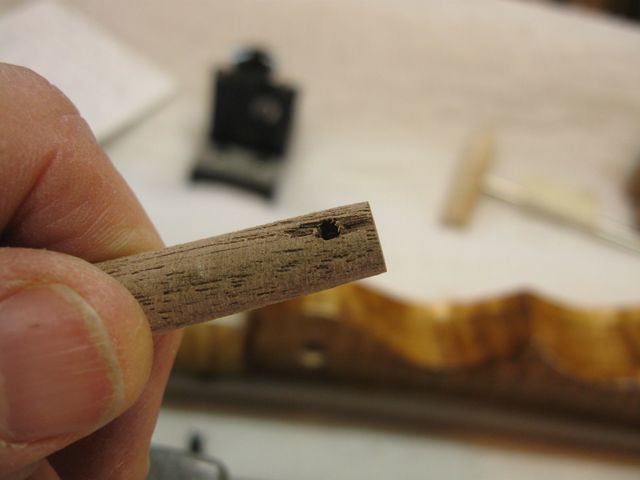
Tearout From Drilling the String Hole
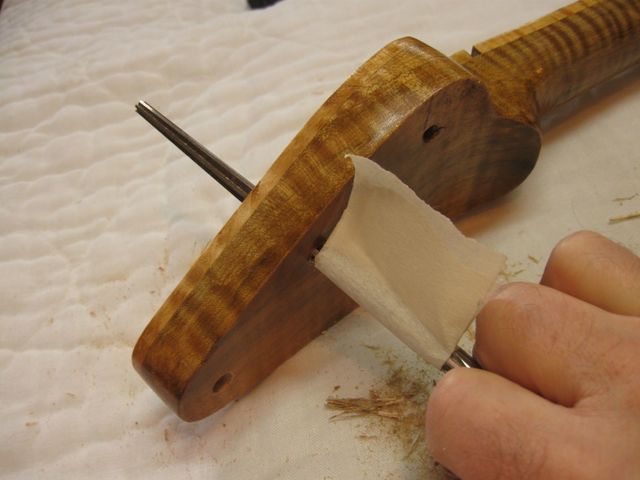
I did the pegs in the order of the holes again, Peg I first. The shaver is pretty easy to use, but not as easy as the reamer. I turned the knob on the top until the moving bar that pushes down on the peg is all the way at the top. Then, I put the peg into the shaver a specific distance and turn the peg against the blade.
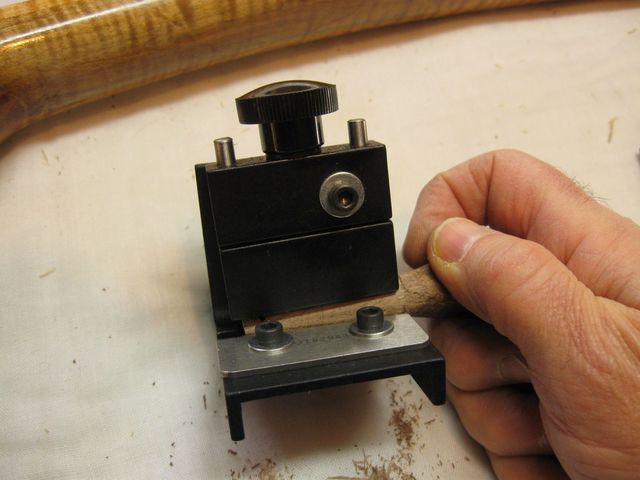
Shaving a Peg
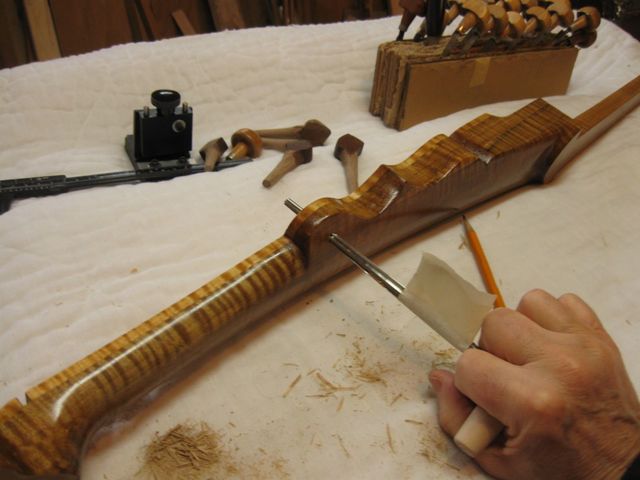
It takes one hand to hold the peg and the other hand to take the photo, so I can't show both hands in action at once. When I am shaving the peg, I am turning the peg with my right hand and working the shaver knob with my left hand. Here is how I hold the shaver with my left hand.
The trick is to gradually lower the sliding block down on the peg while turning the peg in the slot. The sliding block presses the peg down onto the blade, and it has to move as the peg gets thinner.
The Left Hand Works the Moving Block
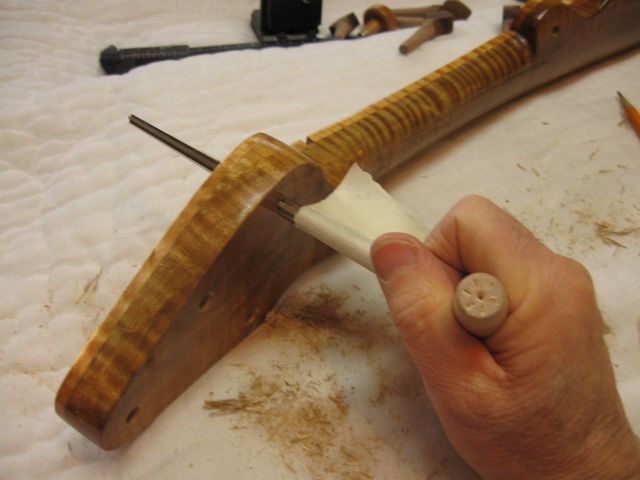
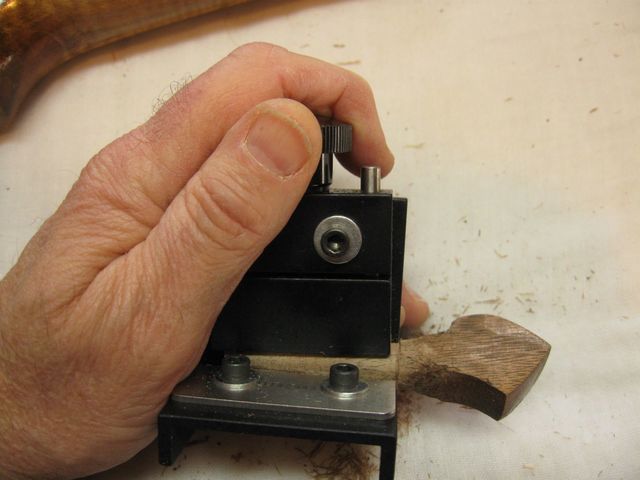
Turning the shaver over, you can see that it is taking wood off of the shaft up by the button. That means that I did not rough in the taper properly. The peg shaft tapers too quickly. But that is OK because the shaver is taking care of that.
It Is Cutting Near the Button
I shaved it and tried it in the hole and shaved it some more and tried it in the hole again. Here it is with the tip even with the top of the peghead.
The Peg is Even With the Peghead Surface
I kept shaving and fitting and shaving and fitting, and finally the string hole was peeking above the surface.
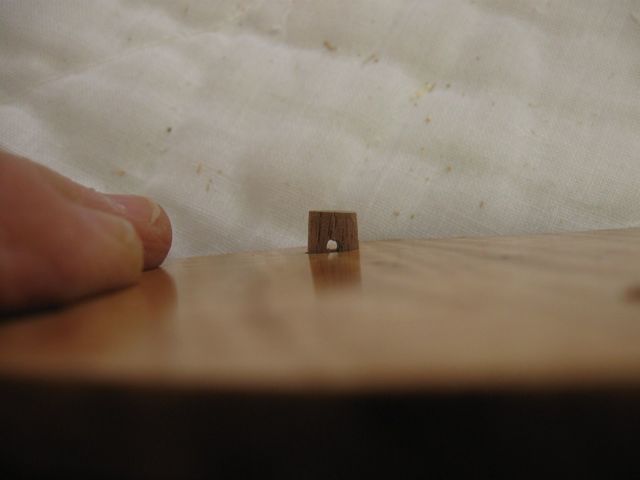
The Hole Has Arrived
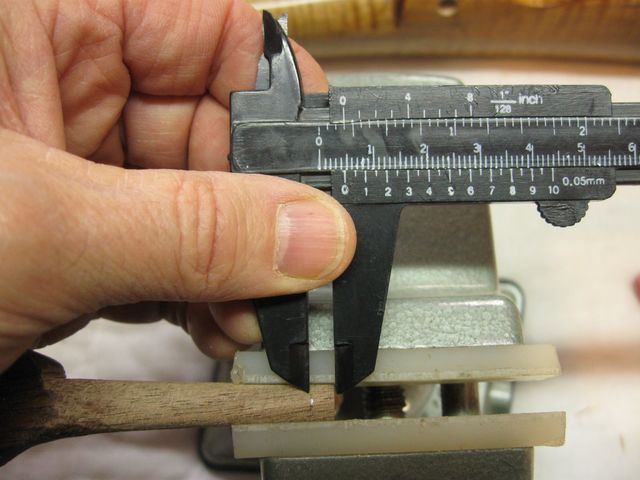
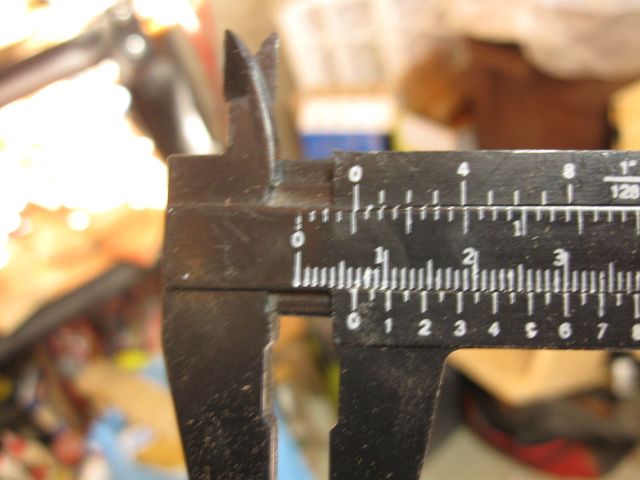
As I got close to the end, I measured the distance of the peg tip from the surface of the peghead.
Measure the Distance
Not quite there. I am looking for 5/16" above the surface.
Not Quite There Yet
Shave and fit; shave and fit. Finally, we get there.
It Measures 5/16"
Looking at the back of the peghead after I am done, it is clear that there is space left on the shaft of the peg, so all is well.
Peg From the Back
I measured how far up the shaft I had shaved the peg. I have shaved about 1 3/4" of the shaft. I will do the other pegs the same.
About 1 3/4"
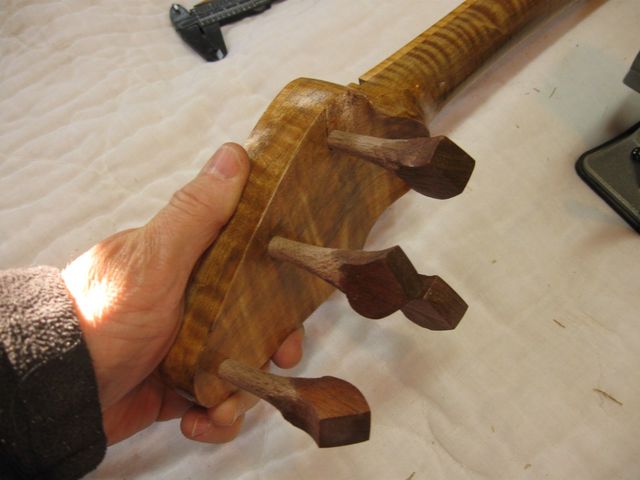
Tick tock; tick tock. A couple of hours go by doing the same thing to the other pegs. And here it is, with all the pegs installed in the neck.
All Five Pegs Have Been Fit To the Neck
Taking a look at it, the fifth string peg seems to be leaning toward the heel a bit. I really need to get a drill press involved in this hobby.
The Fifth Peg Leans
It looks a little funny, but it will work. Besides, I can't redrill the hole.
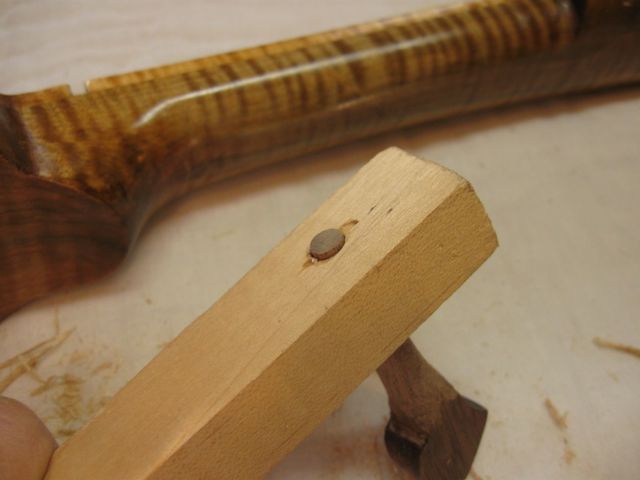
I had some time left in the day, so I decided to make the nut. Here is one of the nut blanks that I cut off of the peg blanks.
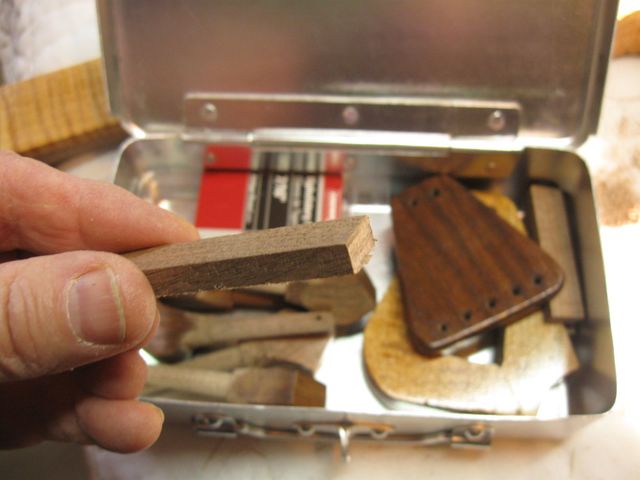
A Possible Nut Blank
You can see that it is way too big to fit into the nut slot... which is good because that means that I can cut it down to size.

This Is Way Too Big To Fit
I measured the width of it against the neck and cut off the end with my dovetail saw.
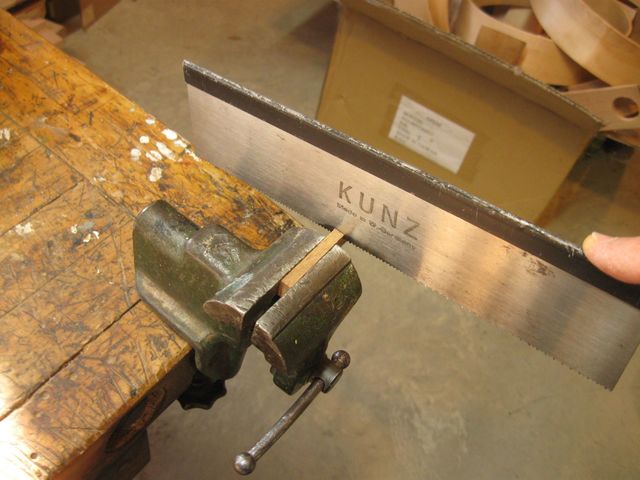
Cutting the Blank To Length
The cabinet scraper takes wood off quickly, especially with this soft walnut. So I used that to thin down the blank.
Scraping the Blank Thinner
I finished up with sandpaper. Even that cuts the walnut quickly.
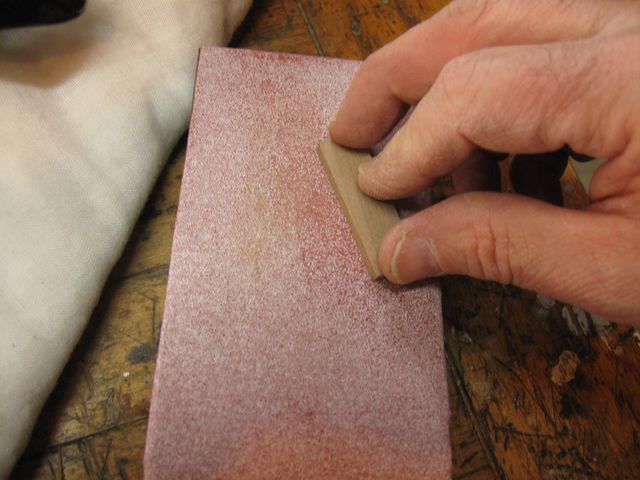
Use Sandpaper for Final Sizing
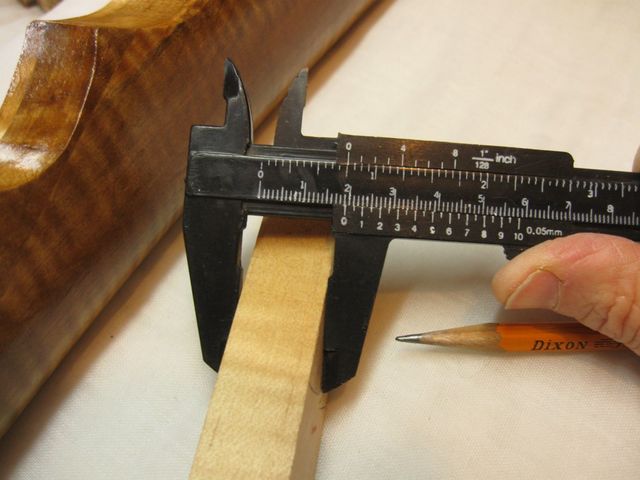
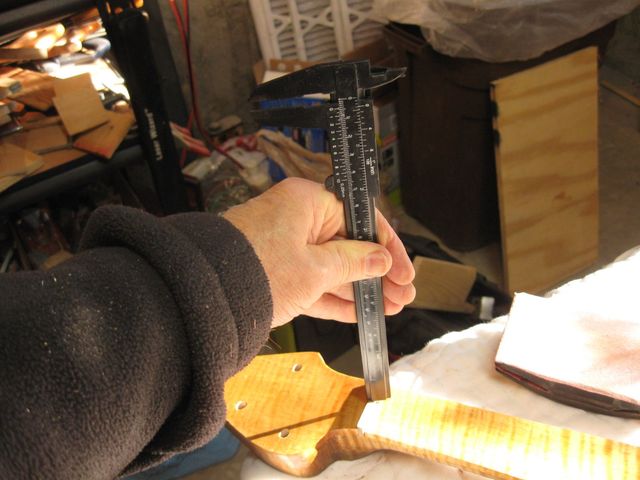
After I fit the nut into the slot, I measured how tall it was.

Measuring the Height of the Nut
Looks like it is just over a quarter inch above the surface of the neck.
The Nut Is 1/4" Above the Finger Board
I took the nut out and measured how high it is. Just under a half inch. So that means that it sits just under 1/4" in the slot... which happens to be the thickness of the finger board.
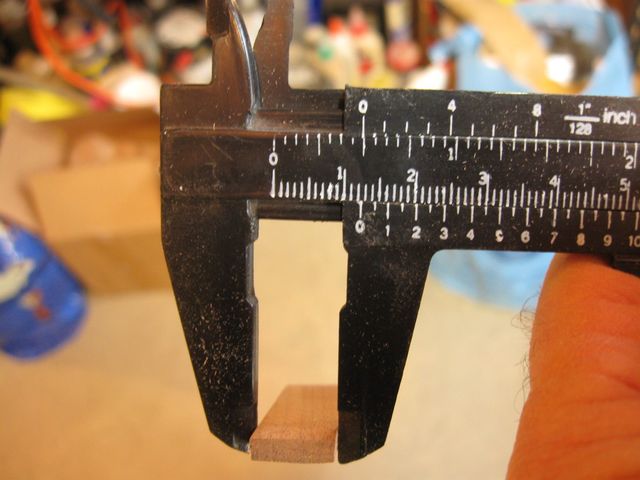
The Nut Blank is Just Under 1/2" Tall
I set my strings at 1/8" above the finger board, so I will cut the slots down to that depth. I do not want to have another 1/8" of wood sticking above the tops of the strings, so I need to take some of the top off. I decided to take the nut down so that it will be 3/16" above the finger board. That was easily done with the cabinet scraper again.

Reducing the Height of the Nut
When I got it down to 3/16", I quit.
The Top of the Nut is Now 3/16" Above the Finger Board
Four strings go across the nut. The fifth string stops at the fifth string peg. So I need to cut four notches that are equally distributed across the nut and 3/8" apart. To start, I found the center of the nut.

Mark The Center of the Nut
I marked slots for the second and third strings 3/16" from the center line. That puts them 3/8" apart and centered on the neck. Then I erased the center line. The first and fourth strings were then marked 3/8" from the second and third strings. Here are the results.
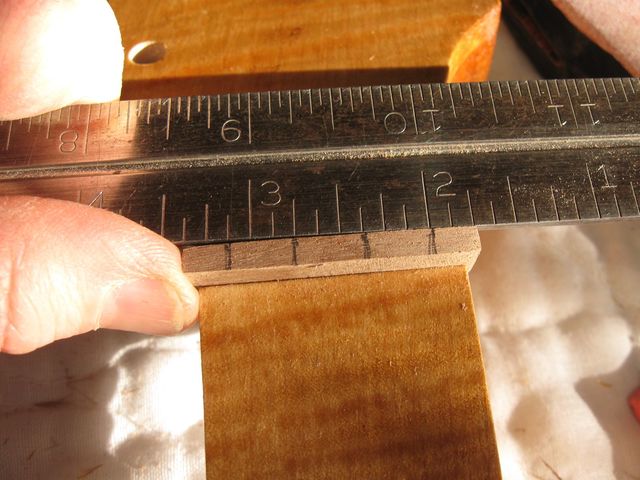
The Positions of the Strings Have Been Marked
I used my triangular file to score the nut at each of the marks. These are not the real slots for the strings, but they are starting points for when I actually set up the banjo.
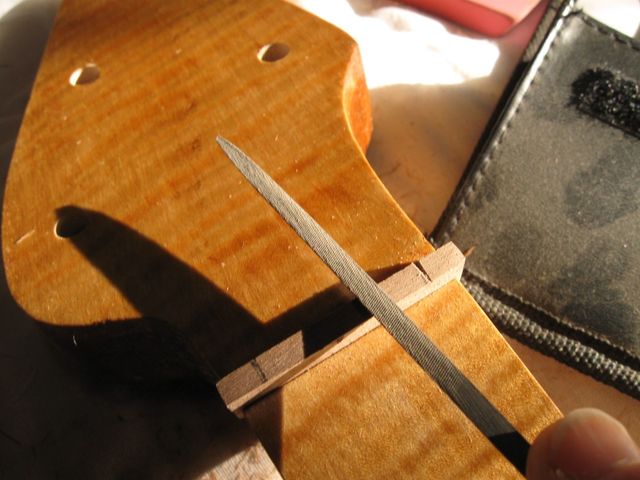
Filing Notches in the Nut for the Strings
Here they are, evenly spaced and notched.
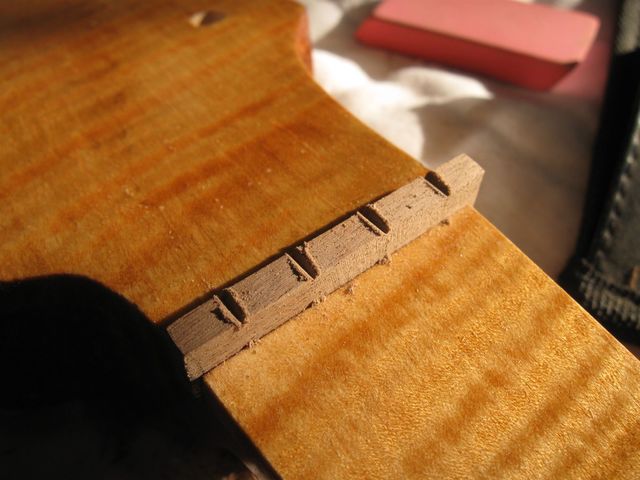
The Notches Have Been Made
OK then, that's done. Now I have found the pile of shaped and drilled banjo pegs. I have a handful of them, and they all look pretty much alike. Fortunately, I marked each one with its hole number, so putting them back into the holes was pretty easy.
A Nest of Banjo Pegs
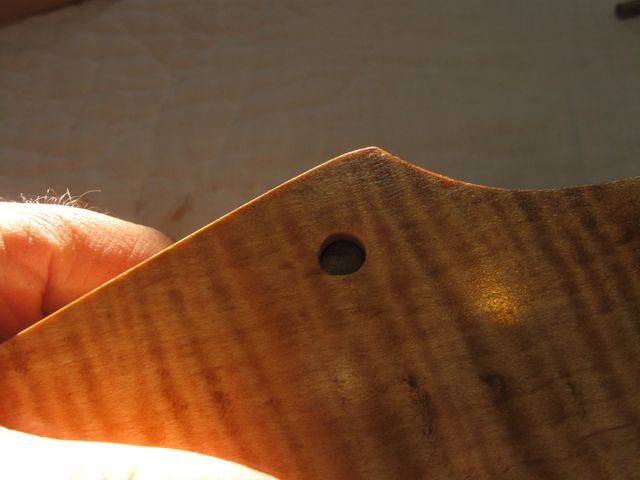
Here is the banjo neck with the nut and the pegs installed.
Wow! That flame maple really lights up when I hold it in the sunlight.
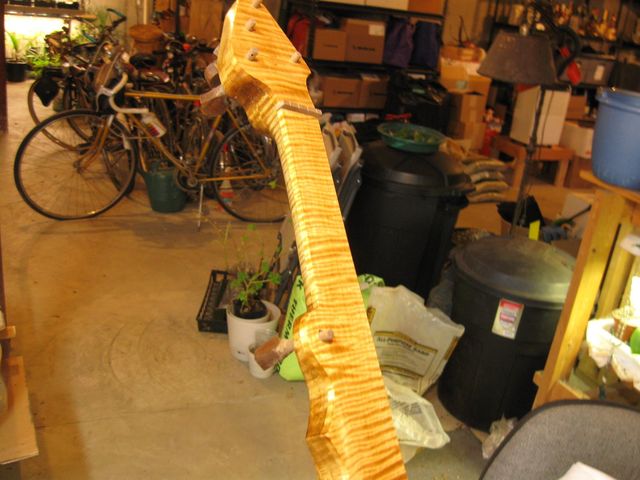
That is One Hot Looking Neck
Here is a photo of the neck stuck into the hoop. Looks like a banjo.
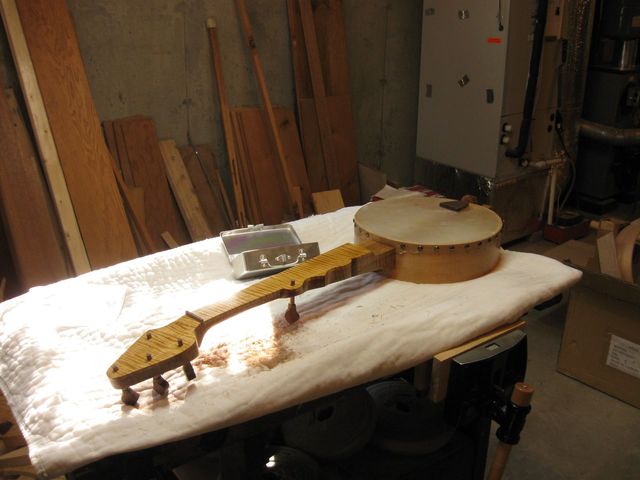
The Neck and Hoop Are Rejoined
One thing that I noticed after I put the neck and the hoop together was that I really dislike some of the extra, ragged skin that got glued down to the hoop.
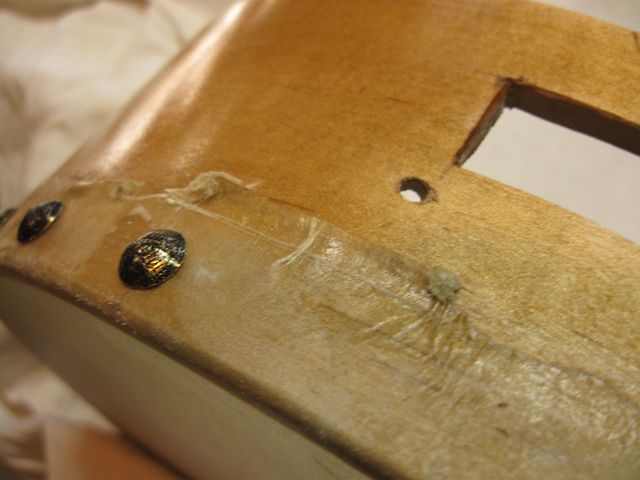
Ick
So I got out the shop knife and picked at it until I could pull if off of the hoop.
Cutting Off the Ugly Extra Piece
Here it is again, all put together with the neck and the hoop and the tailpiece. The bridge sitting on the head is one that I found in one of the gig bags. I will duplicate it for use on this banjo. I put this old one there to see how it looks.
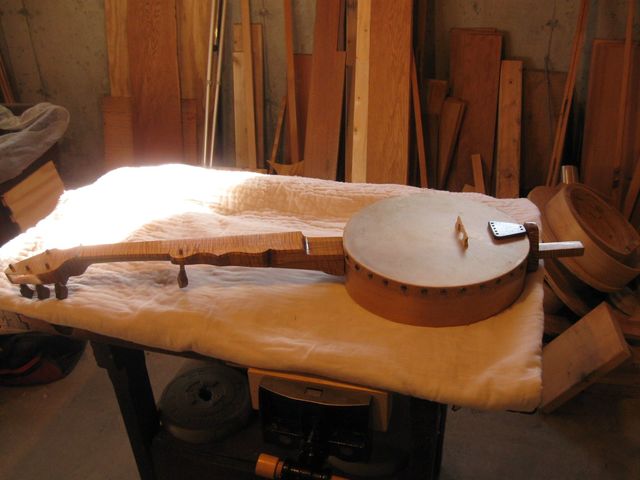
All the Parts Are In Place
One last thing before I put this one to bed. I took the pegs out of the neck and added one more coat of oil to the buttons. They looked like they needed one last coat.
I Put One Last Coat of Oil on the Buttons
That's it for today. It is Thanksgiving today. Happy Thanksgiving, everybody. I'm going upstairs for some turkey.
