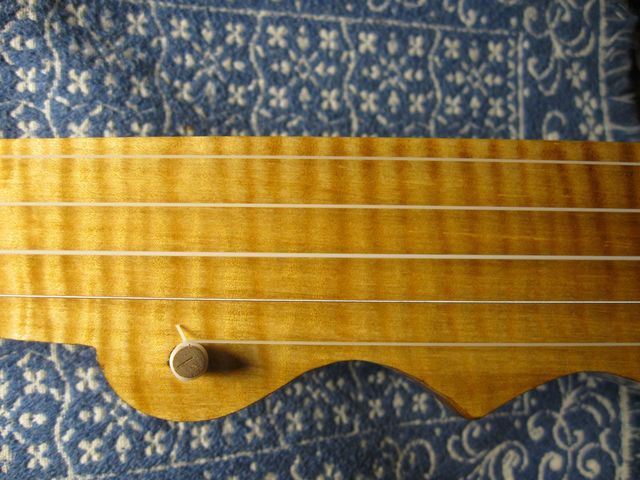
This is the exciting part, setting up the banjo and seeing how it plays and what it sounds like. Here is pretty much all that I need for today's work... the banjo and the strings.
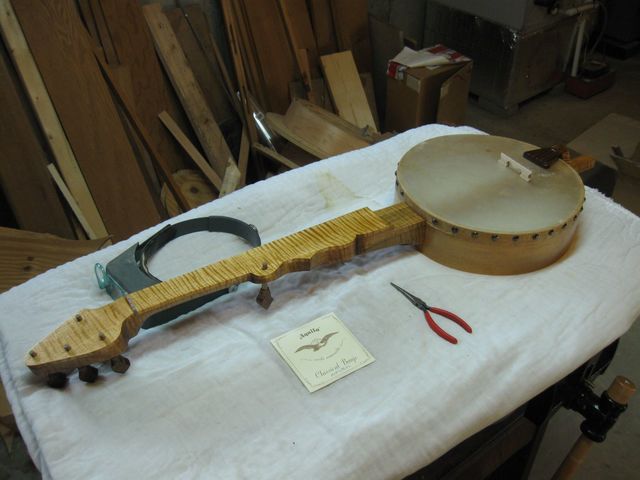
All I Need Today Is the Banjo and Its Strings
I put a set of Minstrel gauge Nylgut strings on it. They are made of a special plastic formulation to sound and feel more like real gut than nylon strings. I have used them on several banjos, and I like them a lot. They are very stretchy when new, but aside from that, they work very well.
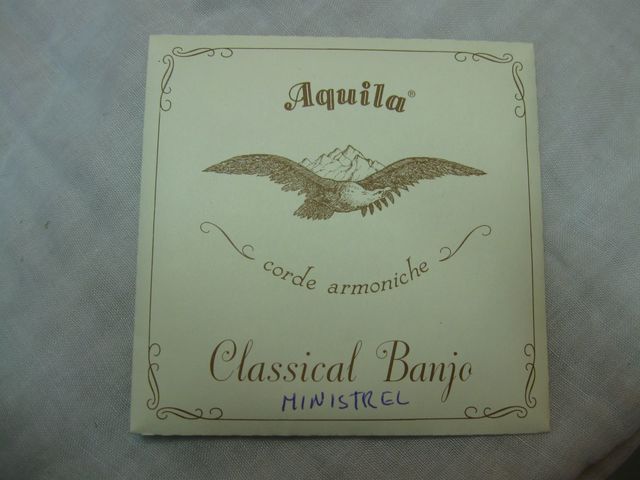
Here Are the Strings
The strings are color coded in the package. The legend for the codes is on the outside of the package.
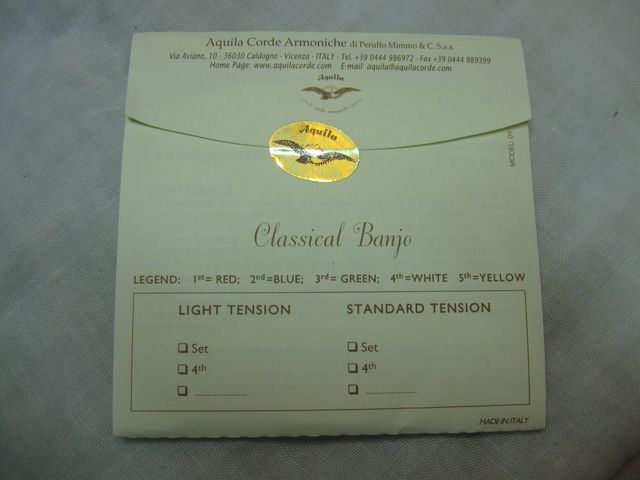
The Strings Are Color Coded
Here are the strings themselves, with colorful dots on them to identify which is which.
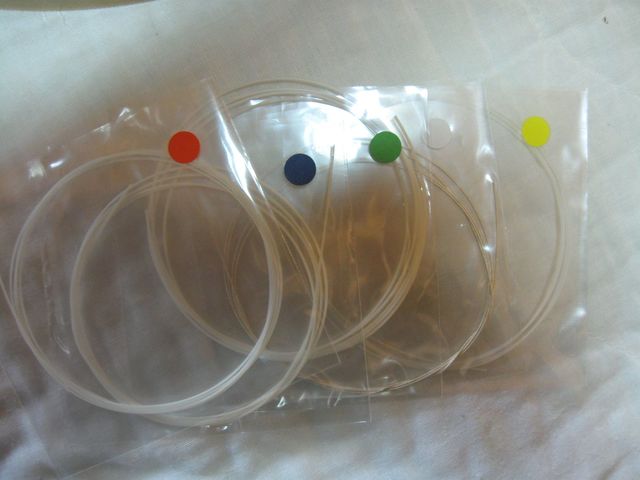
I Guess Color Blind Banjo Players Need Not Apply
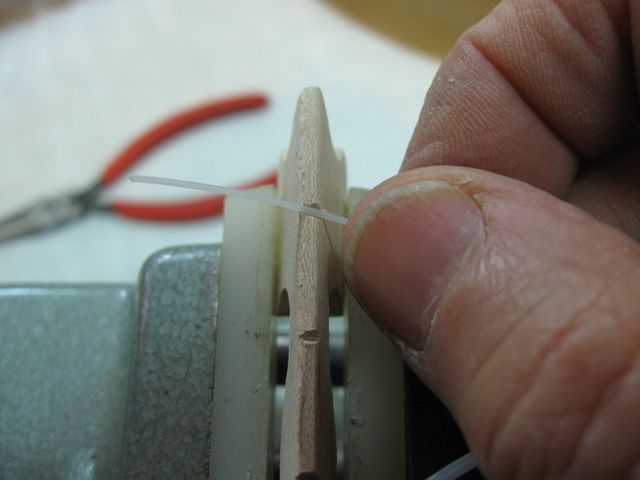
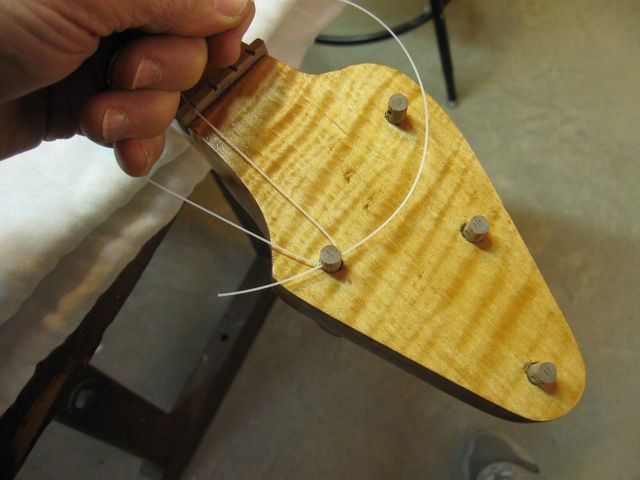
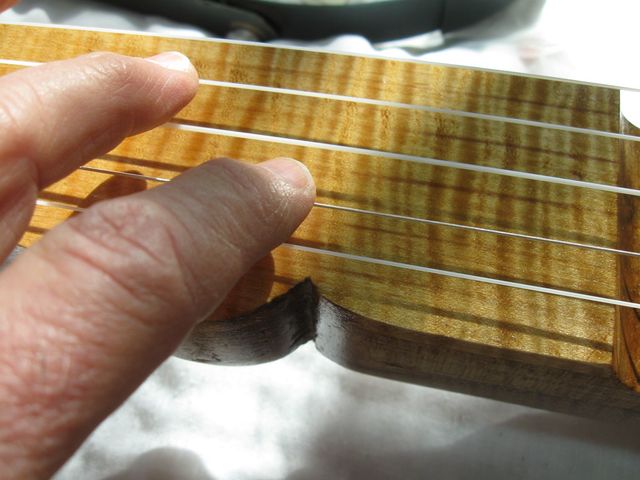
I cut each nut slot to fit each string. I do not rely on a set of sized files, I just carve each slot to fit the string that is going into it. So I took out the first string from the package and put it up next to the notch that I had made in the nut.
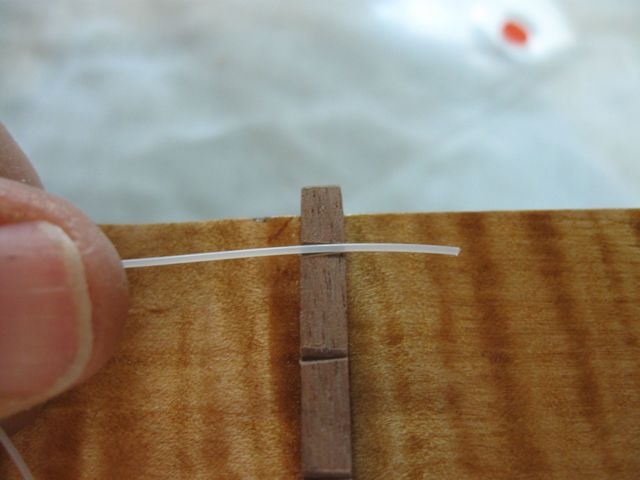
Compare the String To the Notch
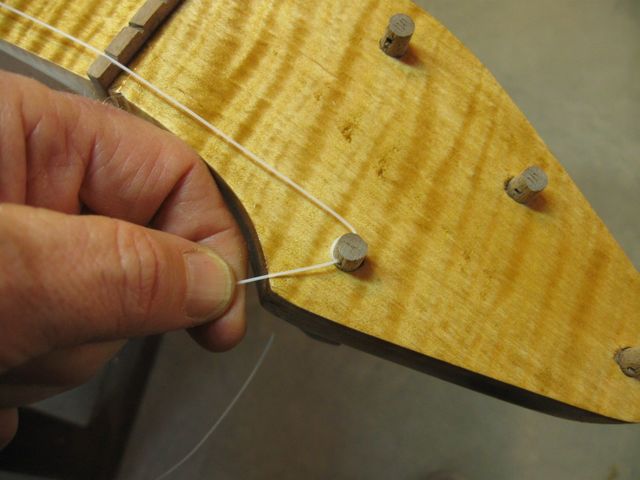
You can see that the fit is not good at all. The string is round, and the notch is a V. I need to carve the notch into a better fitting shape. I usually use my shop knife for that, but this time I thought I would try one of the burins. They are, after all meant for carving notches into wood.
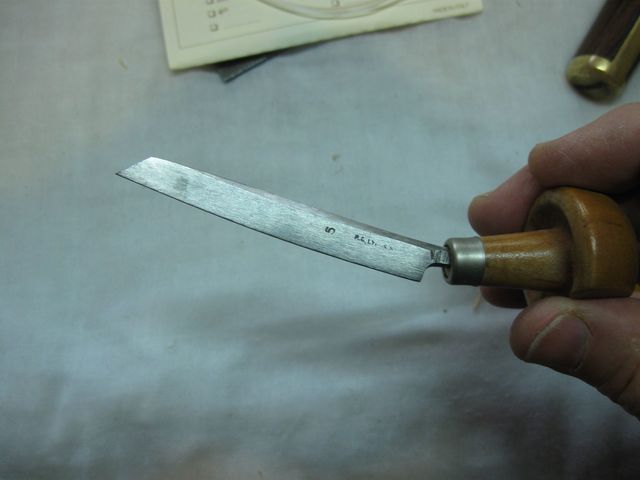
A Number 5 Burin
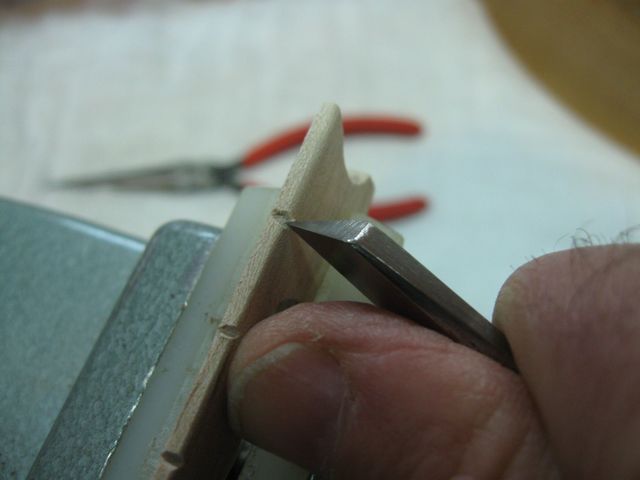
That is a #5 burin, which is larger than the #1 burin that I used to carve the numbers into the ends of the banjo pegs. I put it into the slot and cut some of the wood out.
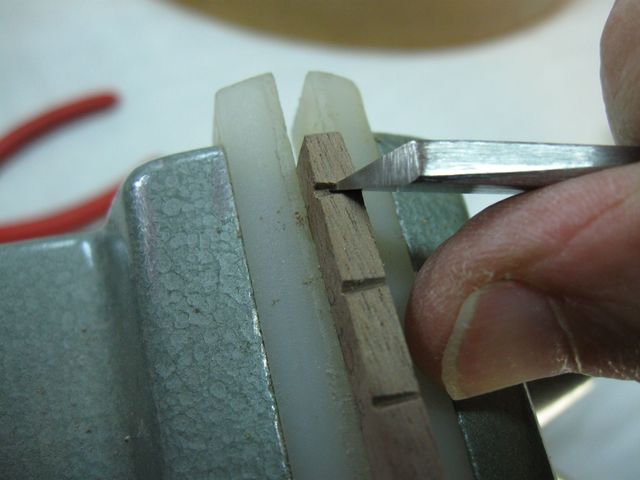
Opening the Slot With the Burin
I did the same thing on the other end of the string, at the bridge.
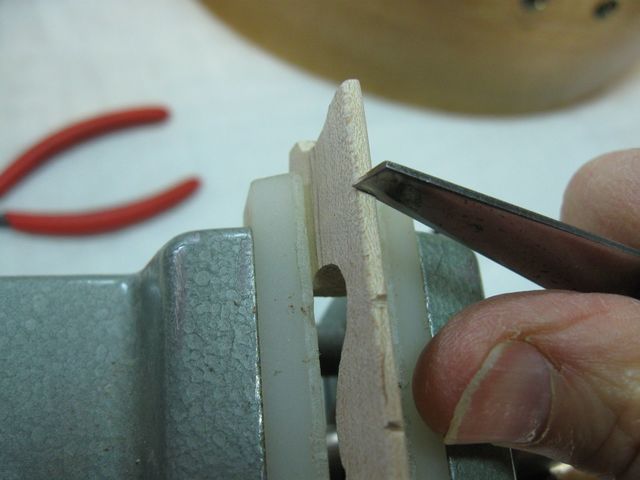
The String Has to Fit the Bridge Too
The string needs to be about half of its diameter in the slot. Since there is a slight pull to the side between the bridge and the tailpiece, I usually cut it a bit deeper than that and undercut the side of the notch to hold the string and keep it from popping sideways out of the slot.
The String Has to Fit In the Bridge Slot
I cut and fit and cut and fit. It really is just carving a shape in the bridge that hugs the string. The string has to pull down across the bridge to the tailpiece, so I angle the slot downward to ease the transition.
Angling The String Down to the Tailpiece
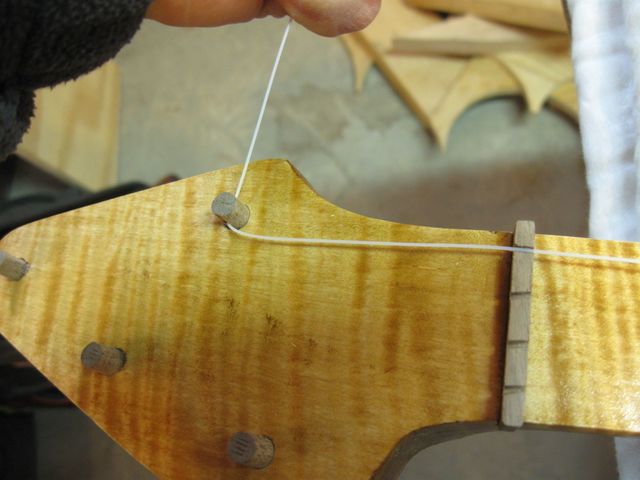
Back up at the nut, I have an additional issue to address. As well as shaping the notch to the string, the string has to be set to the correct height above the finger board to make it playable. If it is too close to the finger board the string will buzz, and if it is too far away, it will be difficult to play. So, I marked the location of the finger board on the nut for reference.
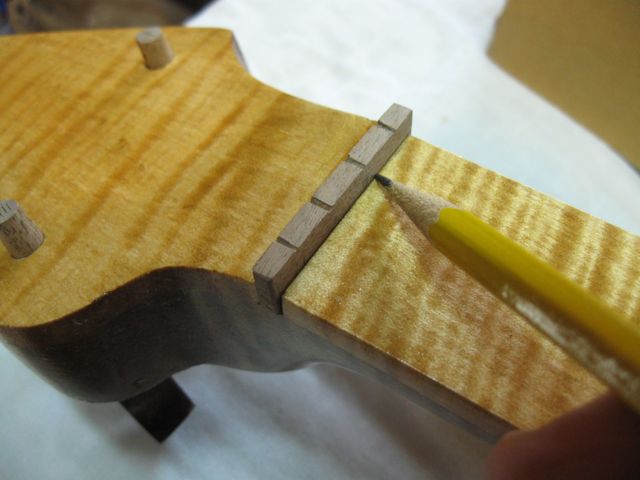
Mark the Location of the Fingerboard on the Nut
I pulled out the nut and drew a mark that is 1/8" above the finger board. I like to put my strings 1/8" above the finger board on these minstrel banjos. On a steel strung banjo the normal height of the string at the nut is about 1/16", but these Nylgut® strings are pretty fat and floppy, so I give them 1/8". That has worked well for me in the past, so I keep doing it.
The Line is 1/8" Above the Fingerboard
I put the nut back into its slot, and you can see that there is quite a ways to go on the slots to get them down to the line.
The Slots are Not Yet Deep Enough
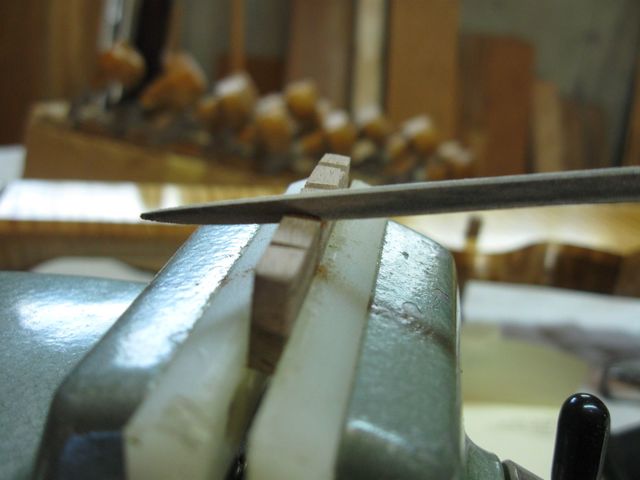
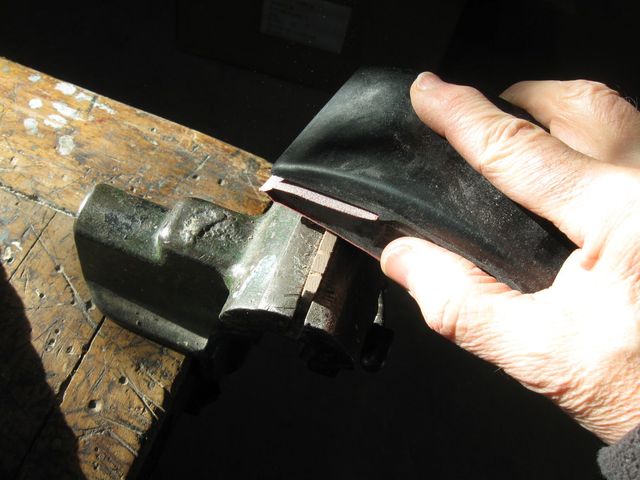
I temporarily put the burin aside and I got out the triangular file again to take off some serious wood before I start carving the notch again.
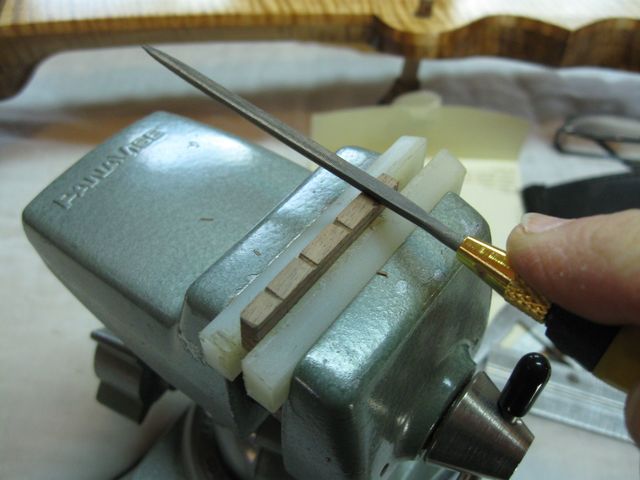
Lowering the Notch With the Triangular File
Just as the strings have to angle across the bridge down toward the tailpiece, they also have to angle downward across the nut to the peghead. So I angle the file down to ease that transition.
The Nut Slot Is Angle Toward the Peghead
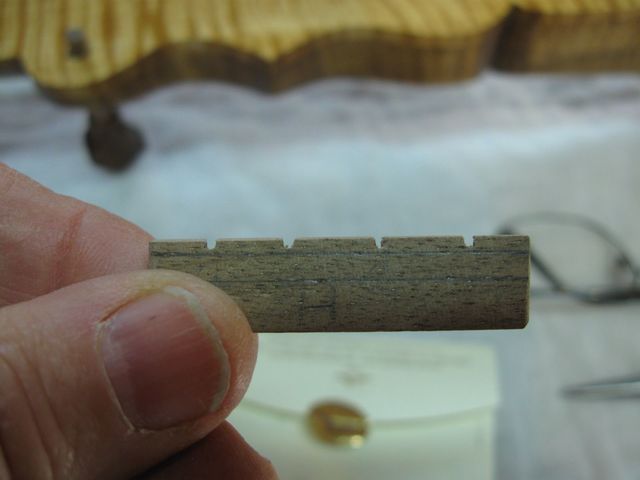
In the photo below, you can see that I have lowered the slots and carved them round to fit the strings. You may also notice that there is a chip out of the nut by the first string notch. That was caused by the burin, so I put the burin aside again and went back to the shop knife for cutting the slots.
You may also notice that there is a heck of a lot of wood sticking above the slots. I can cure both of those problems with some sandpaper.
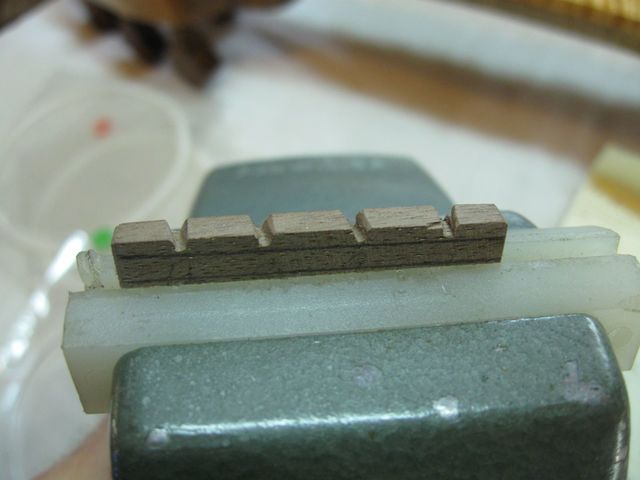
This is Not a Nice Looking Nut
The sandpaper cuts quickly because the walnut is soft.
Sanding Down the Nut
Here you go. That looks a lot better.
This is a Better Nut
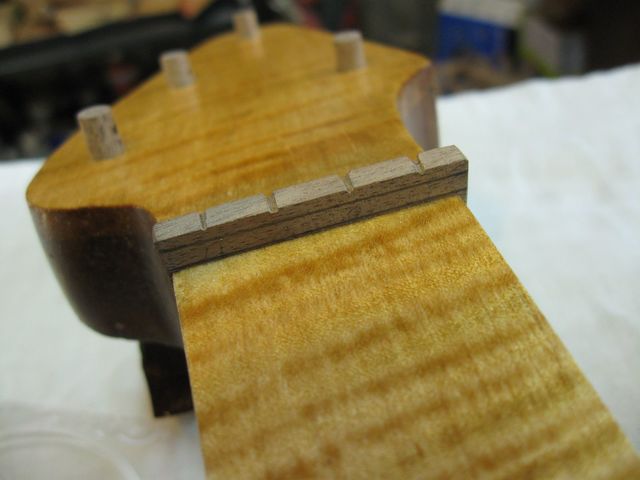
I did the bridge basically the same way, The slots are not as deep because the angles on the strings are not as steep.
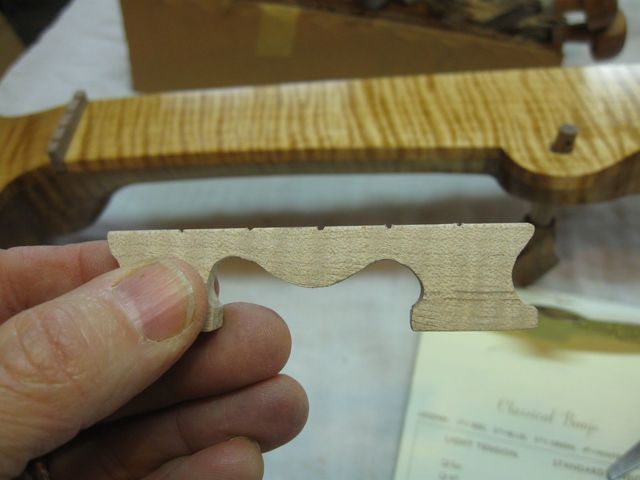
The Bridge Slots are Not As Deep
After cutting all of the slots and notches, the banjo is ready to string up. Here is how I do it.
I start at the tailpiece with the first string. Push it down through the hole in the tailpiece. I find that it is easier to push the peg end of the string down through the hole and then pull it most of the way through than it is to try and shove the tailpiece end up through the hole.
Push the String Down Through the Hole
Then, pull most of the string up toward the peghead until there is just a short piece left at the tailpiece.
Leave a Short Piece to Tie On
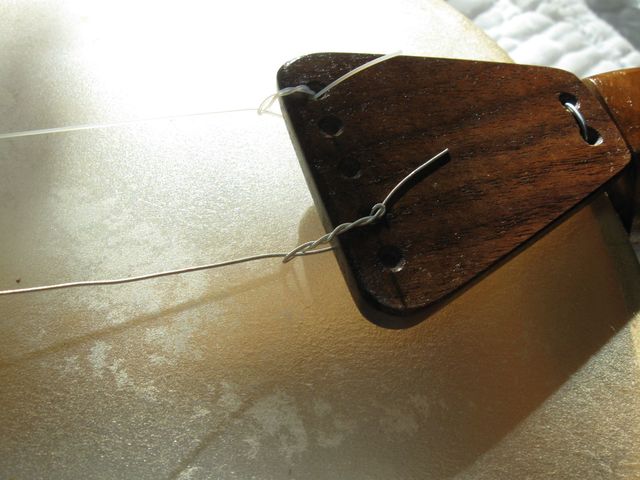
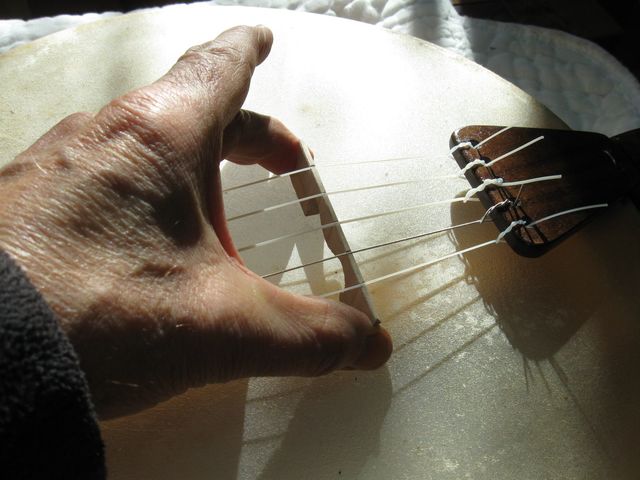
Pass the short end under the long end to make a loop. Then, wrap the short end around the top side of the loop.

The Short Piece Goes Under the Long Piece and Around
You can see that the short piece has gone under the long piece, and it is then wrapped around the top of that piece, through the hole, three times. The short tail of the string is going off to the right in the photograph.
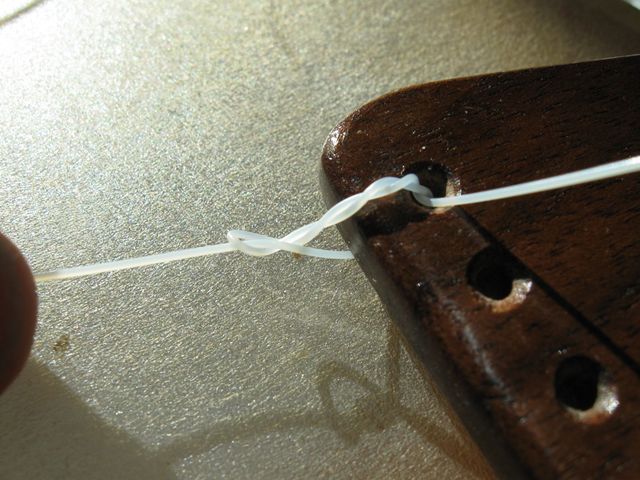
The Knot Before Tightening
The knot is then pulled tight by pulling on the long part of the string. The knot is secured this way, coming off of the bottom of the tailpiece so that there will be some downward pressure on the bridge.
This is just the normal knot that is used to secure nylon strings to the bridge of a classical guitar.
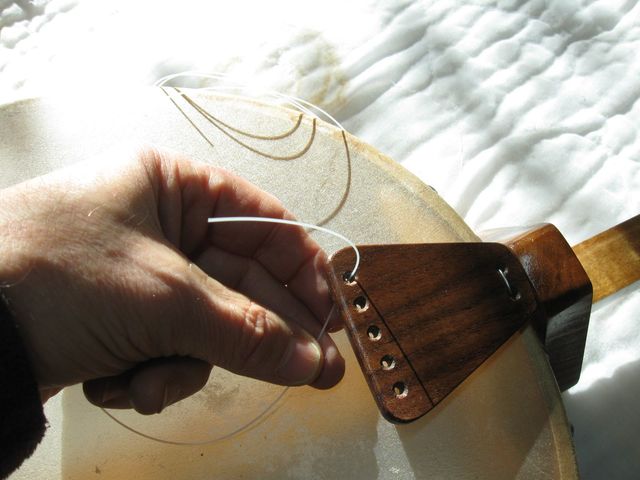
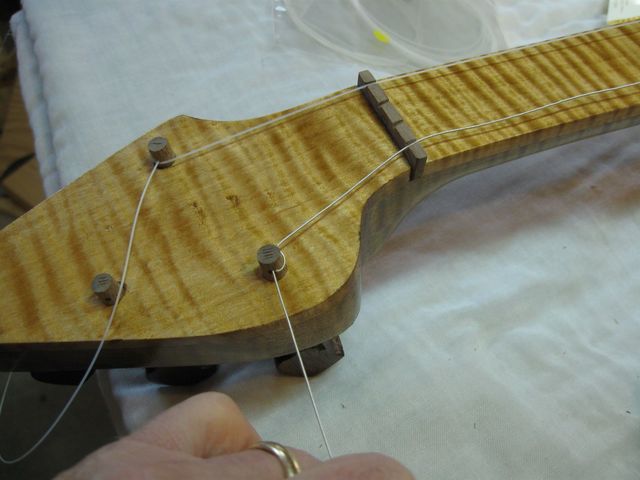
After the string has been tied to the tailpiece, I tie the other end to the peg.
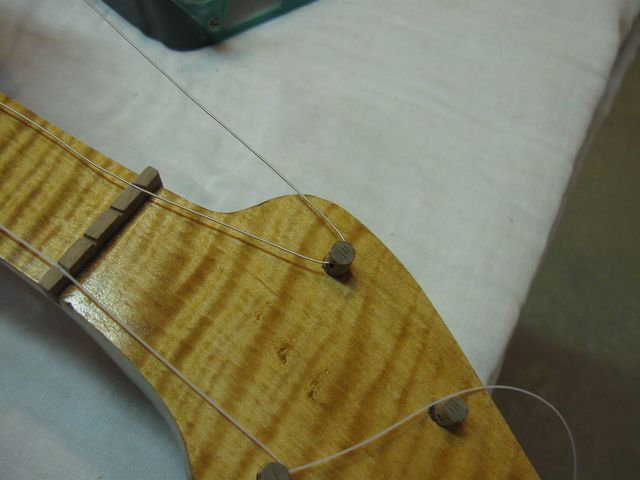
Pass it over the nut slot and through the hole in the peg, from the inside of the peghead to the outside. Remember that it is always inside - out.
The String Goes From the Inside to the Outside
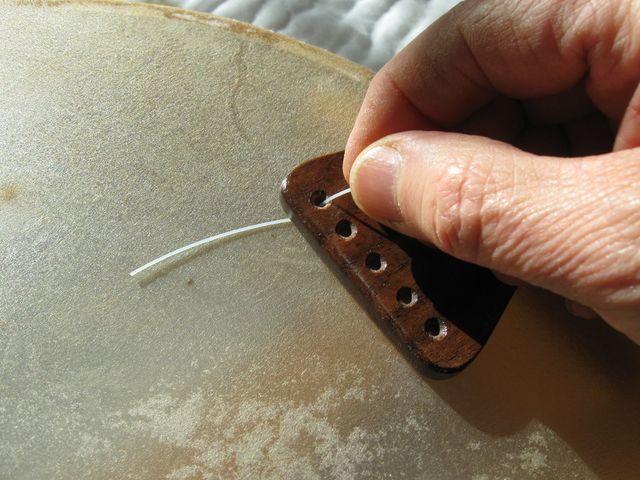
At the other end, I have it stretched over the bridge.
The String Goes Over the Bridge
Then I put the string back through the same hole, from the inside to the outside to make a loop.
Put the String Through the Hole Again
Pull the string tight around the peg.
The String is Pulled Tight Around the Peg
Here is something important to remember about the Nylgut strings. They are very stretchy. You should not leave any slack in the strings. Pull them tight and cinch them down on the peg. They don't have to be up to pitch, just tight enough to hold the bridge in place.
If you leave any slack in the strings, by the time you have stretched them up to pitch you will have a Monkey's Fist of string wrapped around the peg, and it will all slip off.
When stringing a steel strung banjo, I leave a hand's width of slack at the bridge to make sure that there will be enough windings on the pegs that they won't slip. I put my hand on the head vertically and stretch the string across it as if it were a bridge. Don't do that with the Nylgut or you will regret it.
Got that?
Don't leave any slack in the Nylgut strings. Cinch them up right away.
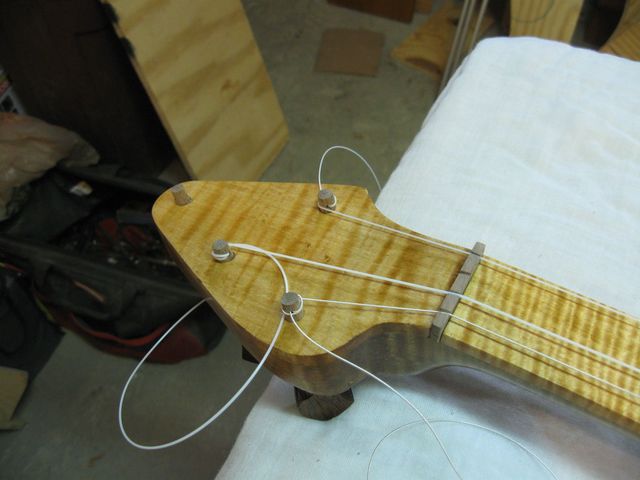
After I did the first string, I put on the fourth string. That was to even out the side pressure on the nut and bridge to keep them in place.
The Fourth String at the Tailpiece
Same deal at the peghead. Through the hole from the inside out, then cinch it up tight.
Through the Hole Inside Out
You might notice in the photo below that the fourth string is a bit wiggly and obviously not tight. On that one, you can get away with a slightly looser string because it is a wound string, and it will not stretch out as much as the others. But still, it has no real slack in it.
The Fourth String is Tied on the Fourth Peg
The third string is done the same way. Tie it to the tailpiece, then through the hole inside out and.....
Best laid plans. Back when I drilled out the peg holes, I drilled out Peg IIII with a larger bit because it has the "fat wound string" in it. It turns out that the wound string is smaller in diameter than the fat third string. I was supposed to drill out Peg III with the larger bit. Dang!
It doesn't matter much; the fat third string went through the 5/64" hole OK (barely). So I am still good to go. I may enlarge the hole later if I ever restring this thing.
It works so I just won't tell anybody.
Oh. I just did. Dang.
Here it is with the third string tied to the peg.
It worked anyway. Ha!
Second string same same.
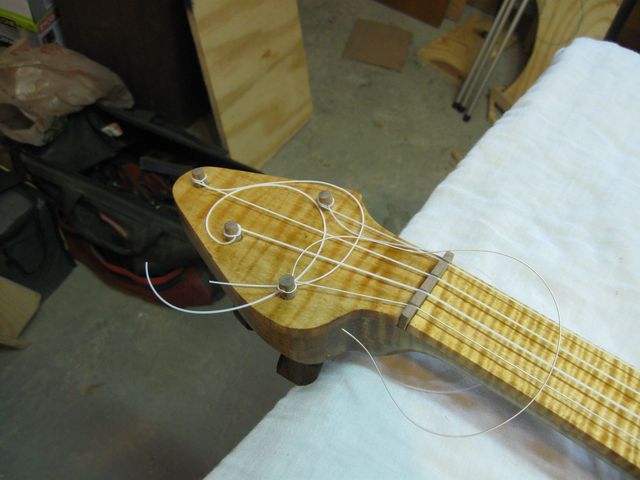
All Tied Up
Fifth string peg same deal. No nut. Didn't show it.
Since these strings are so very stretchy, it helps make the process go more quickly if you pull the strings out and stretch them before tuning up.
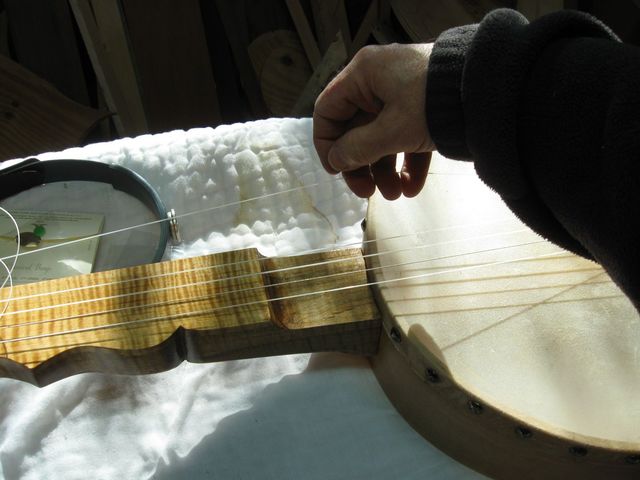
Stretching a String
Go ahead and stretch 'em out. Pull on them sideways so that the windings won't pop off the ends of the pegs.

Stretching
As I twisted the pegs to pull the strings up to pitch I could hear them go flat when I played a note. The pitch drops audibly as the note decays. That is because the strings are going slack from stretching. The only thing to do is the keep tightening them and stretching them.
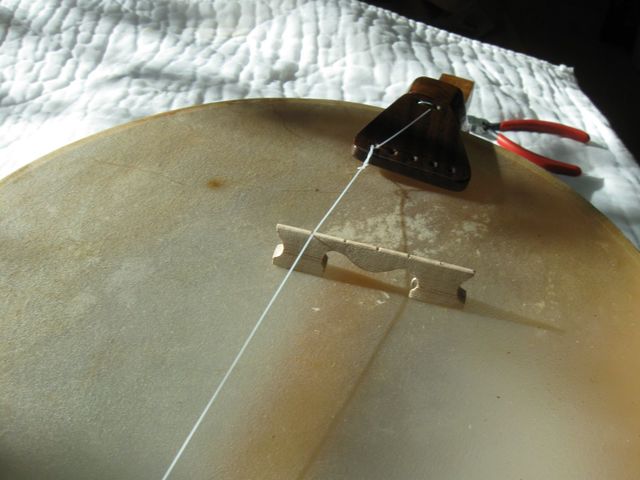
After I got the strings tight enough to hold a note, I tried chiming a string to see how the double ogee is lined up. I put my finger gently on the string at the notch in the double ogee where the 12th fret would be if the banjo had frets. Then I plucked the string and lifted the finger at the same time. The finger damps out the fundamental vibration, leaving the second harmonic, which is the octave.
Chiming the Strings at the 12th Fret Marker
The location was a little high up the neck, so I adjusted it by moving the bridge back toward tailpiece.
Move the Bridge to Adjust the Fret Location
OK. All done. Snip off the extra ends of the strings.
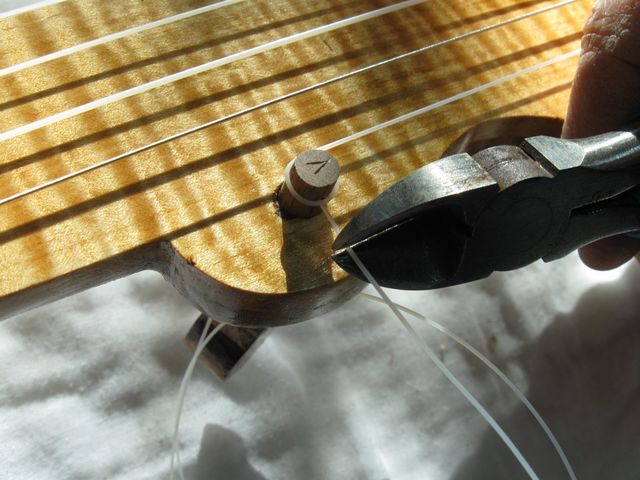
Snip Off at the Fifth String Peg
Snip off all the strings on the peghead. Some people leave the tails on the strings, but I always cut them off. They are ugly and get in the way.
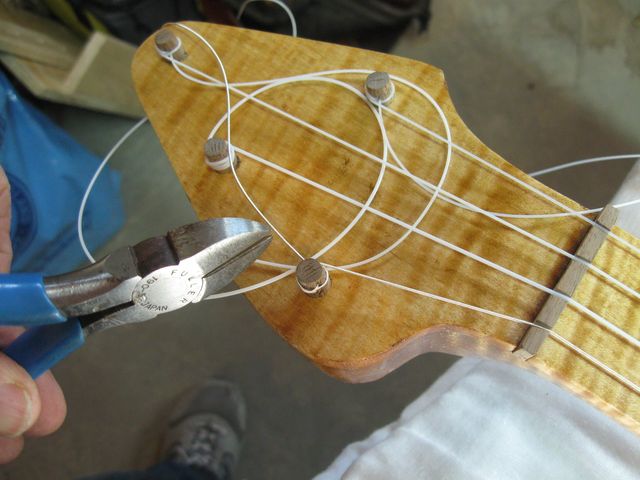
Snip Off the Other Strings
Here ya are. All strung up. You might notice that even though I started with the strings tight, there are plenty of wrappings on the pegs already.... and I am not yet done stretching these out.

The Peghead With the Strings Attached
Here is where the fifth string peg ended up. I was worried about this because I messed it up on my previous banjo and it was too close to the fourth string. This one looks good.
Looks Like Good Separation
Here it is. All strung up and ready to play.
The Banjo is Done
I took it upstairs to start the seemingly endless chore of stretching out the strings. It will take several days before the strings will stabilize enough to be playable. Right now, it will not hold a tuning long enough to play a tune. But it certainly is pretty to look at.
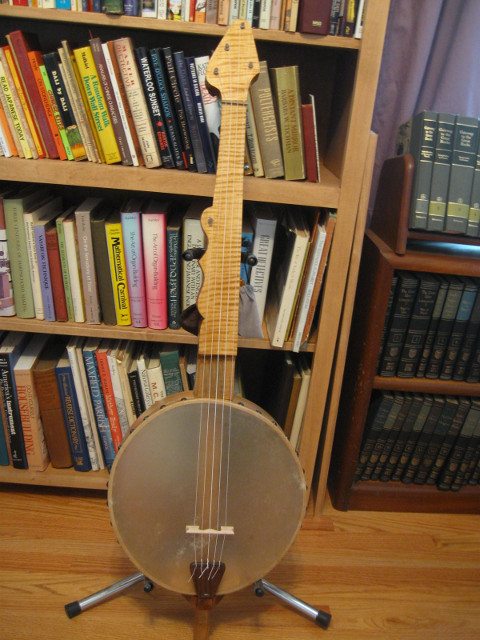
The Front of the Banjo
The back of the banjo.
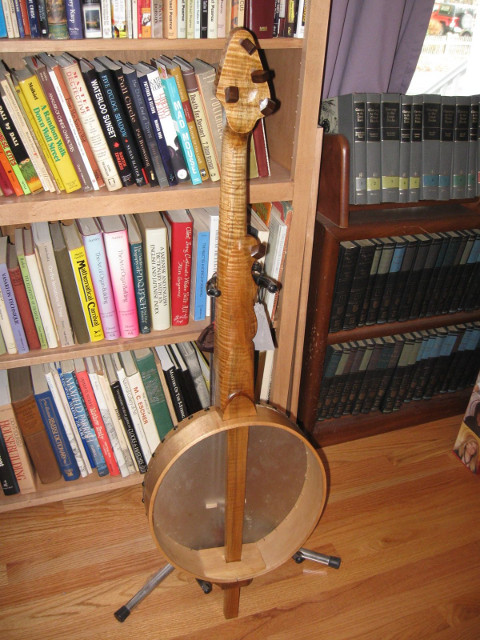
The Back of the Banjo
The tone of the banjo is nice. Smooth and mellow. When I play it next to the large gourd banjo, it does have a very similar sound, which was the goal. I need to break it in for a few days, stretch the strings, and see what I can do with it.
