This page shows how I put the head on the hoop. It is a long page because there were a lot of steps involved. This is one of the most exciting (and the most terrifying) steps. If I mess this up, then the banjo won't play.
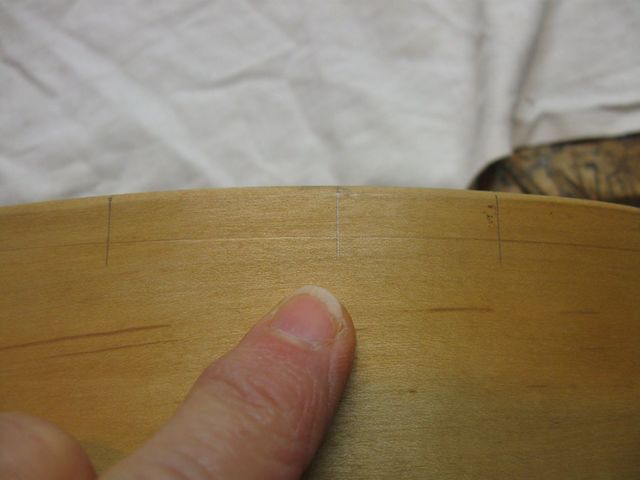
The first thing that I need to do is figure out where to put the tacks. The last time I worked on this, I drew a line 3/8" down from the top of the hoop to locate the tacks vertically. Now I need to space them around the hoop evenly so that they will look nice.
I decided to put 32 tacks on this hoop. That number is somewhat arbitrary, but I chose it because the size of the hoop will keep the tacks close enough together, and it is a power of 2. You see, the way I am going to place the tacks evenly is by dividing the circumference of the hoop into quarters, and then into eighths and then into sixteenths, and finally I will divide it into thirty seconds. The divisions are done by simply putting down four marks around the hoop to divide it into quarters, and then placing a tack between each of the four marks. That makes 8 tacks. Then, I put a tack between each of those marks, and I will have 16 tacks. Finally, placing a tack between each of the 16 marks will give me 32 tacks.
Pretty cool.
I am also going to offset the tacks around the hoop from the centerline so that the centerline is exactly between two of the tacks. It would be easier to start marking the tacks on the centerline of the tail dowel, but that would not be the best choice for several reasons.
- There is a split at the back where the hoop comes together. I do not want to put a tack in that location.
- I do not want a tack to be between the hoop and the vertical tailpiece at the back. The tailpiece is designed to avoid touching the back of the hoop, and there is not enough room between the two for a tack head.
- I am not going to have any tacks placed over the heel of the neck, and if I put one right in the middle, I will have to leave out three tacks instead of two.
These things will become more apparent as I draw in the locations of the tacks. The plan is to put two tacks evenly spaced around the centerline at both the front and the back of the hoop. In order to do that, I need to figure out how far apart the tacks will be when there are 32 of them around the hoop.
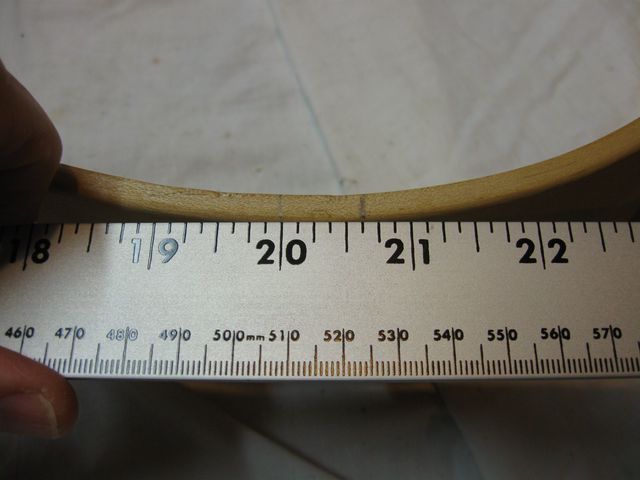
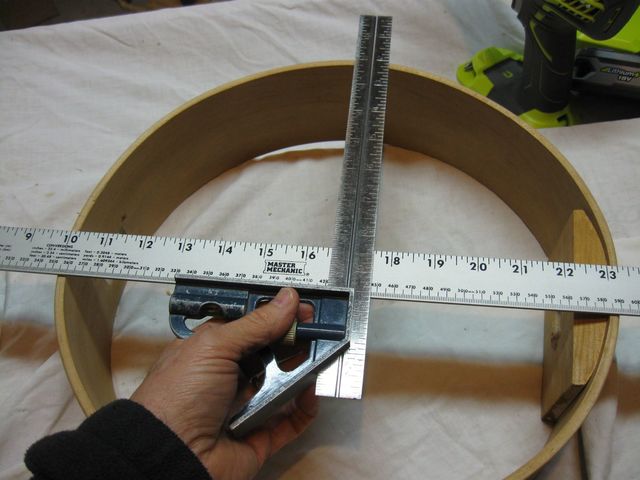
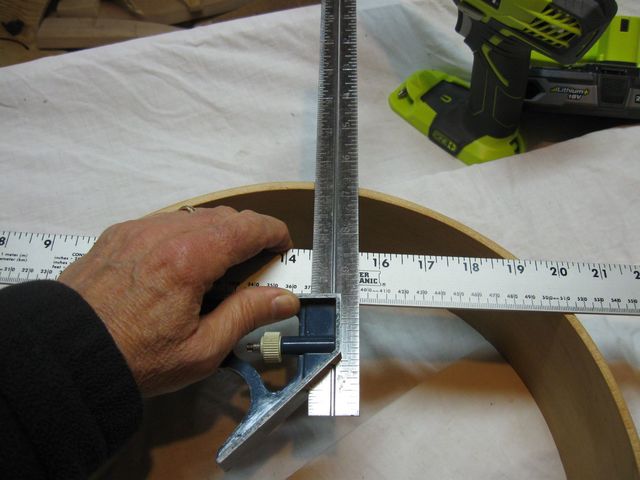
You may remember that the hoop is not perfectly round. It is somewhat egg shaped. You can see in the photo below that I have aligned the 10 on the rule with the left side, and the right side shows 23 1/4". So the diameter of the hoop down the centerline is 13 1/4"
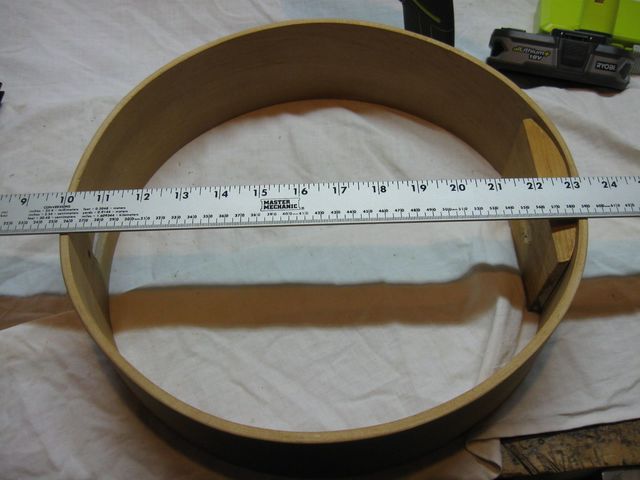
The Hoop is 13 1/4" Long
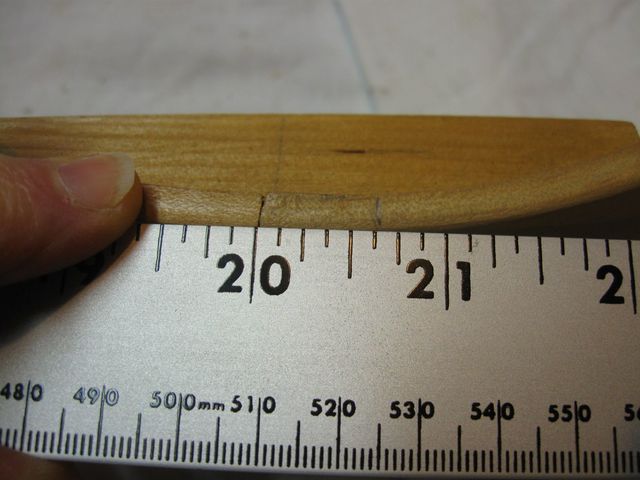
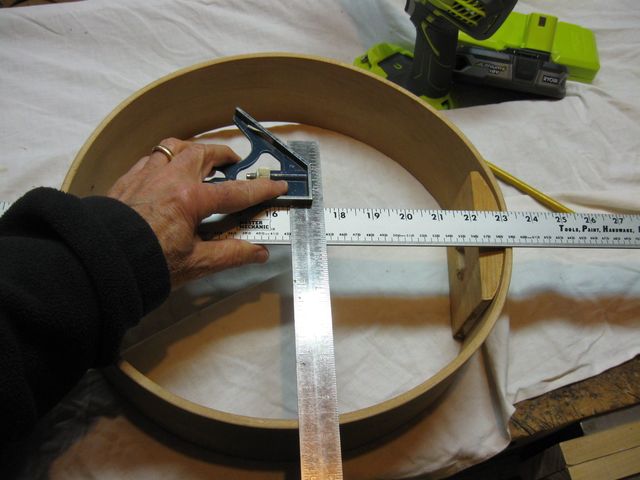
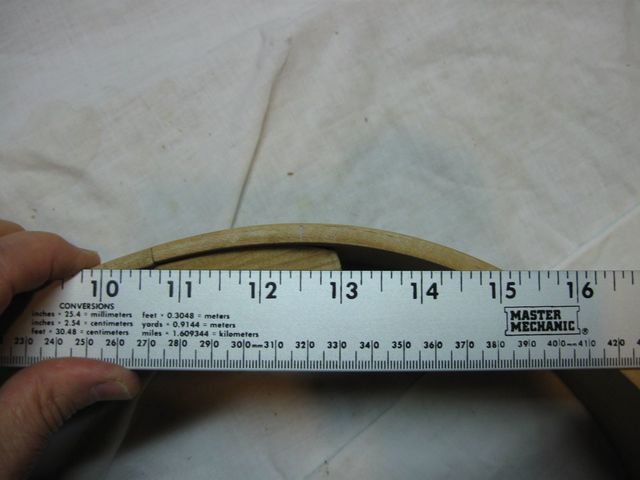
In the following photo, I have aligned the 10 with one side of the hoop, and the other side shows 23". So the hoop is 13" wide.
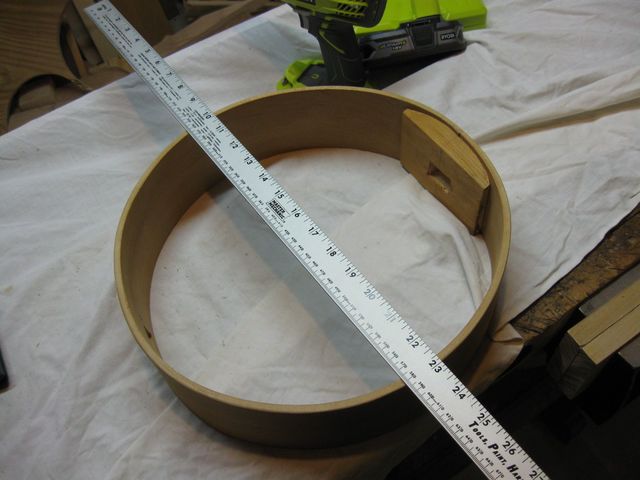
The Hoop is 13" Wide
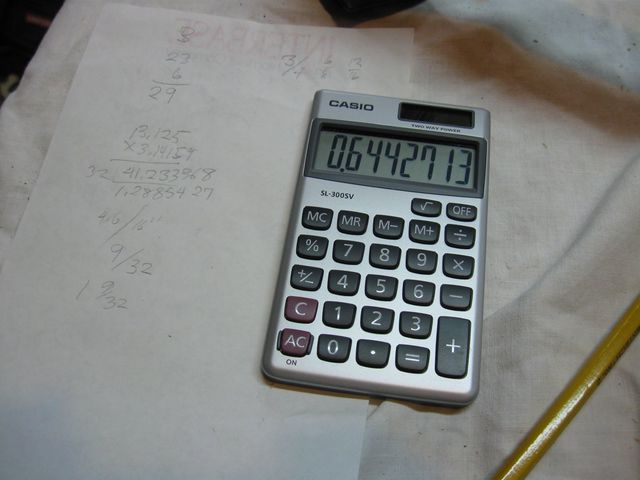
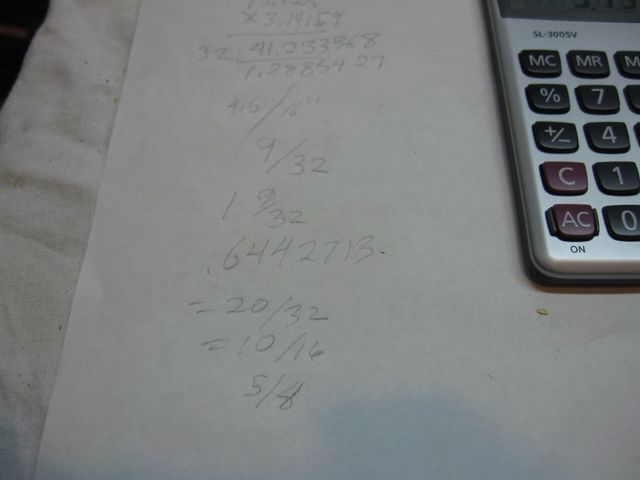
To do the calculations, I averaged the two measurements and came up with 13 1/8", or 13.125". Multiplying the diameter time PI
13.125 * 3.14159 = 41.233368
as you can see on the calculator screen below.
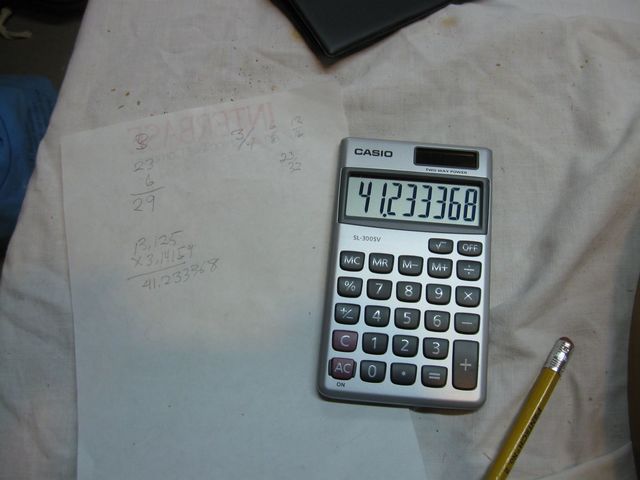
This is the Circumference of the Hoop in Inches
Since I will have 32 tacks, equally spaced, I divided the circumference by 32.
41.233368 / 32 = 1.2885427
which is the distance between each pair of tacks.
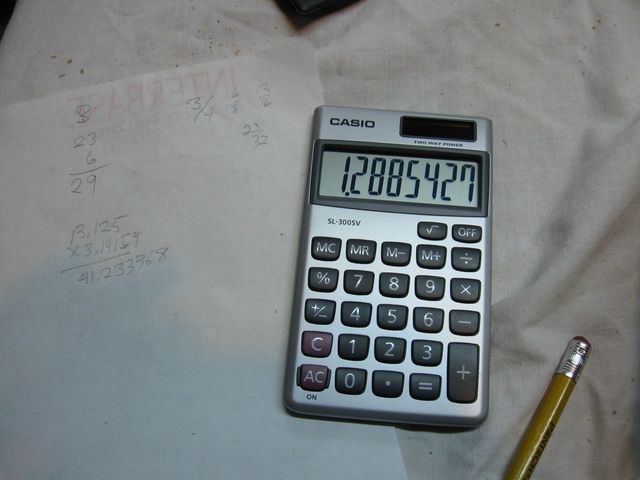
This is the Distance Between Two Tacks in Inches
I am going to offset the first tack from the centerline by half that amount in order to split the gap between the two tacks in the middle. So I divided by 2.
1.2885427 / 2 = 0.6442713
Which is the distance that the first tack must be offset from the centerline.
The Offset of the First Tack from the Centerline in Inches
Now I need to turn that number into something that I can measure on my rule. I figured out how many 32nds that is by multiplying it by 32.
0.6442713 * 32 = 20.6166816
That is a little more than 20/32, so I should round up to 21/32, but I didn't because truncating it makes the numbers come out clean. So I assumed that I will use 20/32 and that is 10/16, which is 5/8". See how well things work out when you add a little fudge to the numbers?
My Notes
That is the number that I went with. So to start marking the tack locations, I measured off 5/8" from the centerline at the end of the hoop where the neck heel goes. That is the location of the first tack mark.
Offset The Tack at the Heel
Then I turned the hoop around and offset the the 17th tack the same amount at the tailpiece end.
Offset At the Tailpiece the Same Amount
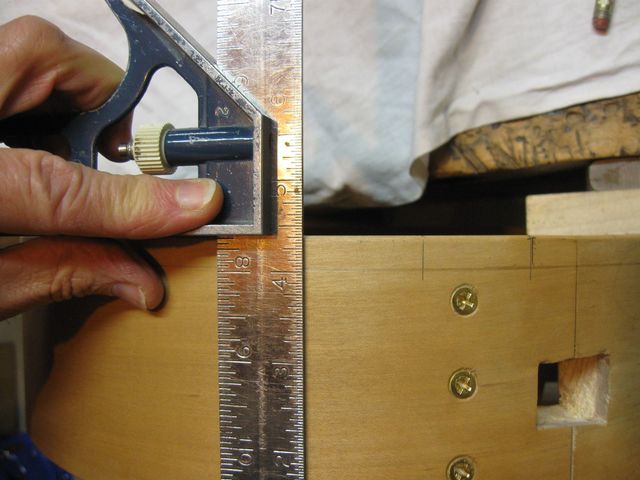
OK. That has divided the hoop in half, the left of centerline, and the right of centerline. The next trick is to put a mark between the first two marks on each side so that the hoop is divided into quarters. Note that I need to center the marks so that they are on a line that is perpendicular to the line between the offset marks, not perpendicular to the centerline.
I used my try square to do that. First, I aligned the rule between the two marks, then I put my try square against the rule at the center point. The edge of the try square ruler intersects the hoop where the next tack mark will go.
The Try Square is Half Way Across the Hoop
Since I am doing this along the length of the hoop, I used the 13 1/4" size. The try square is set just off of the 16 1/2" mark. Remember that I am aligning the rule at the 10" mark on the left, so the 16 1/2" mark is really marking 6 1/2" from the edge. After marking one side, I turned the square around and marked the other side.
Marking the Other Side
Hot dog! Now we have marked the hoop into quarters. Next is to mark it into eighths.
Set the 10" mark on the left side mark.
Align the 10" Mark
The right side mark sits on the 19 1/4" location, so it is 9 1/4" between the marks. The half way mark is 4 1/2" plus 1/8".
The Distance Between the Marks is 9 1/4"
Using the same trick I did before, I align the square on the half way point, and then I put the mark where the ruler lands on the hoop.
The Mid Point is 4 1/2" plus 1/8"
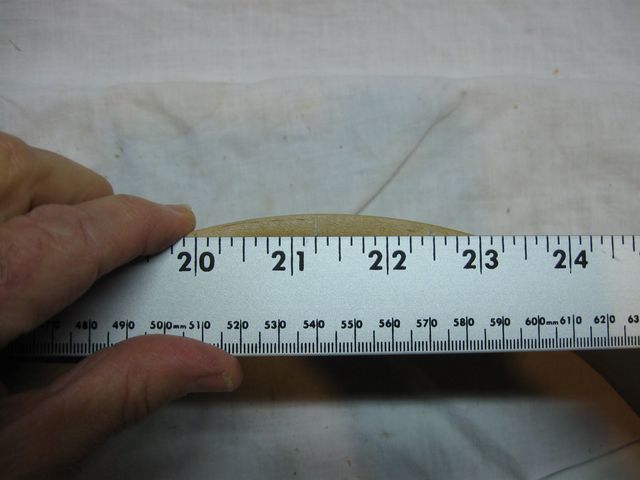
I went all the way around the hoop and added four more marks, thus dividing the hoop into eighths. It gets easier from here, because I can just set the rule down between the two marks and eyeball the half way point. Looks like we are down to 5" between the marks. You can barely see the mark in the photo, but it is there. Blame the photographer.
Oh, wait. That's me.
Eyeball 2 1/2" To Find the Center
I went around the hoop again and made 8 more marks. That gives me 16 tack locations. One more step. I measured 2 1/2" between the marks now, which makes sense since it was 5" last time. I marked off all 16 gaps into 1 1/4" gaps. That is an interesting number, because that is about the value that I came up with in the first calculation for the tack separation.
Eyeballing the Smallest Gap
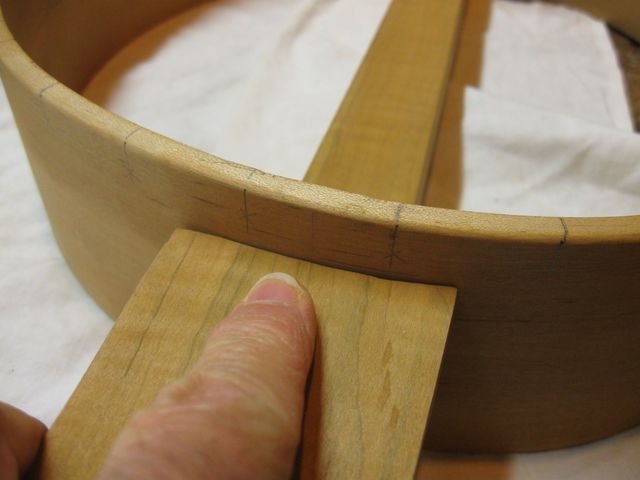
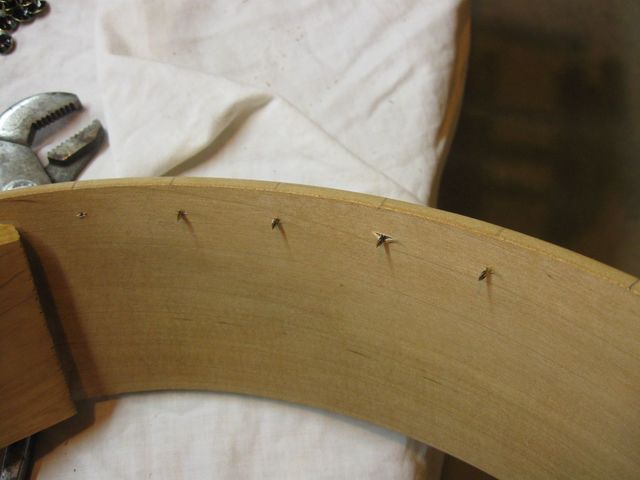
Done with that! I how have 32 evenly spaced marks around the hoop indicating where I will put the 32 tacks. I took the square and dropped a vertical line down from the edge to each location where a tack will go.
Dropping A Vertical To Mark the Spot
Then, I inspected the hoop to see how I did.
Hmmmm. Not so good.
Some of these gaps are not like the others.
This Does Not Look All That Even
So I eyeballed it back into the middle, put an X to mark the spot, and then I erased the calculated location. So much for mathematical precision.
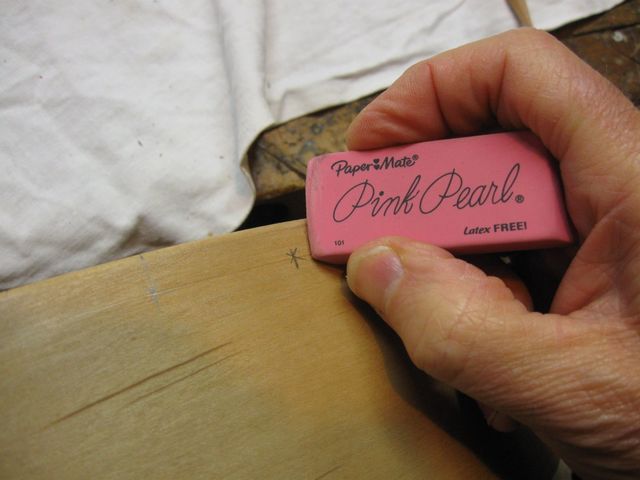
The Pink Pearl Works Wonders on my Mistakes
Oh well. Eyeballing it is better than leaving it uneven. I liked the X so much that I went around the hoop and corrected all of the positions and marked them with an X.

X Marks the Spot
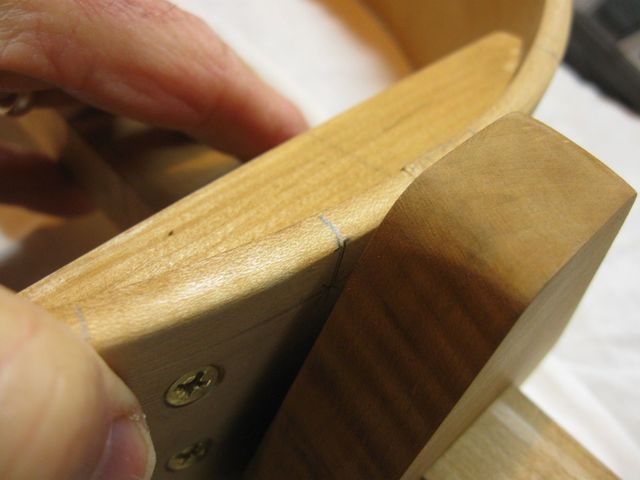
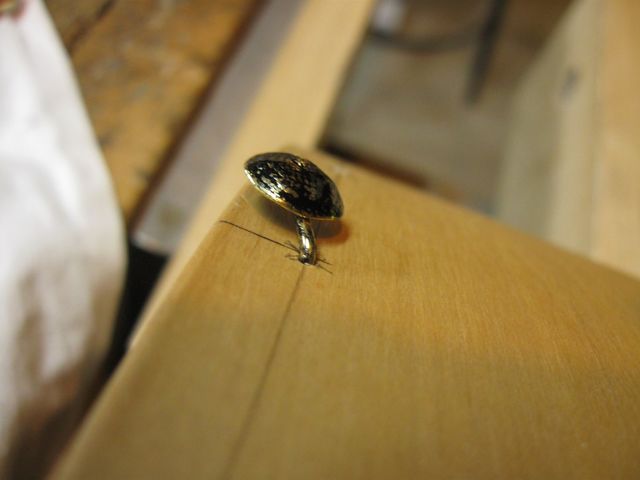
Back up at the neck, you can see that two of the tacks have landed by the heel. I do not want those there because they will interfere with the neck. The tacks are not very important because the glue is what really holds the head on the hoop after everything is dry. The tacks hold the head down to the hoop while it dries out. I am going to remove those two tack locations.
These Two Spots Will Not Get Tacks.
Back down at the tail, the marks have landed perilously close to the tailpiece. I guess the tailpiece is wider than I thought.
These Are Too Close
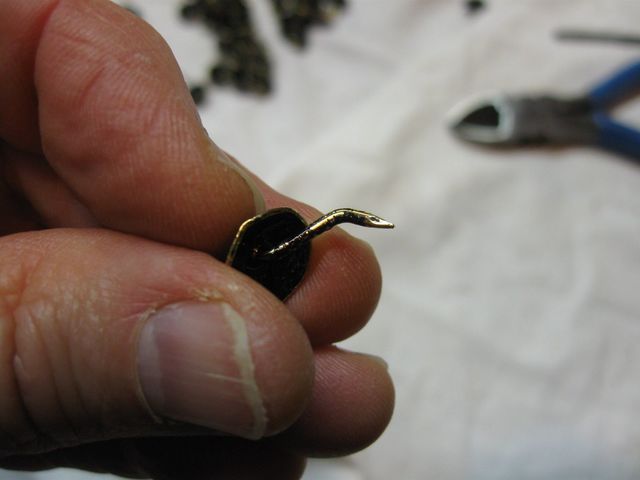
I put a tack up next to the tailpiece to see how it might interfere or not. There is not a whole lot of space to mess with in there.
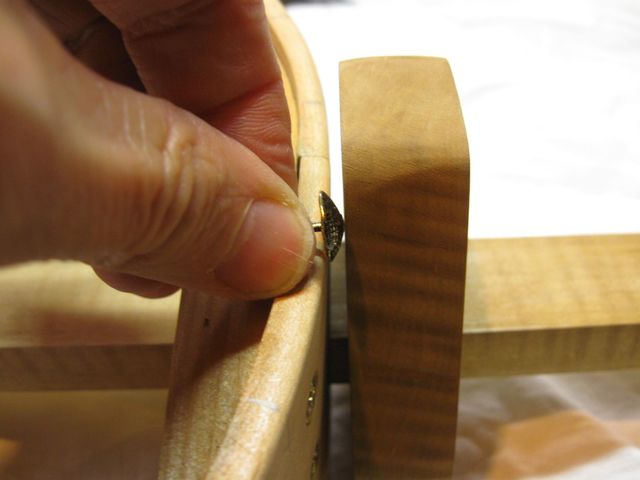
This Tack Will Be Too Close
So I grabbed my Pink Pearl and erased some lines up by the heel of the neck. I also moved the lines down at the tailpiece out a bit from the center. One nice thing about making these by hand is that I do not have to slavishly follow a plan. I can make it up as I go.
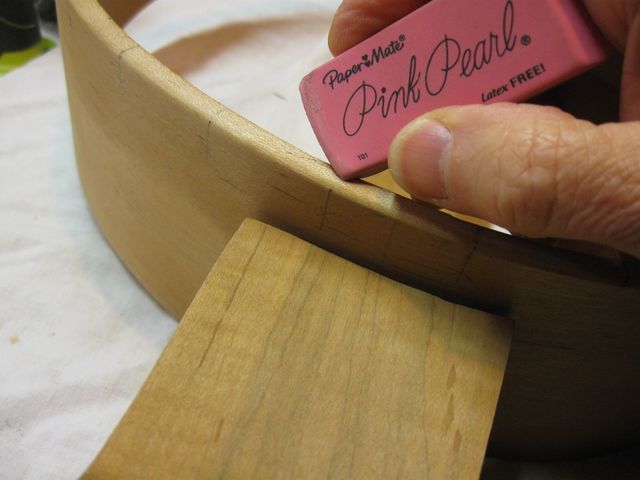
The Pink Pearl Saves the Day Again
So, here is the hoop all decked out with its X's
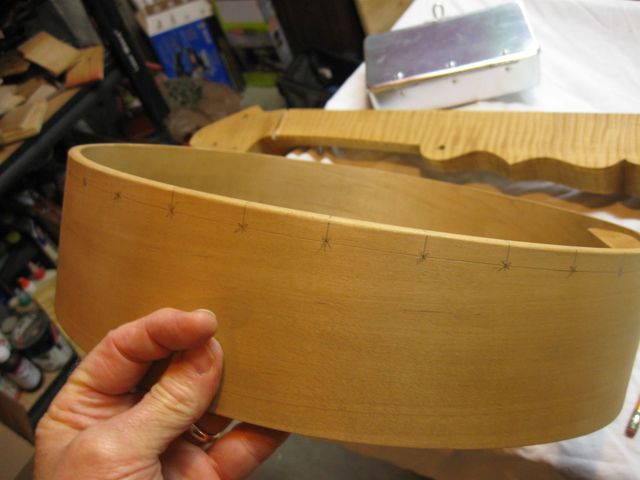
The X's Mark the Spots
And, of course, it is missing the two marks up by the neck.... so I really only need 30 tacks.
The Heel Has No Tacks
Before I go any farther on this there is one thing that I must remember to do, and that is to have some large rubber bands available. The head is glued down to the hoop as well as tacked, and I need a large rubber band (or two) to hold it down while the glue dries. Since I do not have any rubber bands that are large enough to go around the hoop I have to make some. I have a pile of smaller rubber bands to do that with.
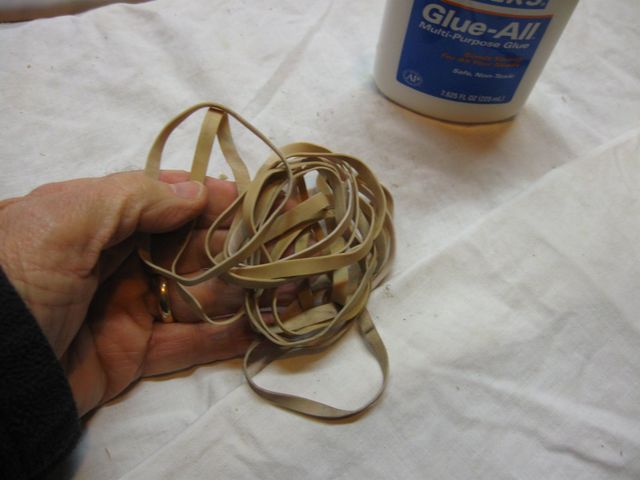
Lots of Rubber Bands
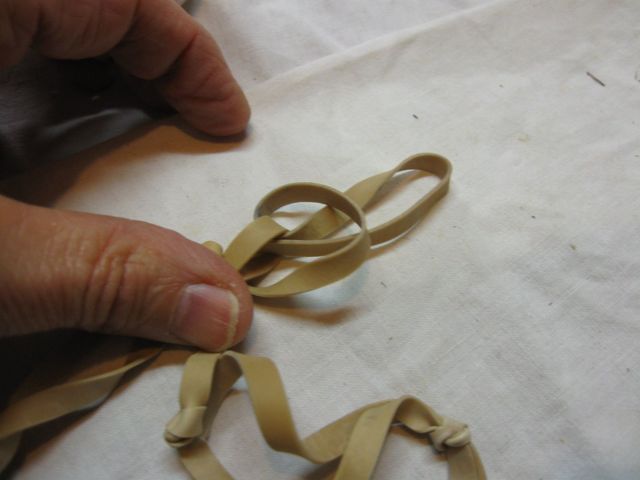
I simply tied them together in a chain by looping one through another and then through itself.
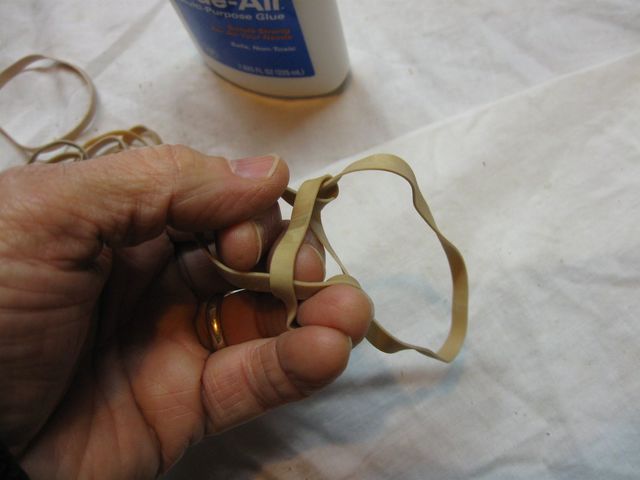
Loop One Through the Other
Here are two of them tied together.

Two Rubber Bands Tied Together
Then I add one more to make three.
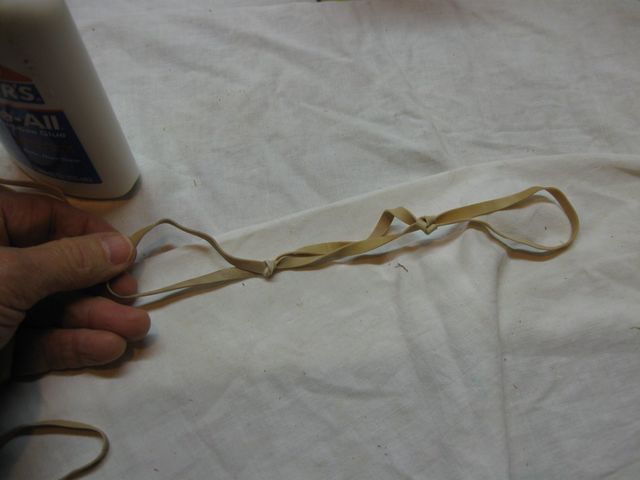
Three Rubber Bands
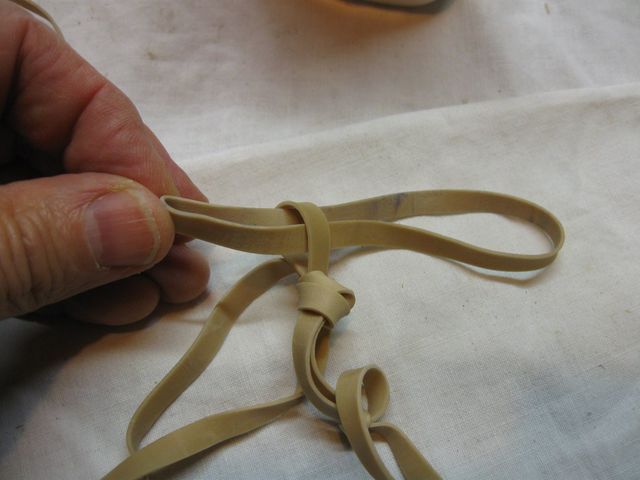
I kept doing that until I had about 7 of them all hooked together in a chain. To close the loop, I just tied the last one around the first one.

I Tied a Simple Overhand Knot
Then, to keep the overhand knot from slipping, I put a final rubber band through it.
Put the Last Rubber Band Through the Loop
Loop it through itself, and pull it tight.
The Final Band Loops Through Itself
The ring is completed.
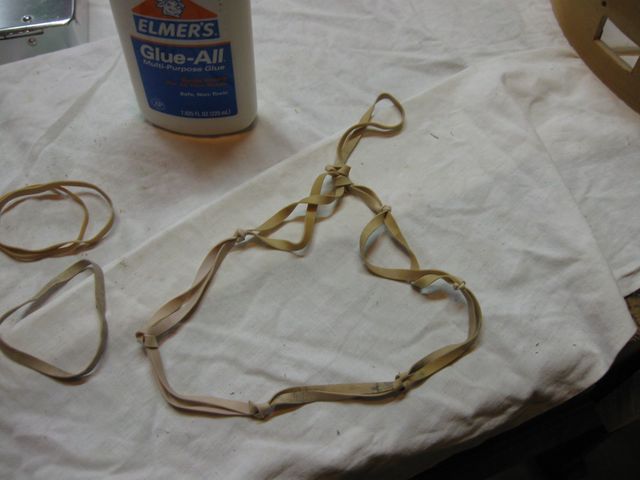
The Complete Ring of Rubber Bands
I made three of those just to be assured that I will have enough once the head has been stretched onto the hoop.
Three Large Rubber Bands Stretched on the Hoop
Here is the reason that I have to glue the head down to the hoop. The photo below is of a tambourine that I bought. The head was not glued down, but merely tacked. You can see that the head has split around the tacks as it dried and has come off the hoop. I do not want this to happen to my banjo hoop. So far, gluing down the heads to the gourd banjos has worked fine, and there have been no issues with heads pulling off the gourds.
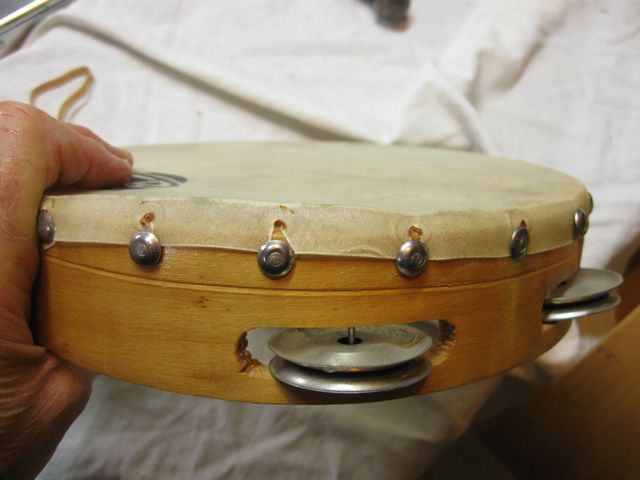
I Did Not Make This
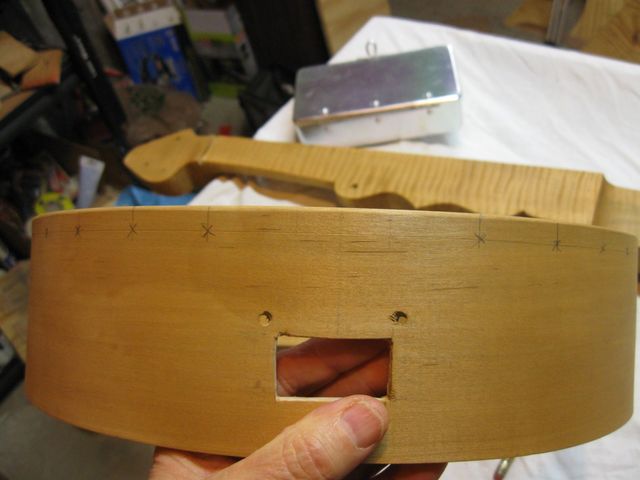
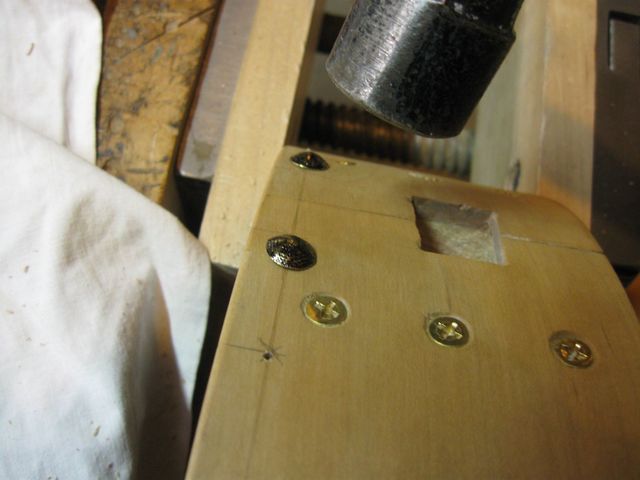
OK. Back to the tacks. I marked each of the places that the tacks will go by punching the X's with a center punch.
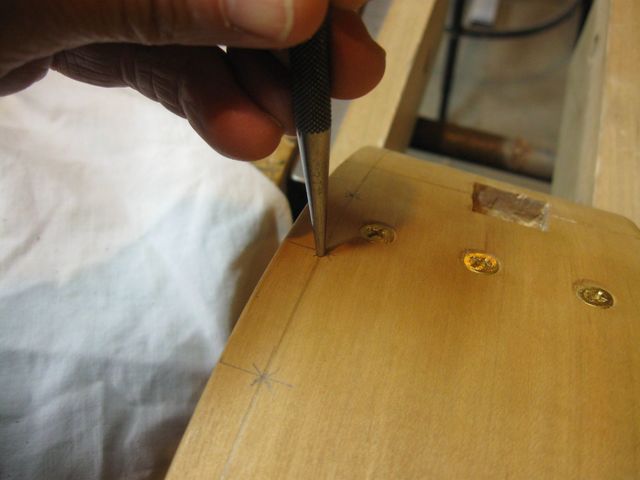
Punching the Tack Locations
I still had the flag on the drill from my experiments with on the scrap wood. I drilled down to the flag, which should be 3/16" deep, 1/16" short of the thickness of the hoop.
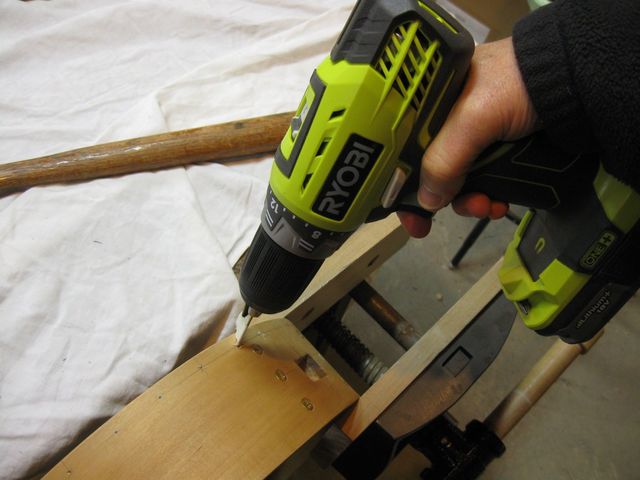
Drilling A Pilot Hole for a Tack
Here is a closeup showing that I am drilling only until the flag is at the surface of the wood.
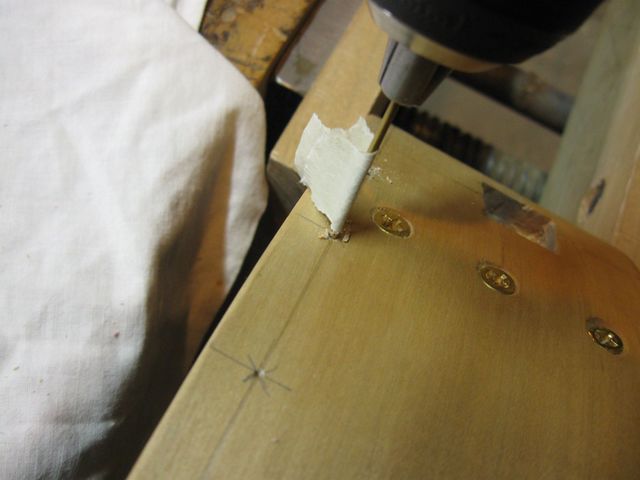
Closeup of The Flag In Action
You can see on the inside of the hoop that I have not broken through the entire thickness of the hoop.

The Inside Has No Holes
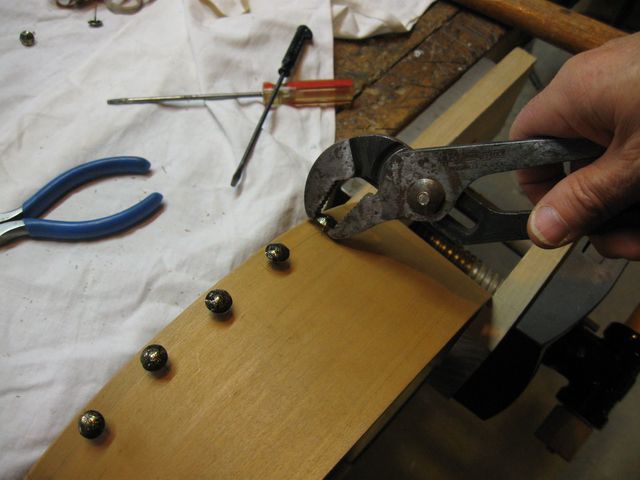
I started at the tailpiece end. That was a bit challenging because the tail block is on the inside. When I put the tacks in, the points were going into the tail block instead of air.
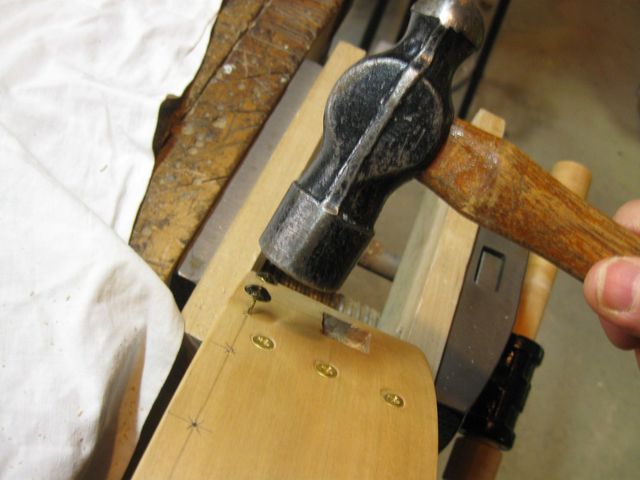
Pounding the Tacks Into the Tail Block
There they are pounded into the tail block. Now I have to get them out again.
The Tacks Have Been Pounded Into the Tail Block
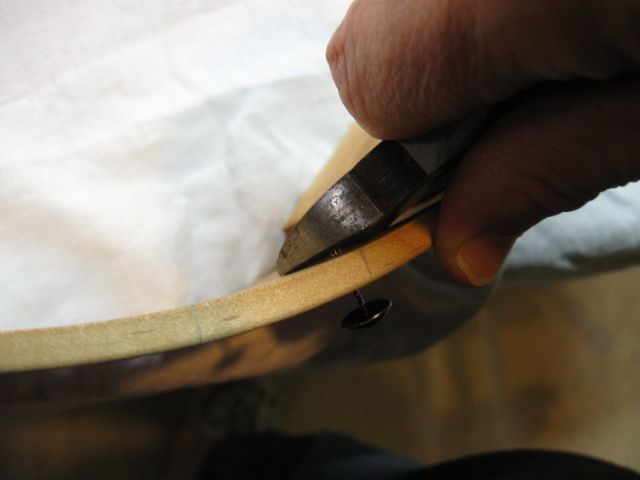
Getting them out of there proved to be a challenge. They were really stuck in there. I tried prying them out using a small screwdriver.
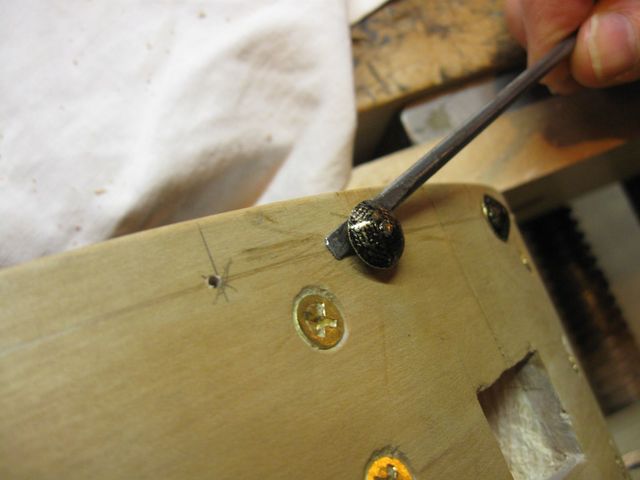
Prying the Tacks Out
That was making a mess out of the wood. So after I got them up a bit, I tried pulling them out with my channel locks.
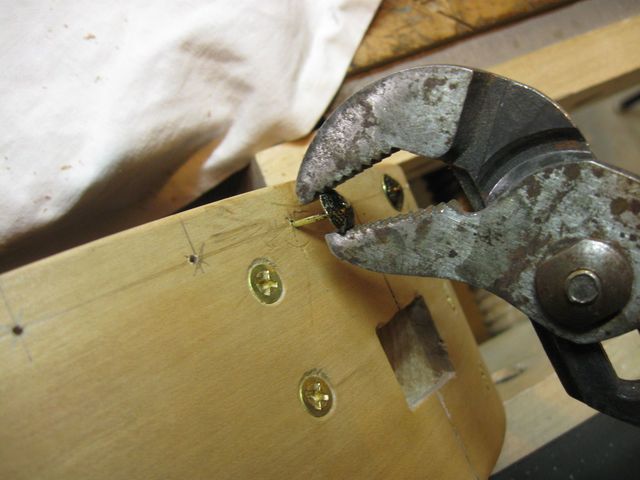
Try Pulling Them Out
That left the tack a bit bent. It was really stuck in there.
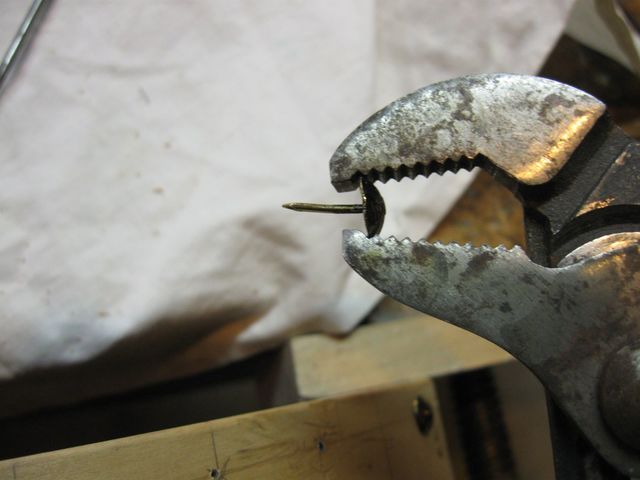
The Tack Got Bent
On the next hole, I bent the tack over double. That isn't going to work out too well.
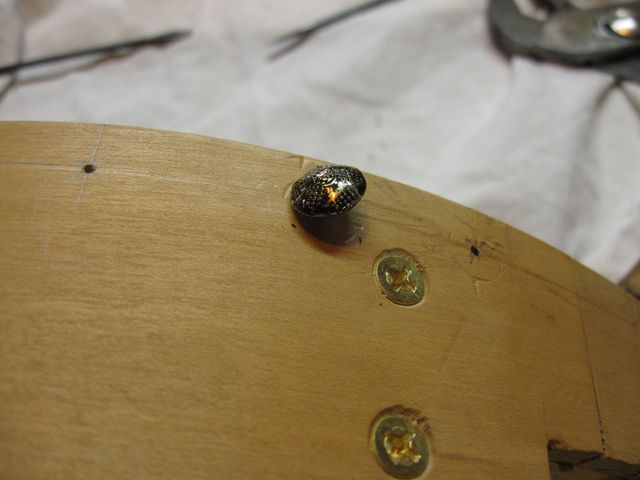
This One Went in Crooked
I had to throw that one out and get a new tack, which went in better than the last one.
That's Better
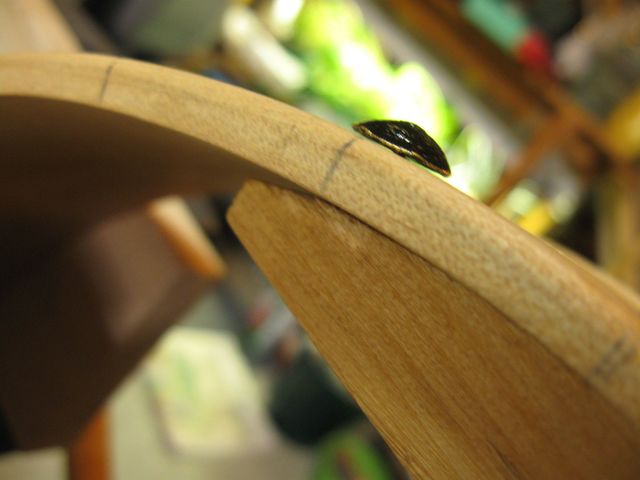
I finally got past the tail block and pounded in a tack that went all the way through into the air.
This One Got Pounded Into Air
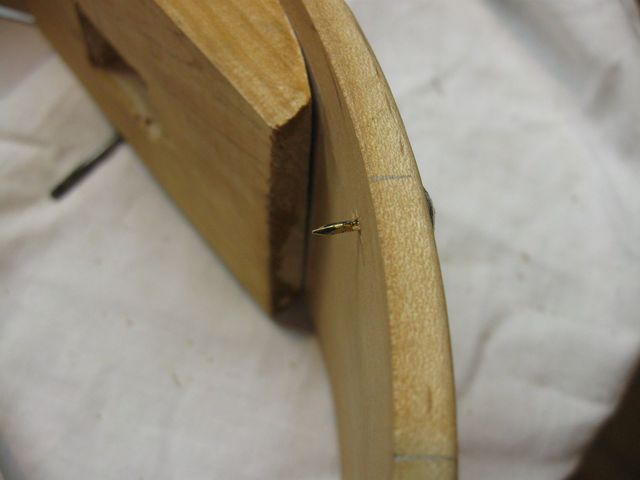
I found that I could use the side cutters to push the tack back out of the hole.
Pushing the Tack Back Out of the Hole
I continued around the hoop, pounding in a tack and then taking it back out. There were some disasters.
This One Went Over Bad
I think that one is wrecked. Glad I have extra tacks.
This One is Really Bent!
But hey, I got better as I went. Here are a bunch of them all pounded into the hoop in a row.... and none of them folded over.
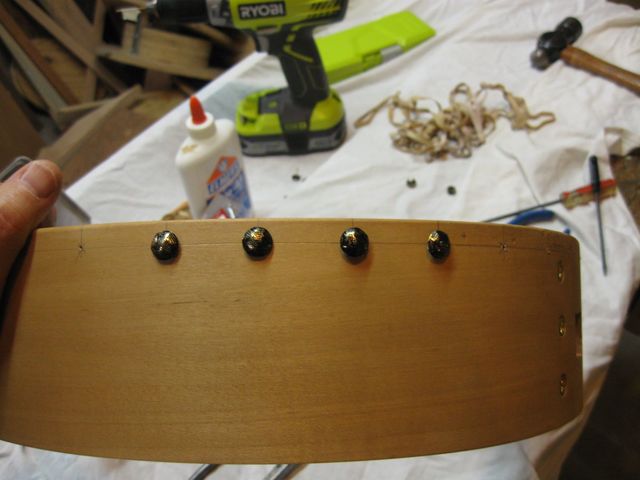
Several Tacks Pounded In
Here is the inside where the points are sticking through.
The Points on the Inside
That is how I went around the hoop. I pounded them in, then I pulled them back out.
Pulling the Tacks Out
It got easier as I went. I guess I learned the rhythm of it.
After I had all of the pilot holes done, I put two clamps on the bottom of the hoop so that I could hold it down while I stretched the skin onto it. I clamped one on the front and one on the back.
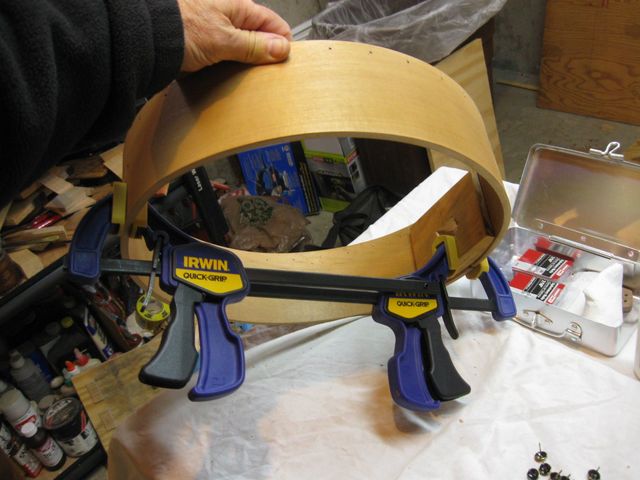
Two Clamps on the Bottom of the Hoop
Then, I clamped the clamps in the bench vise to hold the hoop steady. The hoop is held pretty solid there like that.
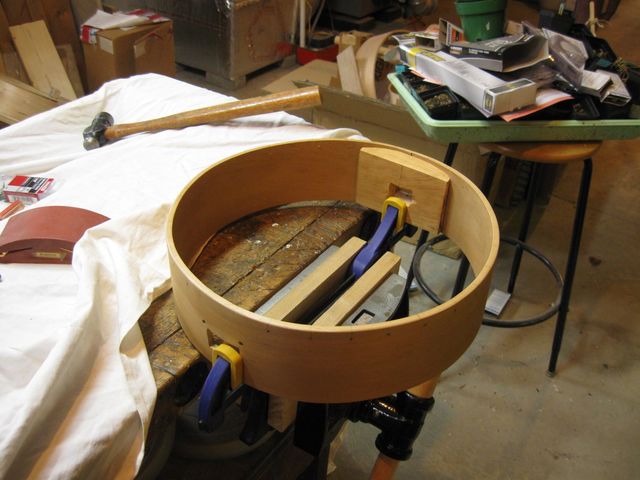
The Hoop is Clamped to the Bench Vise
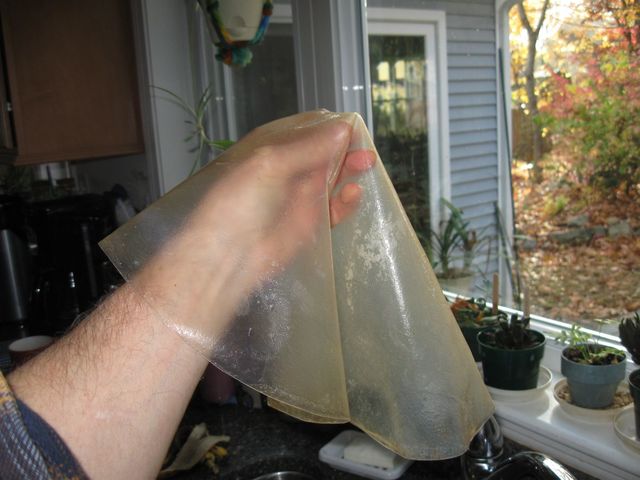
I had three skins, so I needed to choose one of them to use. Here are the three.
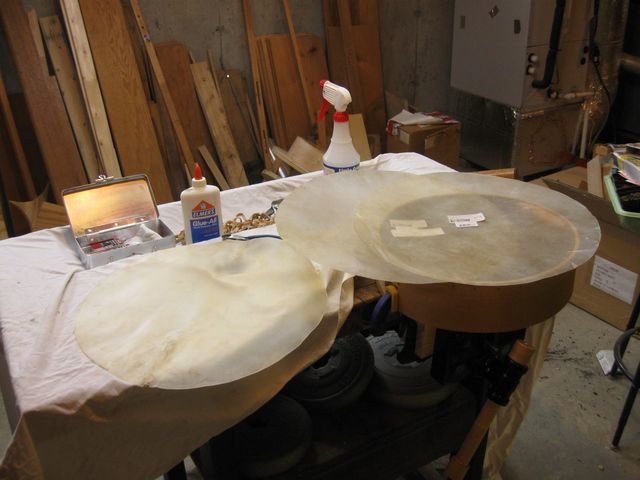
Three Skins to Choose From
I picked the one that looked like it had the fewest defects. These are calf skins, and since they are a natural product, there are variations in them. I did not want to use one that might tear or fold up on me. Here is the one I chose, sitting on the hoop where it will hopefully reside for a long time.
Sitting On the Hoop
The way I do this is to soak the skin for a few minutes. Since it has not been tanned, the skin will absorb the water and become flexible and stretchy. When it dries out, it will become stiff and shrink again. So, I put the skin into the kitchen sink and covered it with tap water.
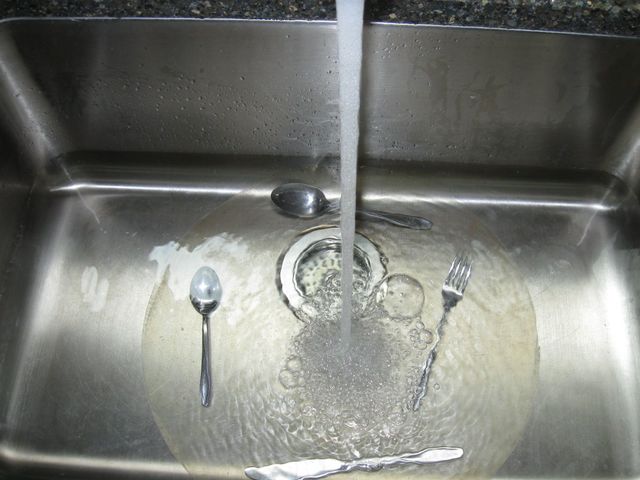
The Skin is Soaking in the Sink
The flatware on top of it is there to keep the edges under the water. There is one of each kind of piece, a knife, fork, teaspoon and table spoon in order to get good Mojo for this stretch. I invented that particular superstition when I stretched my very first skin head onto my first minstrel banjo and had a terrible time with it. You can read that sorry tale on one of my previous pages "Mounting the Head"
You will have to read through several pages to see that entire tale of woe. It is too long to repeat here. Anyway, the flatware keeps the edges of the skin under the water while it soaks. It only has to soak for 10 minutes, so while it was upstairs soaking, I went back down to the basement and get everything ready to go. That white stuff on the blue plate is the carpenter's glue.
I use plain carpenter's glue when I glue down the head because it is not water proof. If I ever have to take off the head, I can soak it off with water. Luthiers still make wooden instruments using animal hide glue because they can take them apart for repairs by heating the glue. I use white carpenter's glue on my heads so that I can take them off later if I have to.
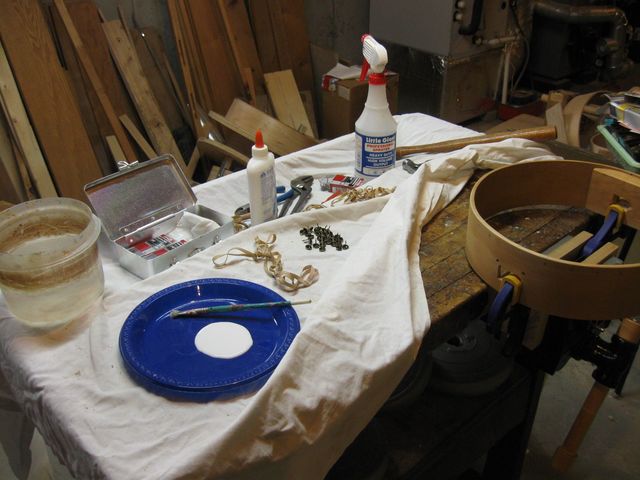
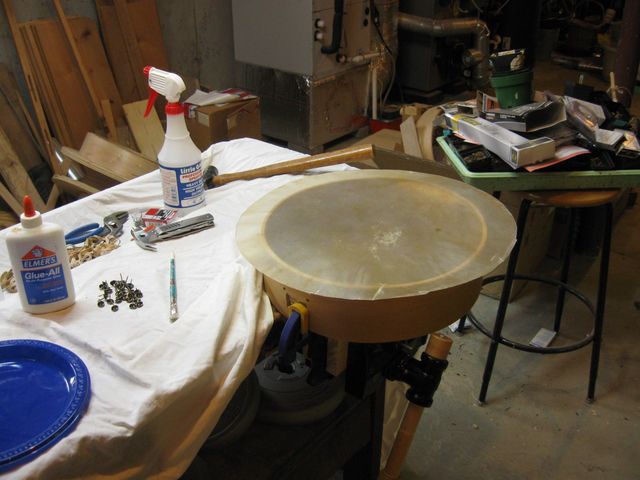
All of the Stuff is Ready To Go
With the skin still soaking upstairs, I put the glue on the hoop over the tack holes. Once the glue is on the hoop, time is limited because I have to get the head on before the glue dries.
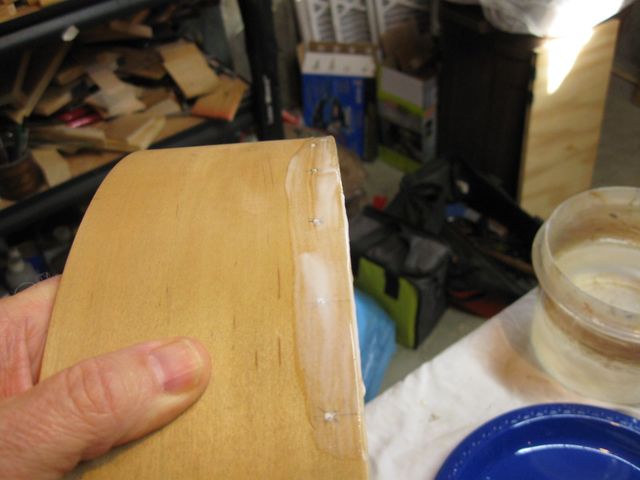
The Glue Is On
I ran upstairs to fetch the skin. Here it is all slack and stretchy from the water.
The Skin is Ready to Stretch
In the past, putting head on was such a mess that I did not get a chance to photograph the process. This time, I had everything so well planned and prepared that I hoped to provide step by step photographs as I leisurely stretched the head into place.
Not so much.
As usual, nothing went well at all. The biggest problem was that once I had pulled the flap of the skin down over the tack hole, I could no longer see the hole. The holes just disappeared. So I was groping around with the tack, trying to find the hole. I had the same problem when I stretched the gourd heads as well, but in that case I could just give up and push the tack into the gourd wherever it was, pilot hole or not.
That was not possible with the hard maple. I had to find the hole, or the tack was not going in. So I stretched and pulled and said "where's the !@#$% hole?" until I finally had some of them in. I did manage to snap one photo with the head partially stretched.
Some of the Tacks Are In
Even after I found the hole with the tack, I could not push it in with my thumb. I had to tap it in using a hammer. But that is OK. I only had to tap gently so it worked OK.
I finally figured out that the reason I could not see the holes is that they were full of glue. Scroll back up to the photo of the glue on the hoop. See how the holes have been filled with glue? That makes them invisible under the head. So I started sticking the point of the tack into the hole before pulling the skin down over it, and that made the holes easier to see. I also had the idea that next time (is there going to be a next time?) I will also chamfer the holes slightly to make them easier to find. Heck, I might even paint them black as well.
I also found that the hoop was not clamped as tightly as I had presumed. It kept rocking and rolling around those clamps when I tried pull on the head. I need to come up with a better way to secure the hoop next time.
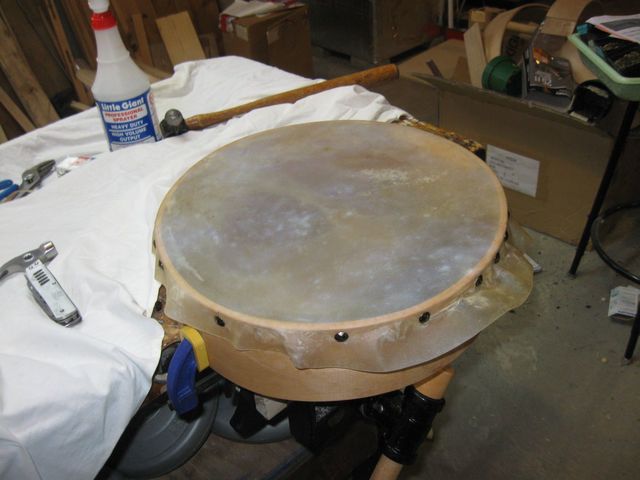
I did manage to get the head on it and all of the tacks in their holes. Here is the hoop after all the stretching was done.
Finally Stretched. Whew!
And here is the tool that saved the day.

My Trusty Magnifiers
Half way through this mess I thought of putting on my magnifiers to help me see the holes. My old eyes have become so bad that seeing the vague holes with just my glasses was a problem. It is a sad day when your eyes are so bad that your glasses need glasses.
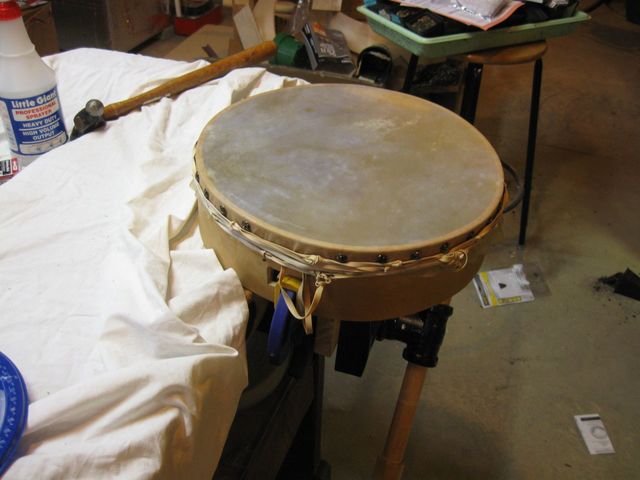
Oh well. It is what it is. I pushed down on the head to see how tight I got it. Not very tight. But then it is still wet. As it dries out it will shrink and tighten up like shrink wrap. If I remember properly, the heads on the gourd banjos were not very tight at this stage either, and they have worked out OK. All I can do now is wait for the head to dry.
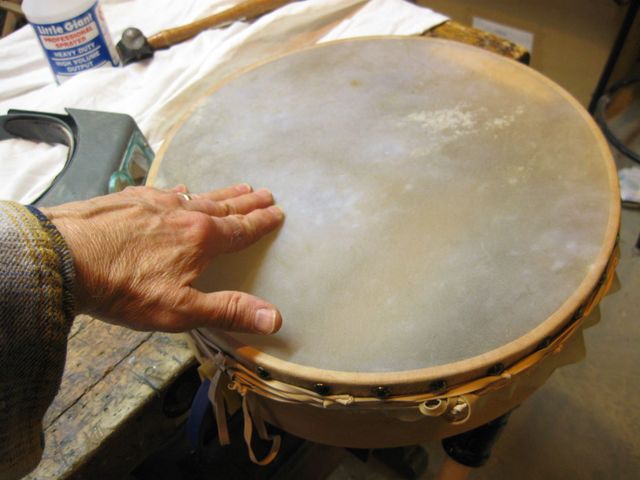
Still a Bit Stretchy
