After using the small 5" file with a handle, I decided that I do need a handle for the large 6" file. I have saws that I can sharpen with the larger file, and using the file with a bare tang is difficult. So I found some leftover Poplar in the wood pile and cut some blanks out of it.
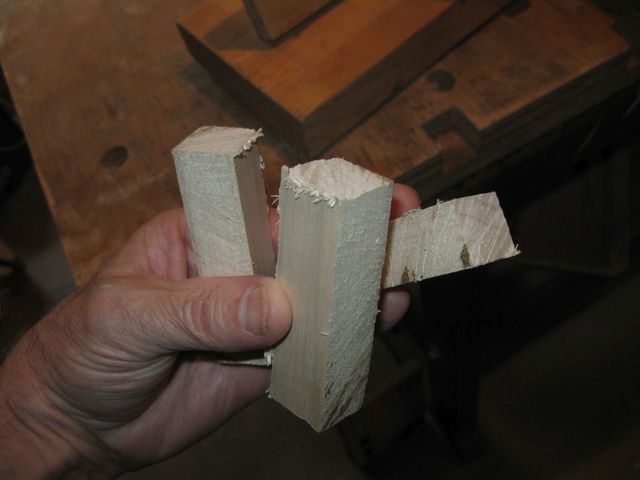
I Got Three Blanks Out Of the 4" Board
I cut the blanks 3/4" wide so that they will be square in cross section. This time I will drill out the tang hole using a jig to keep everything perfectly aligned down the center of the blank. No more eyeballing a vertical drill.
I can clamp a perfectly square handle into this right angle jig that I made earlier.
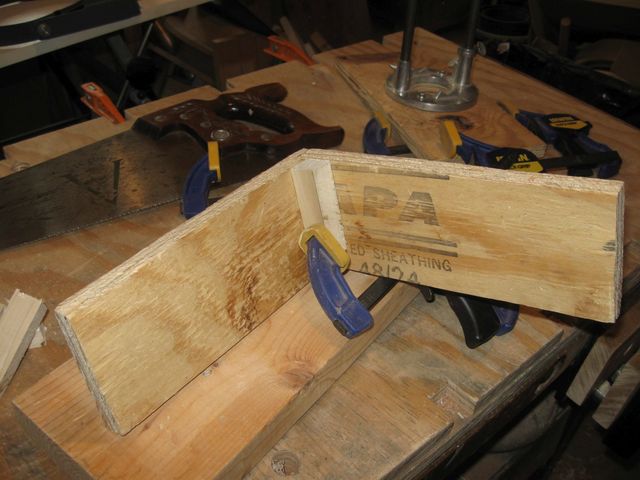
This Jig Was Made for a Different Project
I made the jig out of some plywood for a bookshelf project I am working on. I took pains to join the two sides of the jig at a perfect 90° angle to each other. When I glue up the bookcase, I will clamp the jig on the inside of the 90° joint, thus keeping the two sides properly aligned for a square corner.
But, 90° is 90° is 90°. So I can use the inside of this jig to clamp my handle blank to keep it perfectly vertically aligned. Once I have the handle aligned perpendicular to the jig, I can clamp my PortAlign® to the jig, thus assuring that the drill bit will be parallel with the main axis of the handle.
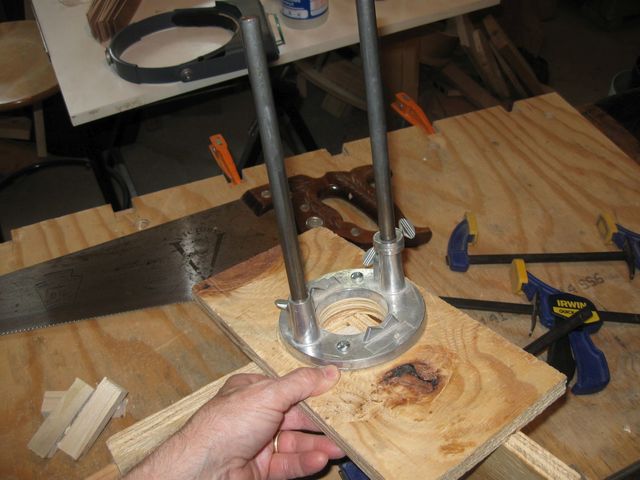
I Bought This Poor Man's Drill Press Many Years Ago
The PortAlign® is a much maligned tool that claimed it would be a cheap replacement for a drill press. I don't think that anyone makes them anymore, although you might be able to find a used one on eBay. The drill is chucked into a jig that rides up and down on the two rails, thus keeping it perpendicular to the surface that you are drilling. While it is not anywhere near as perfect as a real drill press, I have found that I can get pretty good accuracy by screwing the PortAlign to a piece of wood, and then clamping the wooden base to the surface I am drilling.
Anyway, that is the theory. I will clamp everything together at right angles and then drill out the hole, which should come out straight this time. The first step is to make sure that the blank is truly square.
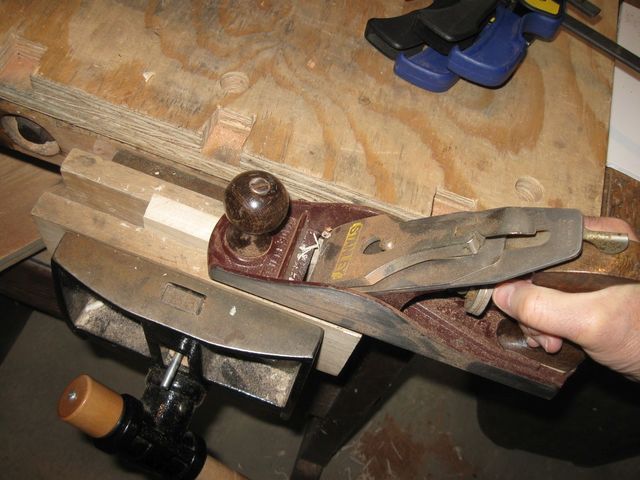
Squaring Up the Blank Using the #4 Smoothing Plane
After squaring up the sides of the blank using the plane and the combination square, I squared up the ends using the shooting board.
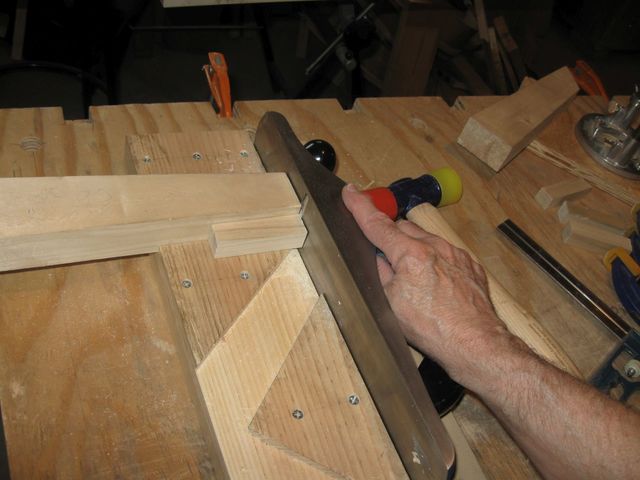
I Switched to the #5 Jack Plane on the Shooting Board
I clamped the 90° jig and the now square handle blank directly into the bench vise.
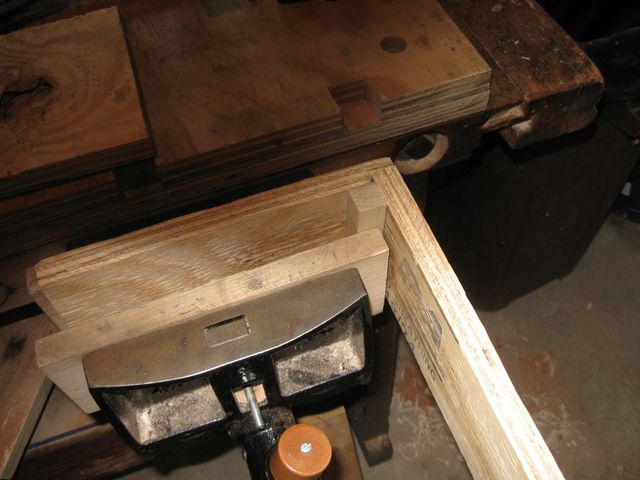
This Is Firmly Clamped and Aligned
The PortAlign will then be clamped down onto the jig with the drill bit over the center of the handle blank, like this.
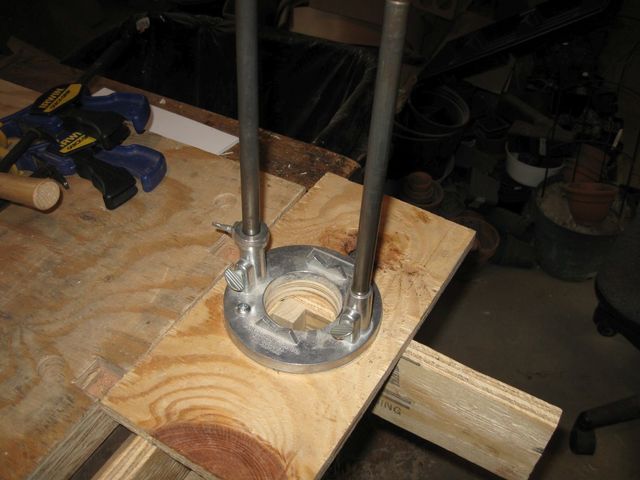
The Wooden Base Allows Me To Clamp It All Together
I ran out of time on this, so I did not get to drill out the blank. I will have to delay that until another day. But I am all set now to try this out. I just need to set it up again and give it a try.
