It has been a couple of months since I have worked on this project. I put it aside to spend time doing other projects, such as my art work. I also wanted to give myself some time to work out how to manage my new allergies with respect to this wood.
At one point, I went down to the shop to look at the wood and plan out where I would cut the blank for the peghead. After simply handling the board for a bit, not doing any cutting at all, I ended up suffering a rash on my face. That was very discouraging. However, I think that if I treat the board as though it were Poison Ivy, I might be able to finish this instrument.
Poison Ivy? Recent research has shown that the effects of Poison Ivy can be stopped with the simple measure of thoroughly washing off the oils immediately after exposure. Using plain soap and water, a thorough washing will remove the offending oils and avoid the worst of the reaction. This has to be done immediately after exposure to avoid the skin reacting to the oils first.
I figure that if I treat the wood as though it were Poison Ivy, scrubbing my hands and face clean after touching any of the wood, I might be able to avoid the reaction. It is worth a try to see if I can finish the project. So I am back to carve the peghead for the dulcimer.
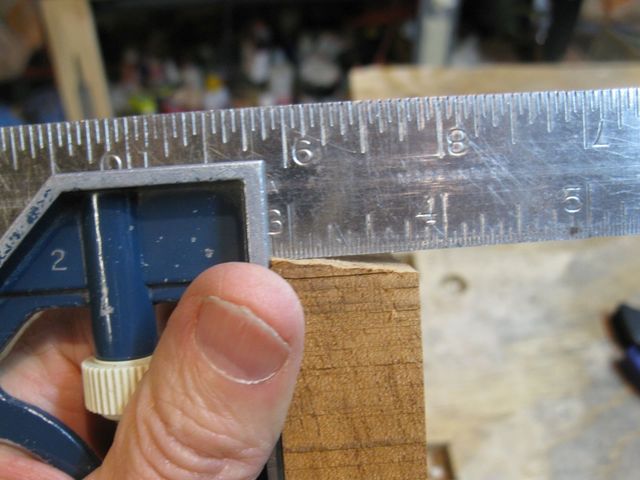
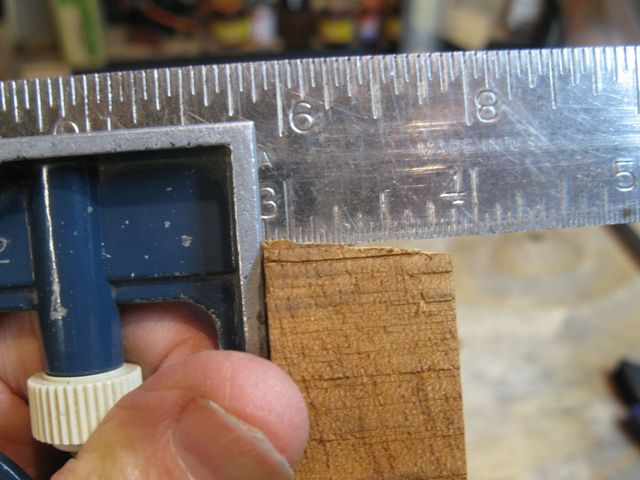
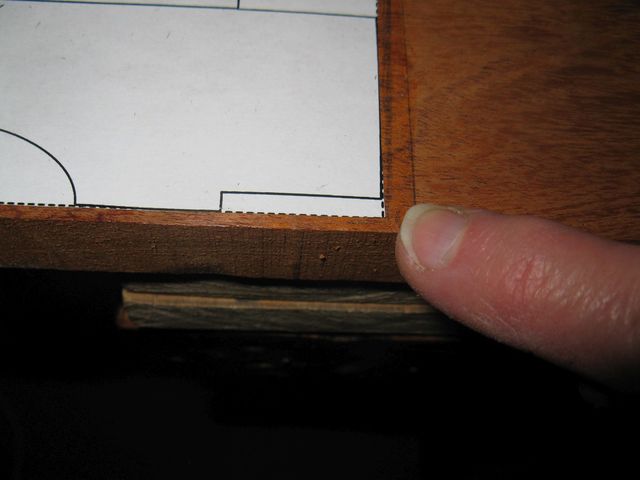
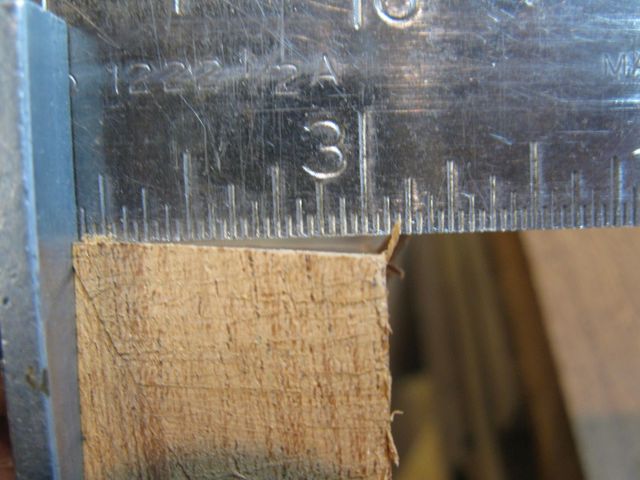
The Mesquite board that I will be making this out of is slightly thicker than the standard 3/4" board. It was custom cut for me by the fellow who sold me the wood.
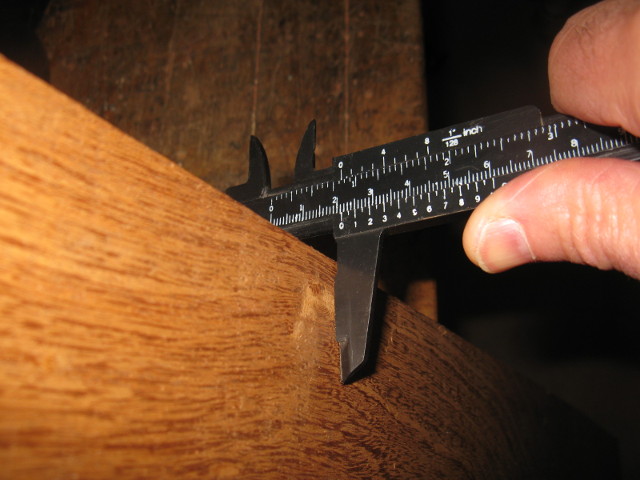
Looks Like It Is 27/32" Thick
27/32" is just 3/32" thicker than a standard board. When I glue two of these together, the blank will be 1 11/16" thick.... just 3/16" thicker than it would be if made up of two standard boards. My design calls for a peghead that is 1 1/2" thick, so this will be good since it gives me some some extra wood for planing it to thickness.
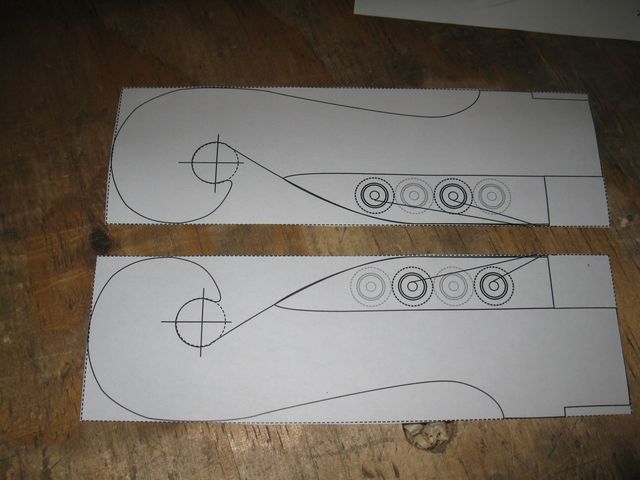
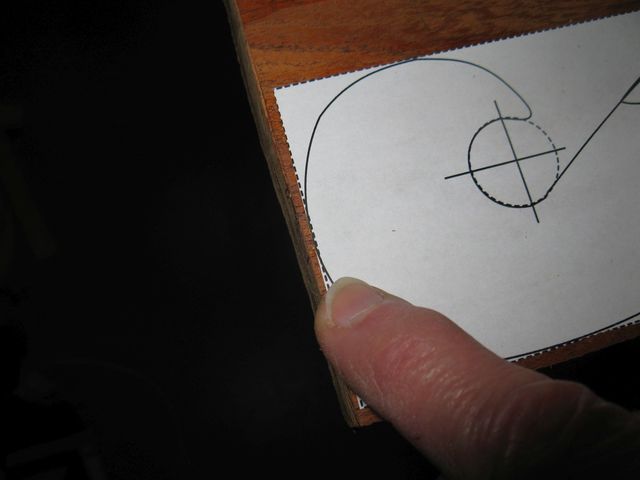
I printed out my peghead plan at full size so that I can glue it to the wood for the purposes of cutting it out. Here is the plan.
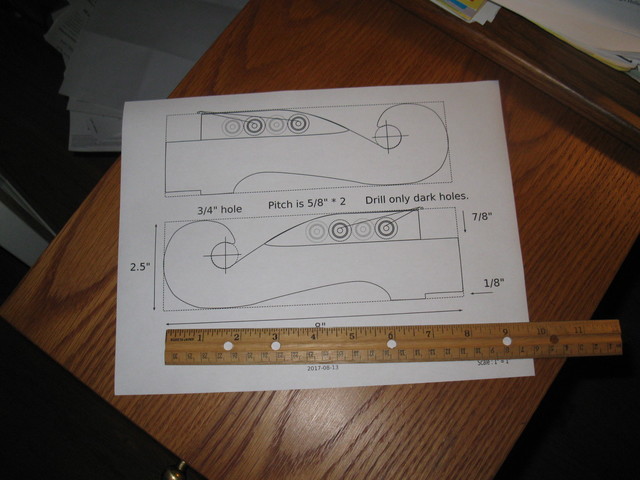
The Peghead Should Be 8" Long
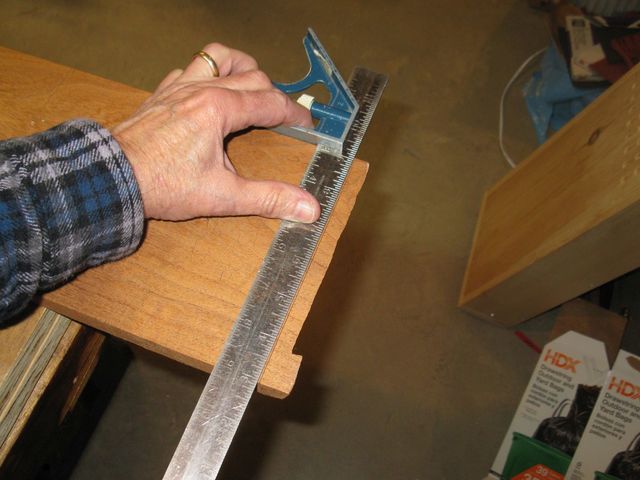
The printer can be tricky with regard to scaling the printout down to fit within the margins of the paper, so I measured it to make sure that it is actually a one to one scale with the design.
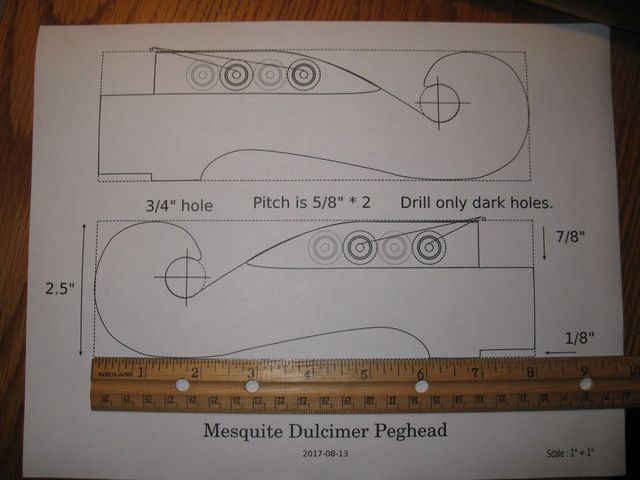
My Ruler Doesn't Lie
It aligns nicely with the printout.
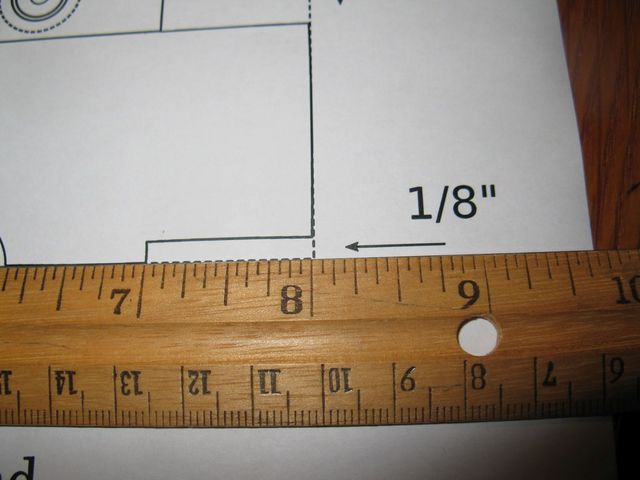
Spot On!
I cut out the two sides of the peghead plan so that I can glue them directly to the wood.

Cutting Out the Plan
Here are the two pieces of the plan, ready to be glued down to the wood.
These Are Ready to Glue Down To the Wood
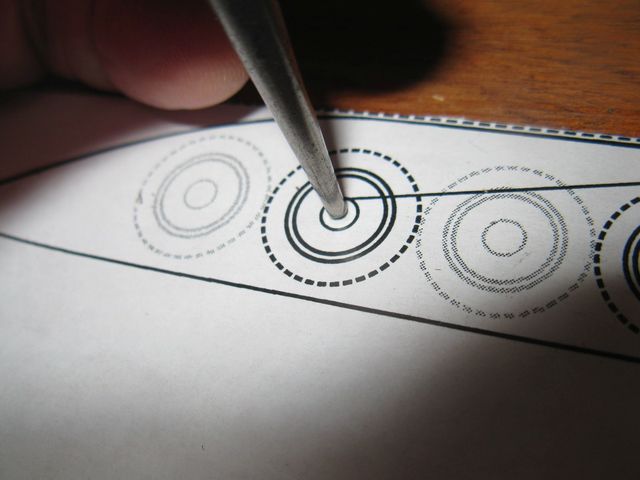
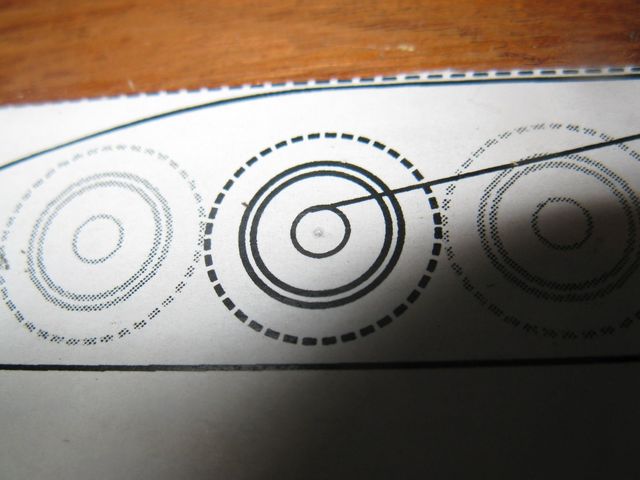
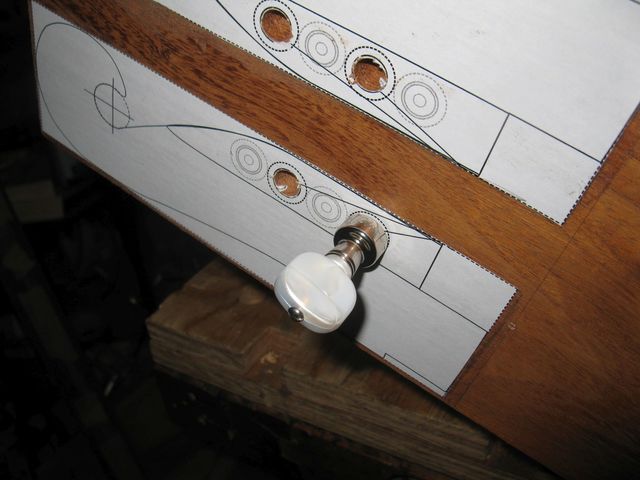
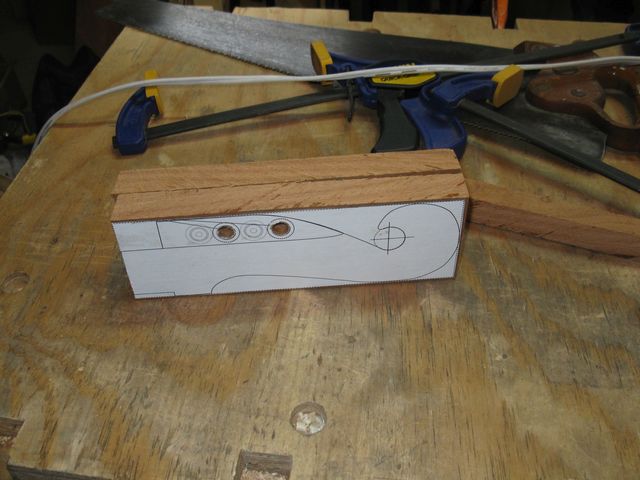
If you look at the two plans, you will notice that the locations of the tuning peg holes are printed in two shades of gray. One pair is darker than the other. You may also notice that the darker circles are staggered on the two sides of the peghead. My plan is to drill out the holes all the way through the board before gluing the two boards together. That will be easier to do than attempting to drill part way through the board after the blank has been glued. I will only drill the darker marked holes so that the pegs will be staggered after the piece is finished.
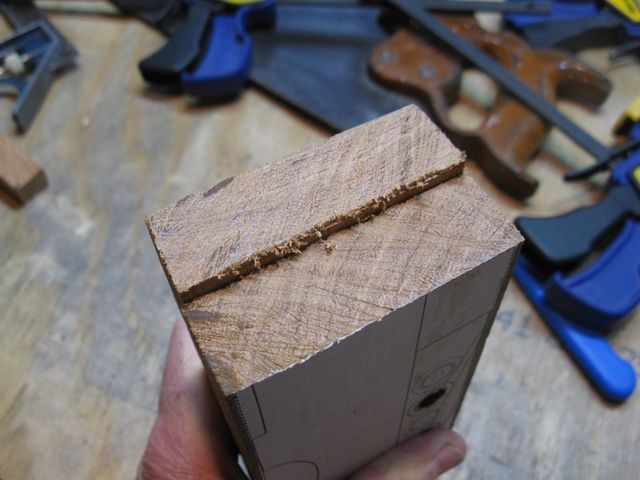
The board itself has a crooked end on it where I want to take out the pieces for the peghead. So I decided to saw it off square before I start laying out the parts.
I Marked a Square End on this Lopsided Cut
I made a knife cut on the square line and then used a chisel to carve a small saw kerf.
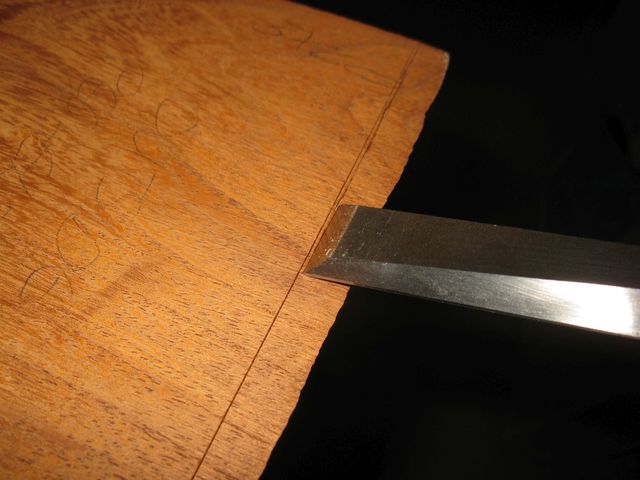
Use a Chisel to Make A Small Kerf
Oops! Dang!
While I was sawing, I let go of the saw to get the camera to take a photo. The saw tipped forward and fell out of the kerf onto the floor, landing directly on the horn of the handle. This is what happened.
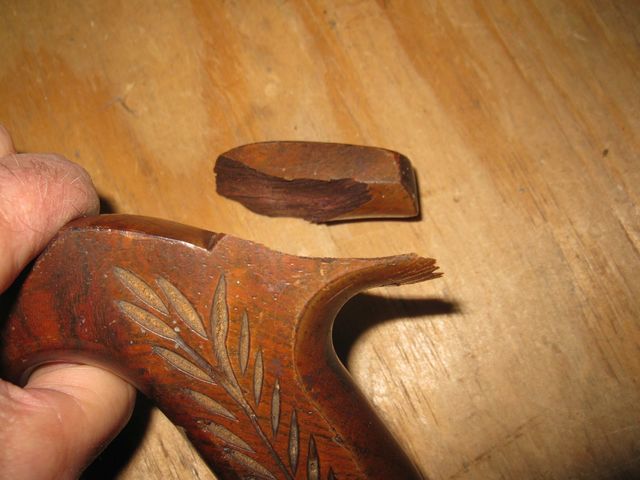
The Horn Snapped Off the Handle
Rats! My antique saw!
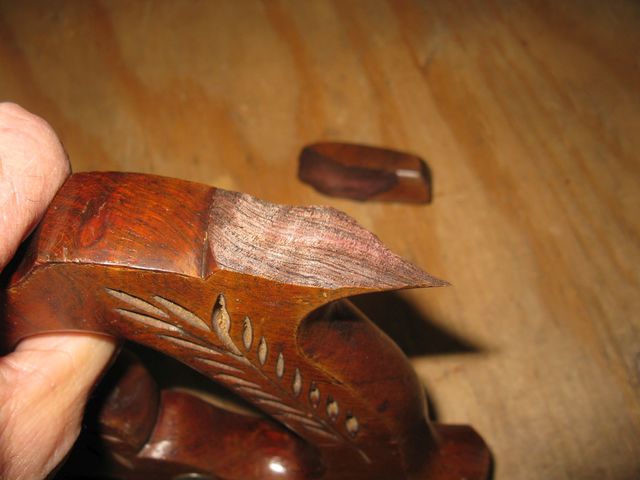
Snapped!
It looks like it is a pretty clean break along the grain. It should be easy to glue it back on.
The Horn Should Glue Back On Pretty Cleanly
I put that chore aside to do at the end of the day and continued sawing a clean end onto the board.

Sawing Off the End
Wow! This is not turning out to be a good saw day. Look at this cut.
That is About As Bad A Cut As I Have Ever Done
There is nothing square about this end.
This Is Not Even Close To Square
The board is way too long to fit into my shooting board, so I squared it up by hand. It doesn't have to be perfectly square because I am going to carve it away anyway when I carve out the peghead. But I need to have it better than that.
I started by removing a lot of the extra wood with the spokeshave.
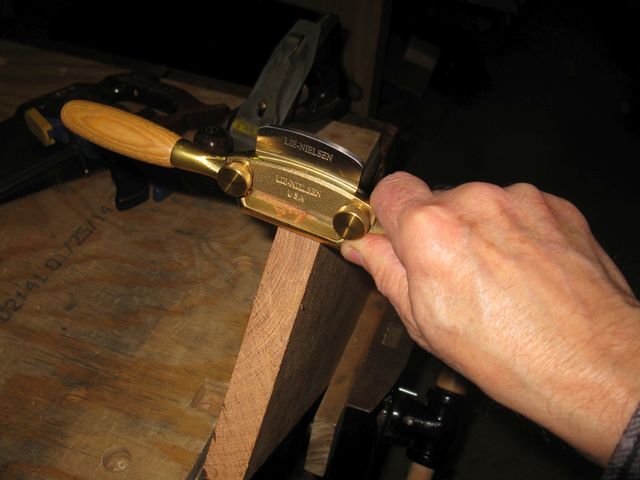
My Lie Nielsen Spokeshave Cuts Endgrain Easily
I finished using the card scraper.
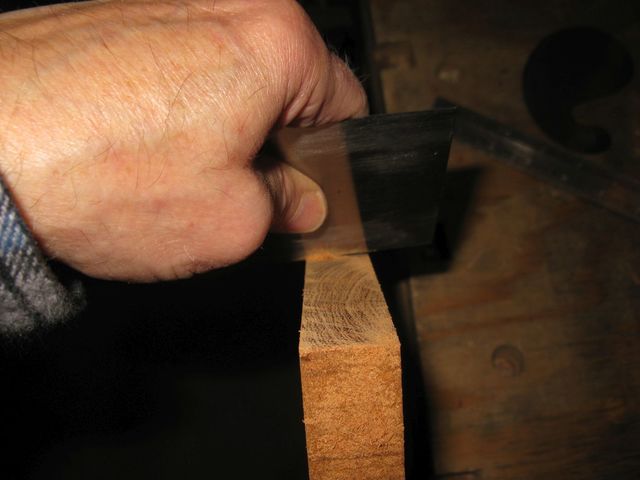
Using the Card Scraper
This is better. It isn't perfectly square, and it has a slight dome on the top. But that is OK because I will be carving it away anyway.
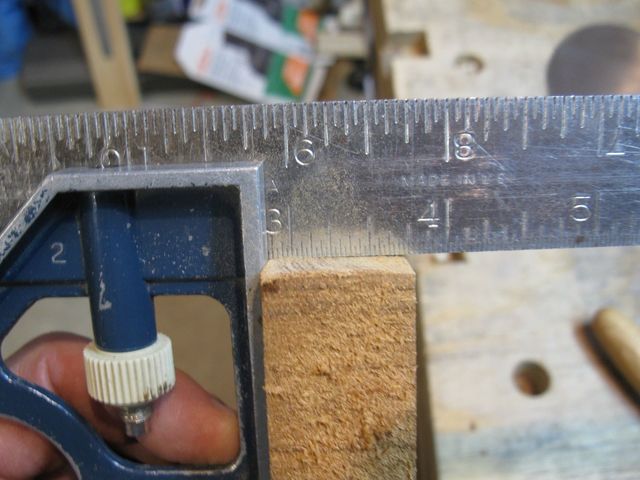
This Isn't Perfect, But It Will Do
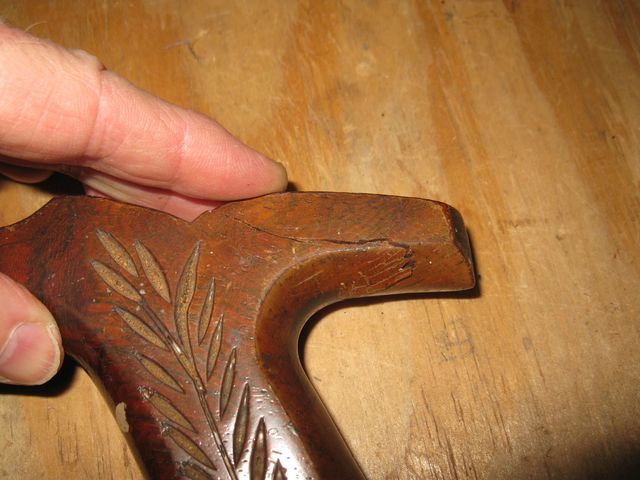
Taking a break, I took some Titebond III and glued the horn back onto my saw handle.
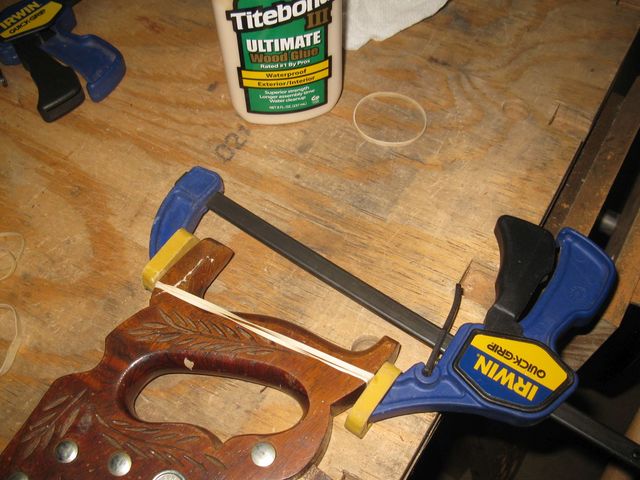
The Horn is Glued Back On the Handle
There is a glue line, but that is OK. That is one of those battle scars that give old tools their character. The saw will be just as functional as it was before.
This Will Be Less Ugly After It Dries
To glue the pattern down to the wood I used my premium "Paper Cement", which is just high quality rubber cement. I got this at the art supply store for a different project where I was gluing paper to foam core. This will work fine to cement the patterns down to the Mesquite even though it is a bit of an overkill price-wise.
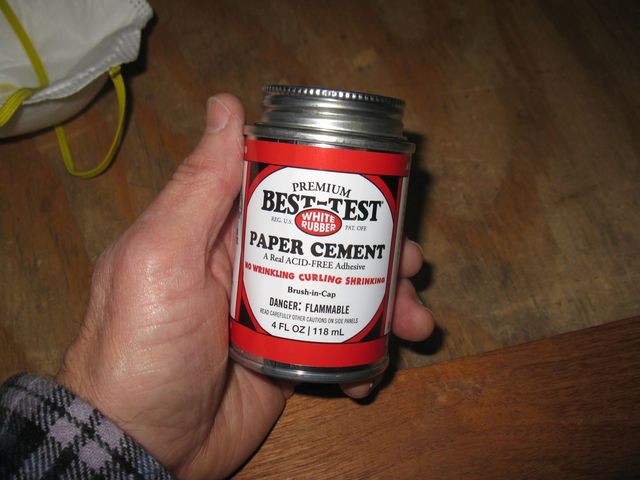
This Is High End Rubber Cement, Which Is Overkill for this Project
I smeared lots of rubber cement onto the wood...
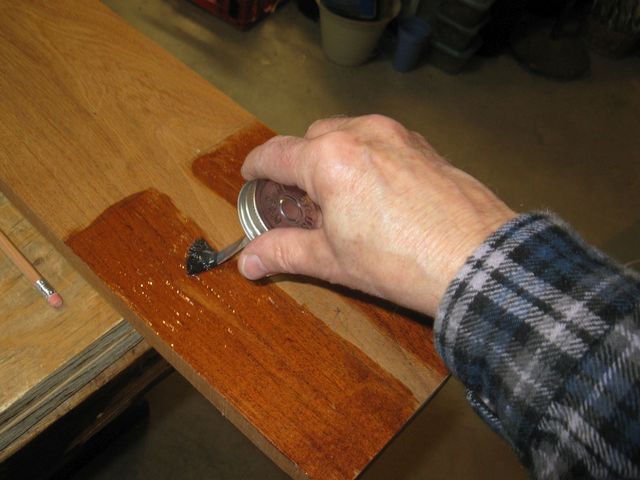
Applying the Rubber Cement to the Wood
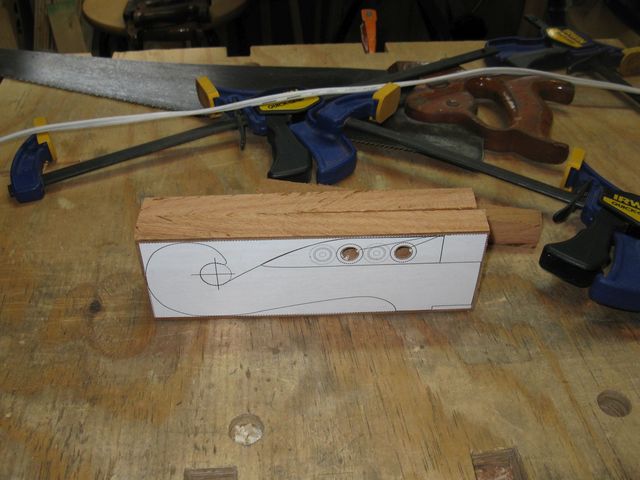
I stuck the papers down to the wood and pressed them down tightly with a piece of scrap wood.
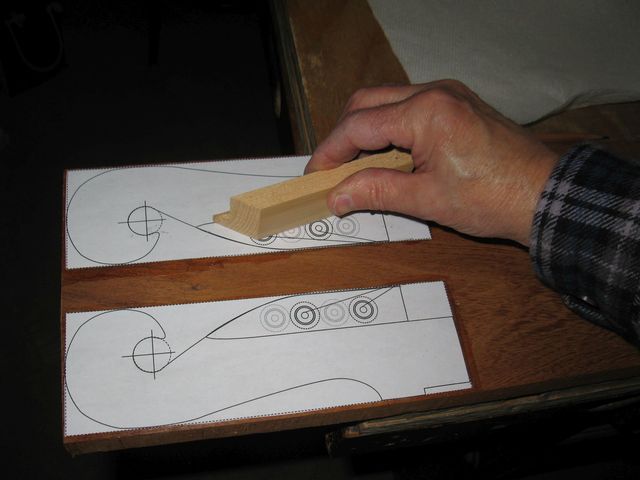
Rubbing Out Any Air Bubbles
I left a small amount of wood at the bottom of the pattern so that I can plane out the saw marks.
There Is a Little Extra Wood On the Side
I did the same thing at the end.
The End Also Has A Bit of Extra Wood
Next I drilled out the holes for the tuning pegs. I drilled out only the dark locations since the gray holes are to be drilled on the other side. First a center punch.
Punching the Center of the Hole
This is really hard wood. You can see that the punch does not make a deep dent in the wood like it does in the pine.
This Is Not Deep, But It Is Good Enough
I only get one chance at this. So I need to make sure that I do it right the first time. As far as I remember, the holes for the tuning pegs need to be 3/8" in diameter. But rather than trust my memory, I got out the pegs and measured them.

I Measured the Peg Shaft at Just Under 3/8"
My 3/8" drill bit looks identical, so I think we are good.
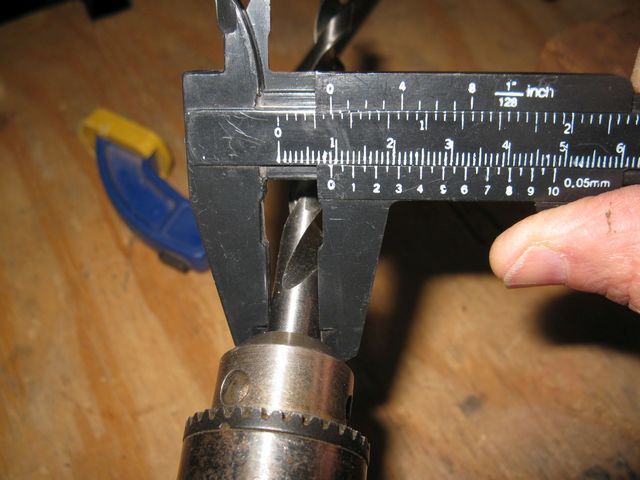
The 3/8" Drill Bit is the Same Size
I used the Brad Point bit in the PortAlign®, clamped down to the Mesquite board for accuracy. This is my homespun substitute for a drill press, which I do not have the $$$ to buy nor do I have the space to store it. So I take special care and use the PortAlign to keep the hole vertical.
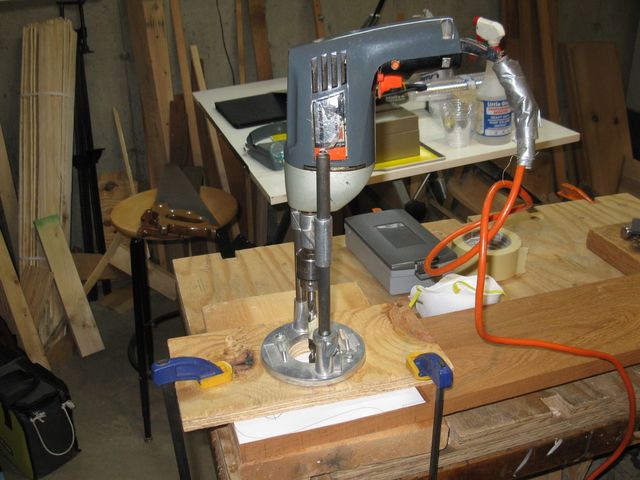
This Is My Setup For Drilling A Vertical Hole
I carefully centered the drill bit over the center punch dent. The masking tape on the bit tells me when I have gone completely through the Mesquite board, but not through the sacrificial two-by-four that is beneath it.
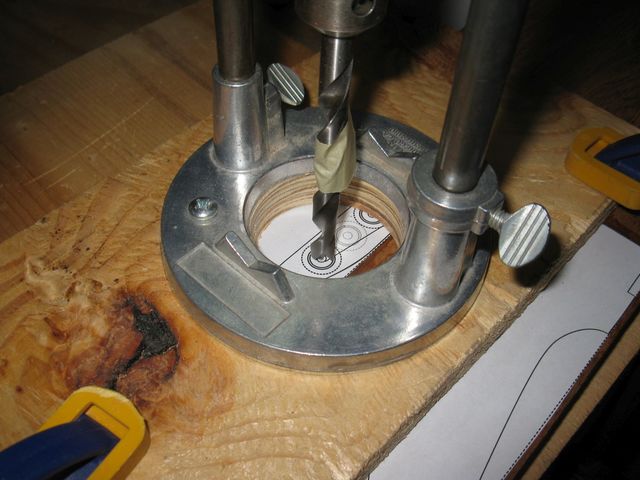
Aligned And Ready To Go
I drilled down through the Mesquite to the tape marker.
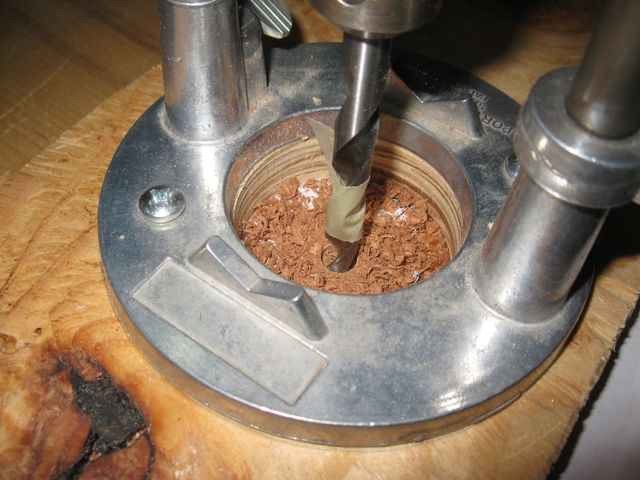
Drilling Out the Peg Hole
Rinse and repeat. I drilled out all four holes using the same technique. Here they are with one of the pegs stuck through a hole.
All Four Holes Have Been Drilled; Looks Good
The next step is to cut off the two blanks from the main board. I left them attached to make it easier to clamp everything to the bench for drilling.
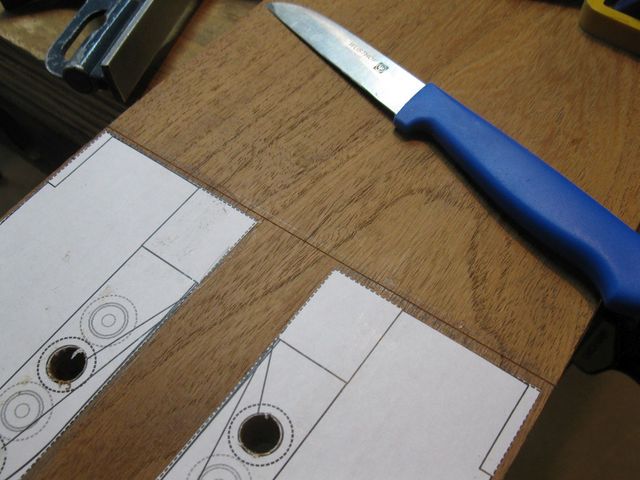
I Cut a Knife Line Where I Will Saw Off the End
I cut off the end with the blanks. Once again, I made a crappy cut. This one is not square either.
I Don't Know What is Wrong With that Saw Today!
I cut out the blanks and put them together. Because of my lousy saw work, they do not line up very well at all.
This Is a Very Bad, Crooked Outcome
But, as I said before, I am going to carve it all away anyway, so I will chalk it up to a Bad Saw Day and move on. Here is how the pieces will go together.
They Get Glued Together Like This
You can see that the two peg holes are the rear-most hole and the front middle hole. Here is the other side.
This Is the Other Side of the Pair
On this side, the hole is in the front-most hole plus the back middle hole. I think that the holes will work out OK.
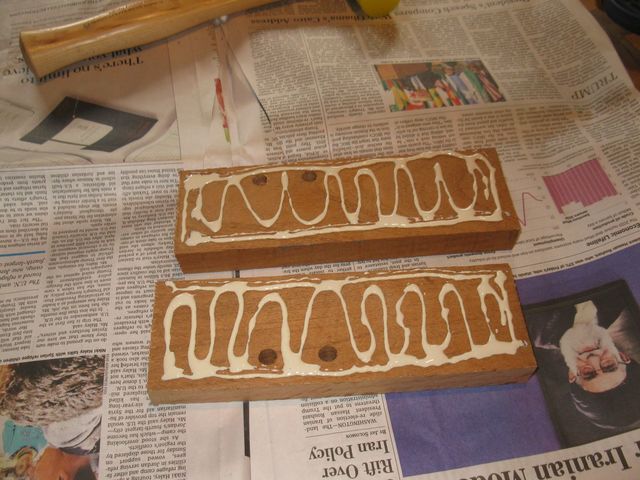
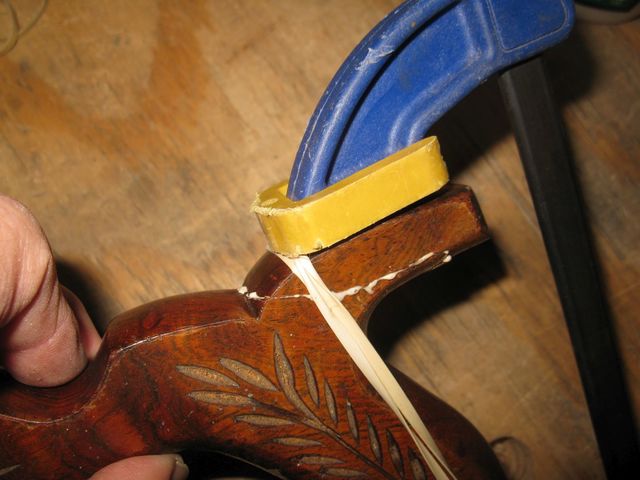
I Spread Lots of Glue On the Blocks
I used lots of glue because I don't care about squeeze-out because..... well.... I'm just going to carve it away anyway.
Clamped, and set aside to dry.
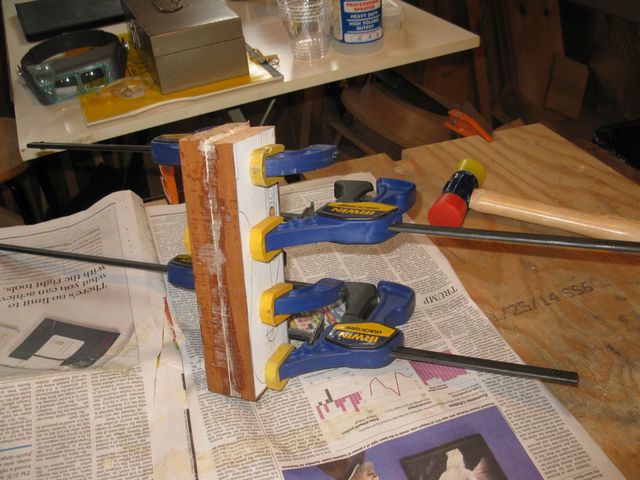
Glued and Clamped
That is all I can do today because the glue has to be completely dry before I start carving the wood.
