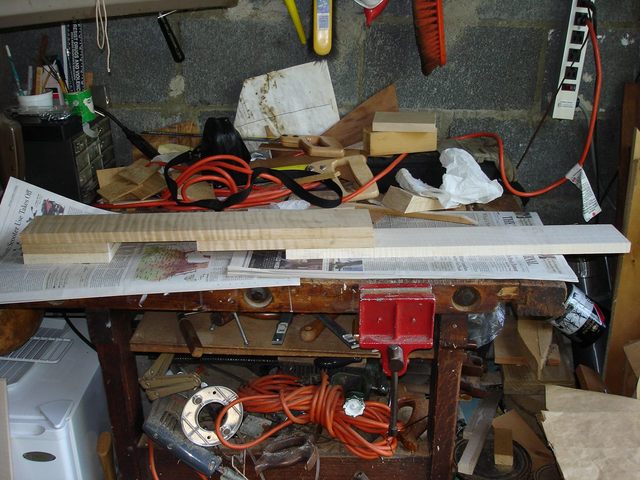
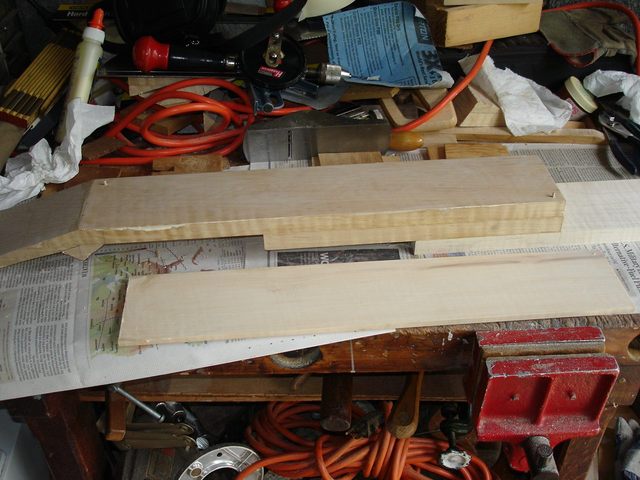
Ok. Here is the neck blank all dry and ready to cut.
I will cut the banjo neck out of the blank by making the cuts in the following order:
I chose the sequence above in order to allow me to clamp the neck securely for the more difficult cuts. As the neck is carved closer to its final shape it will become more difficult to clamp because of the round contours. So I will do the difficult cuts while it is square. Since the peghead is a difficult cut, I will do that one first.
First, I marked off the shape of the peghead. You can see my plan for how to mark the peghead here. I started by dropping three vertical lines from the top of the blank. I used the lines to mark off the extra piece of wood for the handstop. The marks are made 4", 5", and 6" from the end of the blank.
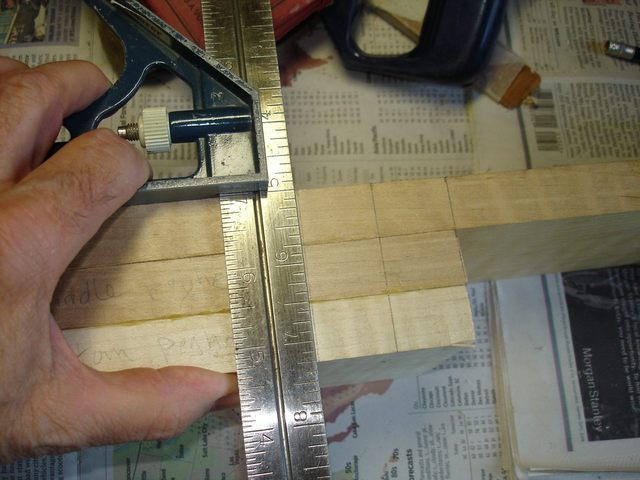
I took my ruler and marked it like this, according to my plan. All of the cuts will be straight cuts along the lines shown below.
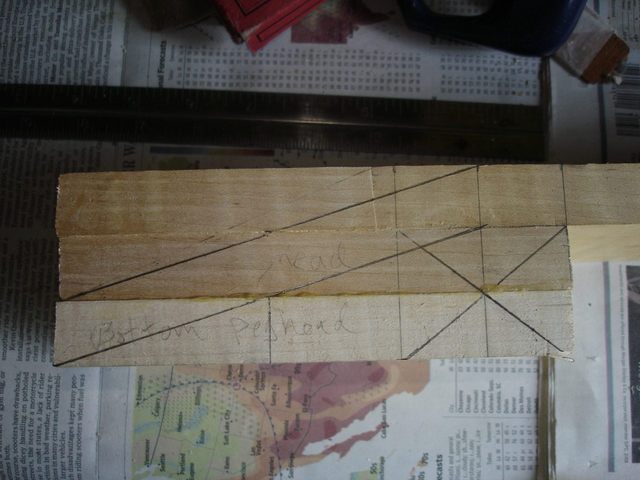
You may notice that I have left wood for the handstop on both sides of the place where the nut is supposed to go. The handstop will be cut out of the wood in the region of the X on the wood. The nut will go just about where the center vertical line is located in the middle of the X.
While I was marking off the lines I noticed that I will be cutting away almost all of the wood in the bottom piece. In fact, there is no need for any of the wood to the right of the vertical line where the pencil is pointing.
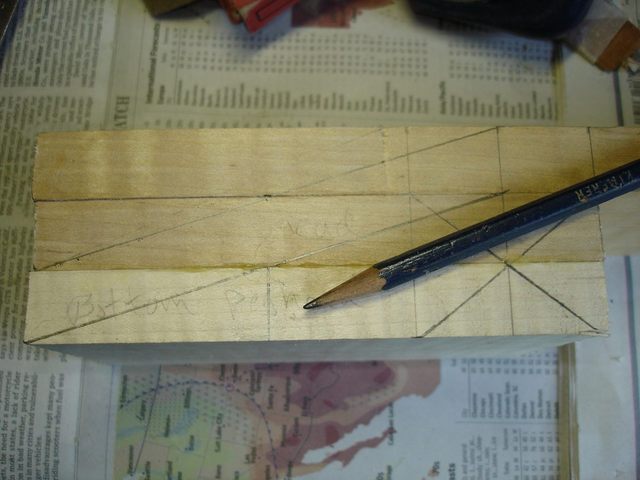
You can see that the handstop wood is entirely above the top of the bottom-most piece. I really only need about 2 1/2 inches of wood glued to the bottom of the peghead instead of the 6 inches that is there. I could save some of my wood next time I make one of these if I just glue a 3" piece on the bottom instead of the 6" piece. Live and learn.
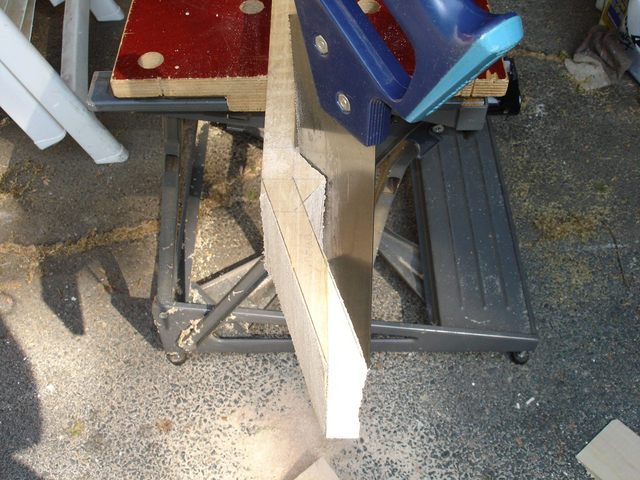
I started sawing with my ripsaw at the nose of the peghead.
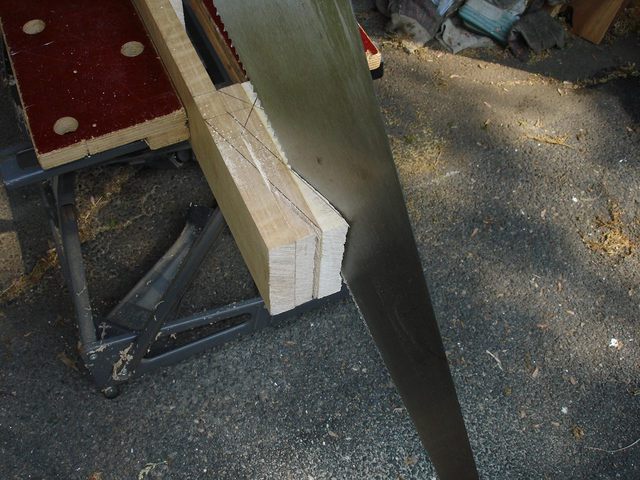
I sawed in the top cut until the top piece came off and I sawed in the bottom cut until I was up to the handstop.
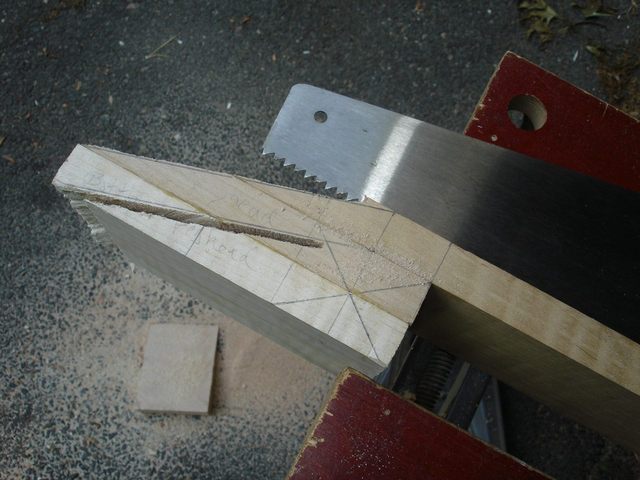
Then I started sawing the X to make the handstop.

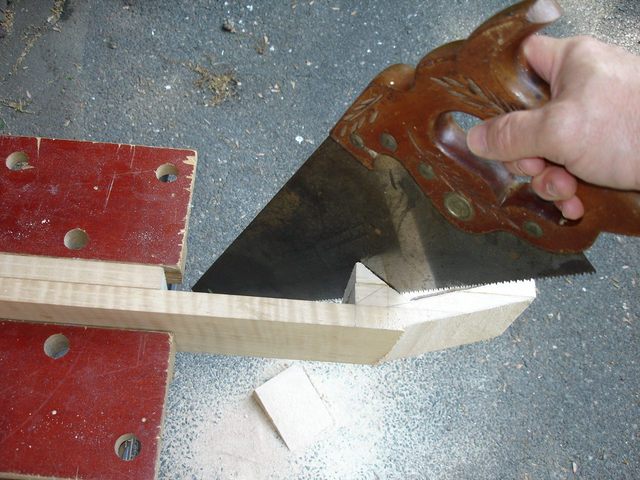
That little panel saw was really slow, so I switched to a large crosscut saw to finish up.
I sawed until the piece came off, and then I turned the neck over to see the other side. Dang!
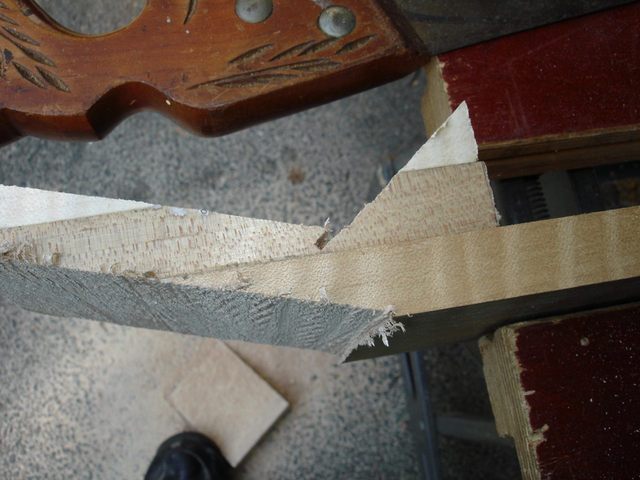
I did not have the saw straight up and down, and I cut too deeply on the other side of the neck. I have sawed way too far.... nearly half way through the peghead. This is a disaster!
I finished the other cut...
... here it is from the good side...
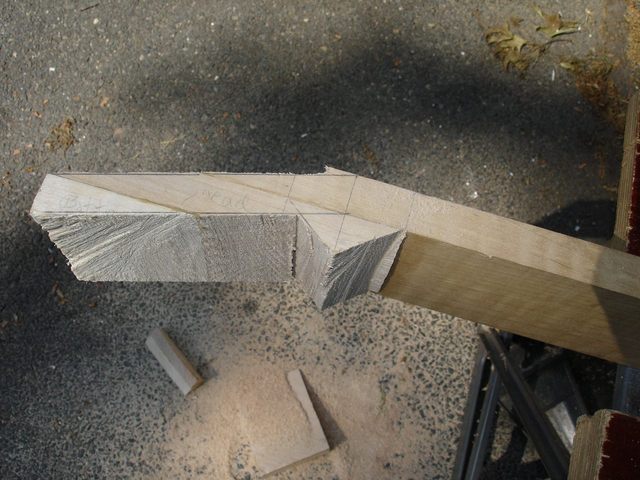
And here it is from the bad side.
Ugly.
I went off to think about this a bit. I have cut the peghead too deeply, and I cannot put the wood back, so I don't know how to fix it. I really don't want to start over again on a new neck. I decided to see if I could carve the peghead a bit thinner to make up for that gouge.
I planed the bottom of it with my block plane. That went fairly easily, and I was able to take the wood off pretty quickly.
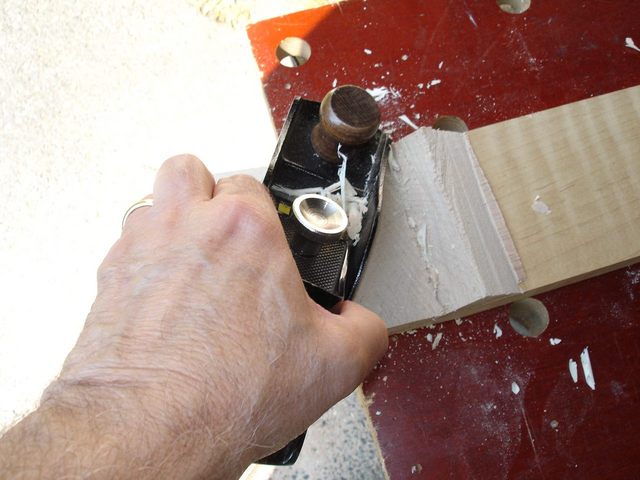
I used the plane on the top of the peghead too.
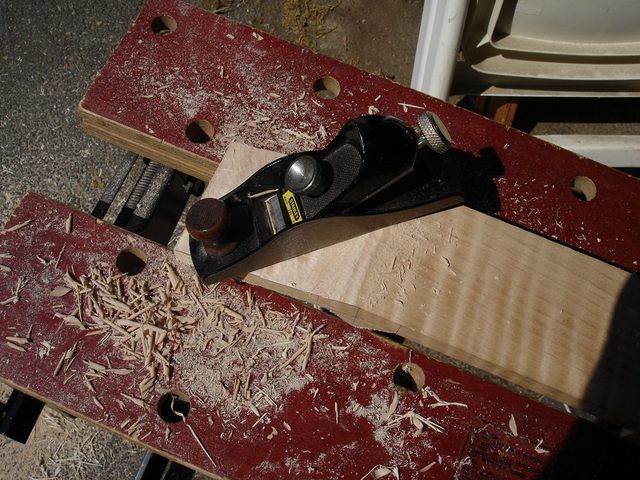
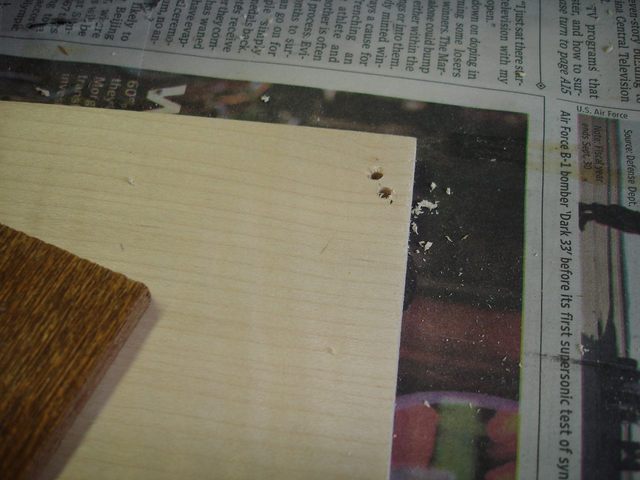
While I was planing the peghead, look what I found.
It is one of the little wooden pegs that I used to align the wood when I glued the pieces together. I'm glad I decided not to leave the metal pins in there or this would make a mess of my plane iron!
I took great pains to keep the top of the peghead as flat as possible since I will be gluing the peghead overlay down onto it. I used my try square to check it out often.
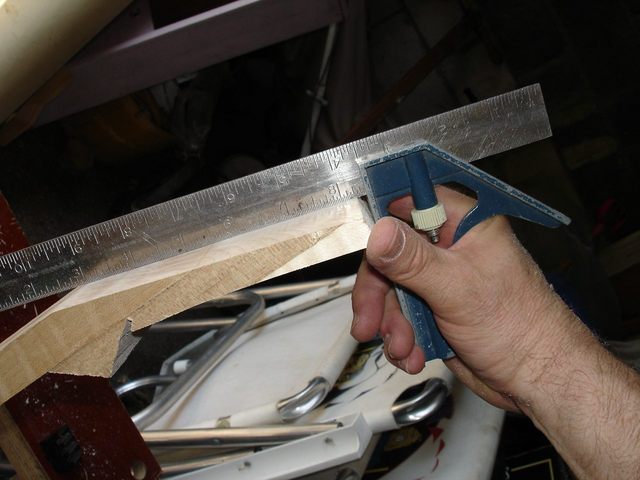
The procedure is simple, but tedious. Cut and check; cut and check; cut and check;.... Finally I put some 80 grit sandpaper on my sanding block and smoothed the whole thing down with that.
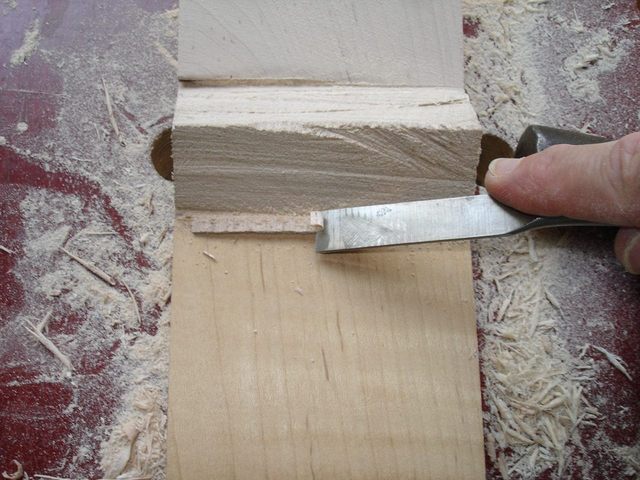
I used my 1/2" chisel to clean up the wood that broke off behind the handstop.
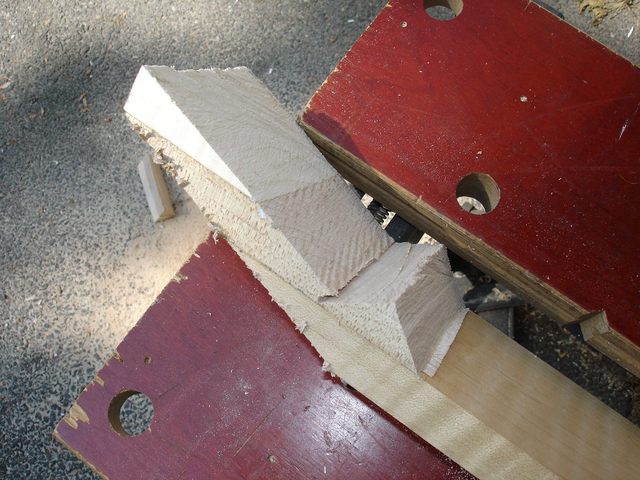
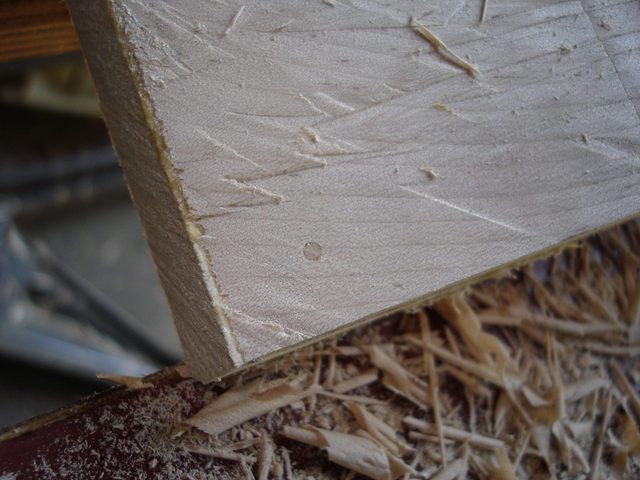
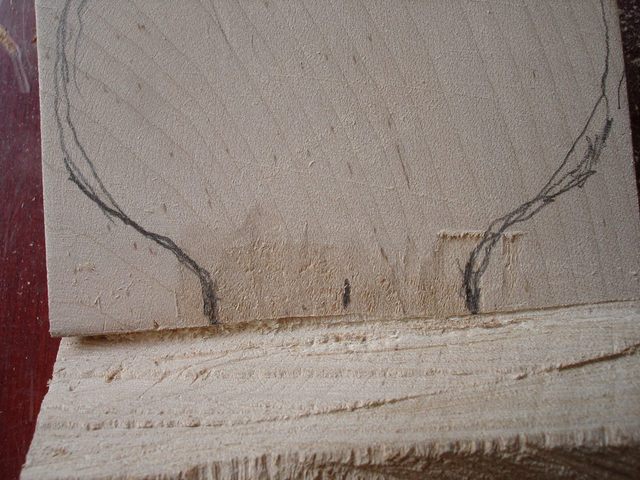
I took another look at that ugly gouge in the neck. It seems that the worst of it is on the edge, which will be cut away when I shape the neck. So I drew the outline of the peghead on the wood to see how far it goes.
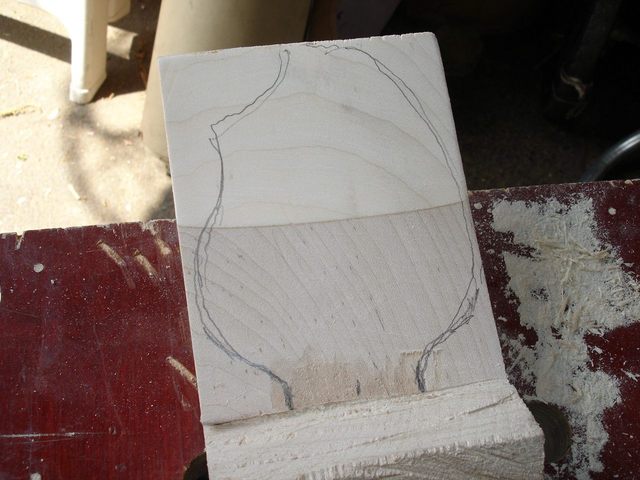
Here is a closeup of the damage.
It looks as though I might be able to carve the peghead into that notch and still save this. That will make the peghead thinner than I had wanted in that area, but I will be stringing it with nylon anyway, so it might hold up. Since I will be making wooden friction pegs for this banjo there is no need to keep the bottom of the peghead flat. In fact, it might look more artistic if I have a bit of a wave in it. I had already decided to make the tail end of the peghead cupped into the handstop, so maybe I can just fit this curve into that one and come out OK.
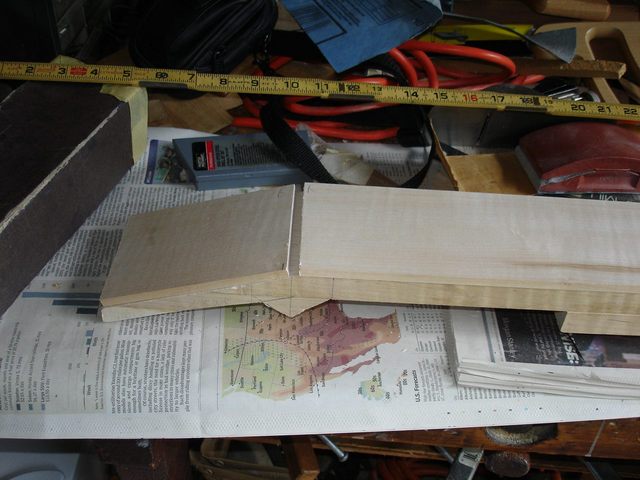
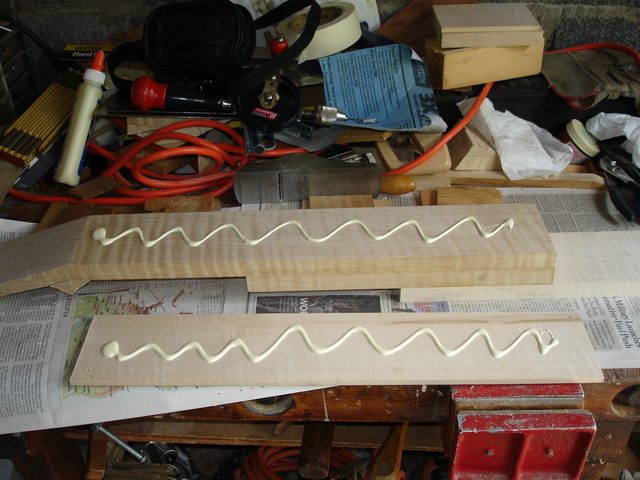
I had some hours left in the day, so I thought I would go ahead and glue down the peghead and fingerboard overlays. I cut my 1/4" by 3 1/2" by 24" board 5 inches from the end to make the two pieces. One of them is 5" long for the peghead, and the other one is 19" long for the fingerboard. Actually, the one for the fingerboard came out about 1/8" less than 19" because the peghead got cut that far back into the neck when I planed it flat. That makes the overlay for the peghead about 1/8" longer than 5". This is not a big deal because the neck will be fretless, and the exact length of it is not important. Here are the pieces dry fit to the blank.
I have left a 3/8" gap between the two pieces of wood for the nut. That is a rather thick nut since most of them are only 1/8" thick. But this is a rustic instrument, and a thick nut will not have any effect on the sound anyway.
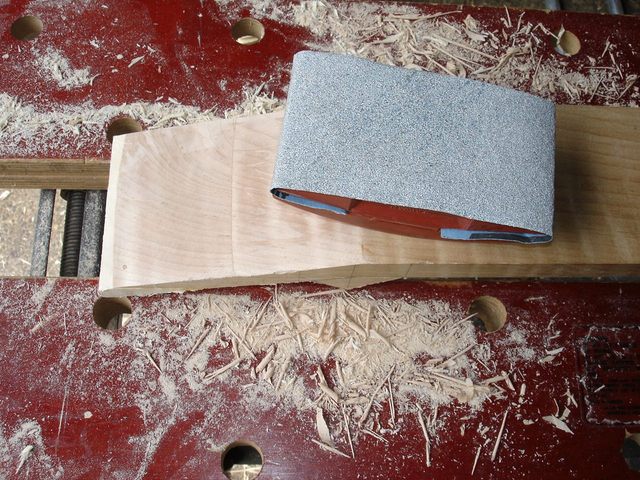
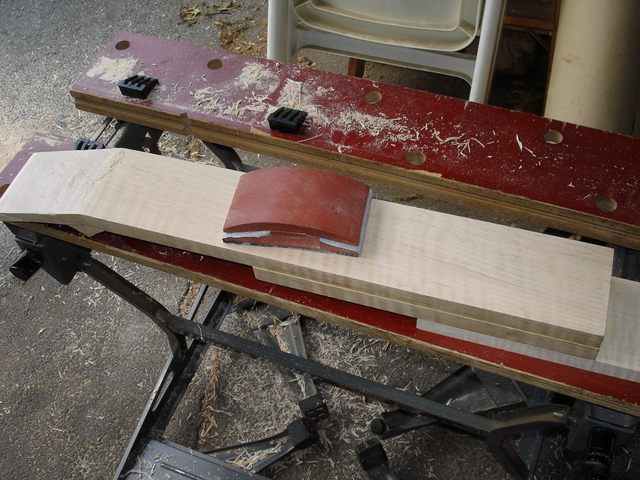
Using the sanding block to flatten the top of the peghead seemed to work rather well, so I used it on the top of the neck too.
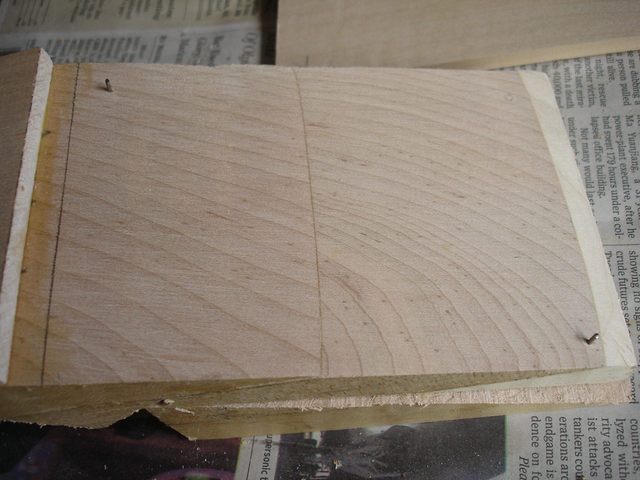
To keep the finger board from creeping as I glued it, I pegged it like I did the other boards. I placed the pegs in the wood that will be cut off as the neck is shaped. Here is metal marker pin pounded into the neck blank.
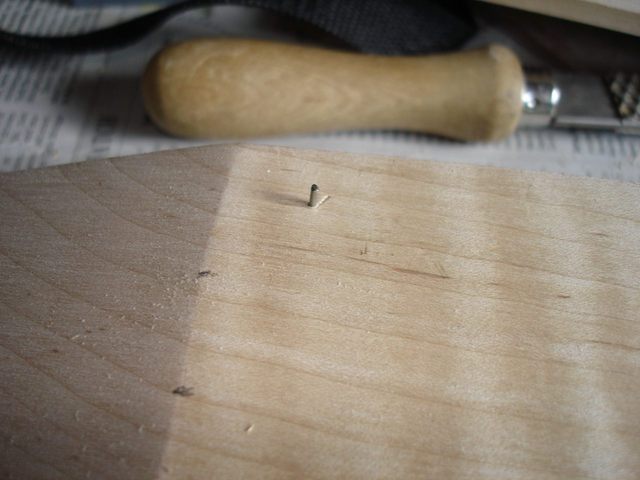
I pushed the finger board down onto the two pins to make a mark. I did not use the mallet this time to avoid bending the pins. I only need a mark anyway, not a hole.
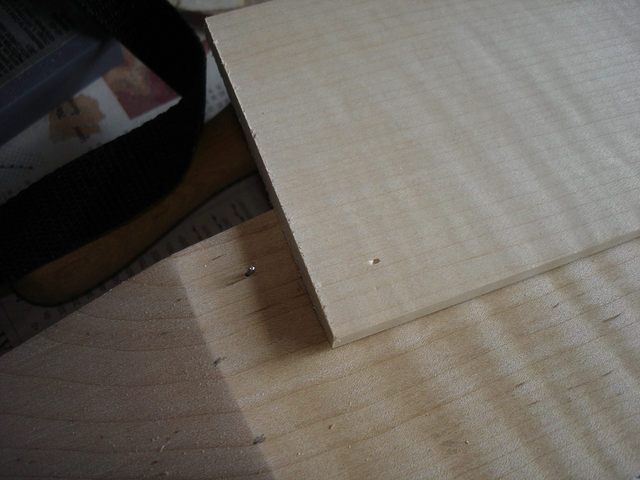
I drilled out all of the peg holes and made some toothpick pins to put in them, then I spread the glue on the wood.
In the photo below I have spread out the glue and put the wooden pegs into the holes.
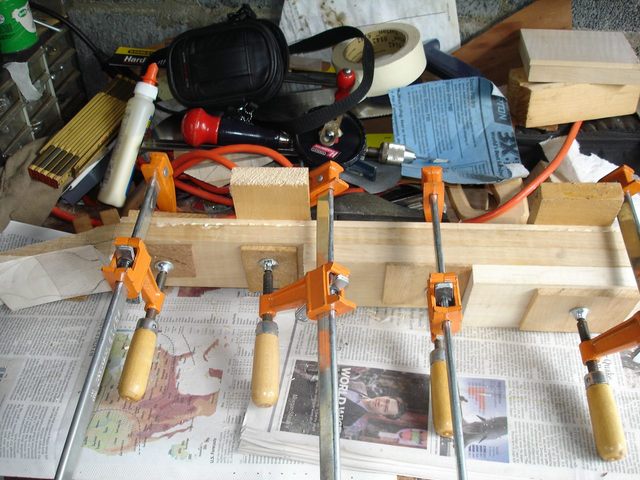
I put the boards together with the pegs and clamped it all together.
The peghead was done the same way. Here are the metal pins.
Dang. I messed it up again. After I marked the overlay and drilled the holes, the overlay did not line up with the peghead. Something must have moved when I marked it. I think a pin got bent. So I started over on one of the pins. I pounded it into a different location.
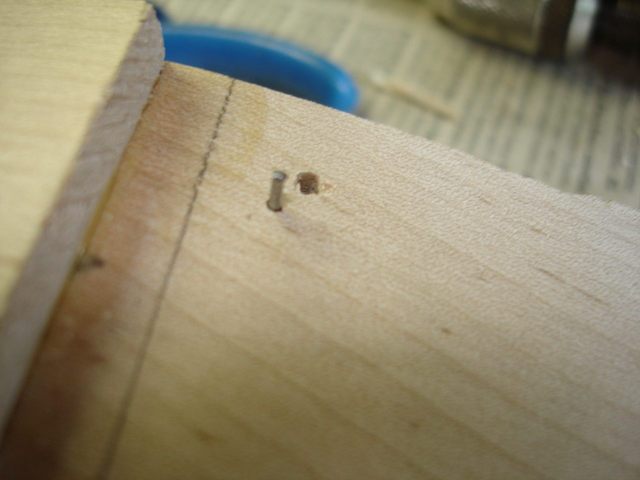
Here is the new hole in the overlay. The multiple holes don't matter because I will be cutting away that wood when I shape the peghead.
Here it is all clamped.
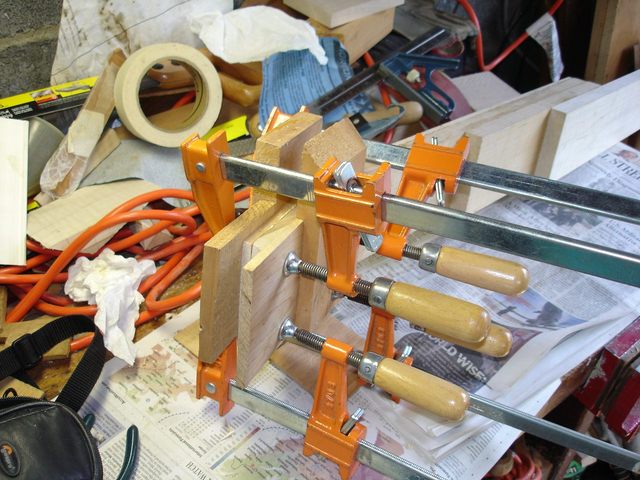
You may have noticed that I have a lot of clamps on that small peghead. After I had the piece glued in place I noticed that there were gaps around the edges, which means that I did not have the surface of the peghead as flat as I thought I did. So to bend the overlay around the surface of the peghead, I added clamps until the glue came out around the edges. Sometimes brute force is a good substitute for skill.
Well that's it. This one was a long day, and a frustrating one with that mistake cutting out the handstop. Once I get the basic peghead shape cut out I will take another look at the gouge and see how I can turn it into an artistic statement. My loose plan right now is to place the gouge in a wider part of the peghead and then carve the gouge out by making the peghead thinner there. If I put the skinny place on a wider part of the peghead it will not be as weak as if I put it on the neck like I did when I drew it on the bottom of the peghead.
Another consideration is that I will probably drill out the peghead holes while the bottom of the peghead is relatively flat. That way I can clamp it down to a board to minimize tearout. Once i start to carve the bottom of the peghead into a wavy or curved shape, drilling the holes will be more of a problem. We shall see what unfolds.
Here is my plan of attack on the peghead:
But that is for another day.
I spent about 5 hours on cutting and planing the peghead and about 1 hour on gluing the overlays on. So I am logging 6 hours of work today.
Original post date June 8, 2008