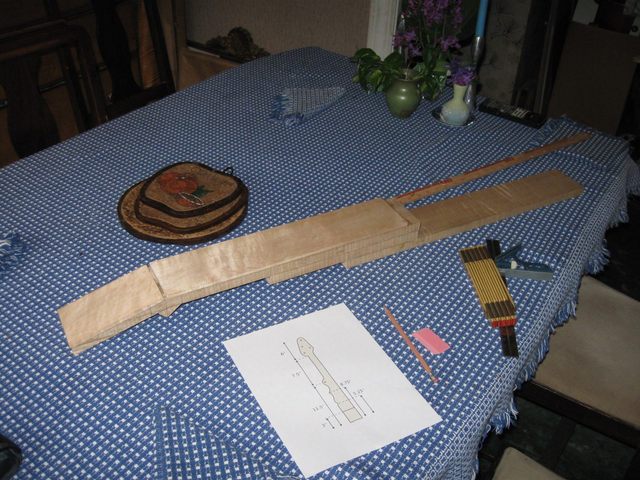
The next step is to cut out the face of the banjo neck from the blank. The face is the shape looking at the front of the finger board. But first I have to draw the shape on the blank. Here is the blank ready to go.
I have printed out the plans to use as a guide as I draw the shape of the neck directly onto the wood. You can see the plans here. I am not going to try to copy the drawing exactly. Instead I will construct the shape of the neck directly on the wood. I started on the peghead by drawing a box that is 1/2 inch in from the edge of the wood.
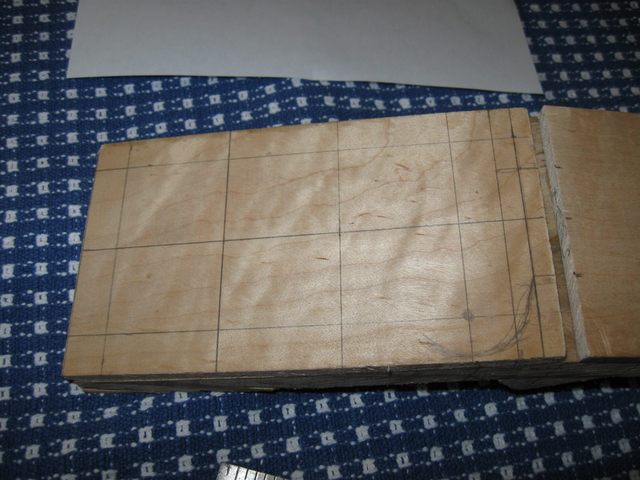
The pegs have to be at least 1/2 inch away from any edge so the box represents the outside boundary for any of the peg locations. I also want to spread the pegs out evenly on the peghead so I measured the space left for them and divided by 3. Then I drew the grid that you can see in the photo above. There are 4 pegs, which will have 3 spaces between them, hence the number 3.
I extended the neck through the nut 1/2" into the peghead. That left 5 1/2" of the peghead out of the 6" total length. Then, with the 1/2" border at the top and the bottom, I had 4 1/2" left for the pegs. Divided by 3, that is 1.5 inches between the pegs. I actually got more space than that because I alternated the pegs back and forth across the peghead, but I drew the grid at 1.5" spacing.
I did a similar thing across the width of the peghead. The peghead is 3 1/2" wide, and with the 1/2" border on each side I had 2 1/2" for the pegs. Divided by 3 that is about 7/8 inch between the pegs. As a first estimate, I just drew the locations for the pegs on the points of the grid. Below is a photo of the peghead with dots where the pegs are to go.
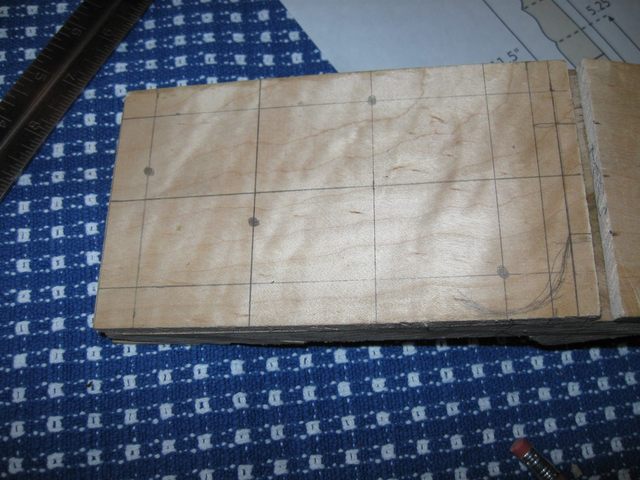
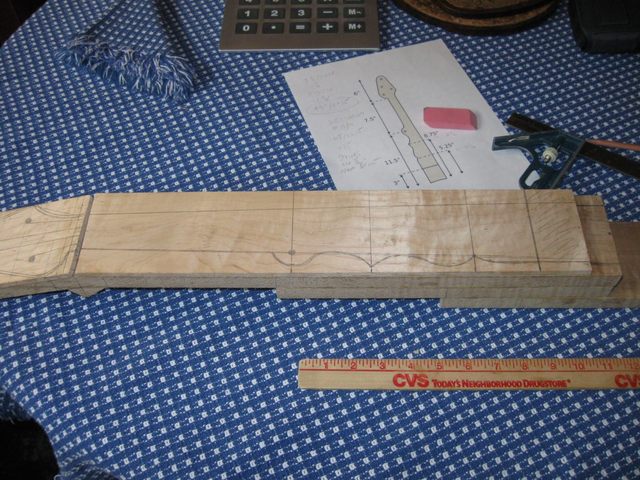
You can see in the photo that I have put the pegs down left-right-left-right to maximize their spacing. After placing the pegs on the grid I drew the outline of the peghead shape using a ruler for the straight segments and drawing in the curves freehand. After I was done with that it was clear that the peg closest to the nut was too close to the nut, so I started moving them around and eyeballing their locations. Here is what I came up with.
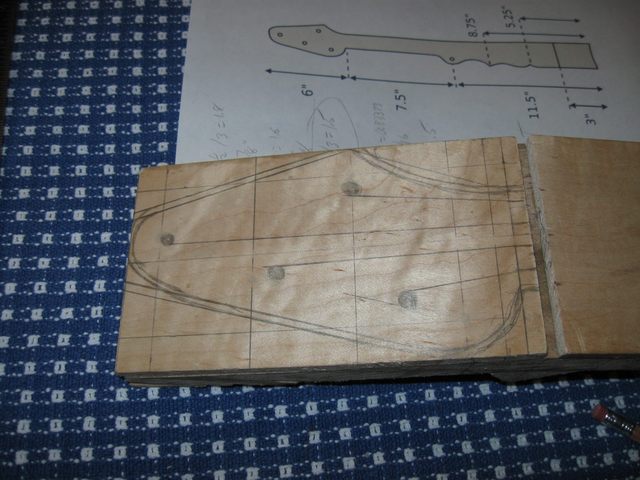
All of the pegs are now 2" apart. The only exception is the distance between the peg for the 4th string and the peg for the 1st string, which are slightly farther apart.
I also drew lines from the nut to the pegs to see how the strings will be angled once it has been strung. That works out well with shallow angles for all of them. That is important for keeping the strings from jumping out of the nut slots.
You may notice that there is a double line around the shape of the peghead. The inside line is the final shape and the outside line is the "cut to" line. When I saw out the shape of the peghead I will cut down to the "cut to" line and then I will have a little extra wood for cleaning up the final shape and smoothing it.
That does it for the peghead. On to the neck. I want the heel of the neck to be 2 1/2" wide and the nut to be 1 1/2" wide. This a bit wider than normal banjo necks, but I find that it is a comfortable size for me. The extra width at the nut allows me to move the strings in from the side to get better action for pull-offs. So I started by drawing straight lines from the 2 1/2" heel to the 1 1/2" nut.
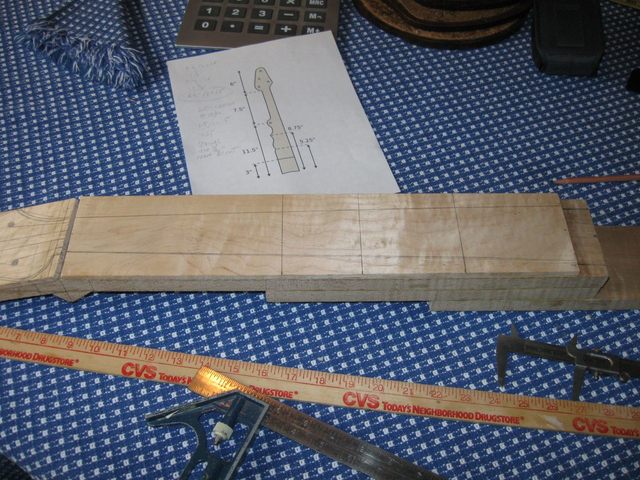
Then I marked the three locations on the drawing for the major shapes on the neck, i.e. the 5th string peg, the point of the scroll and the notch in the scroll. These are 11.5", 8.75", and 5.25" from the heel. I also measured the width of those places on another neck and marked those then drew the curves freehand.
The widths of the locations on the neck are:
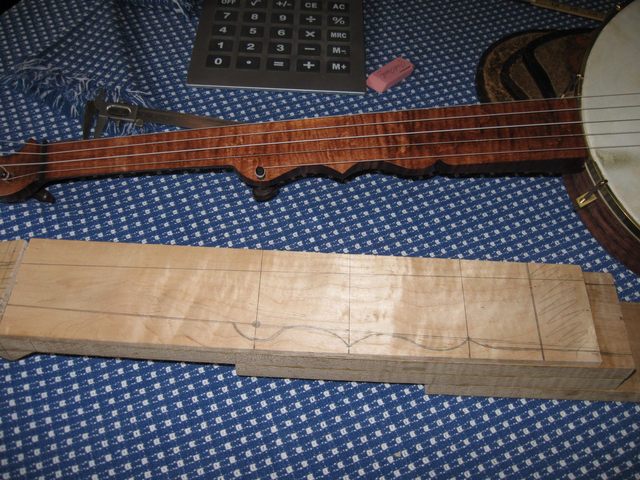
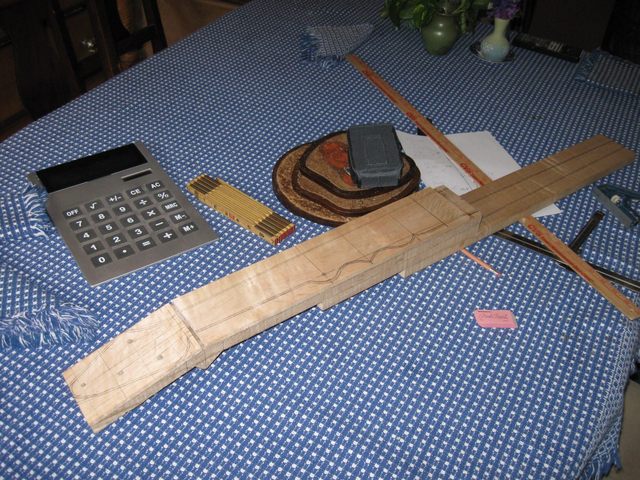
I took a photo of the neck drawing next to the neck on my minstrel which inspired the design. The minstrel is a copy of a classic Boucher design.
Once the neck was drawn I moved on to the dowel stick. The dowel stick is tapered to allow for a friction fit to the gourd. I measured 1" width at the tail end and 1 1/2" width at the heel and drew straight lines between the points.
As I did on the peghead, I drew a second "cut to" line outside of the final shape.
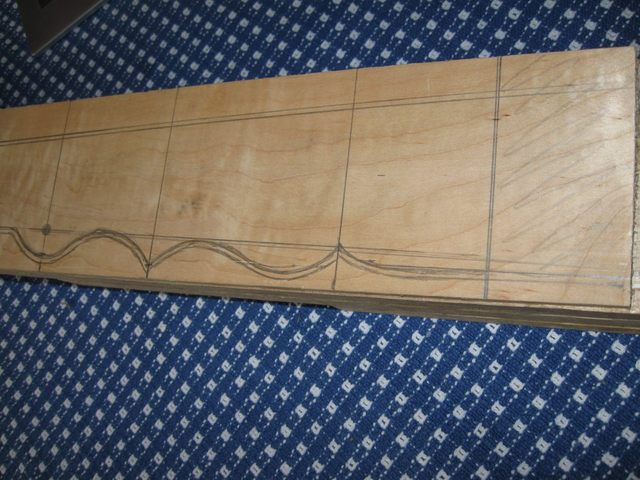
Here is the whole neck with the complete drawing on it.
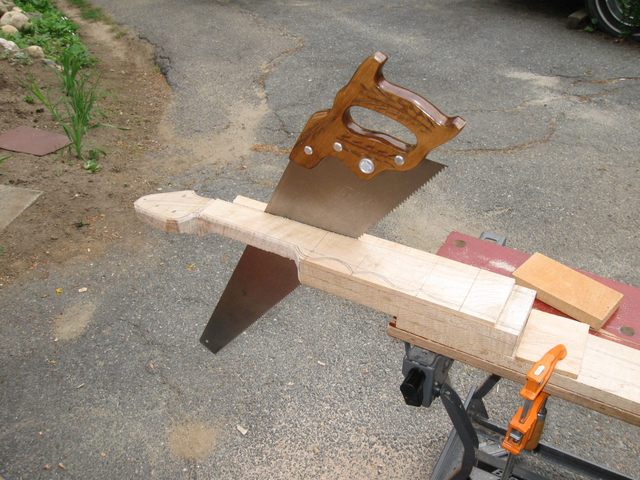
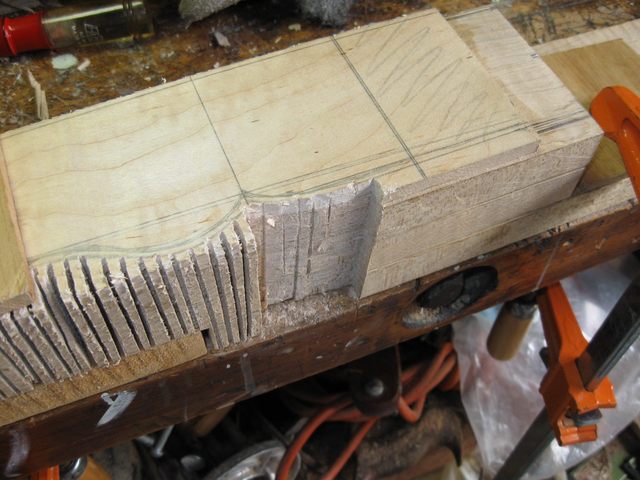
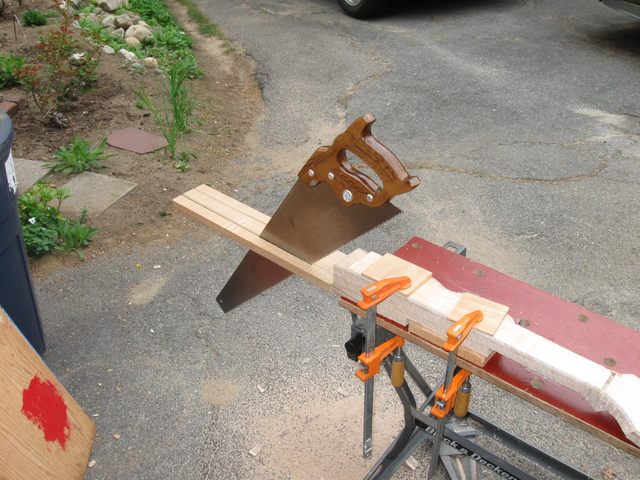
OK. Out to the bench to cut out the shape. I cut the peghead first because that is a challenging cut and I have an easier time clamping the neck when it is still square. I roughed in the basic shape by making straight cuts with my rip saw.
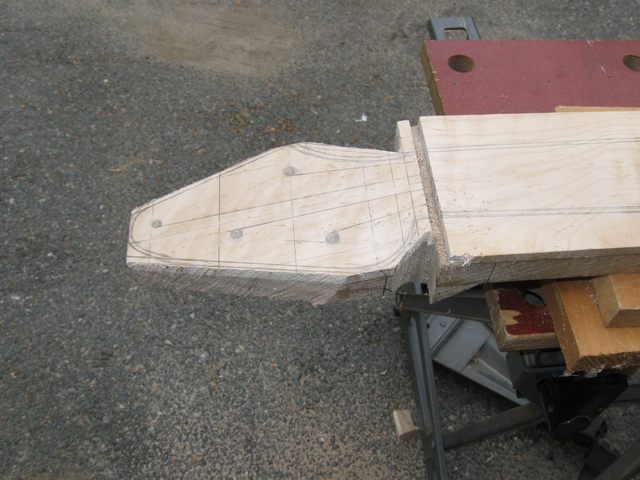
To hog out the curved shapes I take a crosscut saw and cut kerfs along the length of the curve, cutting only up to the "cut to" line.

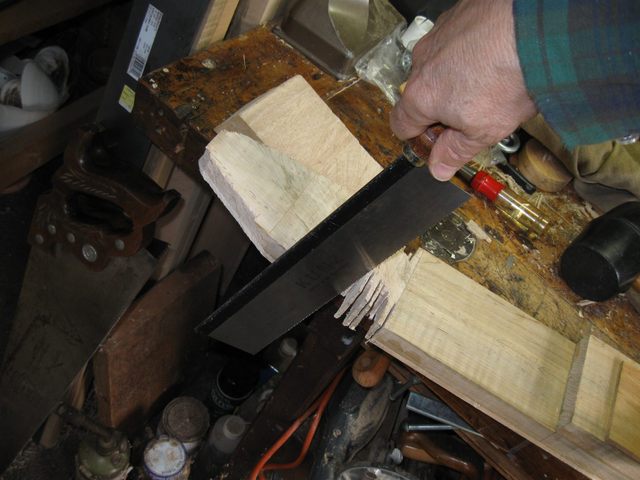
Then I put it on the bench to remove the waste using a number of different tools, like my dovetail saw.
The coping saw gets into tight places.
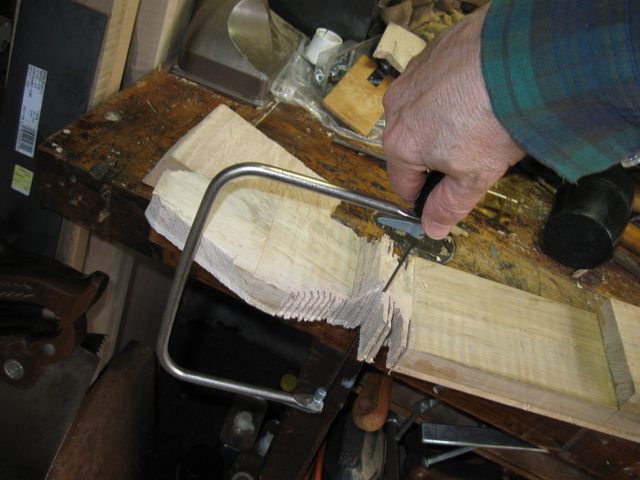
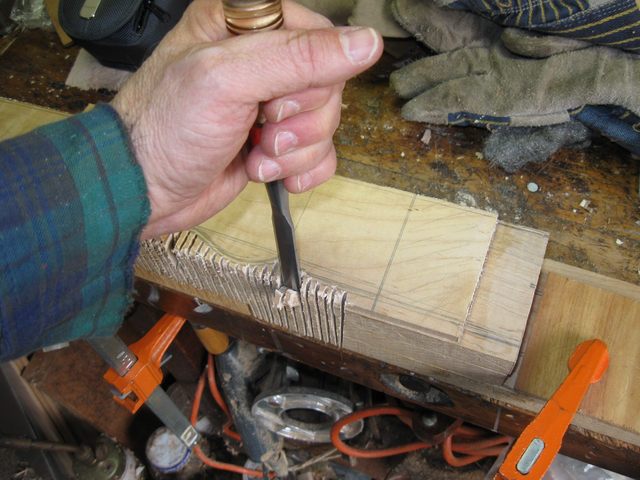
I use my chisels to chip out the waste, although I am very careful using the chisels. Last year I broke a huge chip off the back of the peghead by being too rough with the chisel. I cut kerfs far enough down the neck past the nut to allow space for a saw blade.

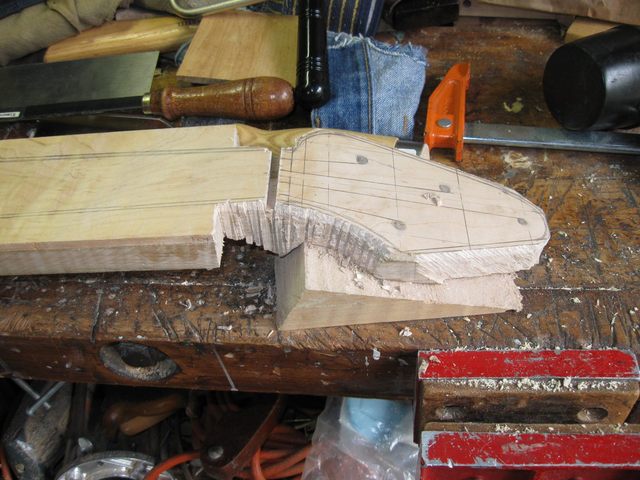
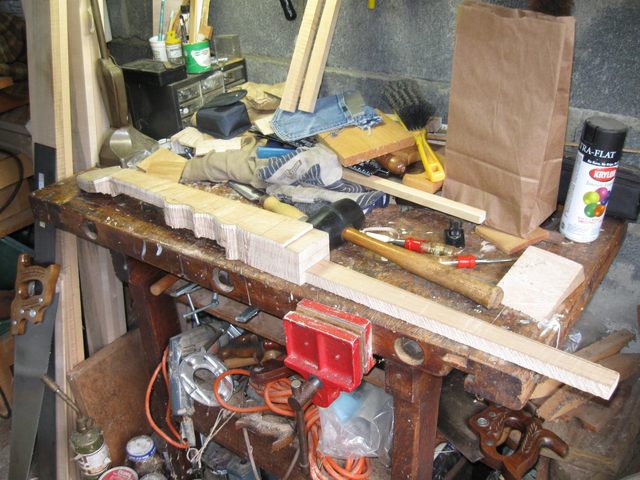
Here it is with the waste wood cut away.
While I was chipping away I saw this mistake.
I got a little lazy with the saw and nicked the top of the fingerboard right where the nut goes. It doesn't look too deep, so I might be able to plane out most of it, and maybe widen the nut slot just a bit if I have to to get rid of it.
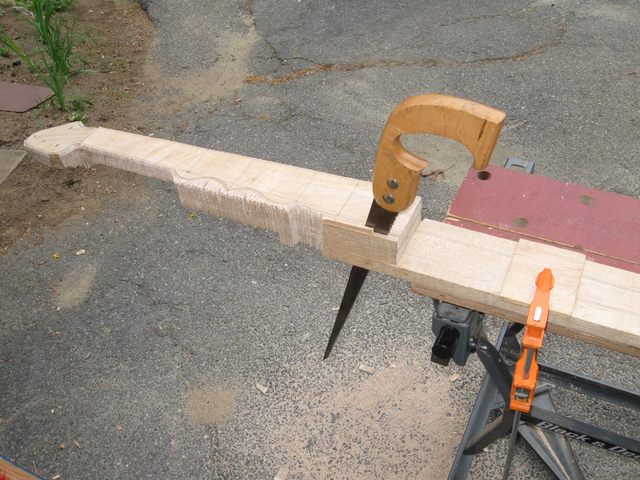
To remove the extra wood on the straight part of the neck I used my compass saw. It has a very narrow blade so there is space for it where I removed the wood along the neck.
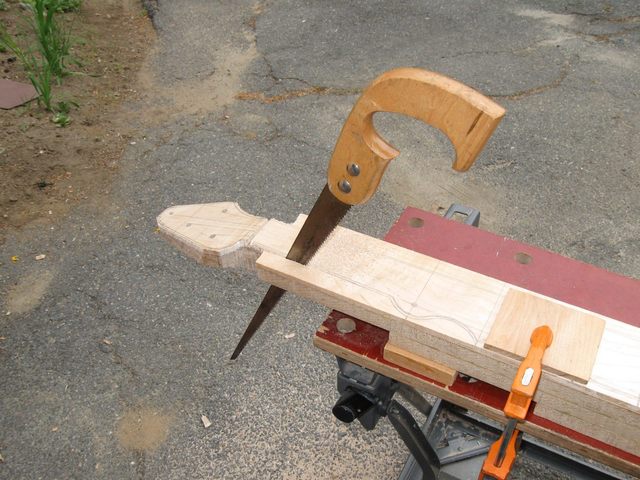
On the long side of the neck I used the rip saw, which cuts faster than the compass saw.
When that straight piece came off here is what I found down at the heel end.
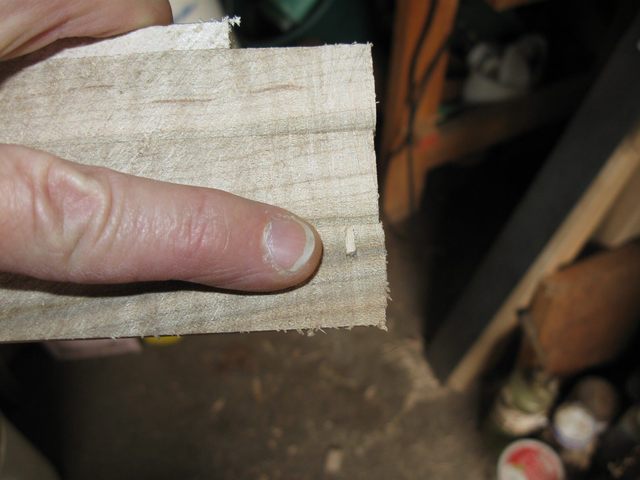
Right where my finger is pointing you can see one of the little pins that I put in to keep the boards aligned when I glued them together. This the pin that I was worried about down at the heel. I don't have to worry about it any more because I have cut it in half. The other half of the pin is in the sawdust from the kerf.
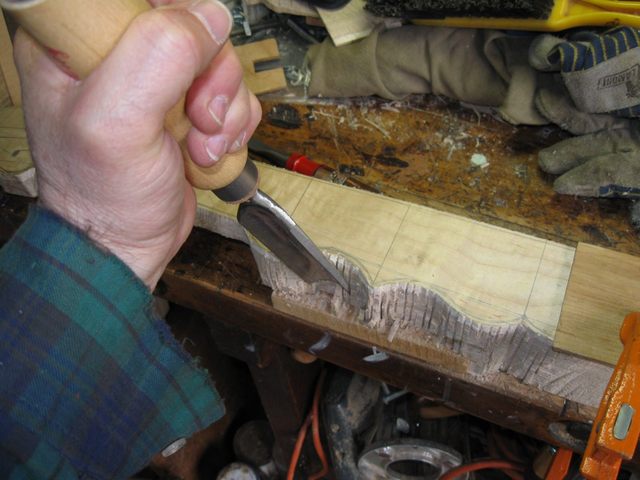
To shape the curved side of the neck I used the same technique. First I cut a bunch of kerfs along the curved shape.
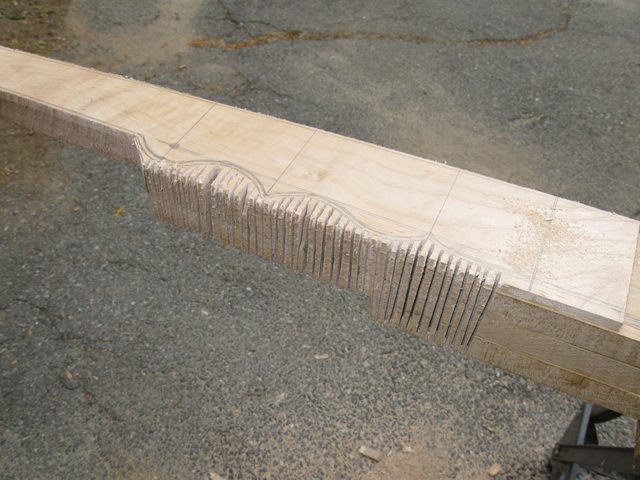
Wow! That's a lot of kerfs. Then I broke out the waste wood with the chisel.
I cut away enough to get room for a saw on a straight section.
Then I cut that short piece off with the compass saw.
The gouge is useful for breaking out the waste wood in the concave sections of the curve.
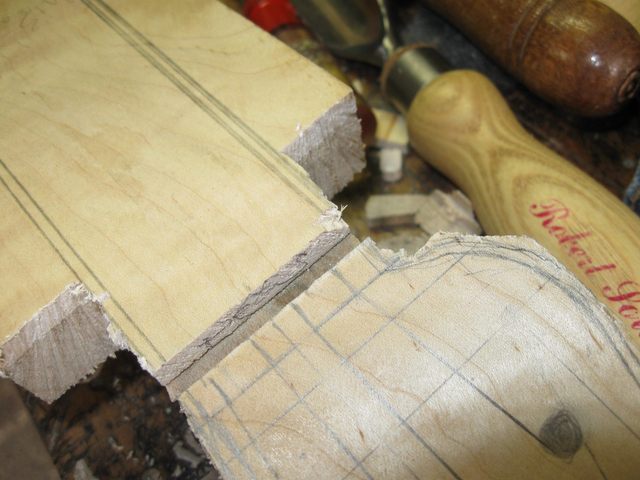
Look what I found. There is another pin, right at the tip of my finger.
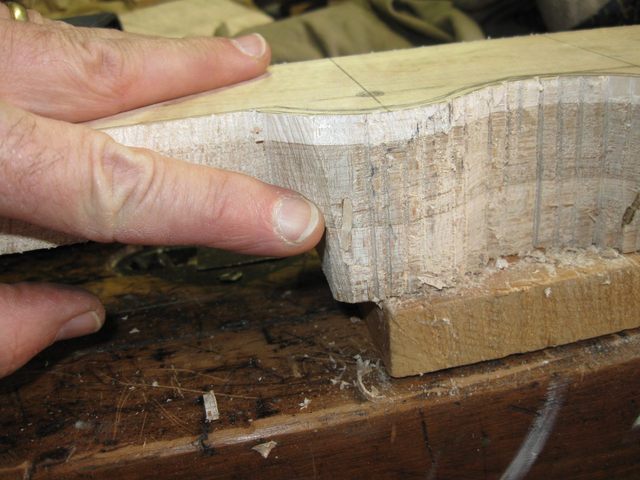
That will be carved away when I shape the neck. It is good that I am seeing these pins now because that means that I will not be seeing them later after I have carved the wood.
The last step is to cut the sides off the dowel stick. These are just straight cuts using the rip saw.
There it is.
The bottom of the neck is still square so the next step is to cut the angle of the neck on the bottom. But that will have to be another day.
I spent an hour drawing the outline of the neck on the wood and another three hours cutting the wood, so I am logging 4 hours today.
Original post date May 5, 2009