
The finger board survived just fine. No oil got on it. Whew!
The next step involved installing the 5th string peg and the tuners on the peghead. You may recall that I had gone to some considerable trouble to enlarge the hole in the neck for the 5th string peg. You can check it out here. I left the hole small enough that the peg did not quite seat fully in the hole. I did that to allow some wood for the splines on the peg to bite into the neck and prevent the peg from turning in the hole under tension from the string.
Now I need to tap the peg into the hole to seat it. I did not use any glue at all when seating the peg. This is to ease replacement or maintenance of the peg should that become necessary in the future. Instead, I simply tapped the peg into the hole, and it relies on friction to keep it in place and the splines to keep it from rotating. Here is a photo. I have the neck perched on my ubiquitous wooden block that I made for this project.
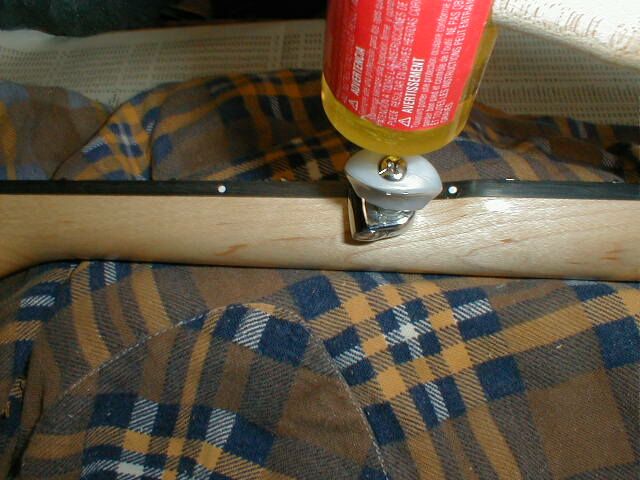
You can see in the photo that I have slanted the post backward very slightly so that the string will pull perpendicular to the post as it will come off the pip.
Installing the 5th string peg turned out much easier than I thought it would be. A half dozen gentle taps with the hammer seated the peg nicely in the hole with no danger to the peg button or to the neck. I think that my care in tapering the hole made the difference here. The peg has seated just to the point where the splines are entirely down in the hole on the fret board side of the neck.
The next step in assembly was to install the tuners on the peghead. There was no indication in the instructions about the orientation of the tuners on the peghead. It is possible to install them with the knobs coming off the bottoms of the posts or with the knobs coming off the tops of the posts. I logged onto the web and looked at some photos of the finished banjo, and found that the knobs were set coming off the tops of the posts. So that is what I did. This may be more clear in the following photo:
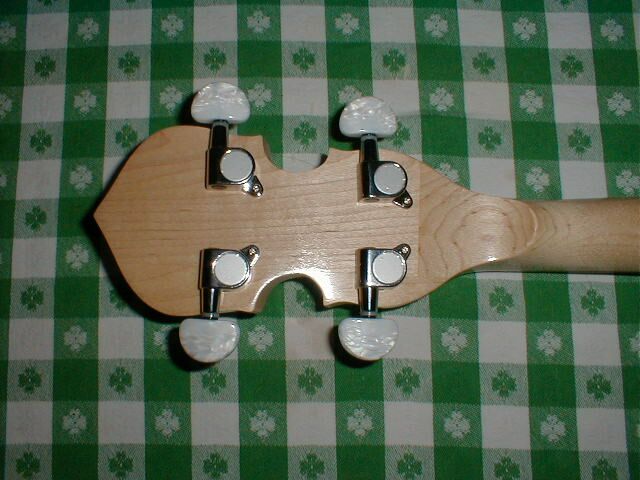
I tightened the nuts on the top gently, then aligned the shafts to be symmetrical. Then, I marked the screw holes with an awl, drilled pilot holes with a 1/16th inch drill and screwed them down. The little screws provide a lever arm to keep the tuner from pivoting in the hole under string tension. Planetary pegs have pins on them that get pressed into the wood to serve the same purpose. After installing the tiny screws, I tightened the nuts on the top of the peghead.
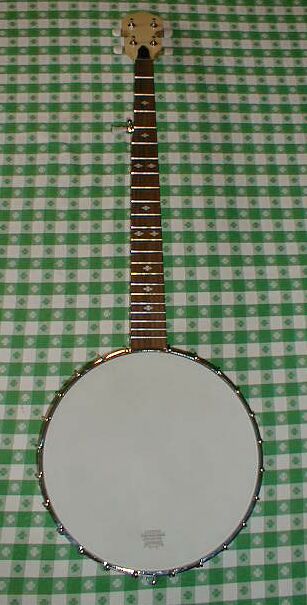
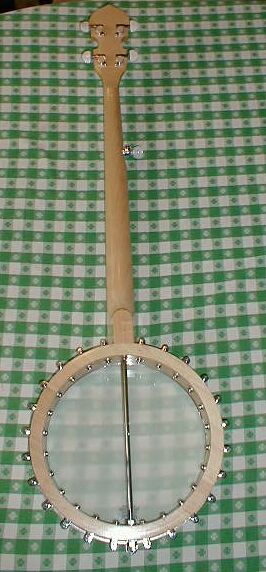
Finally, here is the banjo, all assembled and ready for setup:
|
|
Goldtone recommends that you paint the inside of the resonator black before insalling it. I decided to do that since the edge of the resonator is fairly ugly plywood. So, I masked off the finished part of the resonator with masking tape. This was a tedious process because the binding on the resonator also shows around the outside edge of it. The binding has a white line in the middle of it, and I did not want to paint over that with black. So, I took many small pieces of masking tape and tried my best to make it follow the curve of the binding right next to the wood.
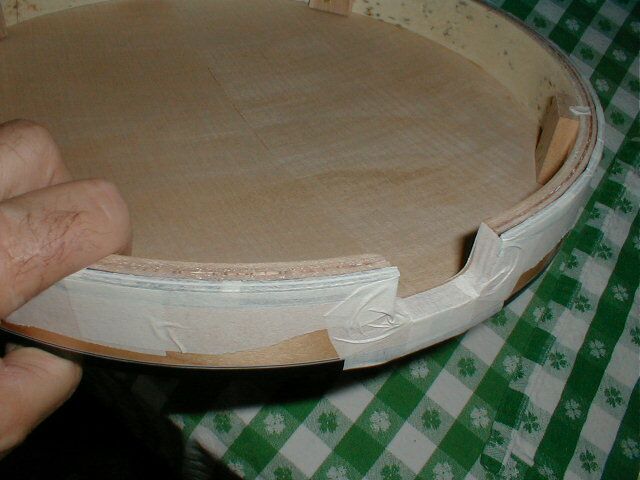
You can also see in the upper right corner of the photo that I have made a little circle of masking tape to cover the brass insert where the mounting screw goes. I did not want to fill the inserts with paint and clog the threads.
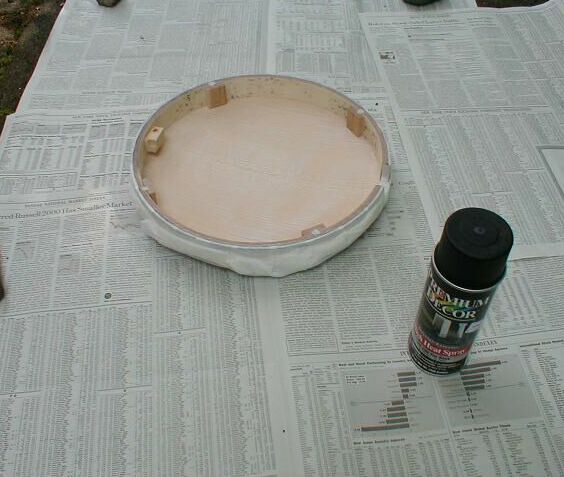
Next I taped a cover over all of the finished parts of the resonator. I actually made this out of the plastic bag that the resonator was shipped in.

Finally, I put some papers down out on the patio and got ready to paint. For this job I purchased a brand new can of flat black paint down at the hardware store. Here it is, ready to go:
So went to a different hardware store and got a different brand of spray paint. Surprisingly, I ended up with a very similar result. However, the second can survived long enough that I got a couple of coats of paint onto the wood before it fizzled out. You can see in this photo some of the runs, drips, and errors that came out of this:
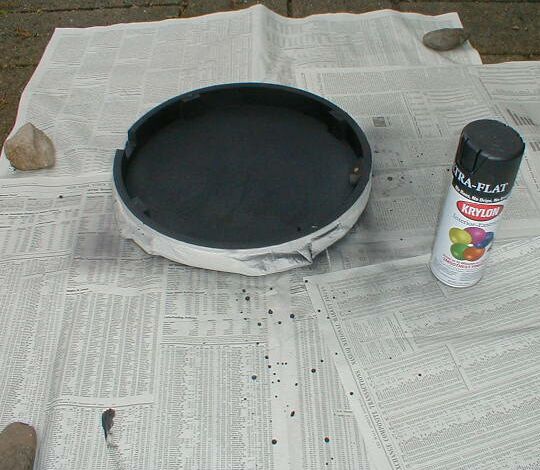
What a mess! To add to all of this, when I went in to clean myself up, the can of Goop slipped out of my hands and landed.... you guessed it...... upside down on the floor.
What a mess!
However, once I cleaned everything up and peeled off the masking tape, I had a pretty decent looking resonator.
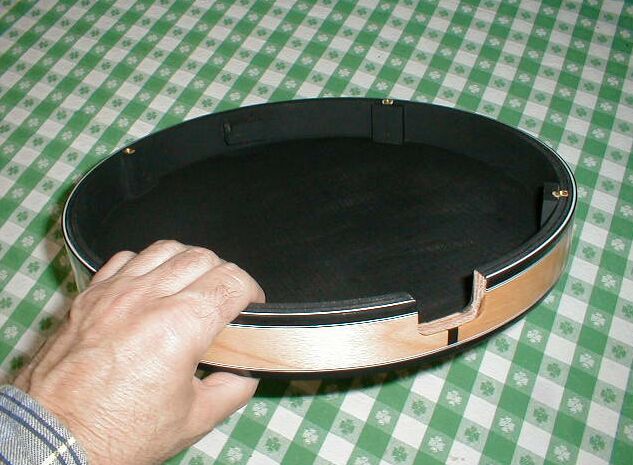
The globs of black paint are fairly well hidden on the inside. You can see the white line in the binding and the bright brass inserts for the mounting bolts.
I left the resonator off of the banjo for the final setup to avoid scratching it. It will show up again later.