In order to avoid damage to the resonator I did the setup work with the resonator and the resonator mounting plates removed.
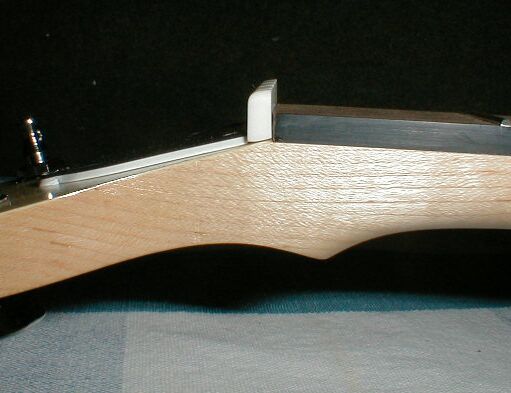
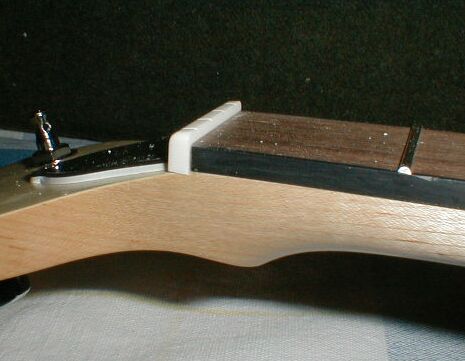
The first task was to do the final shaping of the nut. I put the nut back into place on the neck, and it looked this:
There are a couple of problems with this. The most obvious one is that the nut stands way too high to provide a decent action on the strings. I measured the height of the nut above the fingerboard, and the top of it stands about 5/32 above the fingerboard. I measured the nut on my Reiter, and it stands about 2/32 above the fingerboard. These measurements were not taken from the depth of the notches, but from the top of the nut, so they will provide only a crude target for the final setup. The real critical distance is from the bottom of the notch in the nut to the fingerboard. But I can still use the 2/32 number as a rough target for this new nut.
The other problem is that the surface of the peghead slants away from the fingerboard at an angle. During initial assembly, I had ground the bottom of the nut to a similar angle so that it would make contact with the slanted peghead. You can see this in the photo.
While it is possible to install the nut like this, it made me uncomfortable because the pressure from the strings will make the nut try to slide down the slope of the peghead. So I decided to file down the peghead to make a horizontal surface for the nut to bear on.
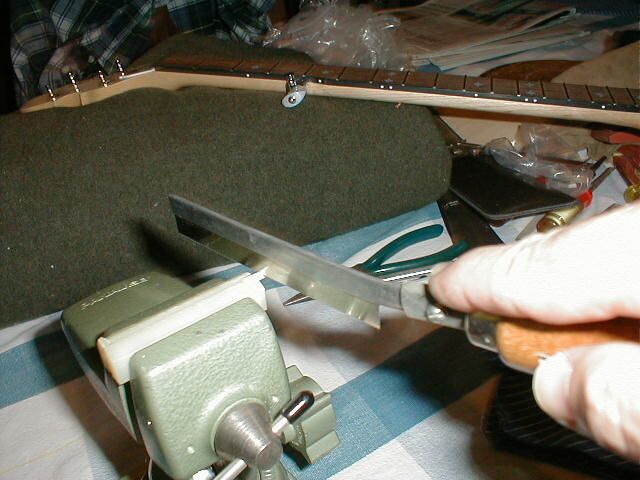
Here is a photo of how I did that.
I removed the truss rod cover and filed a flat right next to the fingerboard using a file. I used a chisel to square up the notch.
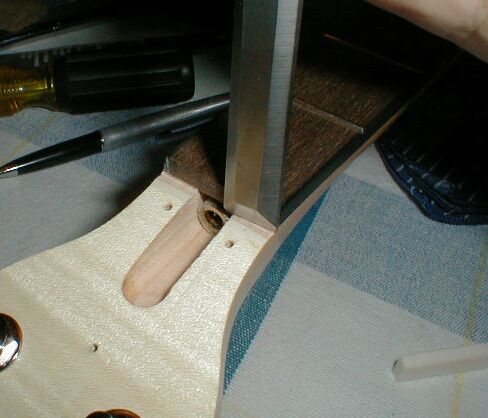
I was very careful not to remove any wood from the end of the fingerboard since the distance from the nut to the first fret is critical for proper intonation.
I also ground a better angle on the truss rod cover since it was interfering with the nut. I used my shoe rasp to do this work.
Then I filed the angle off of the bottom of the nut to make it square.

Here are the results of these efforts. The nut sits square on a flat surface. It is also a bit shorter than it was.

However, the nut still measures about 4/32 high. That is still too high. So I ground it down some more on my shoe rasp until it was the right height.

This was tedious work because I had to do some grinding and then measure, then go back to the grinding and measure again. I also had to be careful to keep the nut square. It has to sit vertically against the fingerboard, and it has to be the same height on the 5th string side as it is on the 1st string side. This is the tedious part that I mentioned at the beginning of this page.
Here is the nut set to the proper height in its slot.
Don't take too much material off the nut or the strings will buzz, and then you will have to shim the nut up or make a new one.
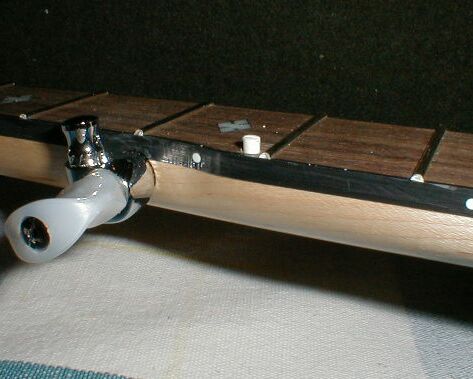
The next step was to set the 5th string pip to the proper height. The plastic rod that was supplied was a bit too long for the job (just a bit)

I marked the pip at about 2/32 above the finger board with a pencil, then took it out and cut it off with my fretsaw. The height of the pip above the fretboard is not critical unless you plan on fretting the 5th string. I do not do that, so I just set it high enough not to buzz. If I learn later how to fret the 5th string, or if I install some spikes as a capo I may have to cut the pip down a bit more.
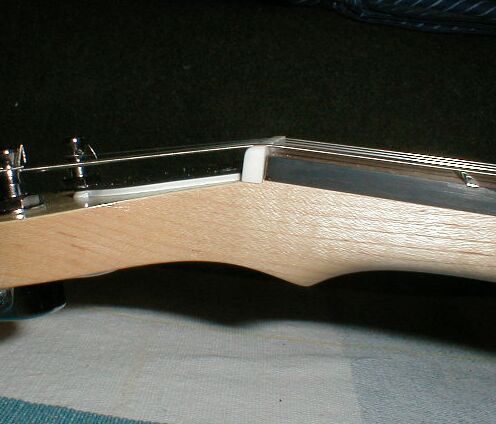
I then sanded the end smooth, stuck it back into the hole, and cut the string slot with the same fret saw. Here is the result. I did not put any glue into the hole for this. The pip is held in place by friction and string tension. You can see in the photo how I slanted the post on the 5th string peg backward slightly so that the string will come off the post at a right angle.
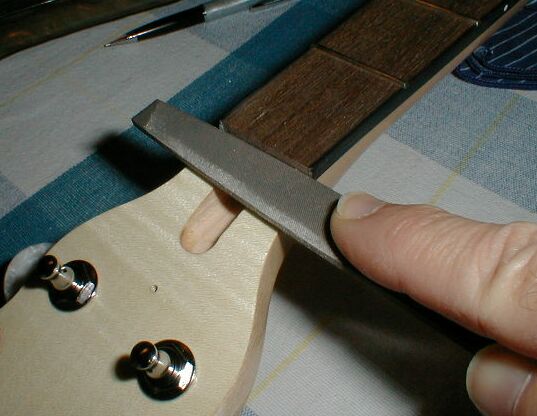
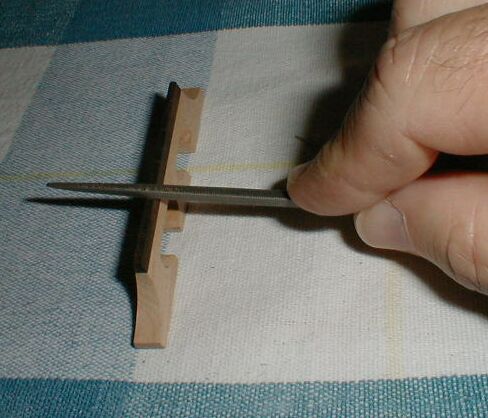
The nut has slots already made in it. They all seemed to be adequate except for the 4th string slot. That one was a bit too narrow. I widened the slot with my small triangle file without making it any deeper. Notice that I am slanting the file away from the side of the nut that faces the fingerboard. This is to make the slot slant down toward the tuning peg to minimize the chance of string buzz.
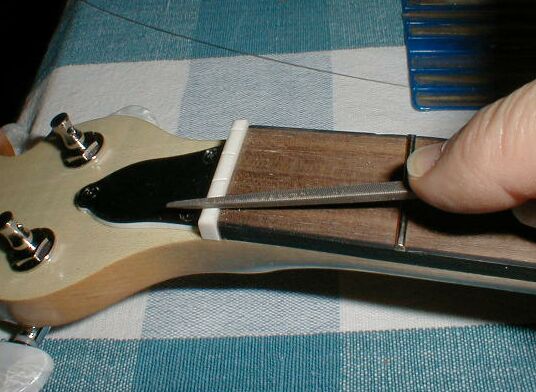
One thing that I want to point out is that I set the height of the strings by removing material from the bottom of the nut, not by cutting the slots deeper. This makes a much nicer looking nut, and it decreases the chance of the strings binding in the slots. Deep string slots are not necessary, and they are ugly.
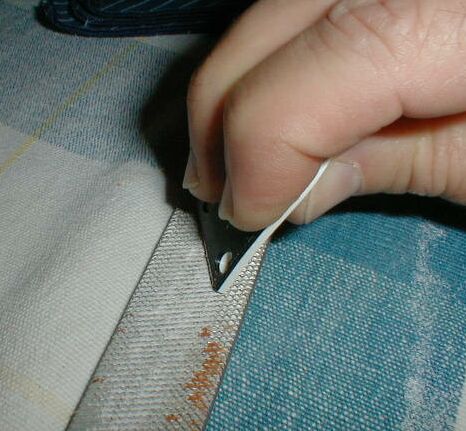
I had to file the 4th string slot on the bridge as well. Notice that I am slanting the file toward the side of the bridge that faces the tailpiece.
Finally, I strung the banjo to see how the strings were set. I got out the micrometer and measured the diameters of the strings that were supplied with the kit. I installed them in the following order:
| 1st | .010 | |
| 2nd | .013 | |
| 3rd | .016 | |
| 4th | .026 | |
| 5th | .011 |
I did not glue the nut onto the neck. It is held in place by the tension of the strings. I may put a drop of glue on it next time I change the strings just so that it does not fall off and get lost. However, it is not necessary to glue it otherwise.
Here is a photo of my new nut with the strings on it.
It plays very well. I got lucky this time, so I called it quits. What usually happens is that I have to take it all apart several times to remove a little more material from the nut to lower the strings, then put it back together and test.
That completes the final setup of the banjo, one of the most delicate operations. This has made the banjo playable, however, I will probably come back later and do some future correction to optimize the sound of the instrument. There is a very faint growling sound on the 4th string if I strike it hard. It does not appear to be a fret buzz, so I am thinking that it is probably caused by the point where the string exits the nut on the fingerboard side or where it comes off the bridge. The noise is more like a "throaty" sound than a real buzz, and it is not very obvious, so I will address it later.
Banjo setup is a complex process, so it will take some time to get it right. The final final setup involves changes to the tailpiece angle, the bridge, the nut, the head tension, plus numerous others to get that great sound that will light my fire. It is a story that is way too long to tell here.
Once I had the banjo strung and playable I installed the arm rest and the resonator mounting plates.
Installing the resonator mounting plates was a bit tricky, but not hard. The plates mount on a pair of hooks between the shoe and the bracket nut. As the bracket nut is tightened to pull the head tight, the plate is secured in its position. The hooks go through slotted holes in the plates so that the plates can be slid back and forth to align them with the bolt inserts in the resonator. You can see the arrangement here and here. .
So, I removed the two nuts, put the plate onto the hooks and then tightened the nuts just finger tight. With the banjo sitting in the resonator, I could then slide the mounting plates back and forth until the holes were aligned with the holes in the resonator. Then I removed the banjo and tightened down the bracket nuts to fix the mounting plates in place. Once the mounting plates were on the brackets, I put the banjo back into the resonator and bolted it down. It is now complete.
Since the string that was incorrectly installed in the third position was really supposed to be in the 5th position, I simply took it off, and put it into the 5th string peg. The string was plenty long enough to install it onto the 5th string position. Whew! Then, I put the real third string in its proper place.
But I wouldn't worry about it too much.