Putting the frets into the fret slots is perhaps one of the most daunting tasks in making a kit. However, it is really not as difficult as it appears. You just have to take your time and be careful.
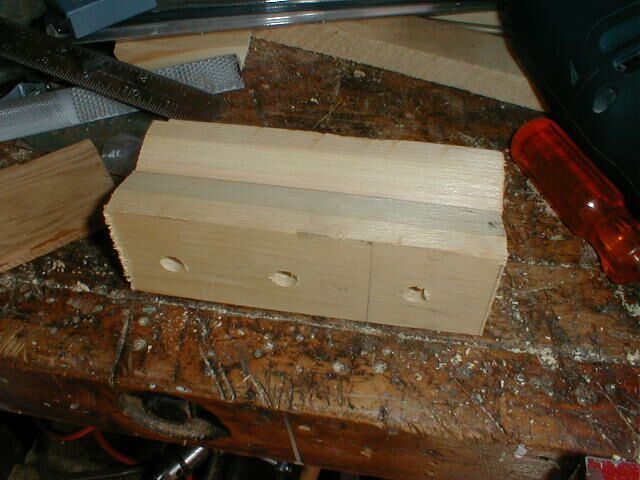
In order to make the fretting job easier and to avoid damaging the neck I made a block of wood to rest the neck on. Here is a photo of it:
I cut a length of 2 by 4 about 10 inches long and then chamfered one side of it with a plane. I then sawed the block in half crosswise, book-matched the two pieces, and screwed them together. The chamfer made a nice notch down the middle to cradle the neck.
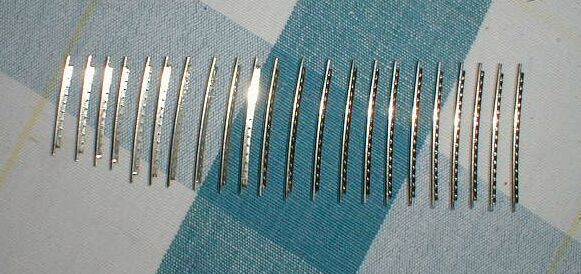
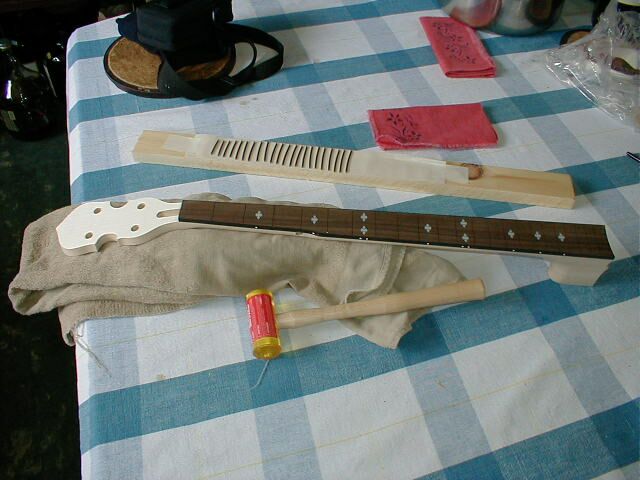
Next I took out the 22 frets and sorted them by length. This was pretty tricky since some of them are very close in length. I finally took a straight-edge and aligned them all on one side to make the sizes more apparent. Here is a photo of the frets all lined up.
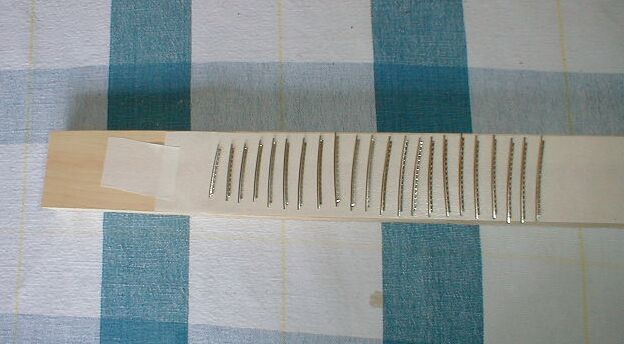
The sorting of the frets actually took me a while, so to keep them in order while I worked I made a sticky board by putting a piece of masking tape on a board and sticking the frets down to it. Here it is:
At first I was puzzled why they went to the trouble of cutting all of the frets to size ahead of time. It is actually easier to fret a neck if the fretwire is left long. You can hang onto the long end of the wire while you pound in the fret. Then, cut it off and file it down to size.
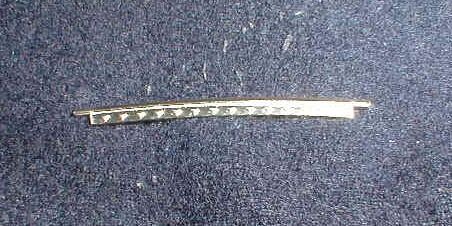
However, this banjo has binding around the neck, so cutting the frets is a rather complex task. The tang of each fret has to be cut away to get it out of the way of the binding. Here is a closeup of one of the frets:
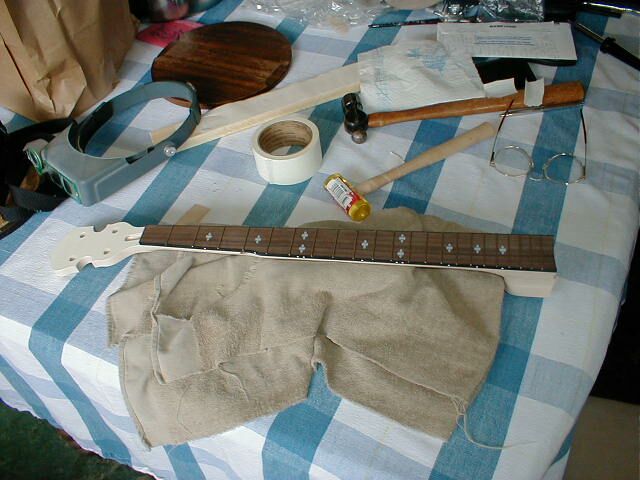
I actually would not want to do that work by hand on all 22 frets. But anyway, now I was ready to install the frets into the neck. Here is my setup. The neck is resting on the support block with a cloth over it to avoid marring the wood.
I pounded the frets in using a plastic mallet so that I would not mar the frets. Here is a photo of my mallet in action:
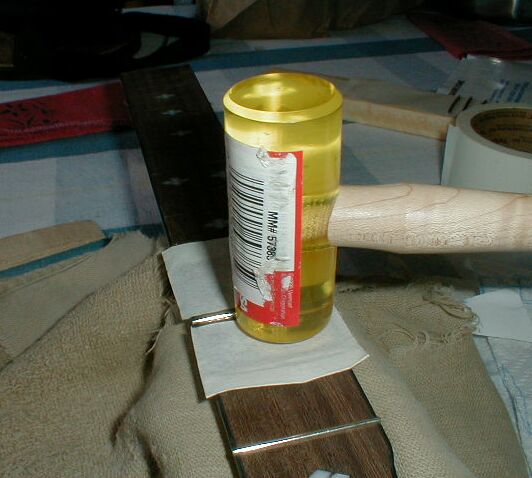
What is the masking tape for? Well, I put it there to shield the fingerboard from my erratic blows with the mallet. See the Disasters section below for the gory details. Right now, just watch carefully where that mallet goes!
It does not take heavy pounding to drive in the frets. I found out that I can use lots of light, sharp blows and drive it in slowly. In fact, I did this work on the dining room table (my wife was out of the house). It was cleaner than my workbench, and less likely to mar the neck.
The frets are curved, so I stuck one end into the fret slot and then stuck the other end into the slot leaving the fret bowed upward. Then, I made sure that the fret was centered on the board and made my way back and forth tapping gently across the fret until it was seated. The fret will bend and flatten out as you seat it.
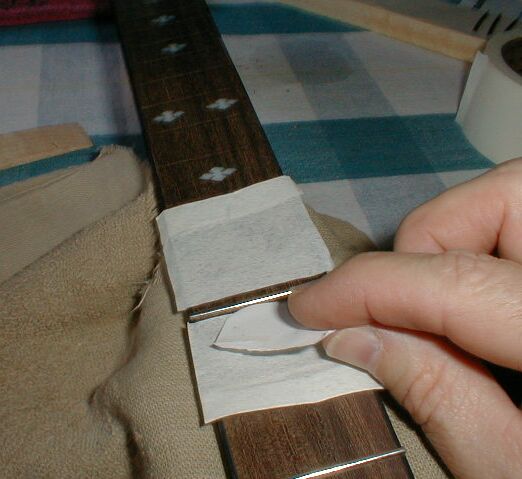
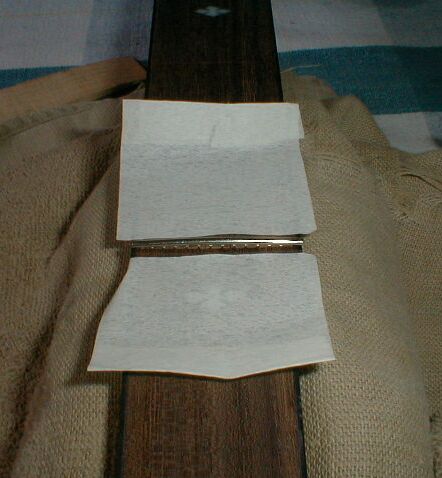
To make sure that I had the fret completely seated I checked it with a piece of paper. When I could no longer slip the edge of the paper beneath the fret, it was all the way down. Here is a photo:
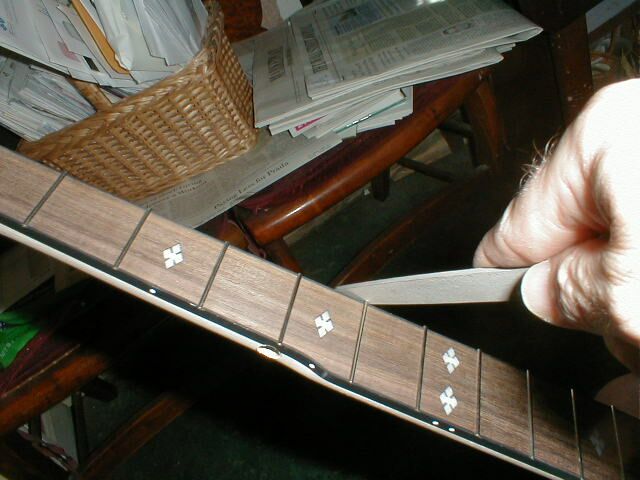
One important part of fretting was left out of the instructions. It is necessary to dress the frets. First you must file the frets at a 90 degree angle to make them exactly the same lengh as the width of the finger board. Then, you should file them back at 45 degrees to get rid of the sharp edges. Here is a photo of me filing the frets to a 45 degree angle.
And here is the neck all fretted:
After I had installed fret number 3, I took a close look at it and I noticed that between fret 3 and the slot for fret 4 there were five nasty dents in my new finger board.
Shoot!
I had been sloppy with the mallet, and hit the finger board with it. There they were.... five nastly little moon-shaped dents! And another one between frets 2 and 3 as well.
So to fix this mess I tried to steam them out. It is possible to steam out shallow dents in wood by using a soldering iron. I wet a paper towel until it is very moist, but not dripping. Then, I put a corner of it over the place to be steamed and I just touch the towel with a hot soldering iron. Here is the picture:
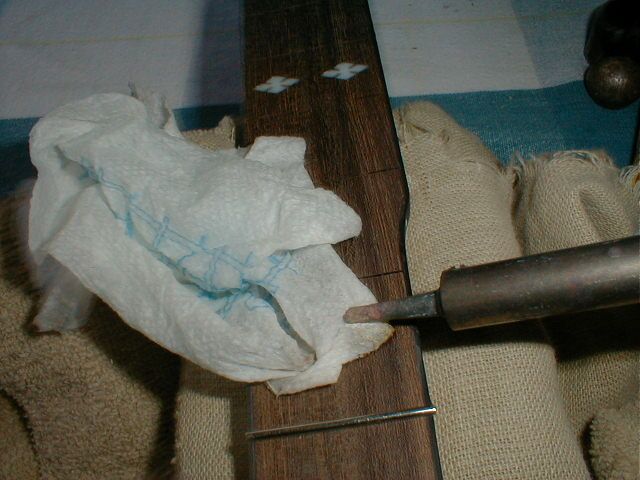
You have to be quick and careful so that you do not burn the wood. Just touch the towel gently and quickly many times until the dent is gone.
When I was done you could not tell that the wood had ever been dented.
Whew! Disaster averted.
But keep that hot iron away from the binding! If you melt the plastic binding there is not much you can do about it.
After I steamed out the dents, I put some masking tape over the wood between the frets just in case.......... and I was MUCH more careful about holding the mallet. Obligatory photo:
If you look closely at the photo you can see that the fret is bowed up in the middle and stuck into the slot at both ends. I described this in the text above.
The frets came out quite even in any case. I actually checked them out with a straightedge and found that they were level enough that I did not bother to file them. The instructions say to file the frets level and then make the tops round again with sandpaper or a fretfile. I prefer to keep the frets high if they are level enough when installed.
This was not really as difficult as it sounds when described, so I probably would not worry about it so much.