Today I made part of the tailpiece for the banjo. The tailpiece has two parts, one that slips over the dowel stick and one that is secured to the first part so that it hangs over the head. Today I made the first part.
I designed this part of the tailpiece to solve a problem of having the string tension crush the hoop (a gourd in this case) and cause the head to buckle. You can see how that happened on my other web page, www.thekimerers.net/brian/gourd2/nuts.shtml
On that page I show the results of the change in the shape of the gourd, and on the next page I show how I designed a tailpiece to prevent it. The tailpiece works by passing all of the string tension to the dowel stick. The strings do not touch the hoop anywhere, so the only tension applied from the strings to the hoop is the down pressure from the bridge. The design works well, so I have used it several times.
The part of the tailpiece that I made today slips over the end of the dowel stick so that it goes almost all the way to the hoop, but stops just short of it. I can do that because the dowel stick is tapered. I put a hole in the tailpiece to match the shape of the dowel stick, and I gradually increase the size of the hole until the tailpiece is stuck just shy of the hoop. All of this will become clear as I show you how I did this.
The tailpiece on my most recent gourd banjo was designed to echo the shape of the peghead. Here is a photo of it.
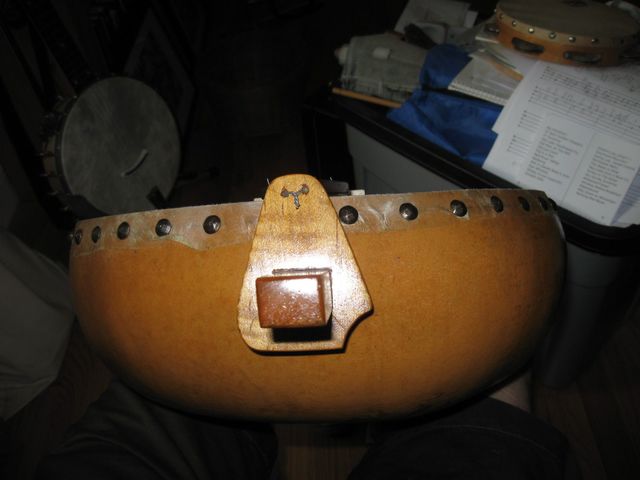
Looks Like the Peghead
Here is a photo of the new peghead so that you can see the similarity between the two parts.

The Peghead Looks Like the Tailpiece
Hmm. Now that I look at that photo of the peghead, I don't think I am happy with the curve on the left side. It has a sharp point there that I don't like. I will have to take care of that when I do the final shaping of the neck.
Regardless of that, the peghead and the tailpiece echo each other. Since I am basically going to make a copy of the old tailpiece, I thought that I would measure the old one to get an idea of how big I need to make it.
Looks like the height is just shy of 3 1/2".
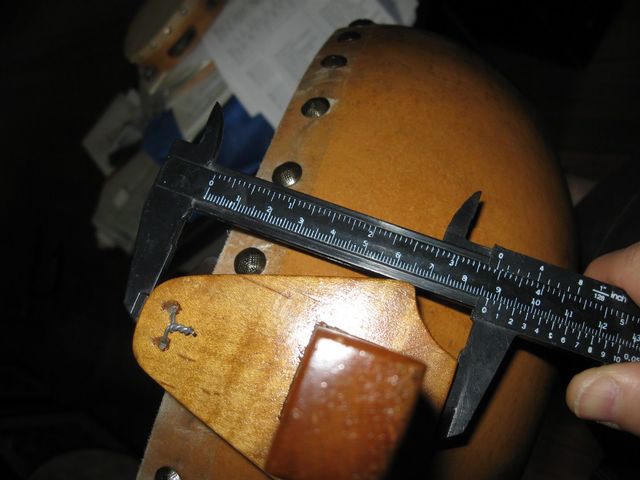
The Tailpiece is 3 1/2" High
I measured the width at the widest point. It looks like it is just a tad over 2 1/2" wide.
The Width is Just Over 2 12/".
What? You can't read the scale? Just a second. I'll flip the photo over for you.

How's That? Better?
Woah! That's making me dizzy! OK, so the width of the tailpiece at its widest point is about 2 1/2".
I am going to make the tailpiece out of the very last end of the board that I used to make the neck. I should barely have enough wood to get it done. Here is the end.
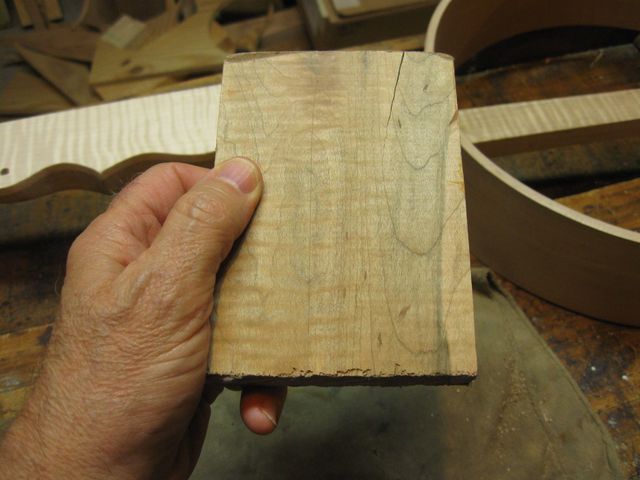
The End of the Neck Blank Board
There is one problem with that piece of wood. It has checked a bit on the end. So there is a short split in it. You can see it up at the top of the board. Here is closeup where you can see that the wood is definitely split.
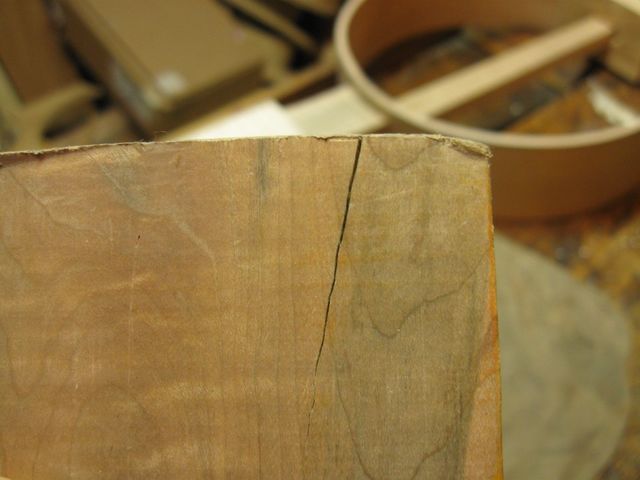
A Closeup Reveals the Split
The view from the end shows that this is not a cosmetic crack.
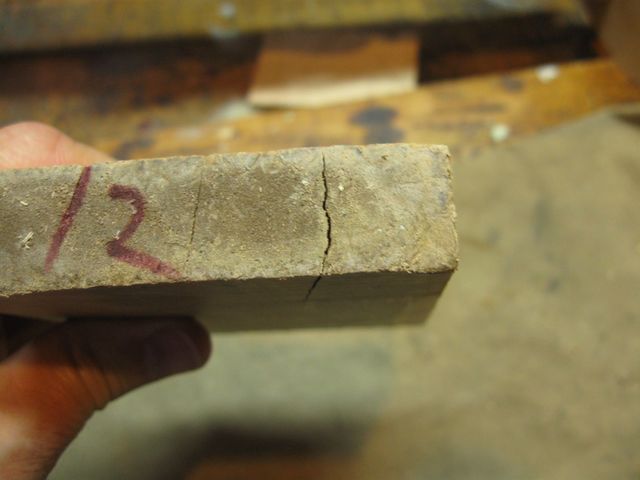
Split Ends
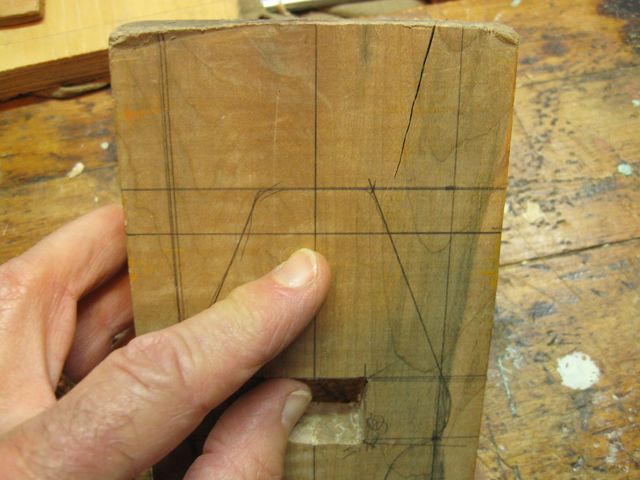
To see how I will deal with this, I drew a box on the board that is 2 1/2" by 3 1/2" on the end that is not split. It looks like I will just miss the end of the crack.
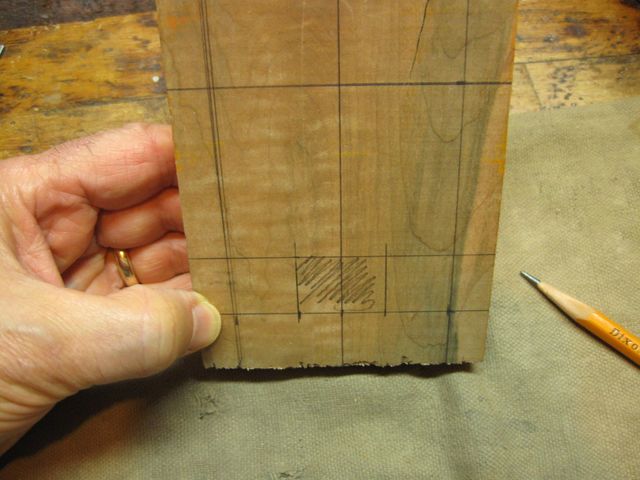
Will This Miss the End of the Crack?
I am assuming that it will be OK also because I will be tapering the end of the board to a bit of a point, and that should also help to avoid the crack.
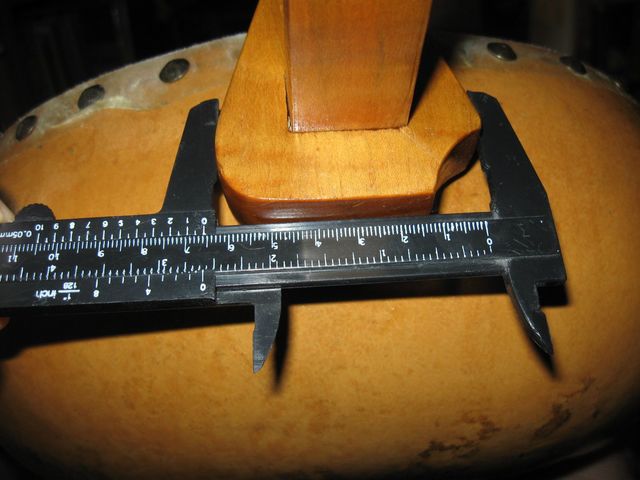
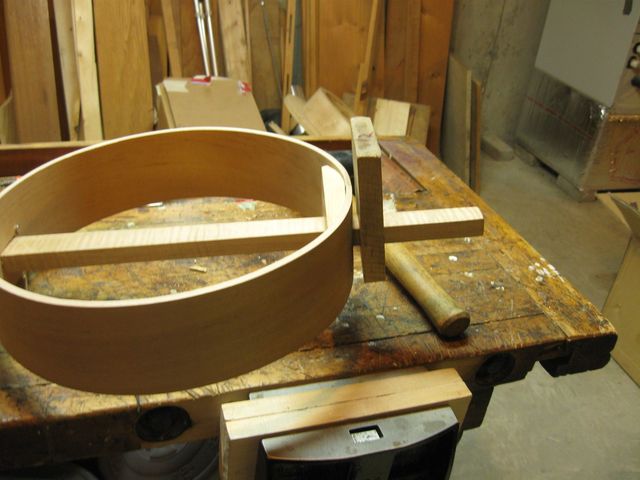
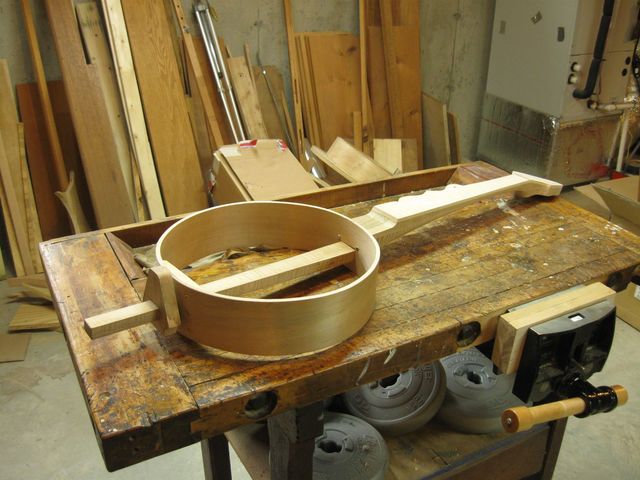
I found another issue too. When I cranked the neck over to the right to level out the finger board, the dowel stick ended up not being square with the hoop anymore. You can see what I am talking about in the photo below. I have to be careful that I don't end up with the tailpiece leaning to the right along with the dowel stick.
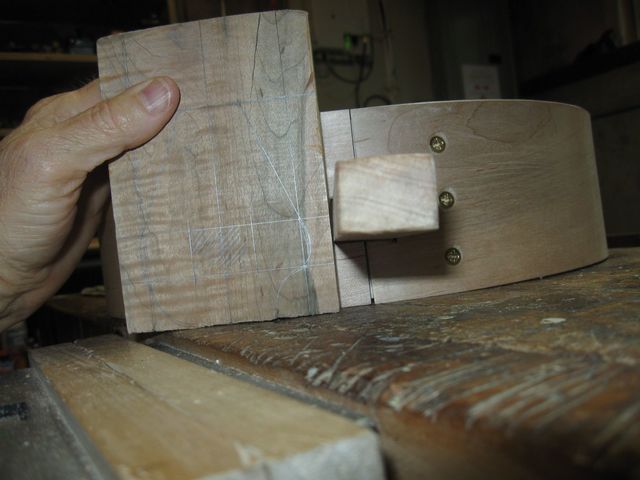
The Dowel Stick is Not Square With the Hoop
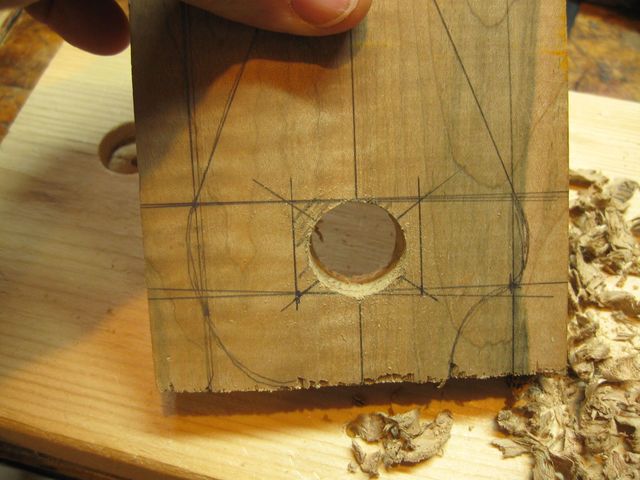
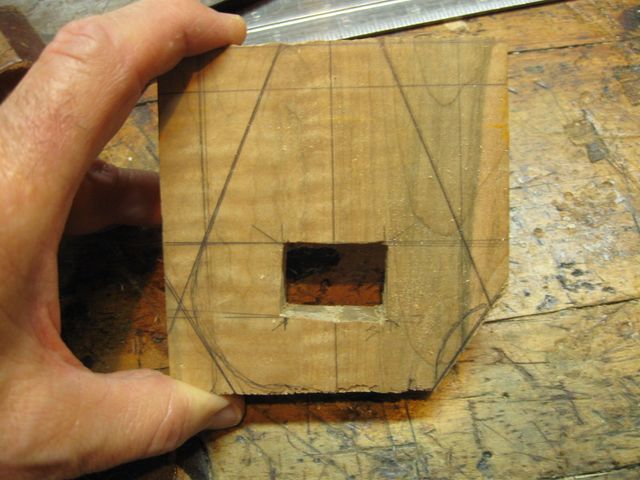
I measured and drew out a box on the tailpiece board that is 1" by 3/4". I will make the hole that size to start. After I have cut the starter hole, I will shape it with my chisel until the tailpiece fits on the dowel just right.
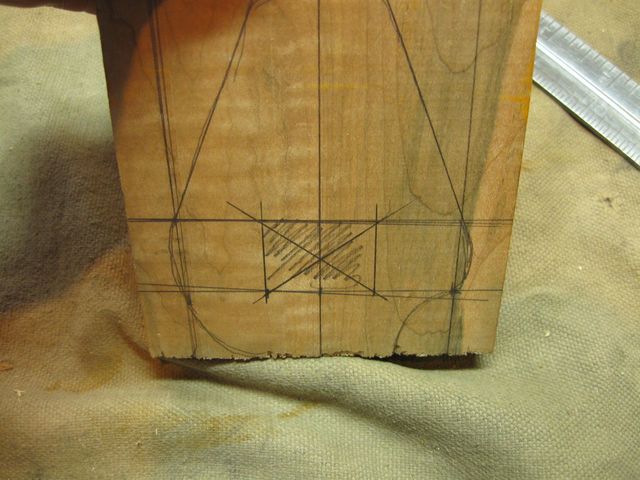
This is Where the Hole Will Go
Center punch the middle of the hole.

The Center Punch Locates the Middle of the Hole
I used the 3/4" auger to drill out a starter hole.
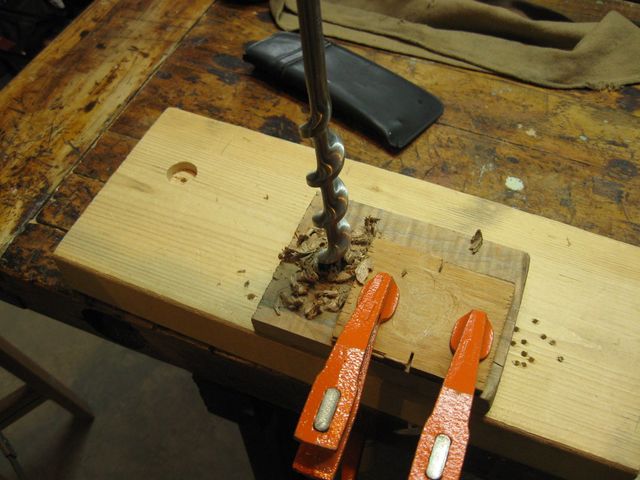
The Auger Works Fine on This Solid Wood
The drill was designed to cut through lumber, which is usually soft wood like pine or fur. It is a bit more difficult in this hard maple, but it works.
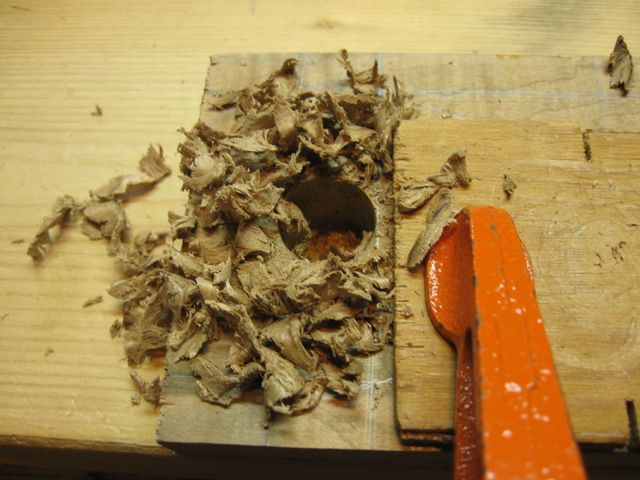
Maple Tailpiece Shards
The bit stopped working just before I broke through. It just wasn't cutting anymore. Here is why.
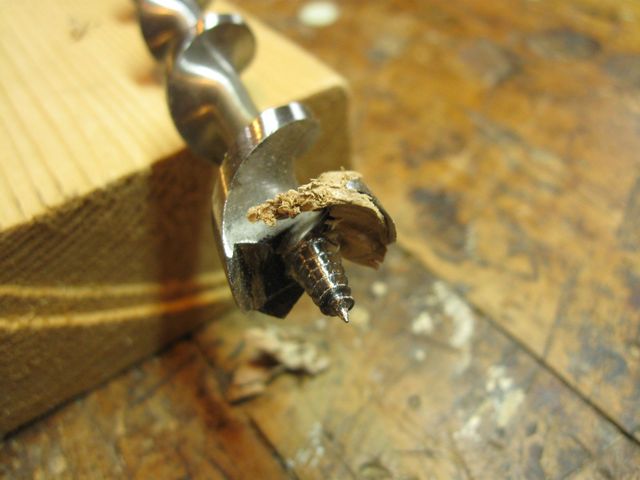
Some Chips Are Stuck on the Cutter
The wood chips stick to the cutter ramps, and then the bit won't cut anymore. So it is necessary to periodically take the bit out of the hole and knock off the chips. After I removed the stuck chips, the cutter worked again.
Here is the hole.
The Auger Bit Makes a Nice Clean Hole
Even the back side of the hole is pretty clean. Not too much tearout back there.
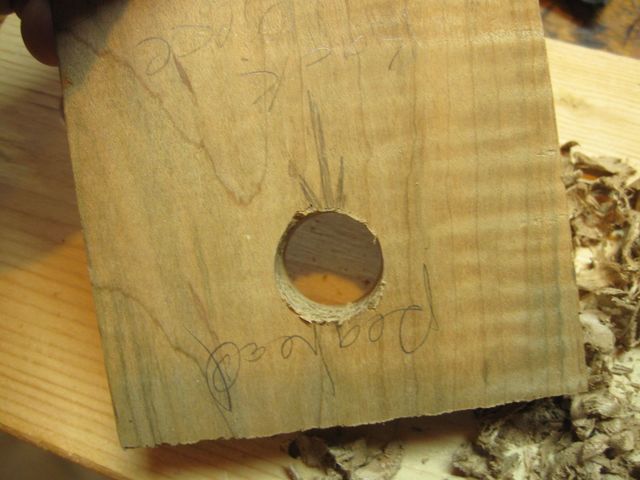
The Back of the Hole is Clean Too
I took the coping saw apart and reassembled it with the blade trapped in the starter hole. I use the coping saw to cut the hole square like I did when I was piercing the hoop with the neck.
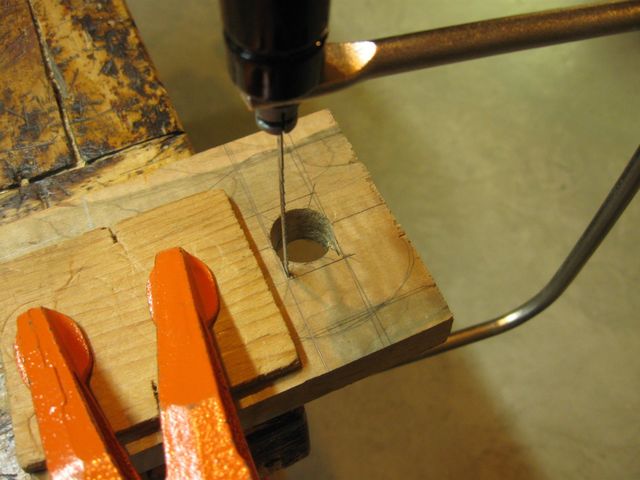
The Coping Saw Fits in the Hole
The photo below shows the hole almost square. At that point I was done with the coping saw, so I took it apart and removed it from the hole.
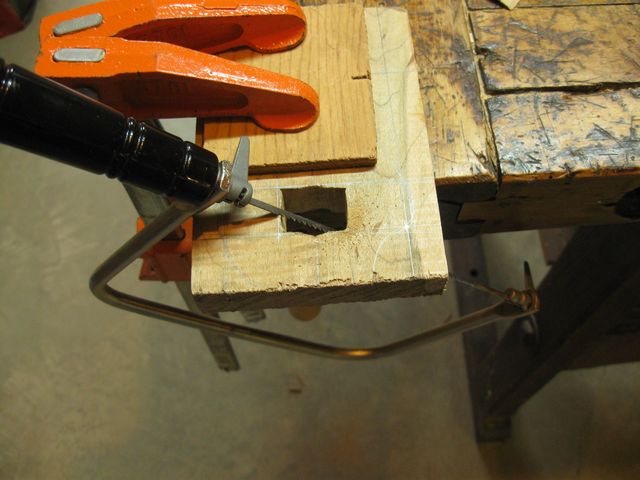
The Hole is Mostly Square Now
I used my 1/2" chisel to square up the sides of the hole so that it will fit over the end of the dowel stick. There are some subtle things going on here that are not readily apparent in the photos. I am very slowly increasing the size of the hole until it will fit over the dowel stick. The sides that are vertical must taper to match the taper of the dowel stick. The sides that are horizontal must be perpendicular to the surface of the wood since the top and bottom surfaces of the dowel are not tapered.
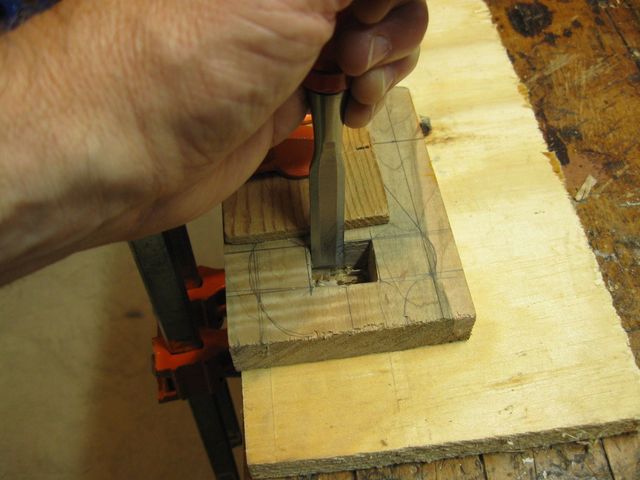
The Chisel Makes the Hole Square
After a while, the block of wood just barely fits over the end of the dowel stick.

The Hole Just Barely Fits the End of the Dowel
Here is an end view so you can see how the hole fits the dowel. You can also see that the dowel stick is canted to the right.
The View from the End
At that point, I stopped increasing the size of the hole top to bottom because the size of the dowel stick in that direction does not change. So the top to bottom dimension of the hole is done. I continued to increase the width of the hole in order to move the block up closer to the hoop.
The Block is Closer to the Hoop Now
Here is another end shot.
From the End
Well, it isn't rocket science. I take it off and cut some more and then put it back on to see how far it goes.. and then I take it off again and cut some more and put it back on and so on and so on.... until I get it close enough to the hoop.
That is Close Enough
You can see in the photo that the tailpiece block is close to the hoop, but not touching it. That is the plan. When I hook the strings to it, there will be no force from the string tension transferred to the side of the hoop. All of the string tension is held between the pegs in the peghead and the dowel stick through the tailpiece.
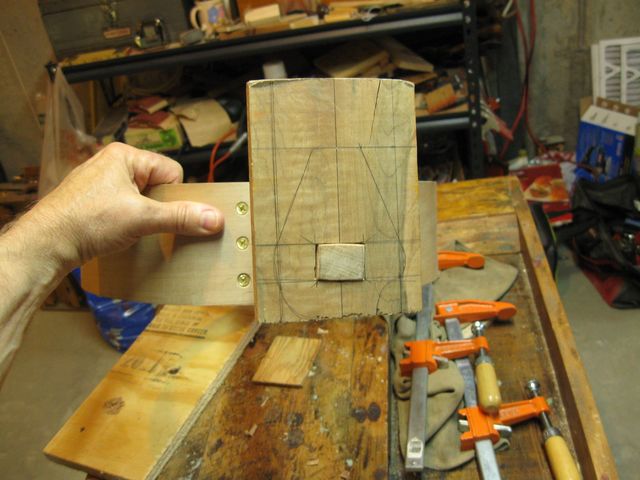
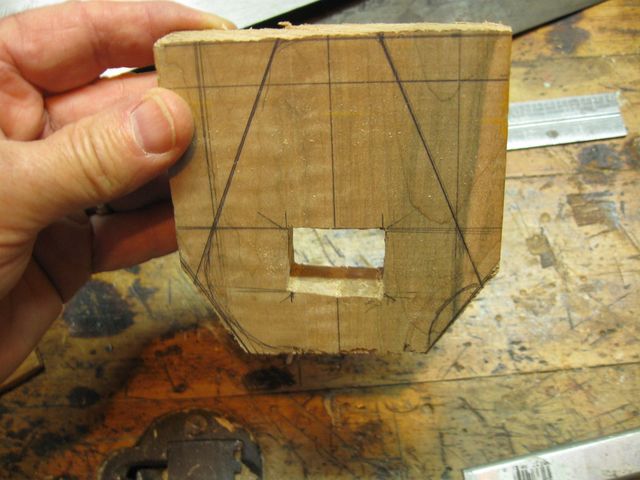
The next thing I need to do is cut the tailpiece to shape. Work is done on the hole. So I marked on the wood where the top of the hoop is located. I need to make the tailpiece a bit taller than that so that I can wire the other part of the tailpiece to it above the head.
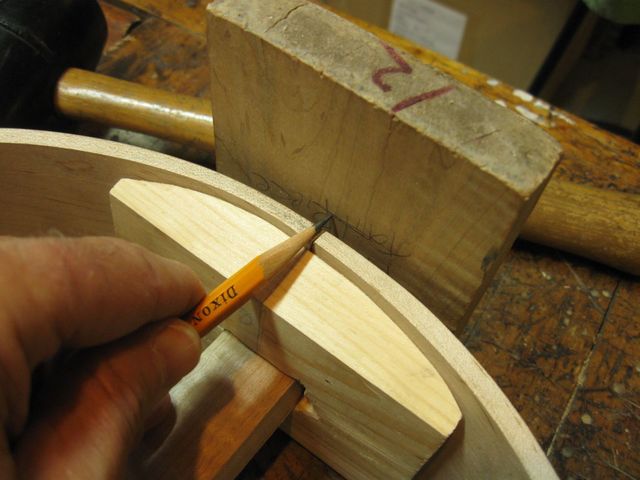
Marking the Top of the Hoop on the Tailpiece
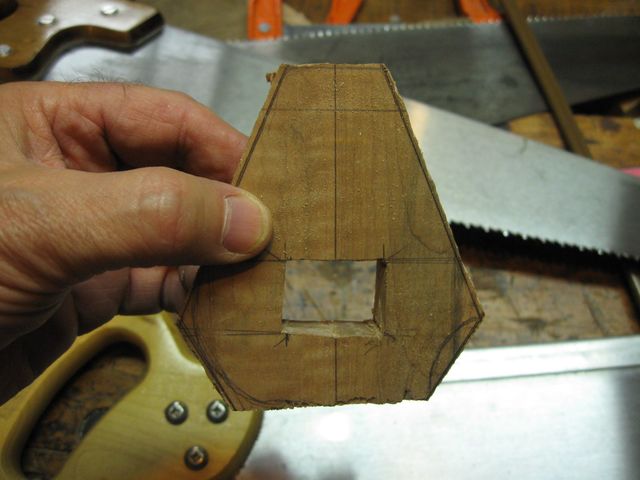
There you go. I have sketched in the shape of the tailpiece with some wood extending above the top of the hoop. My finger is pointing at the line where the top of the hoop will be.
The Shape Near the Top of the Hoop
I started by cutting the end of the block off at the top of the tailpiece.
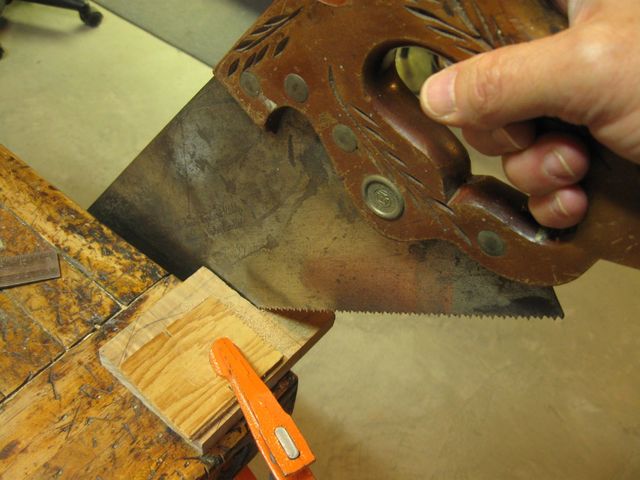
The Crosscut Saw Goes Through the Wood Quickly
Just before I got through, a piece of the wood fell away where that crack was in the end of the block. I guess this proves that the crack was pretty serious.
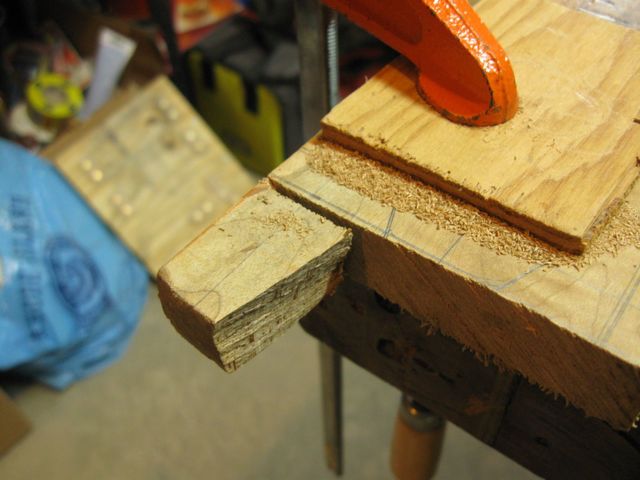
This is Where the Crack Was
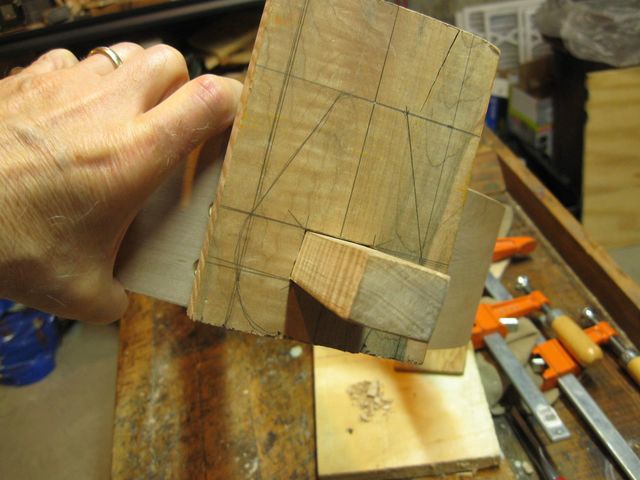
I finished cutting away that little piece and all was well. Then, I started cutting off the corners to get a basic shape.
The Corner on the Right is Gone
I cut off the corner on the other side.
The Next Corner is Gone
One of the top sides is next.
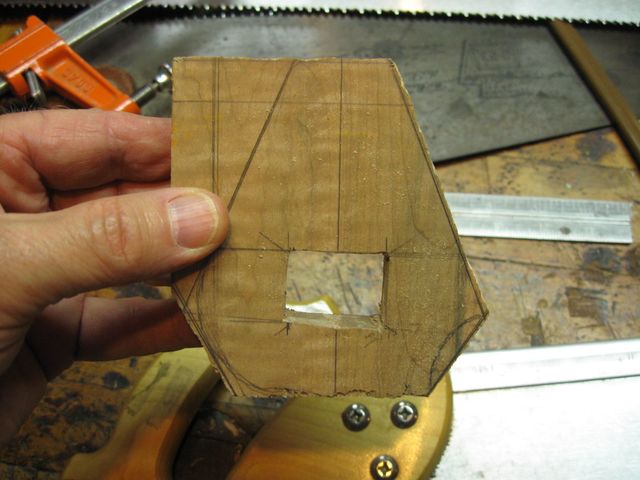
The Side Has Been Cut Away
Finally, the last side is cut.
Notice that the hole is leaning to the right to compensate for the leaning dowel stick. I cut the hole to fit the pole so the tailpiece will stand straight up.
The Last Corner Has Been Cut Away
Final shaping was done with a variety of tools, starting with the spokeshave.
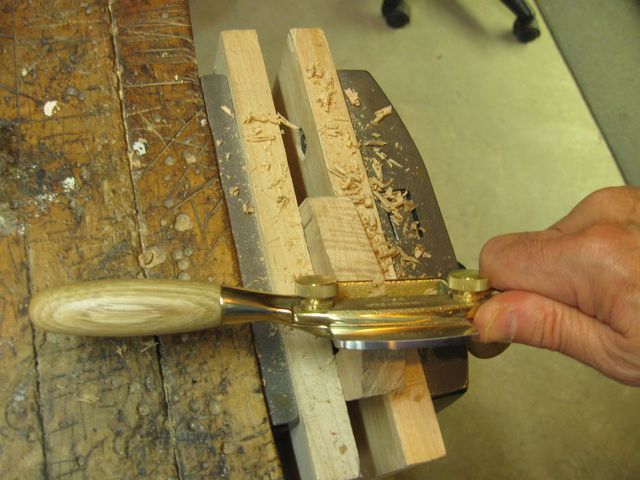
The Spokeshave Cleans up the Saw Cuts
I used the shoe rasp in the hollowed out part.
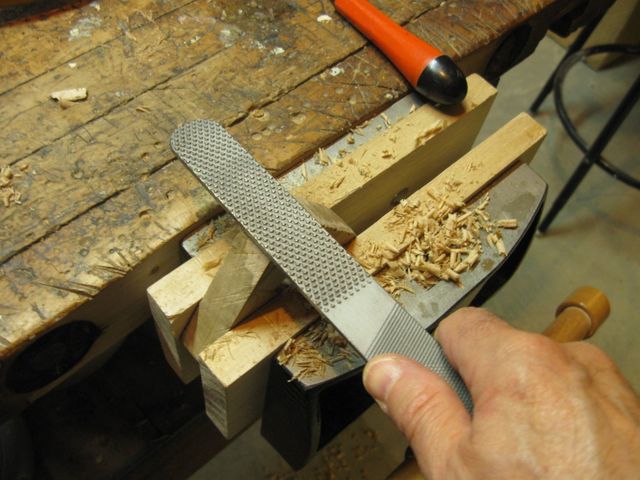
The Shoe Rasp In the Hollow
The rattail file fits in the concave part better.
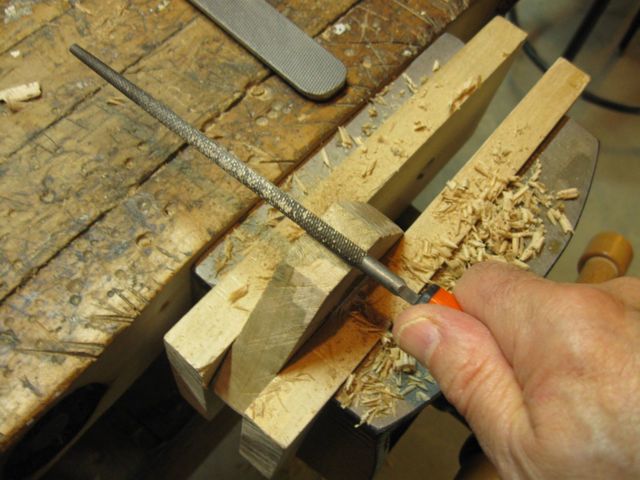
Using the Rattail File
Last, but not least, the bull nosed sandpaper block gets into that concave part with 60 grit sandpaper.
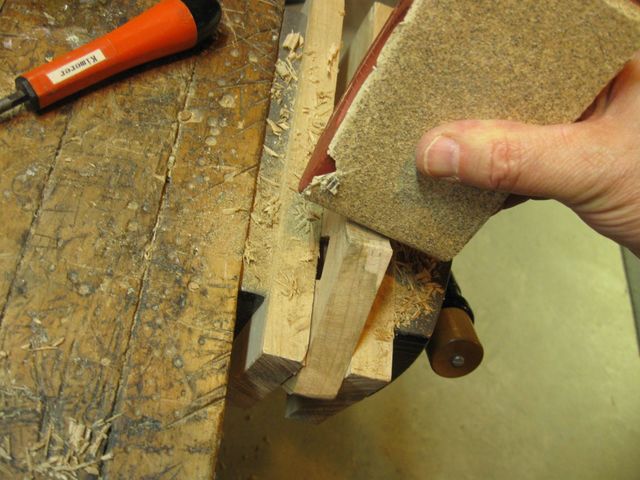
Finish Up with 60 Grit Sandpaper
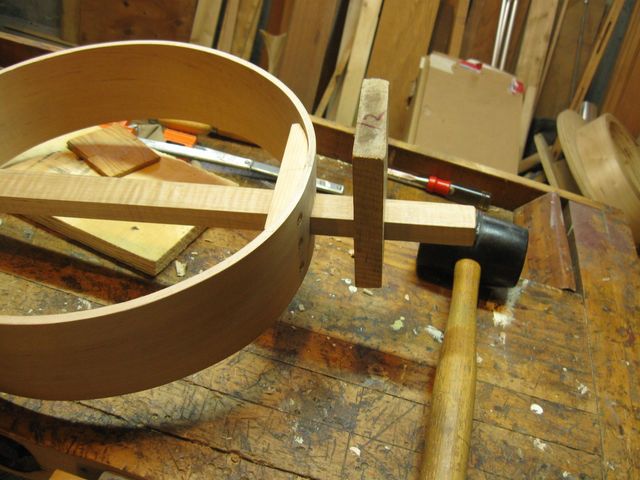
There it is, stuck on the shaft. You can see in the photo that the tailpiece is very close to the side of the hoop, but it does not touch it.
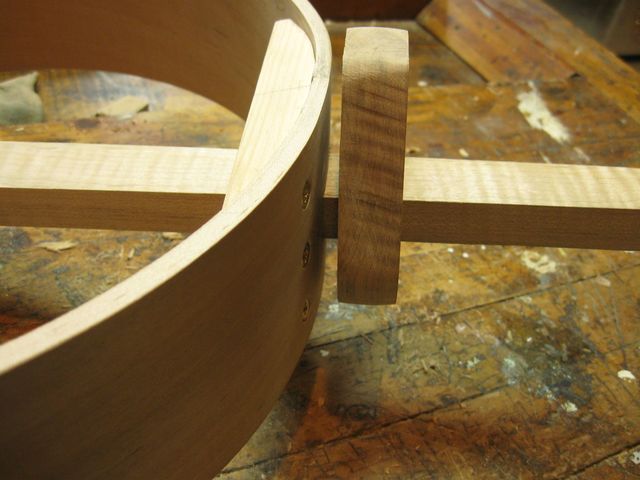
Done
Here is a view from a different angle.
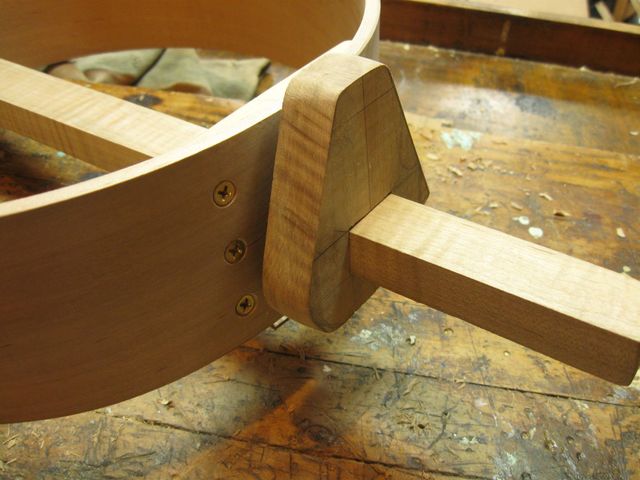
A View from the Back
Here is a view from the other side.
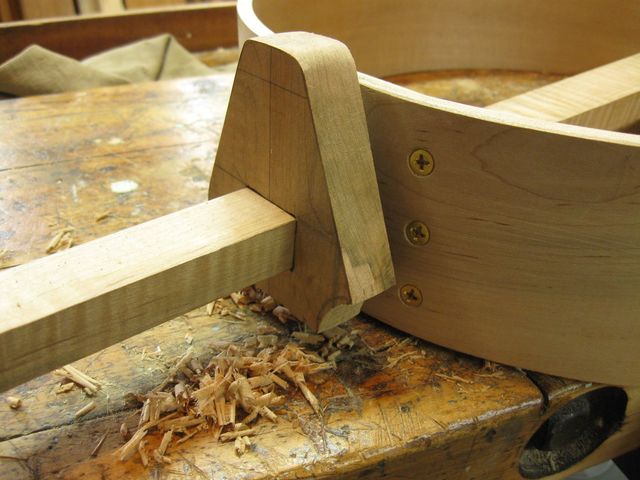
The Side with the Concave Part
That chore is done. The tailpiece will need some final refinements before it is truly finished, but the basic shaping of it is done.
On The Banjo
I tilted the banjo up on its side so you can see the shape of the neck and the hoop.
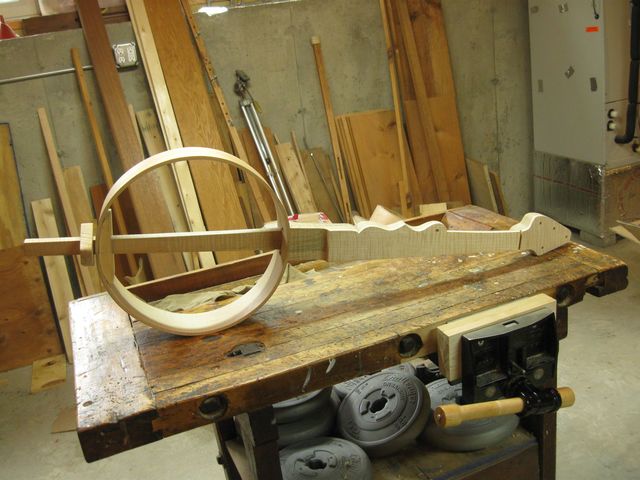
You Can See the Neck Shape and Hoop Shape
There is another part of the tailpiece, the part that hangs over the head and gets the strings tied to it. I will try to get to that part next time.
